2
$\begingroup$

I'm trying to cut a hole in a mesh to create torpedo tubes on a spacecraft, and am running into a bit of trouble. I can get the hole cut out just fine using Knife Project, the problem, however, is that it completely screws with the shading of the mesh.

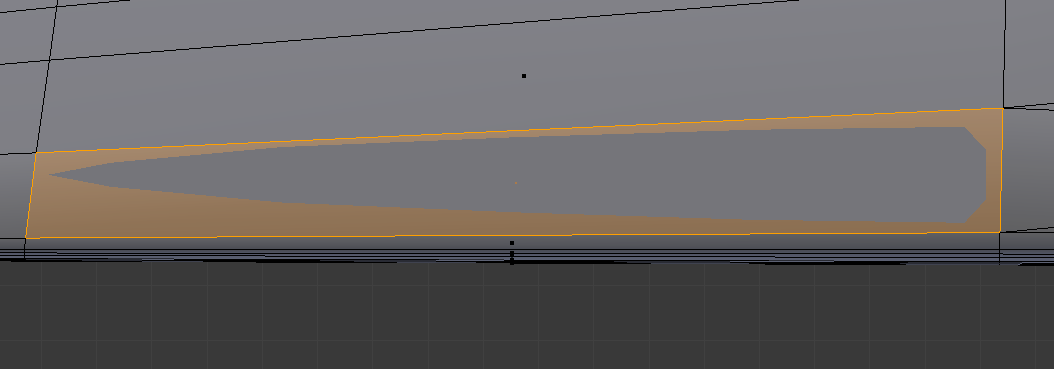
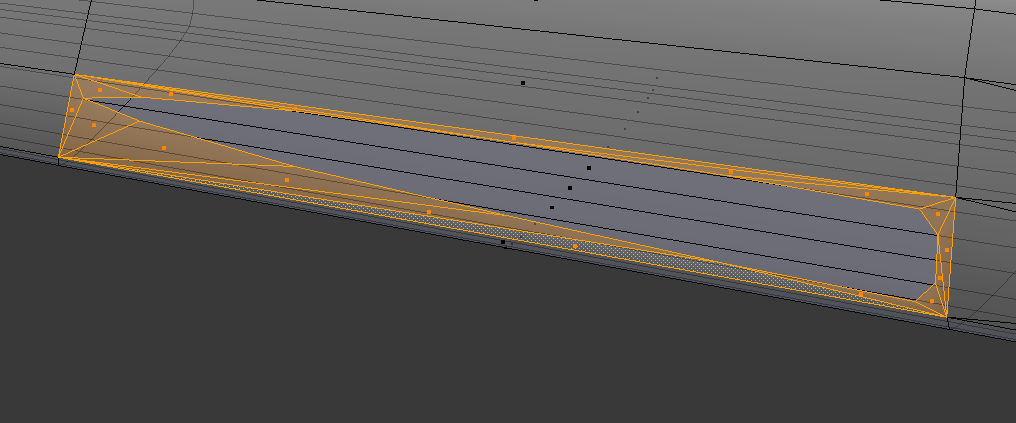
Here are the target and pattern meshes:
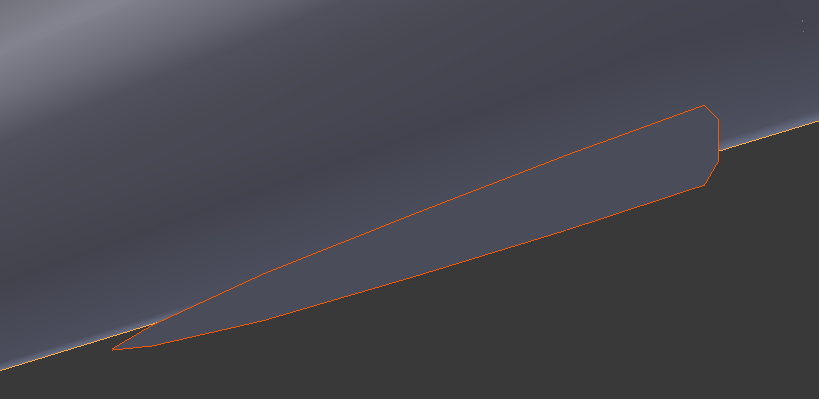
Meshes

Here's a detail of the pattern that creates the shape of the outer tube:
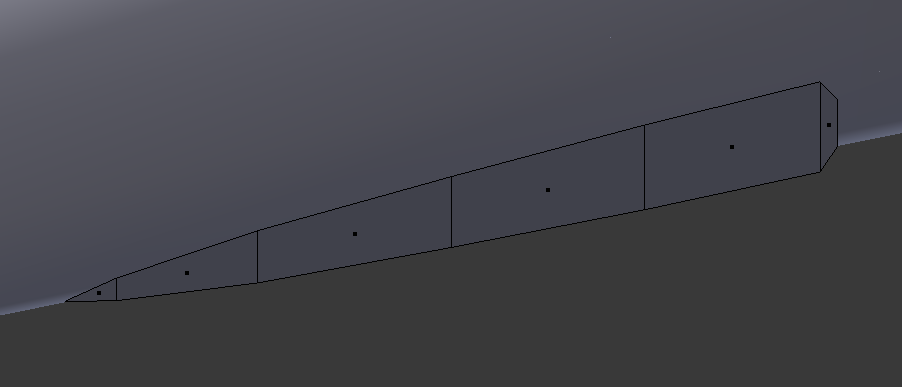
Pattern

and the target mesh:

Target with pattern superimposed

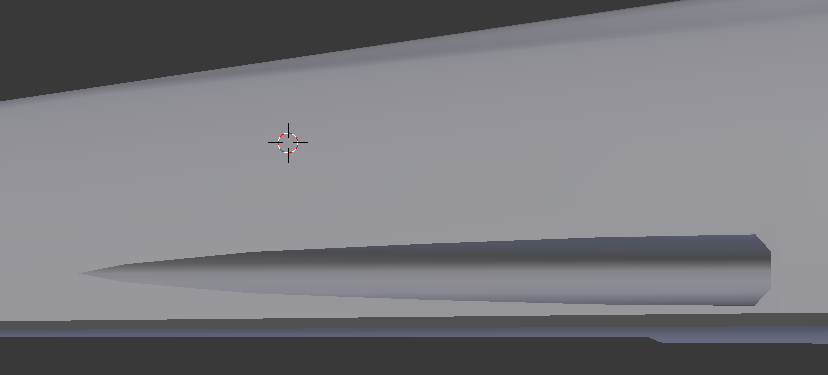
Now, as I said I can cut the hole in the target mesh just fine. The problem is, I get this:
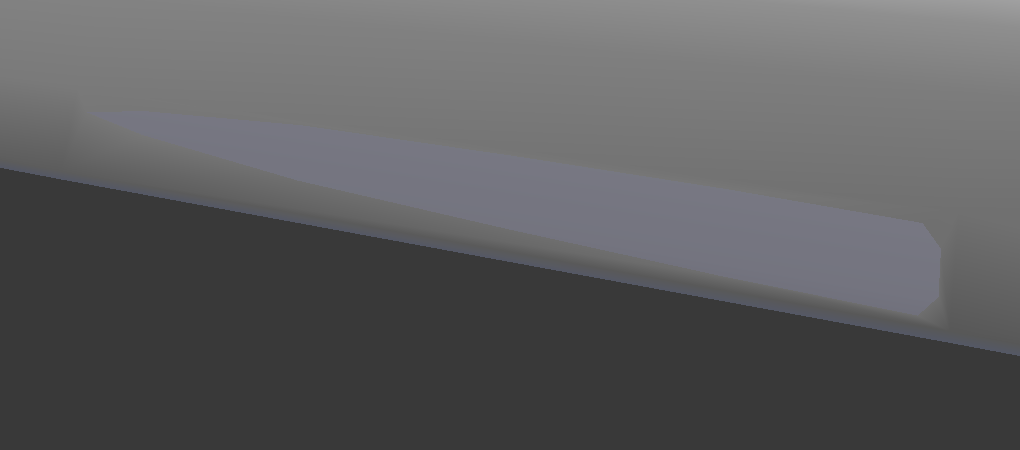
Result Result showing polys

As you can see, cutting the hole in the mesh throws off the smoothing of the mesh, leading to some odd shading which is just unacceptable.

I'm trying to do this with as few extra polys as possible.

$\endgroup$

3 Answers 3

5
$\begingroup$

Prior to cutting the new geometry the transitions are smooth because the shading is a function of the average face normals connected to each vertex. Because each of those adjacent face normals is different as you go around the surface of the object, the transition is relatively smooth. It's a cheap but effective trick.

Once you start cutting into a face, you get new geometry which has a number of vertices which are surrounded by faces which have the same face normals, therefore the shading is 'flat' on those sections. The transition from surrounding faces onto that flat area is also abrupt, and more prominent with transitions between quads and triangles.

Read Blender docs about custom normals

possible solutions

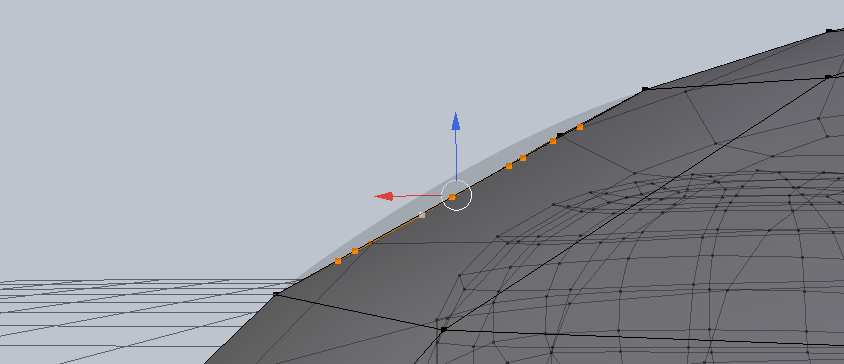
  1. A way out of that is to carefully adjust the positions of the new vertices such that they follow the inferred curvature, this doesn't have to be exact. as long as you get away from the faces all having the same normals on that spot.

    enter image description here The dark area just below the blue arrow indicates the flow that your geometry would need to have (seen from the side of that edited face). If you can move the internal vertices to match the curvature you'll get reasonable smoothing.
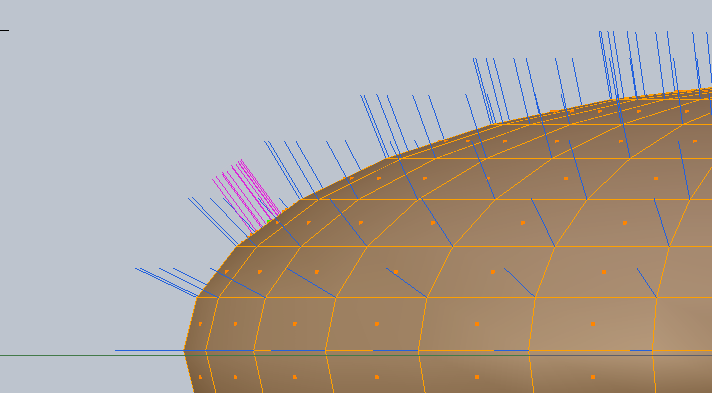
  2. or adjust the vertex normals to follow the curvature, but (May 2015) this is not exposed to the UI, but can be scripted. Manual changes might be overwritten by operations such as remove doubles / recalc normals.

    enter image description here

  3. Normal Edit modifier. It takes a vertex group, and an object, and modifies the normals of the vertices in the vertex group to follow as if they eminated from the center of the object (radial) or directionally if you use a mesh object to help guide the normals.

Blender's Proportional Editing feature can help get nice curvature, but you'll have to experiment with it.

$\endgroup$
7
  • $\begingroup$ So if I'm reading you right, this means that even though the vertices are aligning properly on the plane of that particular poly, I'll need to move them inwards or outwards to fit the curvature that the smoothing is simulating? $\endgroup$
    – Ambaryerno
    Commented May 9, 2015 at 23:13
  • $\begingroup$ The upside of keeping it lowpoly is that any such intervention isn't going to take too long even if you have to manually adjust the verts or faces. That being said: now i'm wondering if there isn't an add-on for this kind of stuff.. $\endgroup$
    – zeffii
    Commented May 10, 2015 at 7:25
  • $\begingroup$ @zeffii probably can be fixed with normal edit modifier copying normals from the original model $\endgroup$
    – Denis
    Commented May 10, 2015 at 8:15
  • $\begingroup$ I tried using the Normal Edit modifier after turning on Auto-Smooth in mesh options (which it required). However while Radial and Directional fixed the specific problem I was having, it caused serious issues on OTHER parts of the model. The modifier required me to turn on Auto-Smooth in the mesh options, and I noticed that when I switched from Radial to Directional BEFORE setting a target for Directional, the problem instantly went away. So it looks like just turning on auto-smooth corrected everything. However I wanted to touch base before I decided to just leave it at that. $\endgroup$
    – Ambaryerno
    Commented May 10, 2015 at 13:55
  • $\begingroup$ Disregard, it was looking ok from some angles but it's definitely not right on others. AND it screws with the Edge Splitting. $\endgroup$
    – Ambaryerno
    Commented May 10, 2015 at 14:10
1
$\begingroup$

Zeffi mentioned surface normals and shading. Perhaps you want sharp edges where the hull meets the torpedo launcher. This effect is often achieved using an Edge Split modifier for Sharp edges. You have to leave the Sharp Edges checkbox checked, and then mark those edges in the mesh editor (Ctrl-E > Mark Sharp).

Another thing that sometimes causes strange shading is if the surface normals are flipped. You can check that using the 3d View's N-panel Mesh Display > Normals (pick the Face icon).

$\endgroup$
1
  • $\begingroup$ Already made sure the normals are correct, and making a sharp edge around the torpedo tube made no difference. $\endgroup$
    – Ambaryerno
    Commented May 12, 2015 at 15:20
0
$\begingroup$

I ended up turning on Auto-Smooth and then making the transition between the sides of the hull and the bottom (specifically, the edge along the bottom of the poly in which the torpedo tube was cut) sharp, and that fixed it. It's not exactly how I wanted the contour to look, but it works.

enter image description here

$\endgroup$
4
  • 4
    $\begingroup$ show an image :) i'm interested to see what was 'acceptable' $\endgroup$
    – zeffii
    Commented May 12, 2015 at 15:29
  • $\begingroup$ @zeffii Added. You'll note I made the transition between the sides of the hull and bottom sharp rather than smooth, and that fixed the shading around the corner and tip of the torpedo tube. $\endgroup$
    – Ambaryerno
    Commented May 13, 2015 at 22:59
  • $\begingroup$ Great, that does indeed appear to look good. Marking Sharp edges + Auto Smooth. $\endgroup$
    – zeffii
    Commented May 14, 2015 at 4:19
  • $\begingroup$ I was actually able to turn off Auto Smooth and just use the Edge Split modifier once I marked that bottom edge sharp. So it definitely had to do with having a smooth transition between the sides and lower hull. $\endgroup$
    – Ambaryerno
    Commented May 15, 2015 at 0:19

You must log in to answer this question.

Not the answer you're looking for? Browse other questions tagged .