1
$\begingroup$

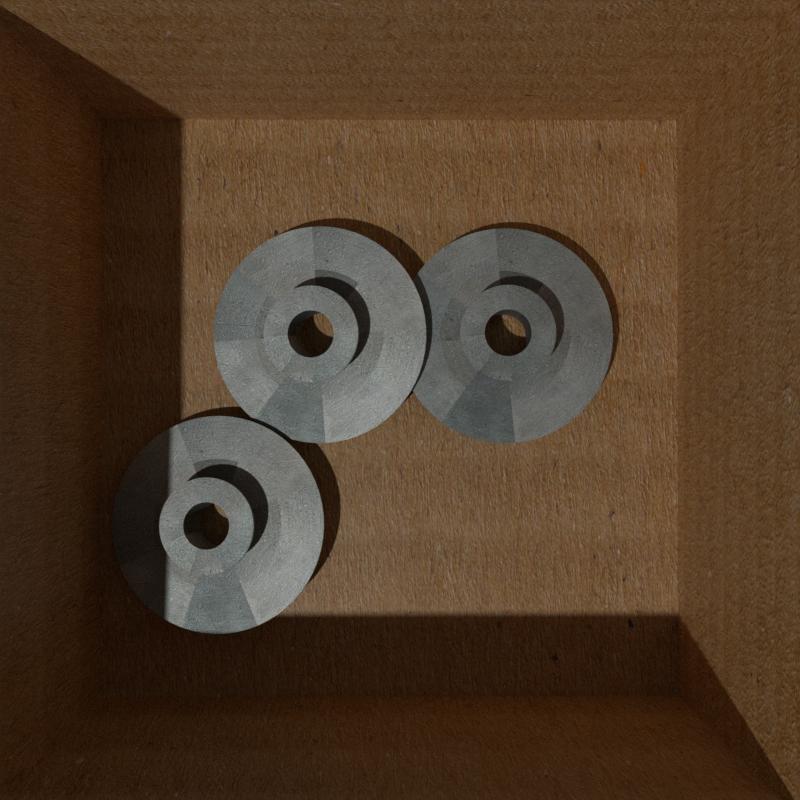
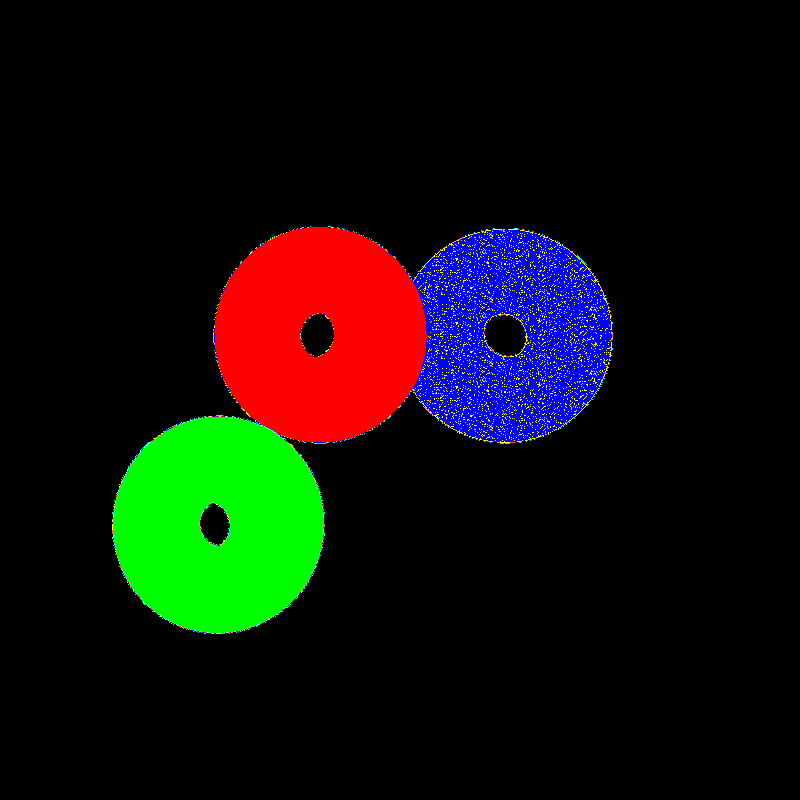
Im generating scenes in blender, then making a 'realistic' render and a mask render for each scene. To get the mask render Im setting transparent everything that should be and changing colors of objects that I need masks for to shades of gray

Example: mask

'realistic'

Here are the functions for setting materials and rendering

def set_material_for_objects(objects):
    if len(objects) > 0:
        num_materials = len(objects)
        for i, obj in enumerate(objects):
            grayscale = 0.5 + i * 0.1

            # Create a new material
            material_name = "Material_{:02d}".format(i)
            temp_material = bpy.data.materials.new(name=material_name)
            temp_material.use_nodes = True

            # Get the material output node
            output_node = temp_material.node_tree.nodes.get("Material Output")
            
            # Create an emission node and set its color to the grayscale value
            emission_node = temp_material.node_tree.nodes.new("ShaderNodeEmission")
            emission_node.inputs[0].default_value = (grayscale, grayscale, grayscale, 1.0)
            emission_node.inputs[1].default_value = 1
            
            # Connect the emission node to the material output node
            temp_material.node_tree.links.new(emission_node.outputs[0], output_node.inputs[0])
            
            
            # Assign the material to the object
            obj.data.materials.clear()
            obj.data.materials.append(temp_material)

in short Im using ShaderNodeEmission and setting its color to a shade of gray

def render_scene(objects, visible_objects, box_obj, i):
    
    curr_folder_name = '/IMG' + f'{i:03}'
    
    # RAW RENDER
    bpy.context.scene.render.filepath = FOLDER_PATH + curr_folder_name + "/IMG" + f'{i:03}_render' + ".png"
    bpy.ops.render.render(write_still=True)
    
    # LABEL RENDER
    # set up render for label

    set_transparent([box_obj])  # set the box to be transparent
    set_transparent(objects)     # set objects to be transparent
    set_opaque(visible_objects)  # set visible objects opaque
    set_material_for_objects(visible_objects)  # set visible objects to shades of gray
    
    light = bpy.data.objects['Light']
    light.hide_render = True
    
    # Store the original display device
    original_display_device = bpy.context.scene.display_settings.display_device
    original_aa_settings = bpy.context.scene.view_layers[0].cycles.use_denoising

    # Set up render settings for label
    bpy.context.scene.display_settings.display_device = 'None'
    bpy.context.scene.view_layers[0].cycles.use_denoising = False
    bpy.context.scene.view_layers["ViewLayer"].use_pass_diffuse_color = True

    # render for label
    bpy.context.scene.render.filepath = FOLDER_PATH + curr_folder_name + "/IMG" + f'{i:03}_label' + ".png"
    bpy.ops.render.render(write_still=True)
    
    # return to settings for raw
    set_opaque([box_obj])  # return the box to be opaque
    set_opaque(objects)
    light.hide_render = False
    
    # Set the display device back to the original value ("sRGB" in this case)
    bpy.context.scene.display_settings.display_device = original_display_device
    bpy.context.scene.view_layers[0].cycles.use_denoising = original_aa_settings
    bpy.context.scene.view_layers["ViewLayer"].use_pass_diffuse_color = False
    
    return i + 1

Here I first render and save without any trickery and then render and save only diffuse pass while setting transparent objects that are supposed to be.

full disclosure, I abused chat GPT to write the parts that interact with bpy module as I never worked with it before and didnt have time to properly study it, so it just might be gibberish

So, the question is: how to make these masks have exactly one color? with a naked eye I can alredy see some gradients along the edges. With further inspection the masks are completly out of wack:

mask = Image.open('label2.png').convert('P')
# each mask instance has a different color, from zero to N, where
# N is the number of instances. In order to make visualization easier,
# let's adda color palette to the mask.
mask.putpalette([
    0, 0, 0, # black background
    255, 0, 0, # index 1 is red
    0, 255, 0, # index 2 is yellow
    0, 0, 255, # index 3 is blue
    255, 255, 0, # spare indices
    0,255, 255,
    255,100, 100,
    100, 255, 255,
])

mask

enter image description here

It is also possible that the masks are the way I described I want them to be and Im just cheking the wrong way

$\endgroup$

1 Answer 1

0
$\begingroup$

I think you shouldn't making a custom solution for this as there is already a built-in way to achieve what you want.

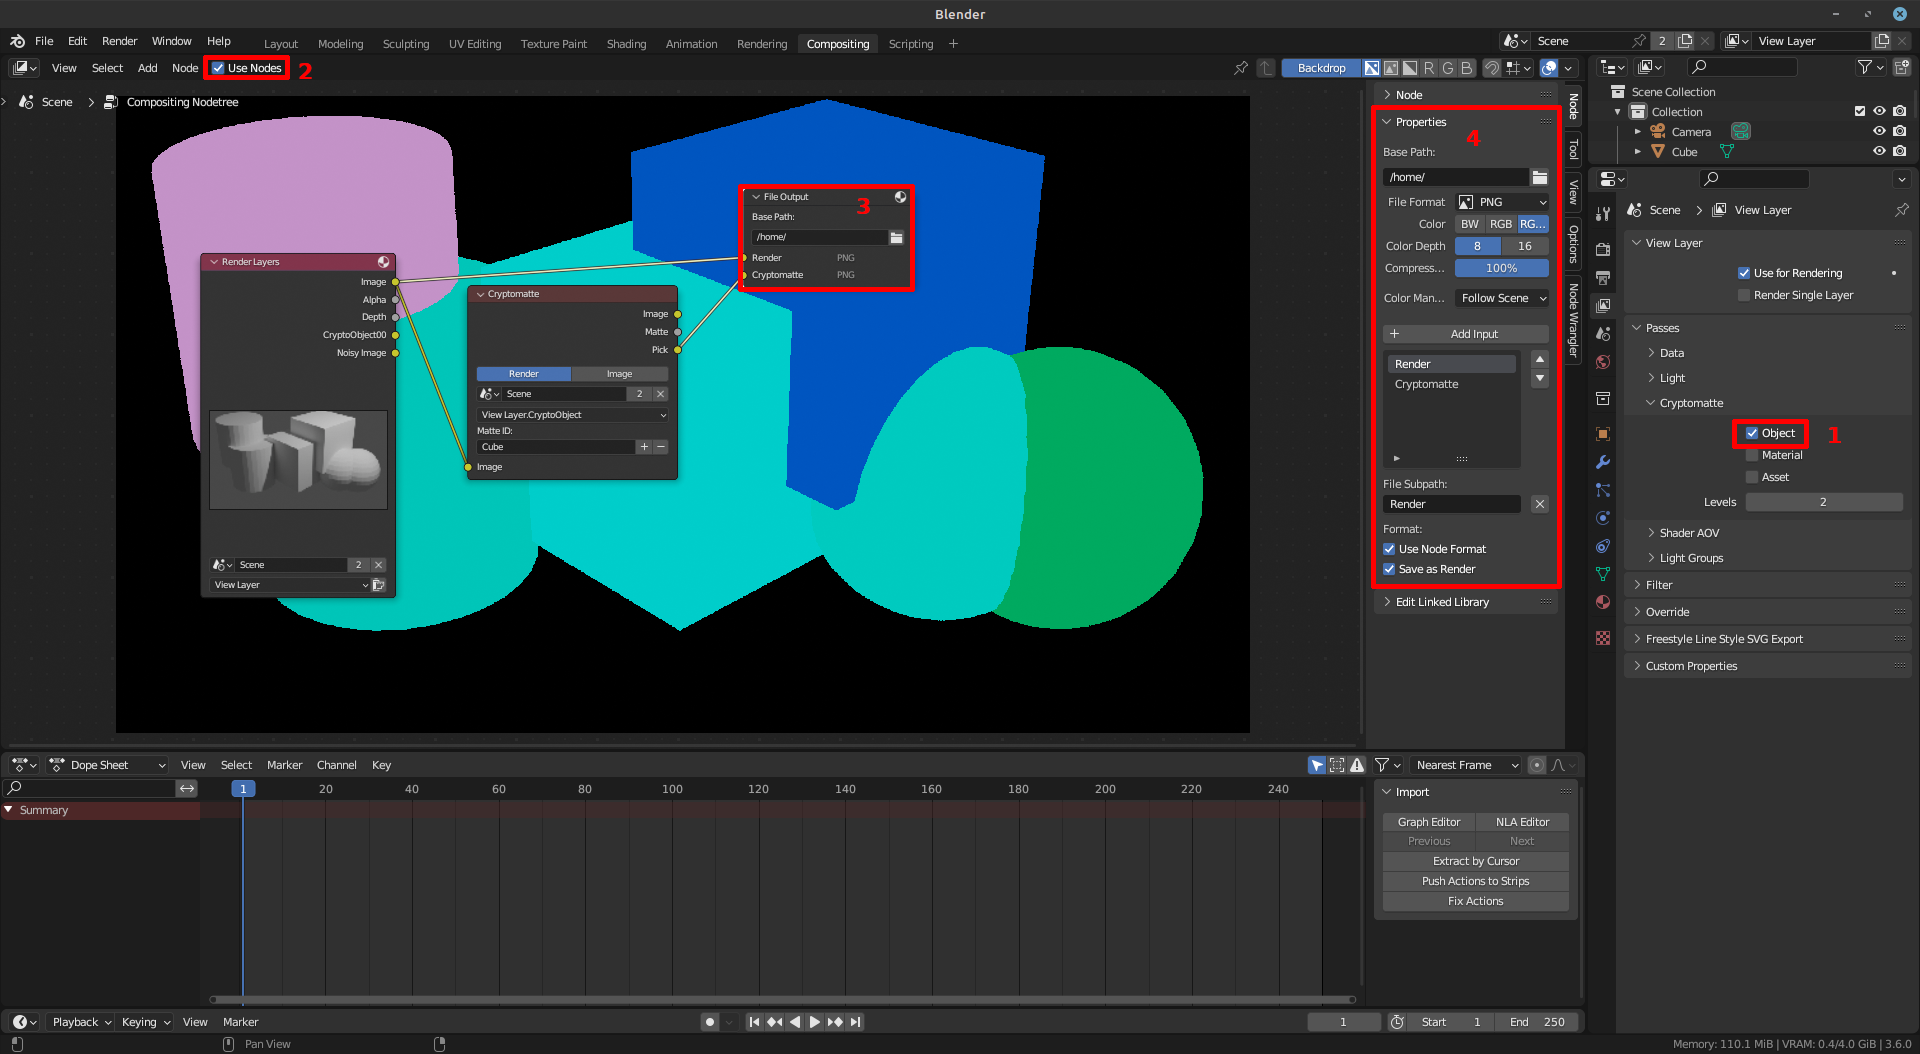
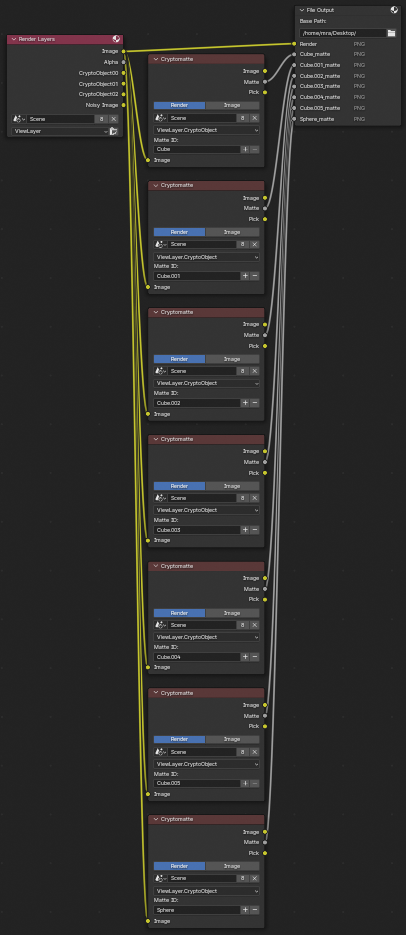
Assuming you have your scene ready for rendering, the steps you need to follow are listed below and illustrated in the attached screenshot.

  1. In the Compositing workspace, turn Object Cryptomatte on which can be found in the View Layer tab in the Properties editor.
  2. In the Compositor, enable Use Nodes, and add the nodes shown in the screenshot. You can search for the nodes using their names through the Add menu.
  3. Click the File Output node.
  4. Adjust the node properties to add an extra Input. You should also adjust the Base Path which is the folder where the images will be saved. You can optionally rename the inputs which will affect the name of the files that will get generated when you render. You can now connect the nodes as shown in the screenshot.
  5. Press F12 to render.

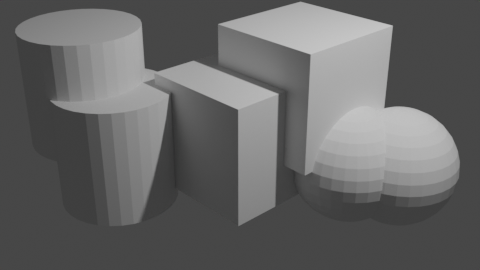
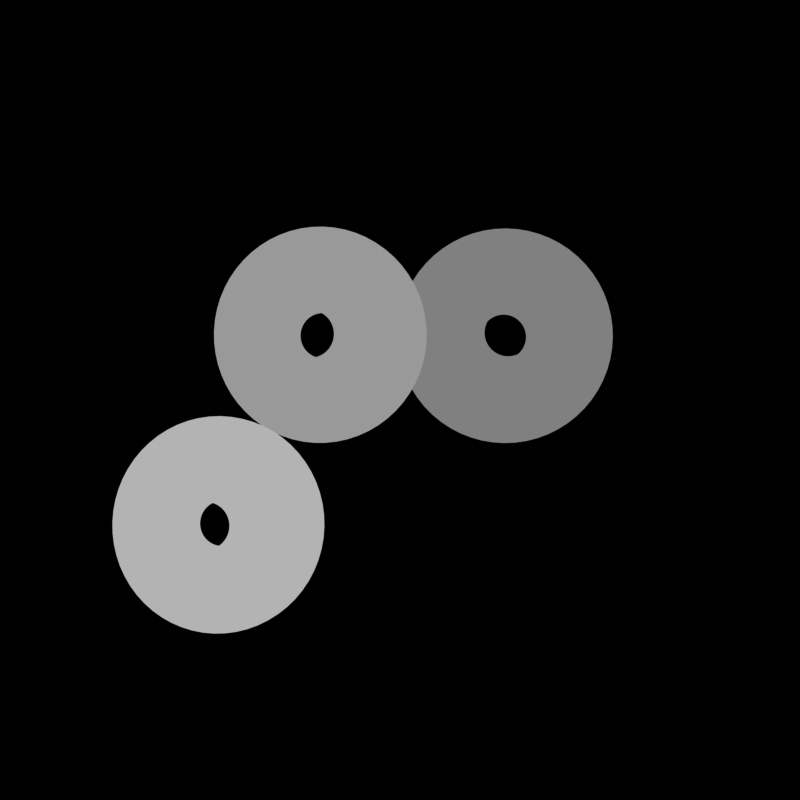
The images that got generated for me are attached for reference. Please note that each object gets a unique color; although, they may look very similar for two of the objects in the second output.

Cryptomatte

Output 1

Output 2


Edit: As requested by OP, I attempted to write a script that automates the steps above. However, I realized that the Pick output is not perfect as explained in the comments and decided to export separate Matte images for each object instead. The script that generates the compositor nodes for this new approach is attached below.

import bpy, mathutils

base_path = '/home/mra/Desktop/'
allowed_types = ['MESH']

bpy.context.view_layer.use_pass_cryptomatte_object = True
bpy.context.scene.use_nodes = True

nodes = bpy.context.scene.node_tree.nodes
nodes.remove(nodes['Composite'])
node_render_layers = nodes['Render Layers']
node_file_output = nodes.new('CompositorNodeOutputFile')
node_file_output.location = mathutils.Vector((600.0, 460.0))
node_file_output.width = 220
node_file_output.base_path = base_path
node_file_output.format.compression = 100
node_file_output.inputs['Image'].name = 'Render'
node_file_output.file_slots['Image'].path = 'Render'

links = bpy.context.scene.node_tree.links
links.new(node_render_layers.outputs['Image'], node_file_output.inputs['Render'])

i = 0
for obj in bpy.context.view_layer.objects:
    if obj.type not in allowed_types:
        continue
    
    node_cryptomatte = nodes.new('CompositorNodeCryptomatteV2')
    node_cryptomatte.location = mathutils.Vector((300.0, 360.0 - i * 260))
    node_cryptomatte.matte_id = obj.name
    
    node_file_output.file_slots.new(f"{obj.name}_matte")
    
    links.new(node_render_layers.outputs['Image'], node_cryptomatte.inputs['Image'])
    links.new(node_cryptomatte.outputs['Matte'], node_file_output.inputs[f"{obj.name}_matte"])
    i += 1

This is a screenshot of the nodes it generates.

Nodes

$\endgroup$
9
  • $\begingroup$ That sounds like what i need. Do you know how i can enebale and disable such render setting with python API? Im generating and rendering many scenes at a time, and need to have it automated $\endgroup$ Commented Nov 24, 2023 at 19:05
  • $\begingroup$ It's possible to automate this; however, considering the fact that you need to do this to multiple scenes/files, you will still need to automate the steps to open those scenes/files. If that's the case, I would say it is much better to prepare the setup once in a main file and automate loading and unloading the scenes/files into the main file. What I have in mind is to link the main collection from one of the other files, render, unlink it, and repeat for the remaining files. You can leave the lighting and camera setup in the main file which means you can delete them from the other files. $\endgroup$
    – Mr A
    Commented Nov 24, 2023 at 21:25
  • $\begingroup$ You will probably need to place all the files into one folder following a naming convention to make it possible to automate finding the files. You will also have to unify the organization of objects in those files. Placing the objects under a collection with a specific name will be my approach. Anyway, please let me know what you think will work best for you. I am not sure if you can organize the files. $\endgroup$
    – Mr A
    Commented Nov 24, 2023 at 21:29
  • $\begingroup$ i have the general automating part figured out, i meant what functions i should call to set these render settings and what to call then to return to normal $\endgroup$ Commented Nov 24, 2023 at 22:38
  • $\begingroup$ I see. Let me write a Python script that does the steps I listed. I will add it to the answer as soon as I have it ready. $\endgroup$
    – Mr A
    Commented Nov 25, 2023 at 11:33

You must log in to answer this question.

Not the answer you're looking for? Browse other questions tagged .