added 1805 characters in body
Source Link
Mr A
  • 2.2k
  • 3
  • 12

I think you shouldn't making a custom solution for this as there is already a built-in way to achieve what you want.

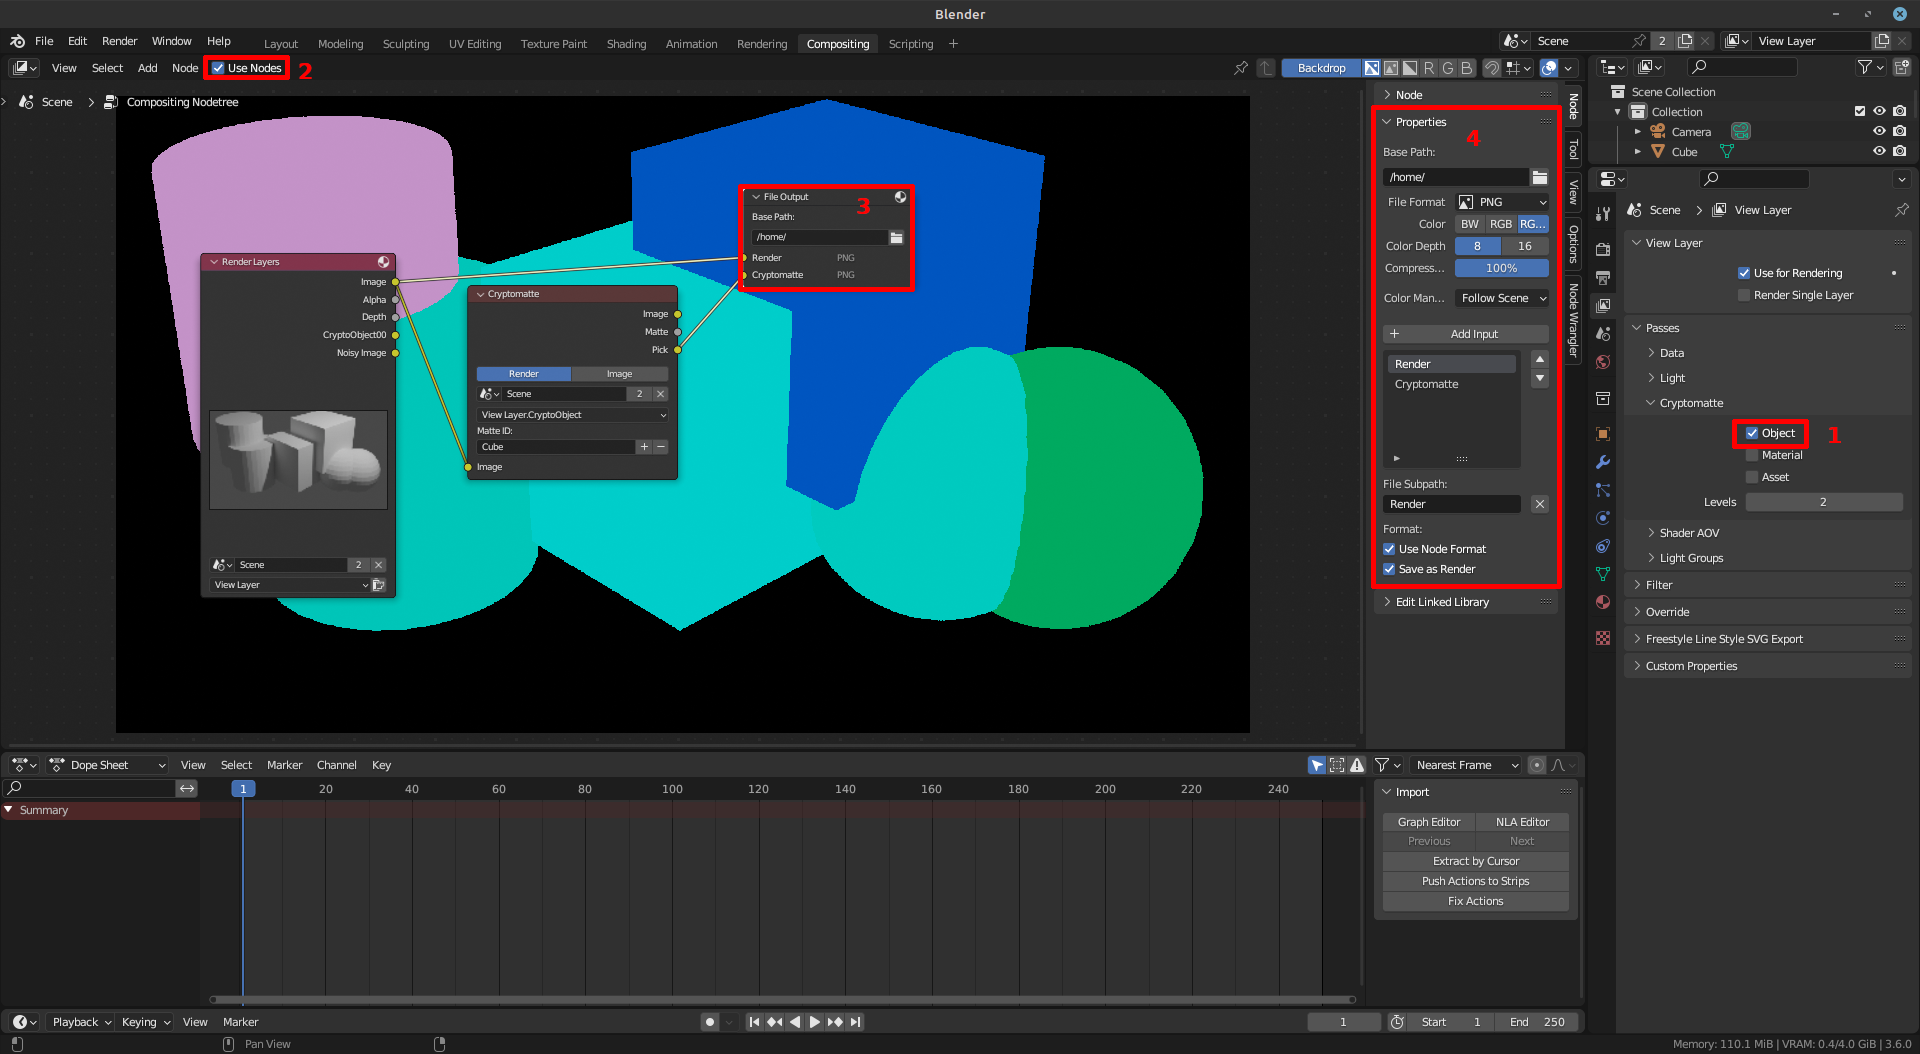
Assuming you have your scene ready for rendering, the steps you need to follow are listed below and illustrated in the attached screenshot.

  1. In the Compositing workspace, turn Object Cryptomatte on which can be found in the View Layer tab in the Properties editor.
  2. In the Compositor, enable Use Nodes, and add the nodes shown in the screenshot. You can search for the nodes using their names through the Add menu.
  3. Click the File Output node.
  4. Adjust the node properties to add an extra Input. You should also adjust the Base Path which is the folder where the images will be saved. You can optionally rename the inputs which will affect the name of the files that will get generated when you render. You can now connect the nodes as shown in the screenshot.
  5. Press F12 to render.

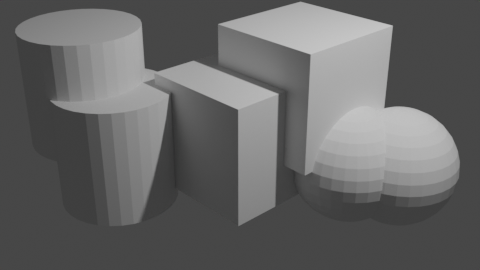
The images that got generated for me are attached for reference. Please note that each object gets a unique color; although, they may look very similar for two of the objects in the second output.

Cryptomatte

Output 1

Output 2


Edit: As requested by OP, I attempted to write a script that automates the steps above. However, I realized that the Pick output is not perfect as explained in the comments and decided to export separate Matte images for each object instead. The script that generates the compositor nodes for this new approach is attached below.

import bpy, mathutils

base_path = '/home/mra/Desktop/'
allowed_types = ['MESH']

bpy.context.view_layer.use_pass_cryptomatte_object = True
bpy.context.scene.use_nodes = True

nodes = bpy.context.scene.node_tree.nodes
nodes.remove(nodes['Composite'])
node_render_layers = nodes['Render Layers']
node_file_output = nodes.new('CompositorNodeOutputFile')
node_file_output.location = mathutils.Vector((600.0, 460.0))
node_file_output.width = 220
node_file_output.base_path = base_path
node_file_output.format.compression = 100
node_file_output.inputs['Image'].name = 'Render'
node_file_output.file_slots['Image'].path = 'Render'

links = bpy.context.scene.node_tree.links
links.new(node_render_layers.outputs['Image'], node_file_output.inputs['Render'])

i = 0
for obj in bpy.context.view_layer.objects:
    if obj.type not in allowed_types:
        continue
    
    node_cryptomatte = nodes.new('CompositorNodeCryptomatteV2')
    node_cryptomatte.location = mathutils.Vector((300.0, 360.0 - i * 260))
    node_cryptomatte.matte_id = obj.name
    
    node_file_output.file_slots.new(f"{obj.name}_matte")
    
    links.new(node_render_layers.outputs['Image'], node_cryptomatte.inputs['Image'])
    links.new(node_cryptomatte.outputs['Matte'], node_file_output.inputs[f"{obj.name}_matte"])
    i += 1

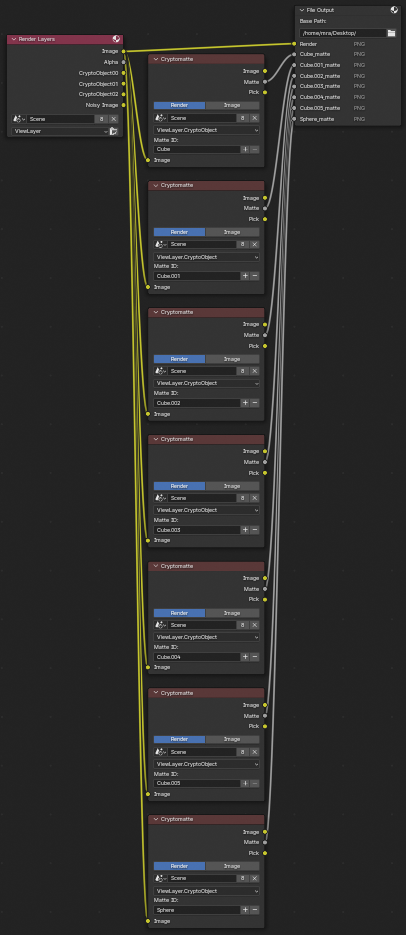
This is a screenshot of the nodes it generates.

Nodes

I think you shouldn't making a custom solution for this as there is already a built-in way to achieve what you want.

Assuming you have your scene ready for rendering, the steps you need to follow are listed below and illustrated in the attached screenshot.

  1. In the Compositing workspace, turn Object Cryptomatte on which can be found in the View Layer tab in the Properties editor.
  2. In the Compositor, enable Use Nodes, and add the nodes shown in the screenshot. You can search for the nodes using their names through the Add menu.
  3. Click the File Output node.
  4. Adjust the node properties to add an extra Input. You should also adjust the Base Path which is the folder where the images will be saved. You can optionally rename the inputs which will affect the name of the files that will get generated when you render. You can now connect the nodes as shown in the screenshot.
  5. Press F12 to render.

The images that got generated for me are attached for reference. Please note that each object gets a unique color; although, they may look very similar for two of the objects in the second output.

Cryptomatte

Output 1

Output 2


Edit: As requested by OP, I attempted to write a script that automates the steps above. However, I realized that the Pick output is not perfect as explained in the comments and decided to export separate Matte images for each object instead. The script that generates the compositor nodes for this new approach is attached below.

import bpy, mathutils

base_path = '/home/mra/Desktop/'
allowed_types = ['MESH']

bpy.context.view_layer.use_pass_cryptomatte_object = True
bpy.context.scene.use_nodes = True

nodes = bpy.context.scene.node_tree.nodes
nodes.remove(nodes['Composite'])
node_render_layers = nodes['Render Layers']
node_file_output = nodes.new('CompositorNodeOutputFile')
node_file_output.location = mathutils.Vector((600.0, 460.0))
node_file_output.width = 220
node_file_output.base_path = base_path
node_file_output.format.compression = 100
node_file_output.inputs['Image'].name = 'Render'
node_file_output.file_slots['Image'].path = 'Render'

links = bpy.context.scene.node_tree.links
links.new(node_render_layers.outputs['Image'], node_file_output.inputs['Render'])

i = 0
for obj in bpy.context.view_layer.objects:
    if obj.type not in allowed_types:
        continue
    
    node_cryptomatte = nodes.new('CompositorNodeCryptomatteV2')
    node_cryptomatte.location = mathutils.Vector((300.0, 360.0 - i * 260))
    node_cryptomatte.matte_id = obj.name
    
    node_file_output.file_slots.new(f"{obj.name}_matte")
    
    links.new(node_render_layers.outputs['Image'], node_cryptomatte.inputs['Image'])
    links.new(node_cryptomatte.outputs['Matte'], node_file_output.inputs[f"{obj.name}_matte"])
    i += 1

This is a screenshot of the nodes it generates.
Nodes

Source Link
Mr A
  • 2.2k
  • 3
  • 12

I think you shouldn't making a custom solution for this as there is already a built-in way to achieve what you want.

Assuming you have your scene ready for rendering, the steps you need to follow are listed below and illustrated in the attached screenshot.

  1. In the Compositing workspace, turn Object Cryptomatte on which can be found in the View Layer tab in the Properties editor.
  2. In the Compositor, enable Use Nodes, and add the nodes shown in the screenshot. You can search for the nodes using their names through the Add menu.
  3. Click the File Output node.
  4. Adjust the node properties to add an extra Input. You should also adjust the Base Path which is the folder where the images will be saved. You can optionally rename the inputs which will affect the name of the files that will get generated when you render. You can now connect the nodes as shown in the screenshot.
  5. Press F12 to render.

The images that got generated for me are attached for reference. Please note that each object gets a unique color; although, they may look very similar for two of the objects in the second output.

Cryptomatte

Output 1

Output 2