16
$\begingroup$

In a video tutorial on All Quad Junctions some different types of junctions are explained. When trying to create them I struggle with extra edges and merging points, ripping points. That takes too much time

Is there a efficient reproduceable way to create these types of junctions?

enter image description here

$\endgroup$
4
  • $\begingroup$ Ah, I see you found a good tutorial. That, and the related videos look useful. $\endgroup$ Commented Sep 19, 2013 at 10:42
  • $\begingroup$ You could use the Knife tool, you just have to be careful to avoid making n-gons. $\endgroup$
    – gandalf3
    Commented Sep 20, 2013 at 1:35
  • $\begingroup$ link is broken. "Video is unavailable" $\endgroup$
    – Vader
    Commented Mar 5, 2014 at 18:34
  • $\begingroup$ @Vader Sorry about that, it was demonstrating how the edge flow is influenced and how to have diamonds and 3 to 5 junctions as all quad. $\endgroup$
    – stacker
    Commented Mar 5, 2014 at 20:45

3 Answers 3

8
$\begingroup$

The easiest way that comes to mind currently is to remove the critical faces, add some loop cuts, then create faces.

So for the second one, you would remove the critical face, make a double loop cut with Ctrl R then 2 then extrude the small edge in the middle, and finally select the edge pairs to Fill them with F.

The same applies to the third and fourth with some changes. For the first one: Remove the upper two critical faces, add the loop cuts, fill the proper edge pairs, move the center vertex down.

$\endgroup$
1
  • $\begingroup$ Still pretty messy, would be cool to create an addon that create and manipulate these patters with one key. $\endgroup$ Commented Sep 19, 2013 at 10:44
8
$\begingroup$

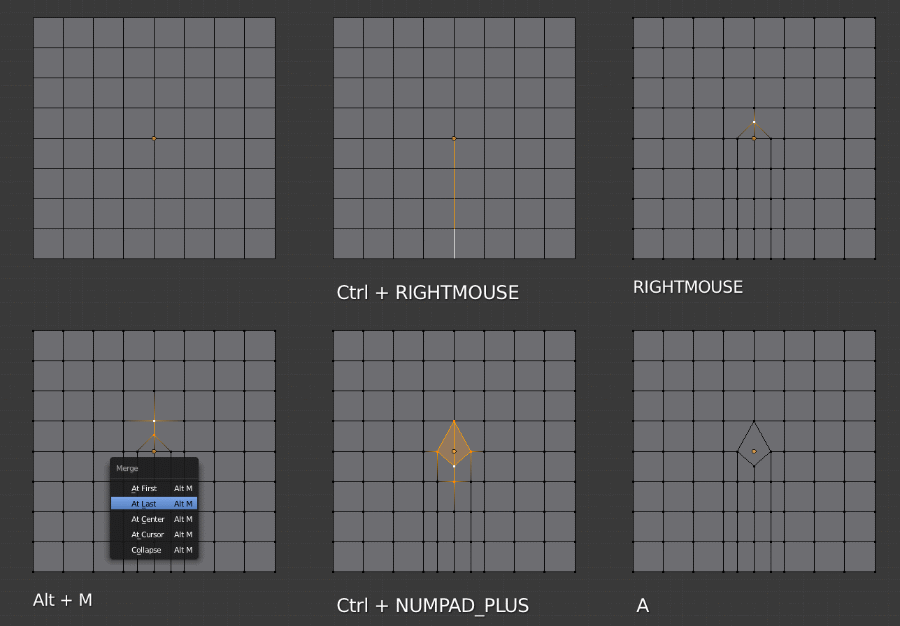
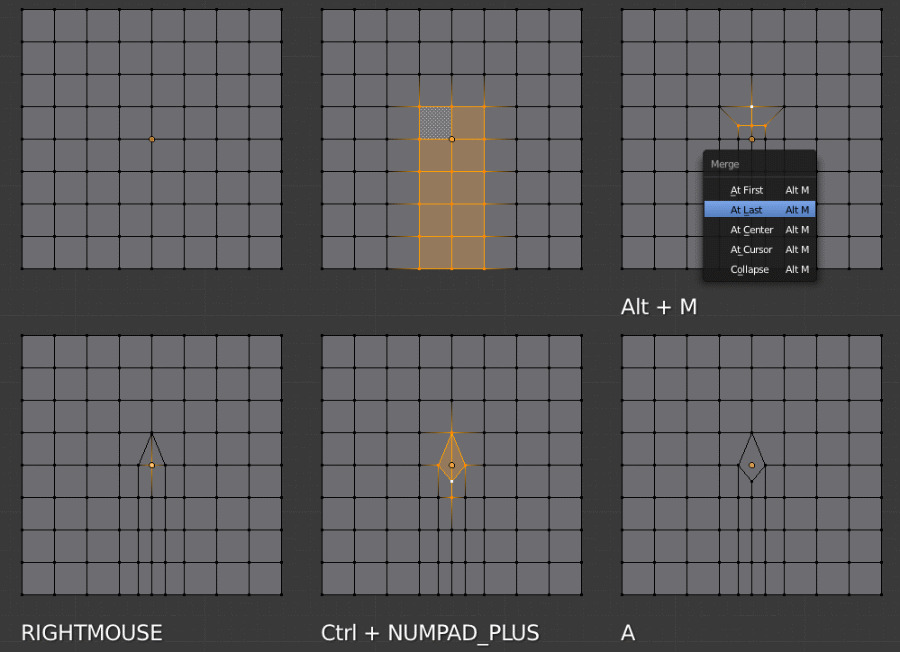
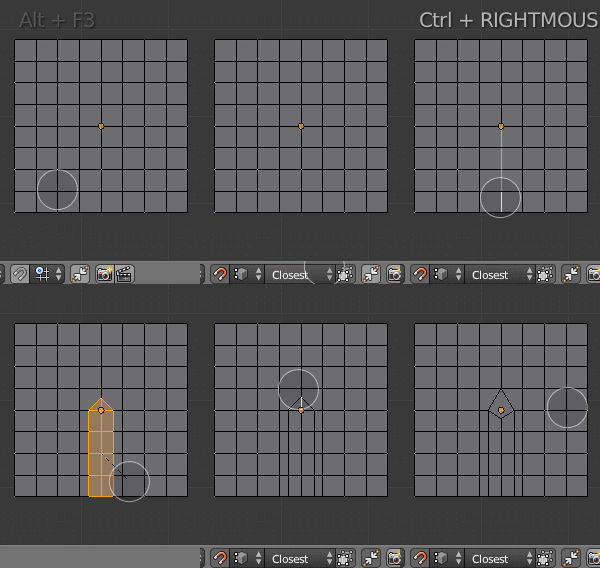
IMHO, the most effective way would be like this:

For the 1st case:

Method 1:

enter image description here

Method 2:

enter image description here

Method 3 (more effective for continuous editing):

enter image description here

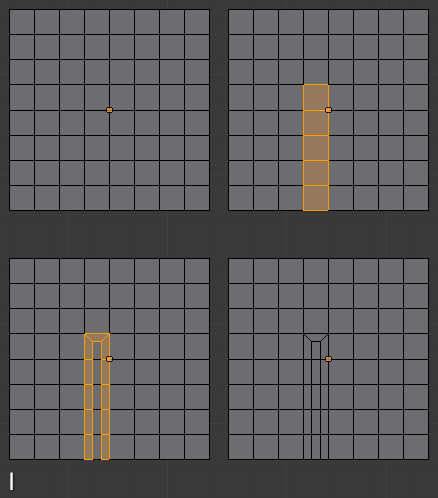
For the 2nd, 3rd and 4th case:

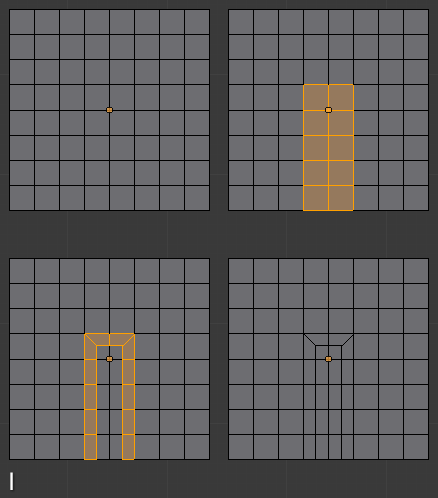
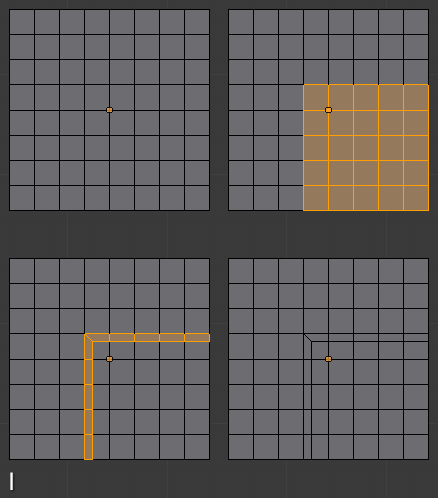
Select target area, then I to inset, uncheck Boundary in F6 panel.

enter image description here

enter image description here

enter image description here

$\endgroup$
2
  • $\begingroup$ Nice GIFs, but they are to freaking fast to follow! $\endgroup$
    – CodeManX
    Commented Mar 6, 2014 at 13:13
  • $\begingroup$ @CoDEmanX Ah, right, I just wanna show how effective they are. :P. Maybe a bit fast. OK. I've slowed them down. :) $\endgroup$ Commented Mar 6, 2014 at 13:31
7
$\begingroup$

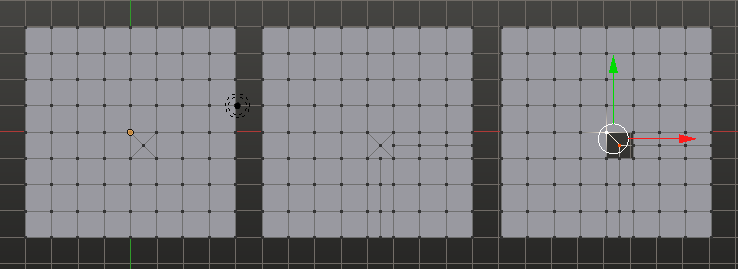
For the 4th case I found this workflow most convienent:

enter image description here

  1. Poke one face AltP basically to limit loop-cuts in next step
  2. Add the loop-cuts
  3. Remove the middle vertex of the face 'poked' in step 1.
  4. Extrude the points from the loop-cuts ends and create the required faces.

enter image description here

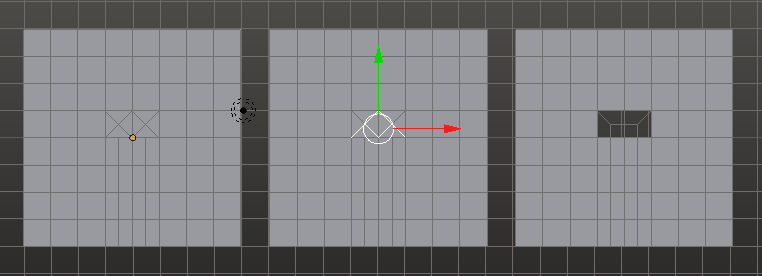
3rd case:

  1. Poke two faces side by side AltP basically to limit loop-cuts in next step
  2. Add the loop-cuts
  3. Remove edges
  4. Subdivide the middle edge
  5. Add edges and finally faces
$\endgroup$

You must log in to answer this question.

Not the answer you're looking for? Browse other questions tagged .