0
$\begingroup$

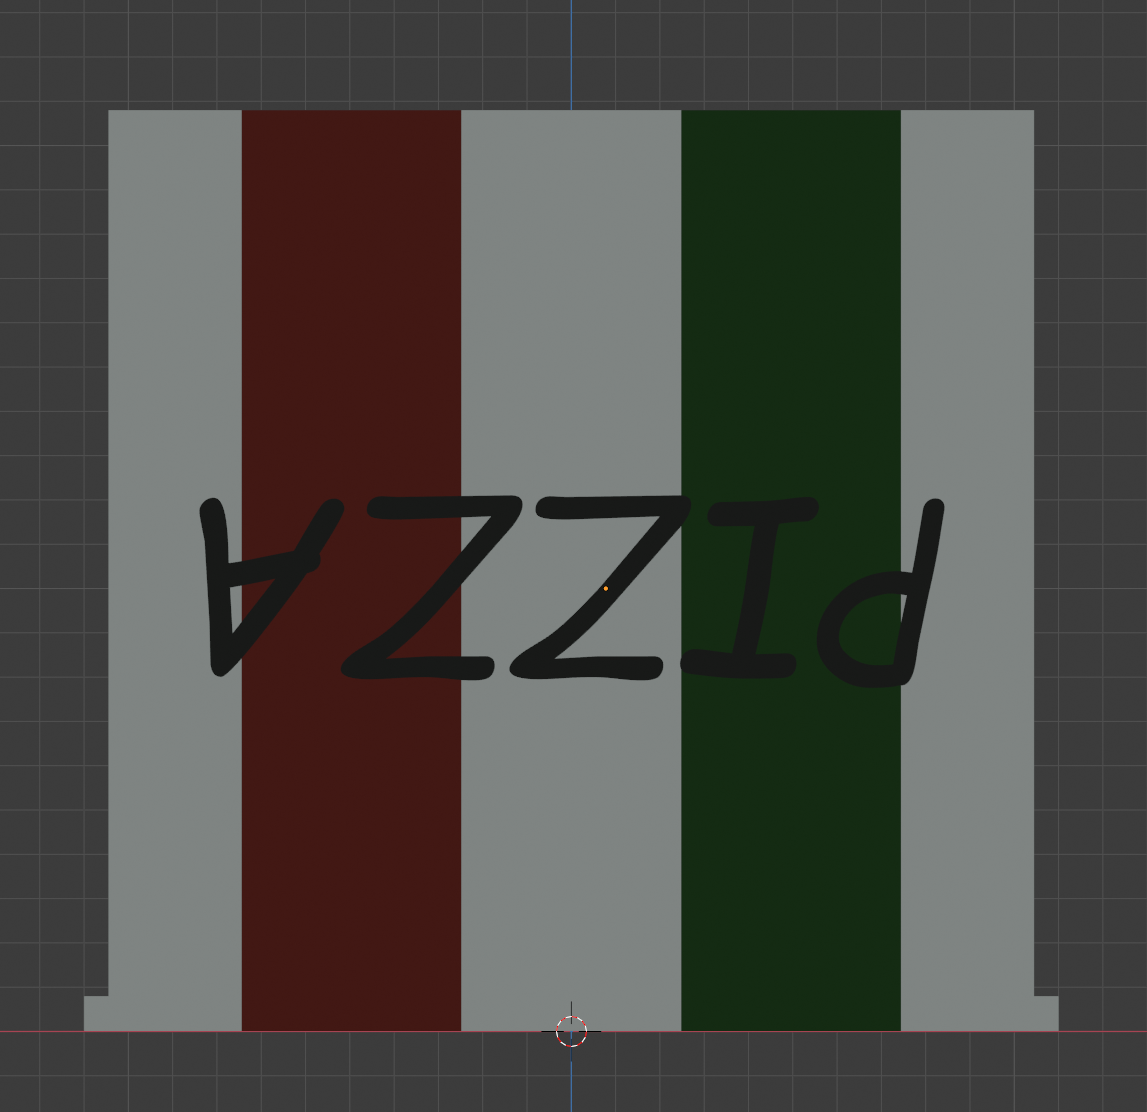
I'm trying to put an image with a transparent background onto an object in Blender. The object has 2 colored lines running across it. No matter what I try I can't get it to work.

This is what I'm trying to achieve (I've used a text object to demonstrate). The reason it's upside down is because it's an open pizza box: Goal
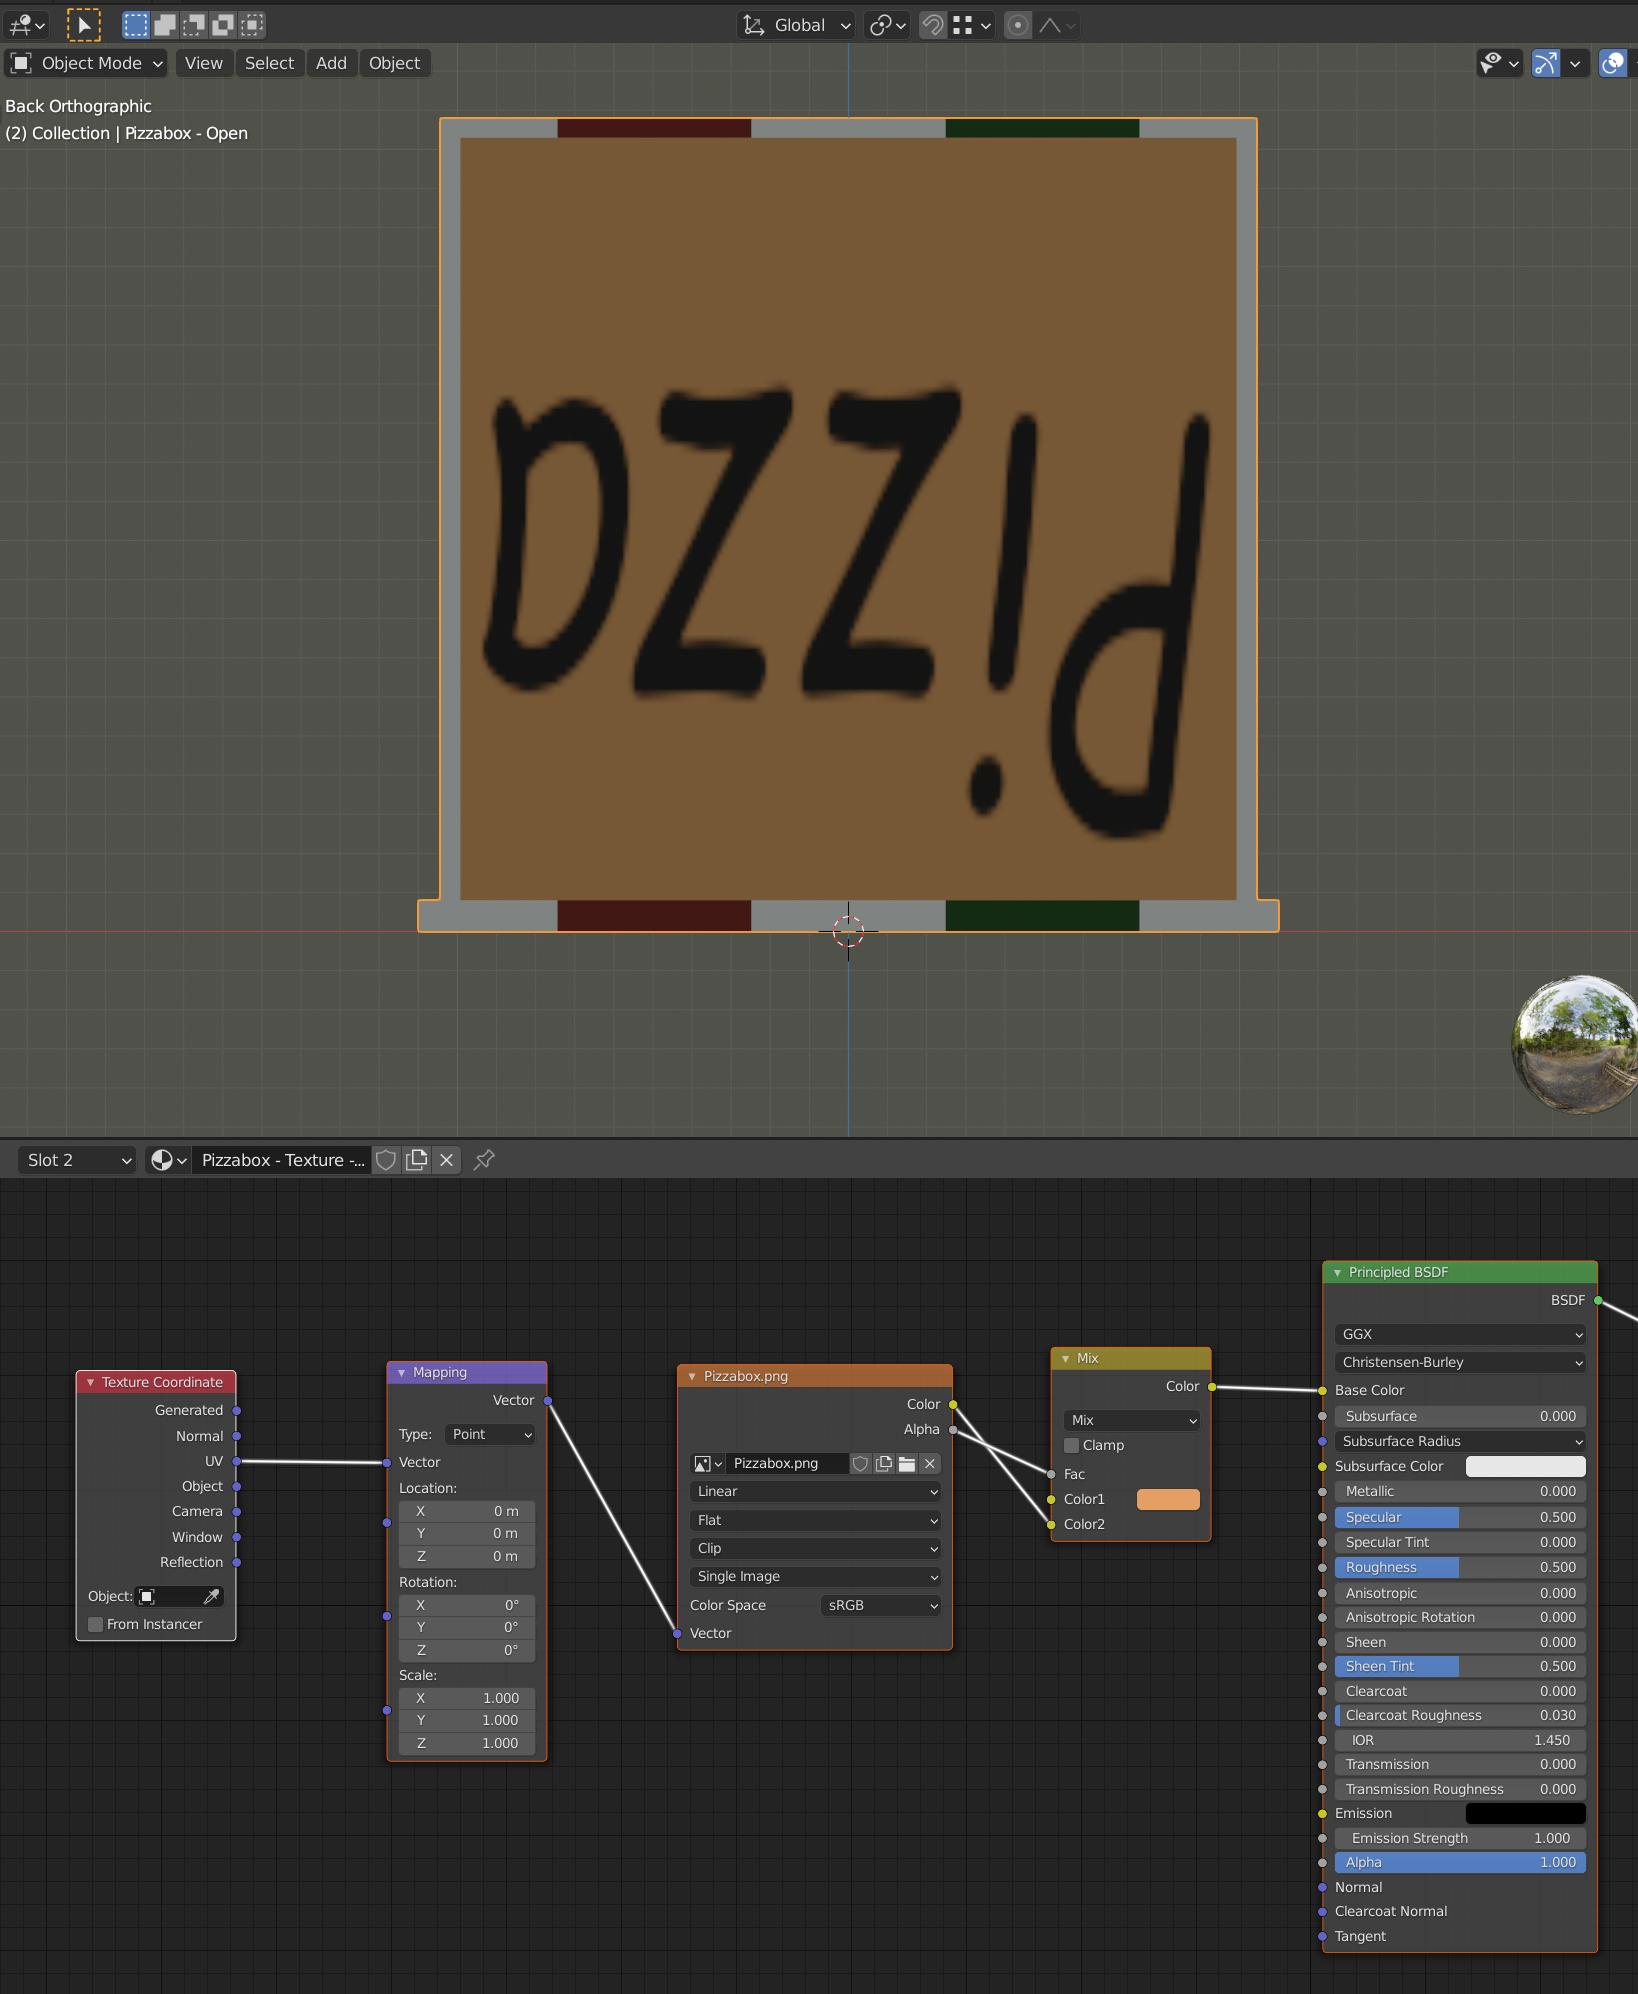
I've tried using the below method but then I've to manually set the background color which works if there is only 1 background color:

Result

I've tried to connect the image directly to the principled BSDF but that makes all the faces that have the material transparent. I've searched and read many topics on this forum but everyone of them seems to set the background/transparency color manually which doesn't work in this case.

$\endgroup$
5
  • $\begingroup$ What exactly is the image texture? What is transparent or how does the alpha channel look like? In the material node setup above, where do the colored stripes come from? From what I see it looks like you have plugged an image with black text into the lower input of the Mix RGB node over this orange/brownish color, mixed by the Alpha which - from the viewable result - seems to be a black square with white text on it. I can't see where the colored stripes are in this material. Your screenshot doesn't show the Viewport Shading, is this Rendered or Material Preview? $\endgroup$ Commented Apr 21, 2021 at 13:31
  • $\begingroup$ The image texture is a black text with a transparent background. The colored stripes are just 2 lanes I created with loop cuts that I then colored using a different material. The view is Material Preview but it looks the same in Rendered view. $\endgroup$
    – 211086004
    Commented Apr 21, 2021 at 13:40
  • $\begingroup$ If you add a material to a certain face, than this is the material on that face. So if you have a red material on one face and then assign the text material on the same face, this replaces the red material. If you go into Edit Mode and have no faces selected, then go to the material tab. Below the material slots you have three buttons, Assign, Select and Deselect. Click on the red material. If you now press Select it will select all faces that have the red material assigned to it. I suppose the faces with the text material won't be selected - you assigned the text material to them. $\endgroup$ Commented Apr 21, 2021 at 13:48
  • $\begingroup$ I get that when assigning a new material to a face that it replaces the old material. But seeing as the image is transparent is there no way of having both? Like layers in Photoshop or something. So that the material that produces the stripes is still on the faces but the material with the transparent image is put on top of that. Or should I just use the text object I created to achieve that? $\endgroup$
    – 211086004
    Commented Apr 21, 2021 at 14:00
  • $\begingroup$ No layers like in Photoshop. One simple possibility would be make three versions of the text material. Instead of the brownish color you'll make one with white, one with red and one with green. If the text is placed by UV mapping, than this would normally work. But a proper or better way would be to maybe create a single material with the stripes created by a Color Ramp for example and the text laid over it with its transparency. $\endgroup$ Commented Apr 21, 2021 at 14:21

1 Answer 1

0
$\begingroup$

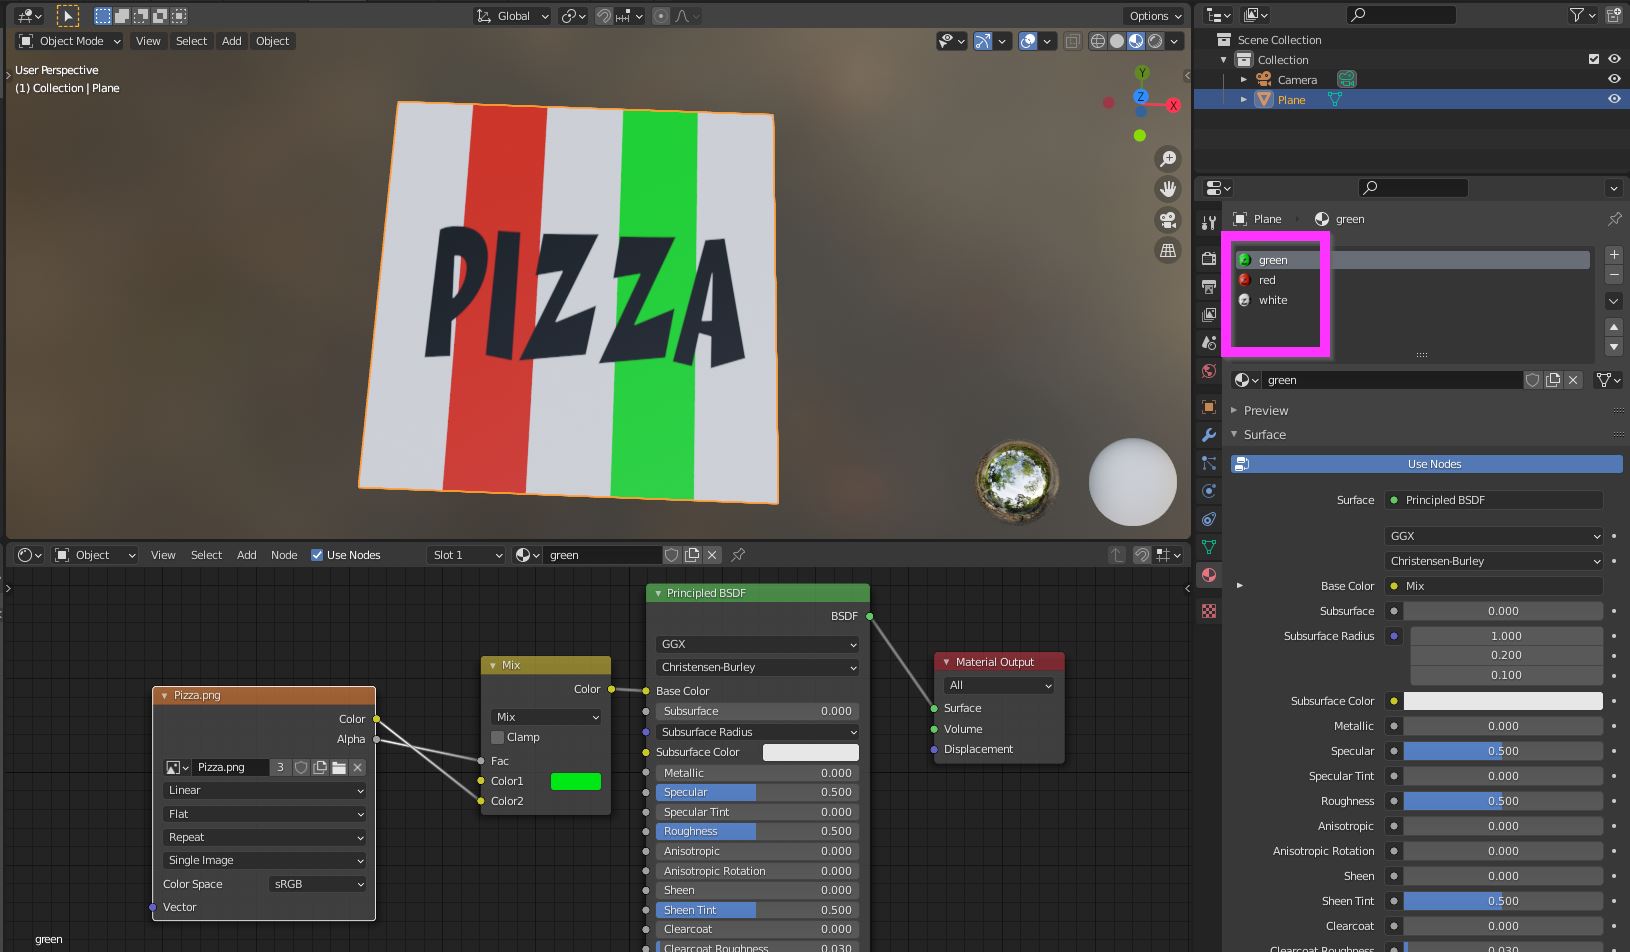
Following your approach, you have to create 3 different materials, one white + pizza, one green + pizza, one red + pizza.

They share the same node tree except for the color of their mix RGB node.

Image nodes are the "photoshop layers", and the mix rgb lets you choose the blending options (add, multiply, screen, ....).

enter image description here

$\endgroup$
2
  • $\begingroup$ Yep, that's exactly what I meant. $\endgroup$ Commented Apr 21, 2021 at 15:51
  • $\begingroup$ Thank you to you both! Will try this. $\endgroup$
    – 211086004
    Commented Apr 21, 2021 at 16:07

You must log in to answer this question.

Not the answer you're looking for? Browse other questions tagged .