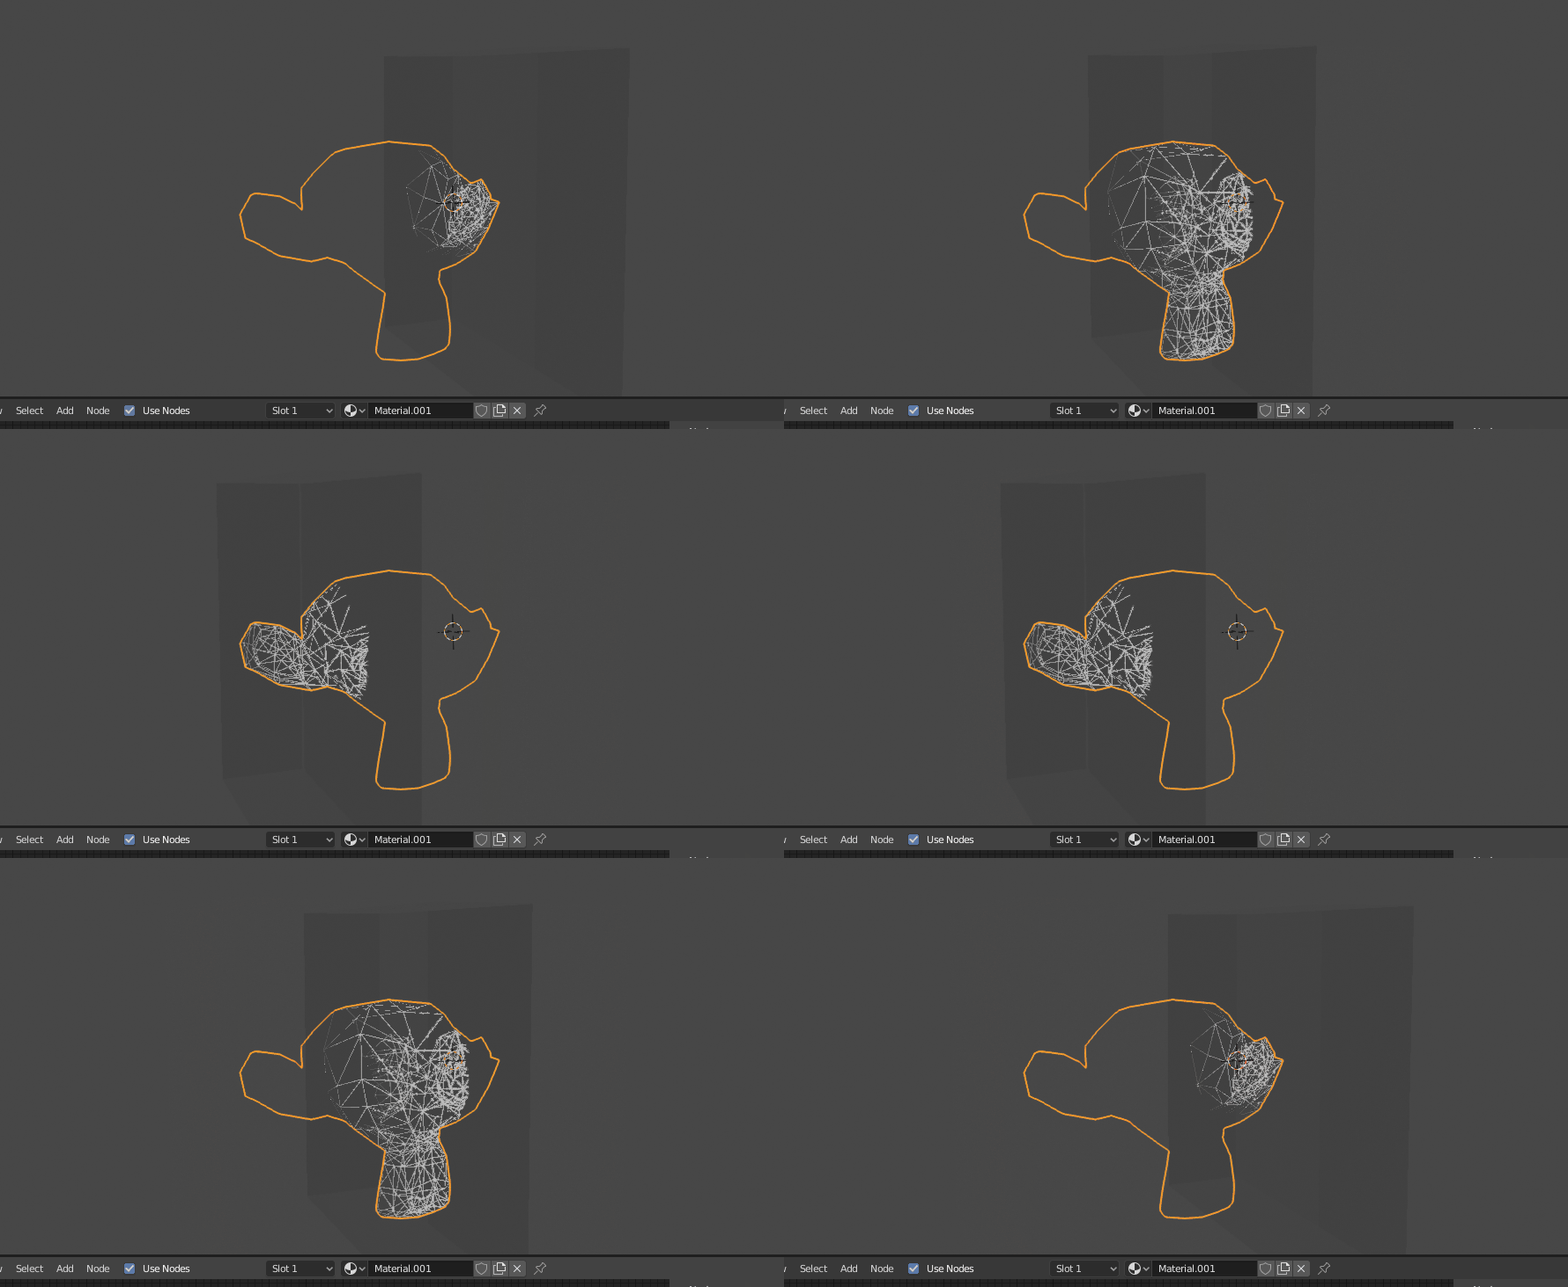
I decided to recreate the CG Geek Wireframe transition effect I had been using as reference. Just to avoid confusion: The wireframe look you see in the example is not a modifier but a simple shader using the wireframe node
1. The first step will be setting up the dynamic paint:
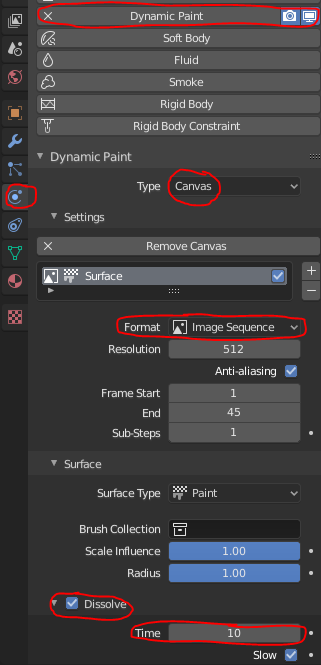
Select your target object (in this example: monkey) and set up a dynamic paint canvas in the physics tab. Set the Format to Image Sequence, surface type to "Paint", and enable the Dissolve option with a low time. You can play with the time value and the "slow" option, they basically define how fast the paint is going to disappear.

If we didn't enable dissolving at all, the paint would stay there and the target would stay visible once touched by the brush.
1.1
Next, add in a Brush object. This is the grey cuboid you can see in the example, and the goal is that everything within its volume is visible, while everything outside is invisible. You can theoretically use any mesh, but keep in mind that higher poly stuff might be more performance consuming.
Go to the physics tab and make it a dynamic paint brush object. Set the Paint color to anything, but make sure the alpha is set to 1. The Paint Source should be set to "Mesh Volume" or "Mesh Volume + Proximity", and again, you can play with all of the settings if you don't like what you see.
2. (Optional:) Keyframe/animate your object
This step is only important if you want to make an animation. If you want a still image, skip this.
3. Bake the dynamic paint
Select your canvas (target) object, go to the physics tab and set up the frame count fitting to your animation. If you are doing a single image render, set it to Start:1 End:1 so that it only bakes a single image and doesn't waste your time.
Now scroll down to "output", set up the directory where you want to have the baked paintmaps saved.
UV Unwrap your object and select the UV Map.
Now you can Bake the image Sequence.
4. Shading
Now that you have the paintmap, you can use it as a factor for a mix shader node.
Just add an image texture, select all the images and click open. If you want to have it respond live in the viewport, enable auto refresh.
Add a Texture coordinate node and plug the UV Map output into the Vector input of the image texture.
Add in a Mix Shader Node and Mix two shaders of your liking. In this Example I mixed Transparency ("Invisibility") with Emission. You can use anything else too.
Plug the paintmap into the mix shader factor, and this should be it.


