0
$\begingroup$

Just like the topic title says, does anyone know if there is a quick way to unwrap an image texture onto a complex mesh?

Is marking seams and manually placing the UV islands the only way to go?

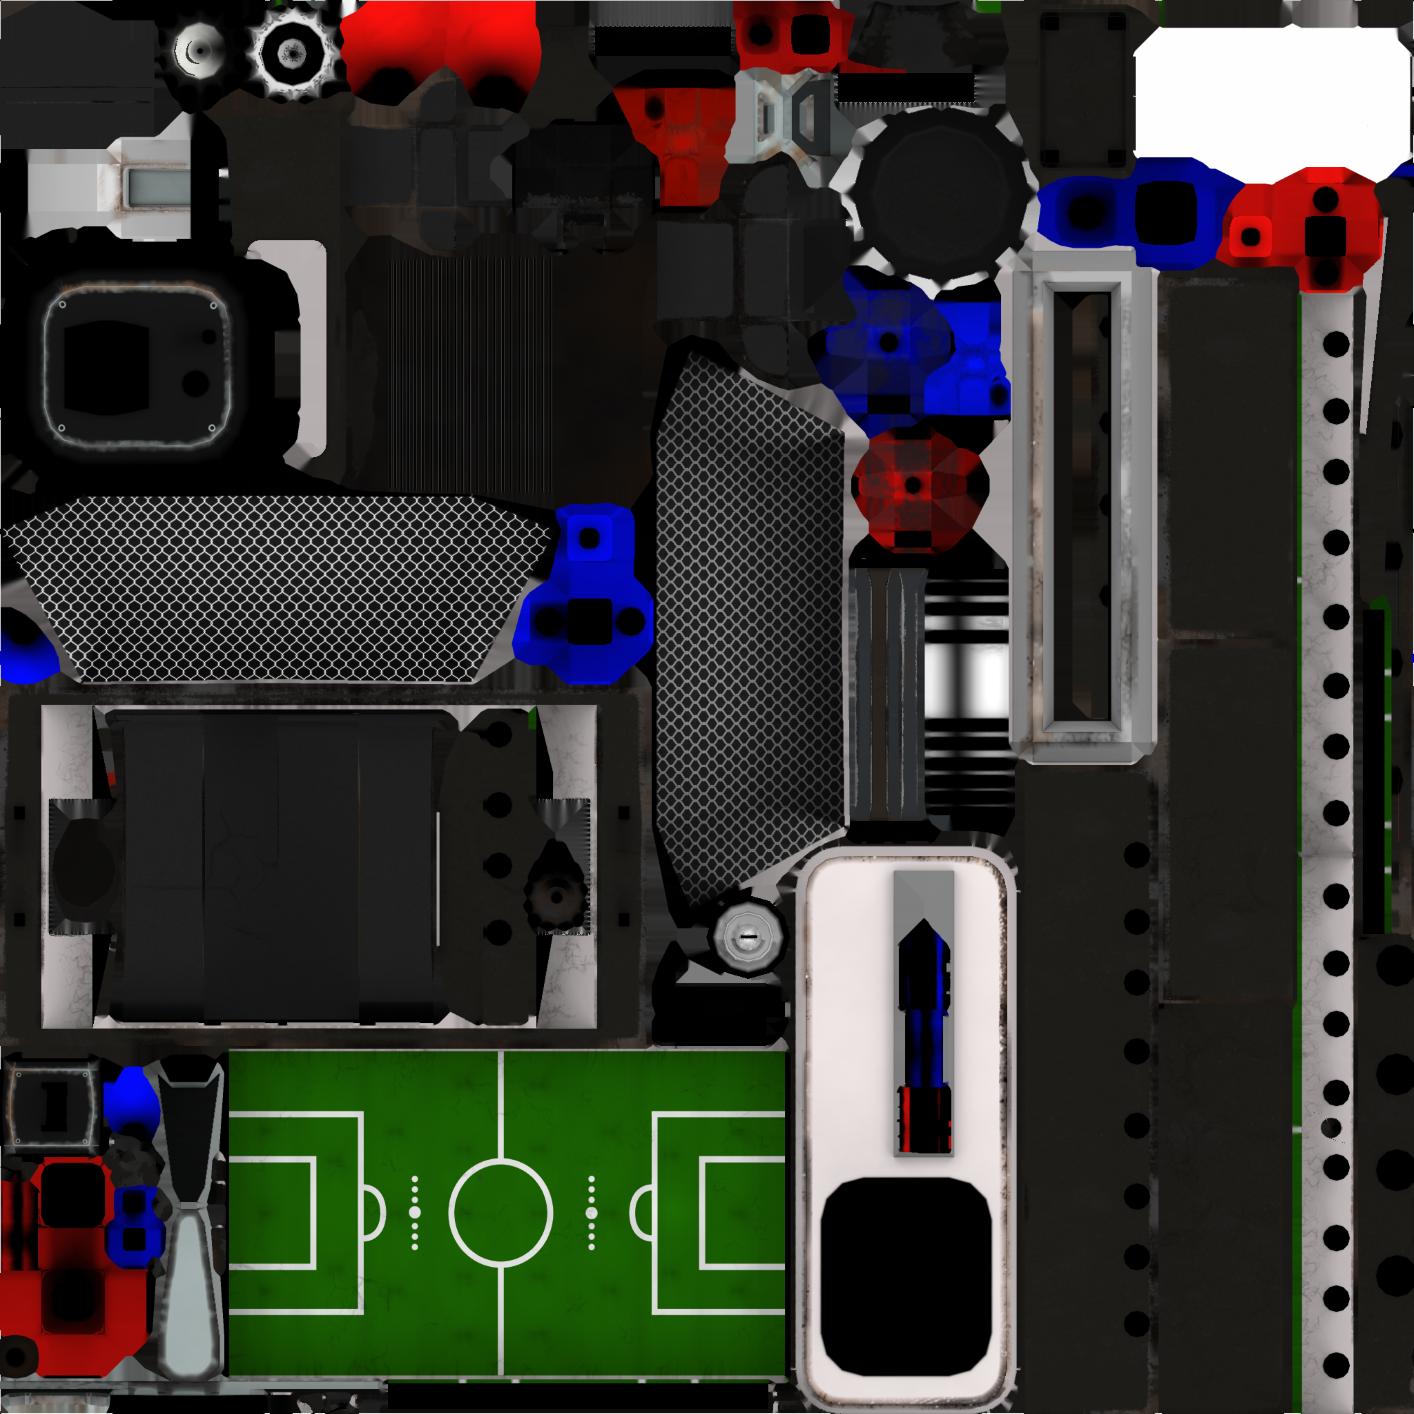
I have a Foosball table and associated image texture (attached below) and it doesn’t line up. What's strange is when you download the model and import it, some edges are highlighted a neon blue color. Could it be that I'm supposed to mark those edges as seams? That seems really inefficient.

The Mesh: https://sketchfab.com/3d-models/foosball-table-1303a318d4584639acef729b9fd296fc

The Resized Image Texture enter image description here

$\endgroup$
5
  • $\begingroup$ I’ve been using Blender for just over a year, and as far as I know, I think that manual placement would have to be the case—because how else is the computer supposed to understand what goes where? As I understand, UV images are very closely linked to the objects they’re created for, short of seamless textures. However, I imagine there COULD be a plugin created that reads all that color information like what you’ve got here on the unwrap and tries to intelligently place it across the mesh on the most likely surfaces. Why not download the model from the site as well? $\endgroup$
    – John
    Commented Nov 17, 2019 at 21:27
  • $\begingroup$ Oh, realizing now you probably DID download the associated model. Strange that it doesn’t line up... $\endgroup$
    – John
    Commented Nov 17, 2019 at 21:28
  • $\begingroup$ Try adding/using the Mapping node to manually adjust? That will probably work. $\endgroup$
    – John
    Commented Nov 17, 2019 at 21:29
  • $\begingroup$ Thanks for your response. I downloaded and imported the model but when I attach the Image Texture node (in addition to a Mapping node), the image is placed incorrectly on the mesh. For example, the green field would be on the handles. $\endgroup$
    – Jisip
    Commented Nov 17, 2019 at 21:29
  • $\begingroup$ If you've downloaded this model it should be ready to use, meaning the UV should align with the image without any work, if it's not the case you need to realign the UV with the image, which is not easy because you need to find where the seams where placed. I don't think there's any way around... $\endgroup$
    – moonboots
    Commented Nov 18, 2019 at 12:10

1 Answer 1

0
$\begingroup$

I downloaded the file myself and checked, the folder contained another zip file in the source folder with the fbx and textures, those i used. The png files in the texture folder seem no different, except their size due to the file-format, up to you which you wanna use.

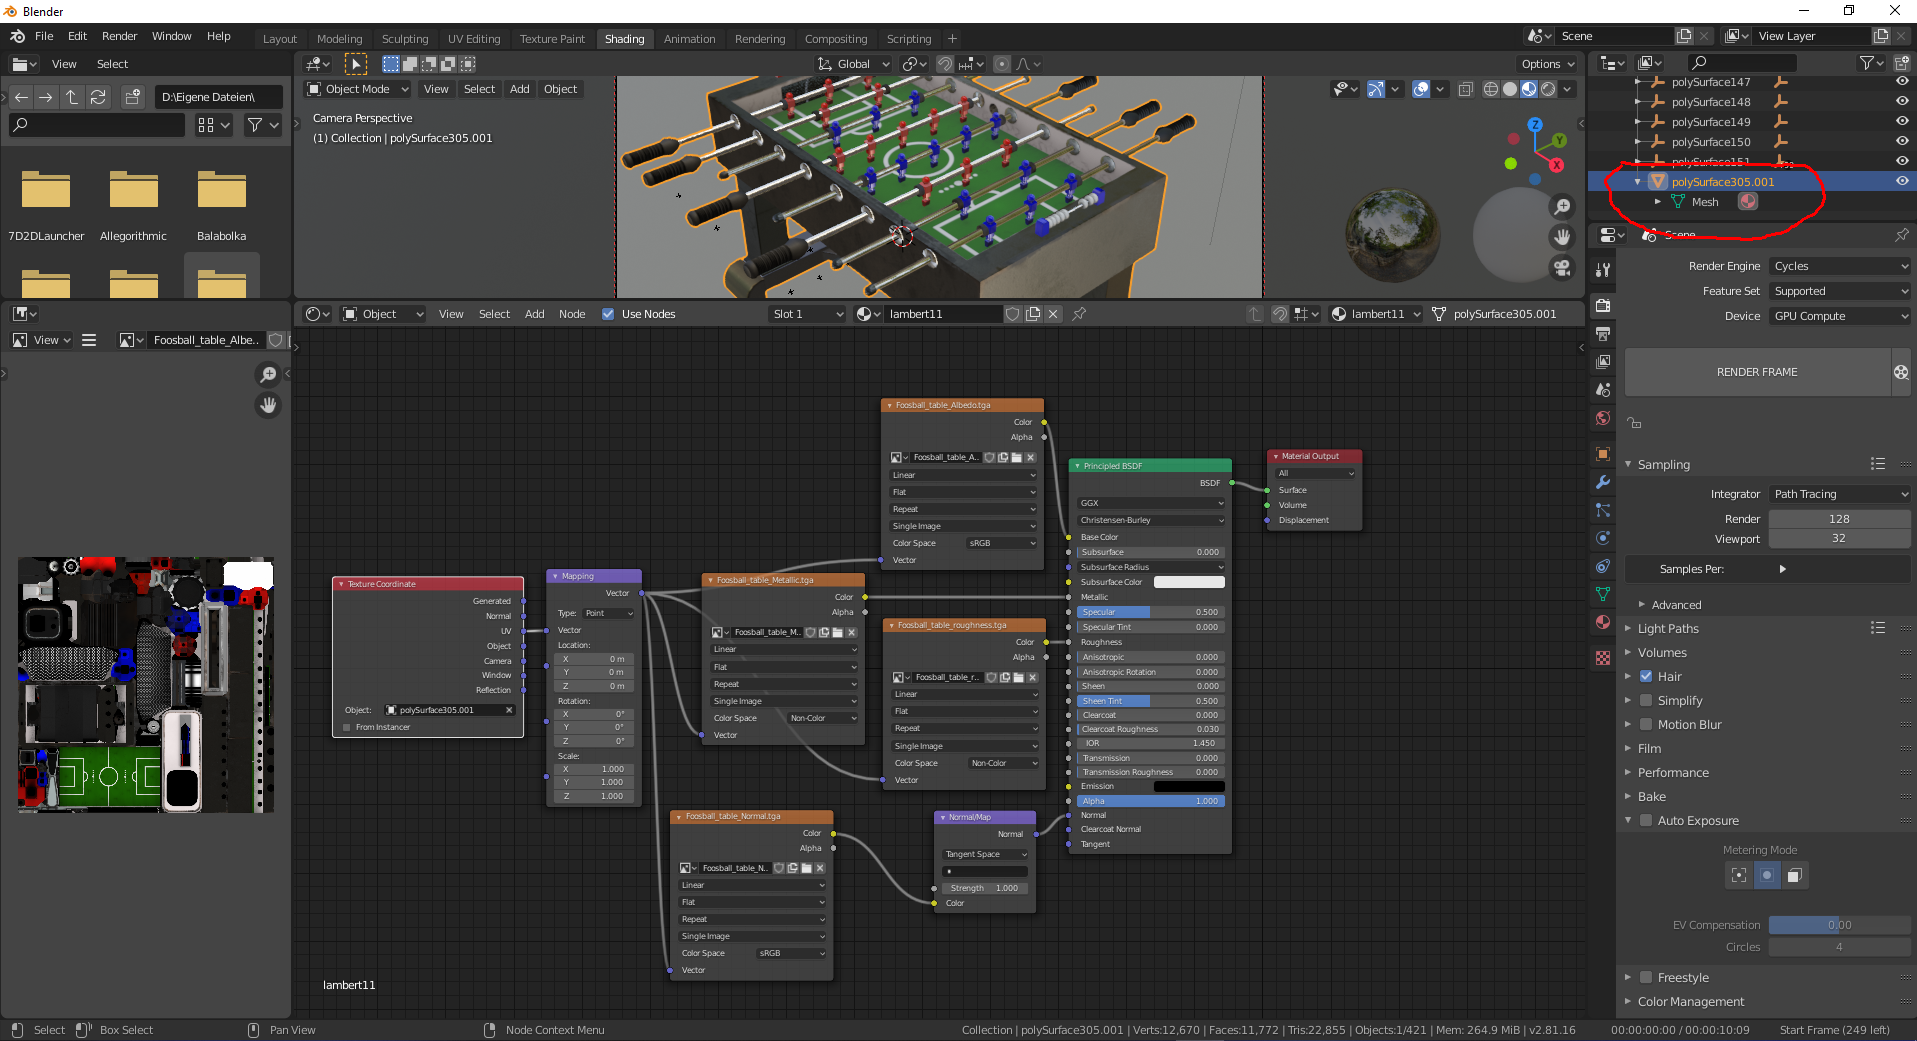
In Blender, after importing, the last object in the outliner (marked red in the picture) got a new material and i used the Albedo, Roughness, Metallic and Normal textures as "Image Texture" nodes. The use of the "Texture Coordinate" and "Mapping" nodes are not needed for this to work, just used to use them. Added a picture to show that it's working even without the "Mapping" node.

The uv-coordinates are fine and all there. The textures align as well. The picture shows the Object with it's textures applied.

Shader setup for the foosballexport2.fbx from sketchfab enter image description here

$\endgroup$
2
  • $\begingroup$ Hmm. So do you think adding the Mapping node is what’s at fault here? Maybe it sets some kind of “default”/resets the placement? $\endgroup$
    – John
    Commented Nov 18, 2019 at 23:29
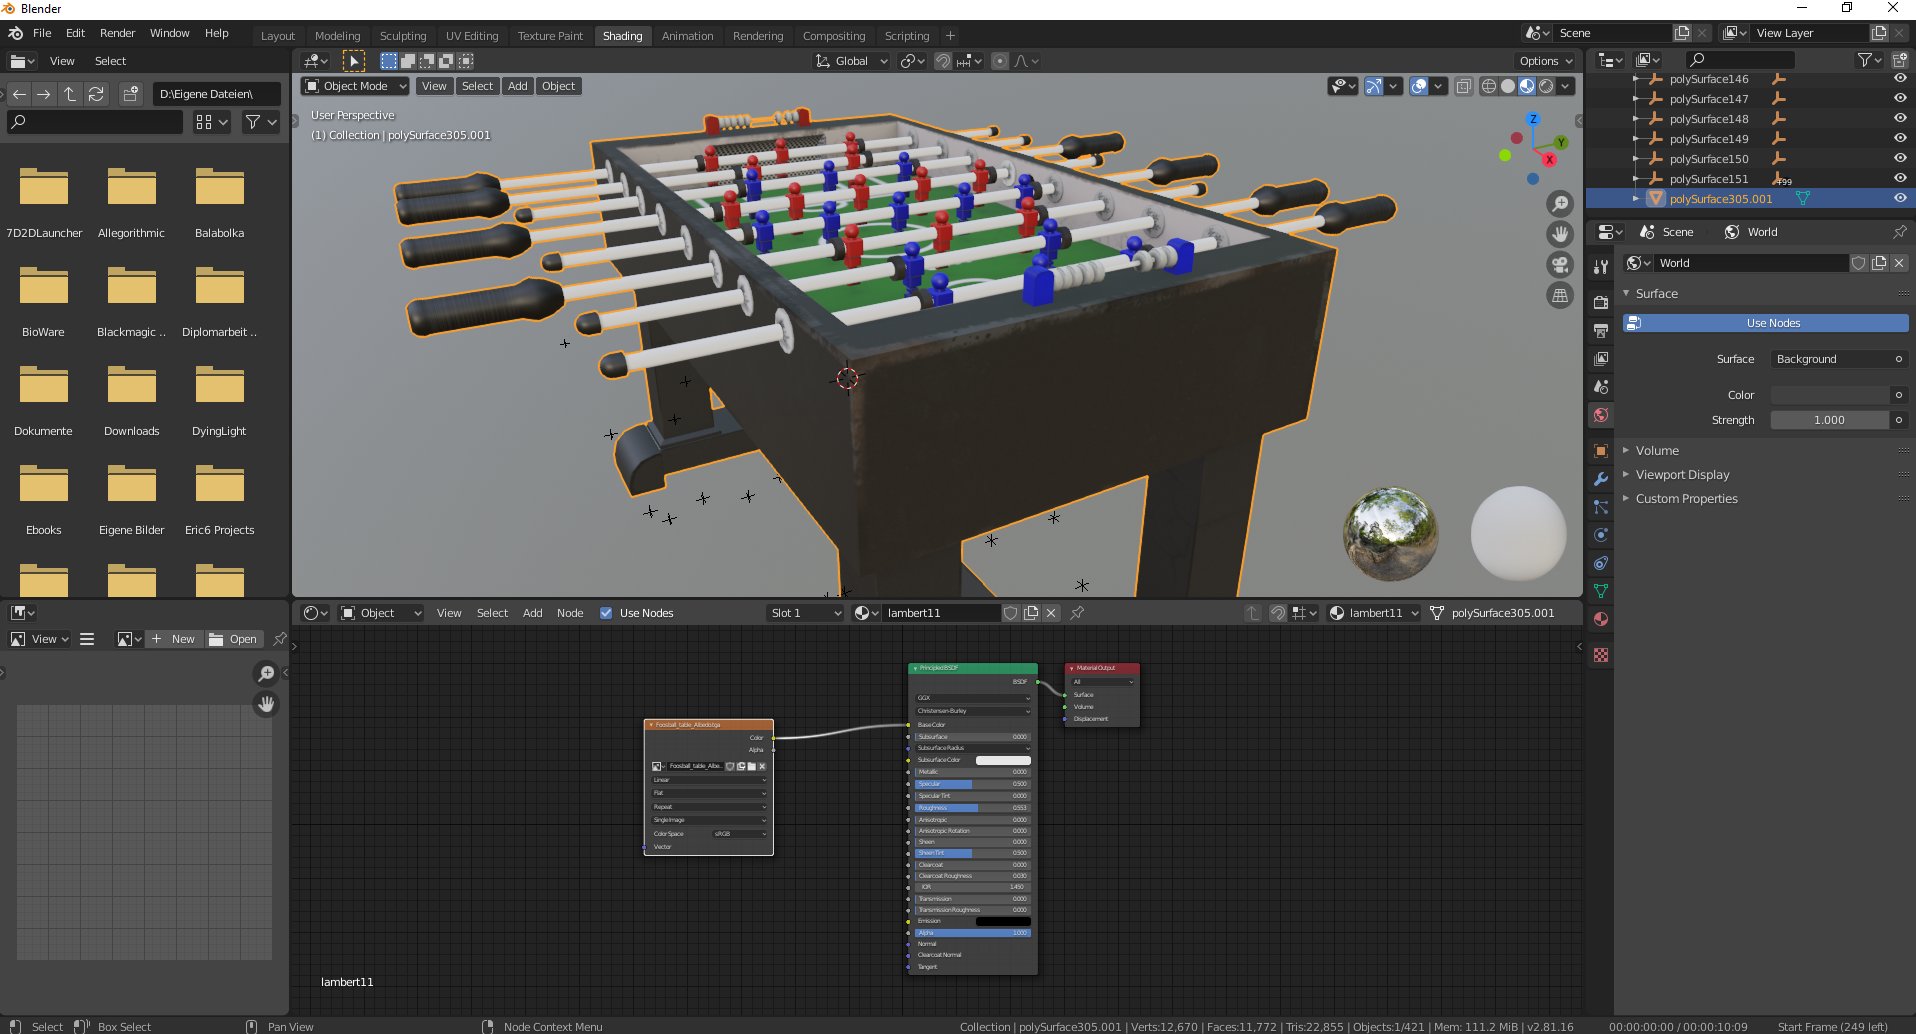
  • $\begingroup$ Added a picture to show that the "Mapping" node is not needed in this case. The second picture was taken from a fresh import and then adding only the albedo texture. $\endgroup$
    – Xylvier
    Commented Nov 19, 2019 at 0:19

You must log in to answer this question.

Not the answer you're looking for? Browse other questions tagged .