8
$\begingroup$

I'm a psychology student (and 3D design noob) who's been tasked with designing items for a test of spatial ability like this example...
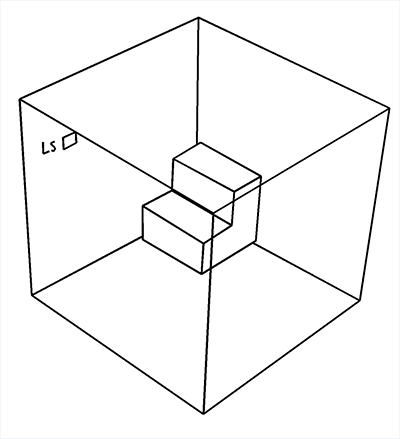
Sample spatial ability item

I've been playing around with Blender, and I've gotten this far... enter image description here
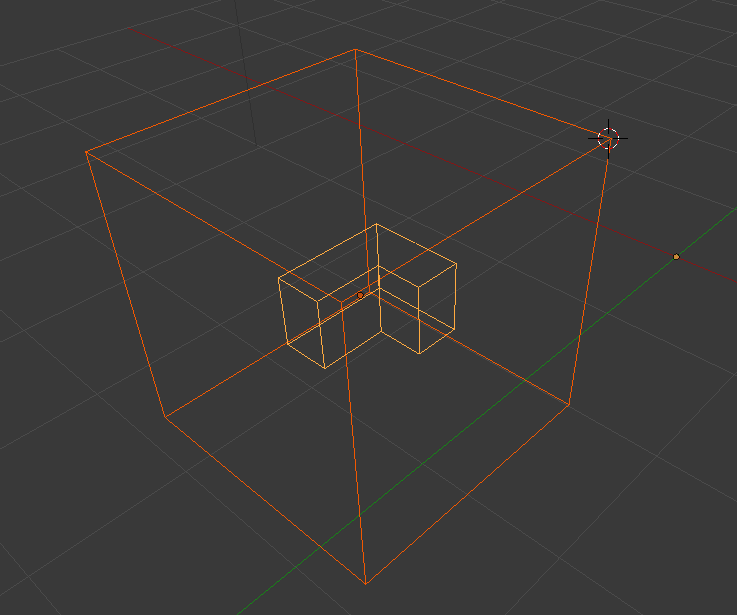
So the shapes I want are there, but I'm having trouble getting out rendered on white with black outlines.

I tried changing the World Horizon Color to white, which fixes the background, but the cube object renders solid. Any ideas on how to get it outlined like in the example?

P.S. That "LS" in the example is meant to be a window. Any suggestions on how to accomplish that would also be wonderful; I haven't even attempted it yet.

$\endgroup$
2
  • $\begingroup$ Related: blender.stackexchange.com/q/9425/599 $\endgroup$
    – gandalf3
    Commented Aug 12, 2014 at 3:33
  • 1
    $\begingroup$ For the "LS" you could try a text object. If you just need a representation of a window, a wireframe plane will give a nice rectangle result. If you want to actually cut a hole, try Inset (I), Knife (K), or Knife project. For a rectangular hole in the side of a cube, I will probably be fine. To avoid messing with the QI range, you might want to use I but not delete the face, and mark it as a freestyle edge with Ctrl E. Example .blend. $\endgroup$
    – gandalf3
    Commented Aug 12, 2014 at 3:37

4 Answers 4

5
$\begingroup$

One way you could do this is by using freestyle:

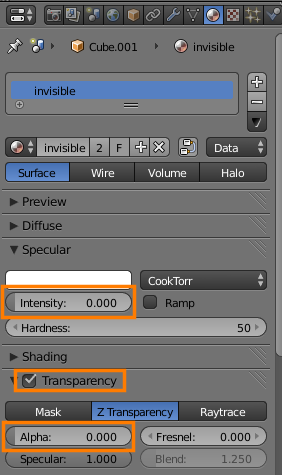
  1. Create a transparent material and assign it to your objects:

    enter image description here

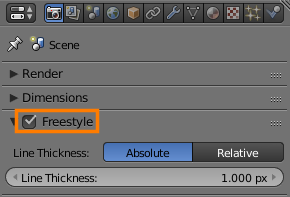
  2. Enable freestyle in Render settings:

    enter image description here

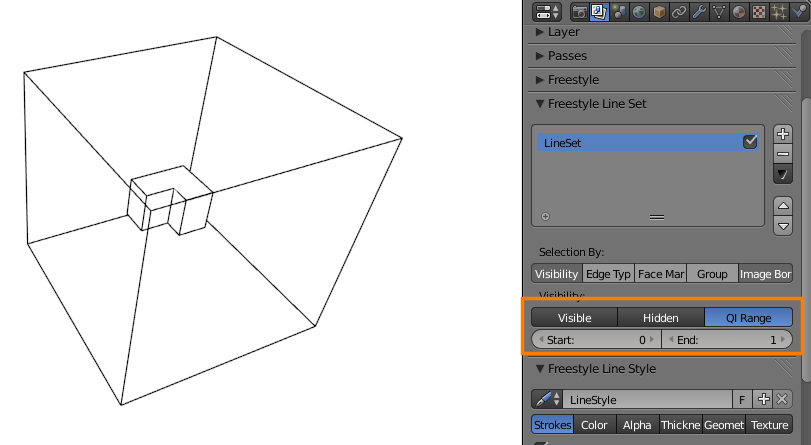
  3. In Render layers, set the line visibility to QI range and set the end to 1:

    enter image description here

    Think of the QI range like a sort of depth index; faces directly visible to the camera are 0, faces behind those faces are 1, faces behind those faces are 2, etc.

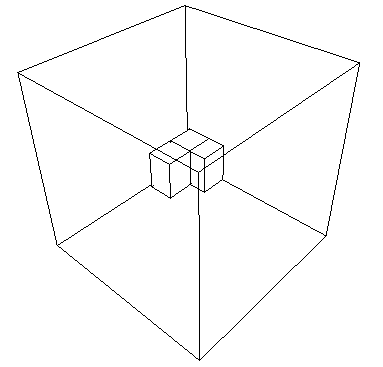
    By only rendering lines on faces between 0 and 1 (inclusive), you can get a result like in your example image.


Or you could use wireframe materials:

enter image description here

See this question for details.

$\endgroup$
2
  • $\begingroup$ I've got the outer cube working using the Freestyle method you outline, but the inner "tetris block" is still rendering as solid, like this Any ideas? Also: Your instructions were incredibly helpful, thank you. $\endgroup$
    – Psych20
    Commented Aug 18, 2014 at 3:48
  • $\begingroup$ @Psych20 Make sure the inner block has the same materials as the outer cube. Also see the .blend from my comment above. $\endgroup$
    – gandalf3
    Commented Aug 18, 2014 at 6:17
4
$\begingroup$

Using blender internal you can set the material type to wire and it will only show the wireframe of the object.

enter image description here

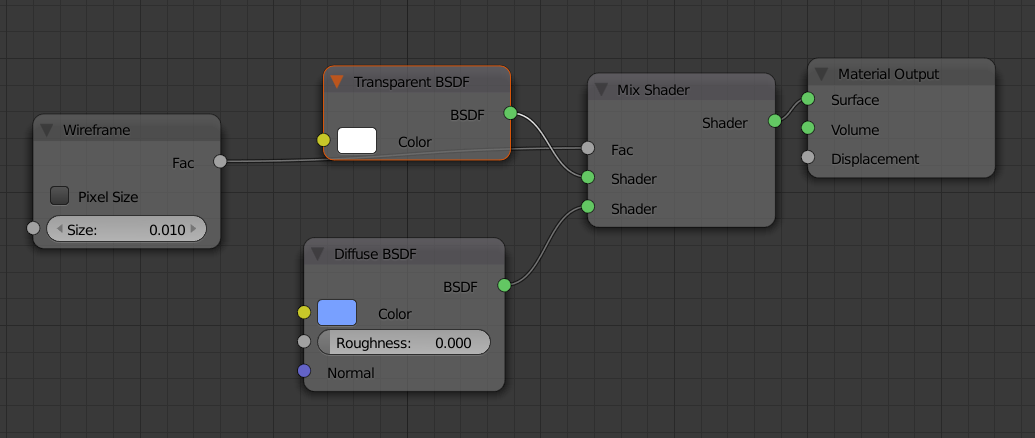
For cycles there is a wireframe node that you can input into a mix node to define transparent areas but it will show a triangulated wireframe.

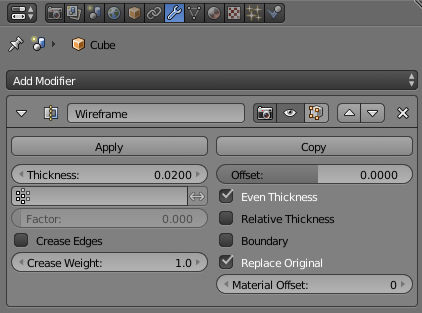
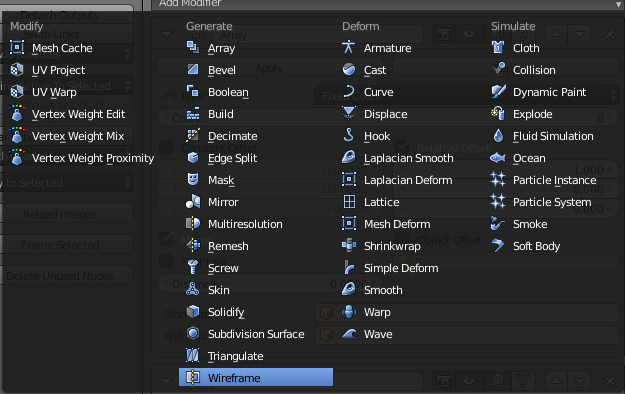
An option that is available in both renders is the wireframe modifier. This modifier was added in 2.70 and gives you control over how thick the wireframe will appear.

enter image description here

$\endgroup$
1
$\begingroup$

There are several ways to do this.

First: Using the Cycles render engine, this is now extremely easy. You can use the node setup below, with which you can control how opaque the faces are, and the color of the edges. enter image description here

Another easy way to do this, is to use the Wirefame modifier. enter image description here

This will alter the mesh to show a mesh along the edges of the base mesh, and will not render any faces. This works in viewport, BI and Cycles. Notice that you may need to get a more recent version of Blender depending on your current build.

$\endgroup$
2
  • $\begingroup$ Using the wireframe node gives you very ugly triangles: i.sstatic.net/wFWG3.png $\endgroup$
    – user1853
    Commented Jan 1, 2015 at 2:54
  • $\begingroup$ Now that is weird!I didn't think it was supposed to do that . . . does it triangulate the mesh in order to work? $\endgroup$
    – J Sargent
    Commented Jan 1, 2015 at 3:20
0
$\begingroup$

Another option would be to make your item from modeled wires, and use that, instead of a texture.

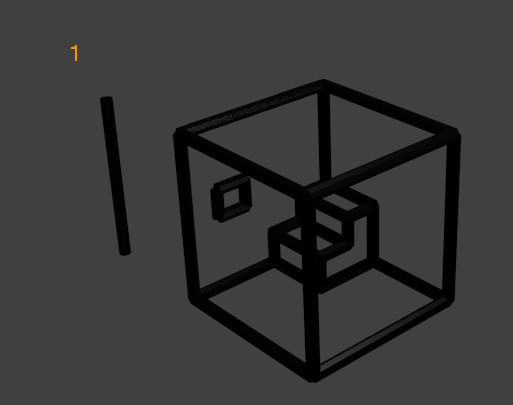
The way to do this is to first create a "wire" from which to construct the wireframes. In the illustration below, I created a cylinder with 8 vertices, and unclosed ends (numbered "1" in the screentshot:

blenderwireframe

A material (black in this case) was assigned to the "wire", and it was duplicated, rotated, and the length of the cylinder was changed the length to create a 3D representation of the original image. Analyzing the blend file from which the screenshot was created,

https://www.dropbox.com/s/awgnd3acubwou8v/blenderwireframeanswer.blend?dl=0

it will be seen that the "wireframe" will show up in a render, because the wires are meshes, and not blender edges.

$\endgroup$
2
  • 1
    $\begingroup$ Please add some more details to your post such as screenshots and steps to create this effect so that others will be able to use your answer effectively. $\endgroup$ Commented Aug 12, 2014 at 17:22
  • 1
    $\begingroup$ I will do that, but I made the response from a location away from home, where I did not have access to Blender. $\endgroup$
    – brasshat
    Commented Aug 12, 2014 at 18:22

You must log in to answer this question.

Not the answer you're looking for? Browse other questions tagged .