Emulating bounce physics -
 .--.
.--.
Producing the basic bounce -
Set the timeline cursor to frame 1.
Set the 3D window to Ortho view mode.
Add a ground plane and keyframe it's Z axis location. Padlock it's location strip in the Dopesheet so it can't be moved. Give it rigid body properties (physics) and untick the "Dynamic" box, give it's "Bounce" a value of 1.0 .
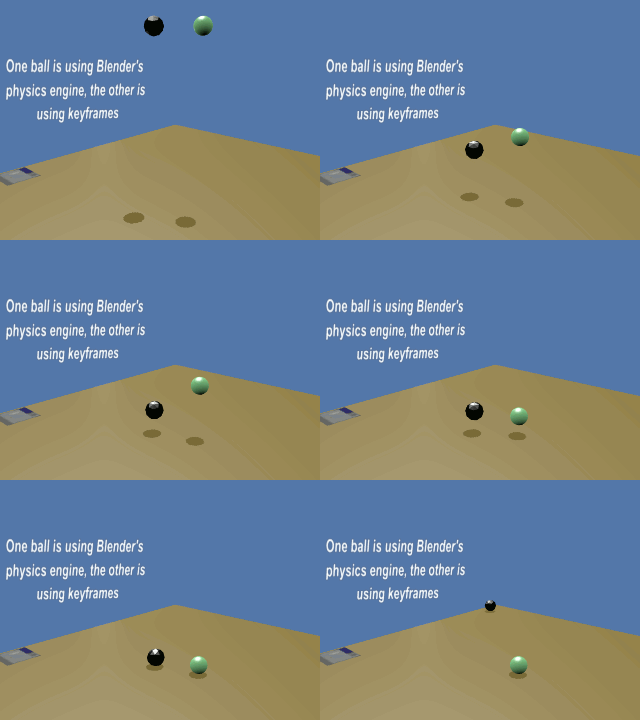
Set up a ball (sphere) at some height above the ground plane. This will be using Blender's physics engine to give us a sequence of bounces with which to emulate with a 2nd ball. Give it physics and tick it's "Dynamic" box so it will fall and hit the plane. Set it's bounce slider to around 0.6 or whatever suits.
Run the animation to check the physics ball falls and bounces off the ground plane.
Set the maximum animation frame to some time after the last bounce.
Take the timeline cursor back to frame 1 and add another ball, take it to the same starting height as the 1st.
Keyframe it's location slots at right. This will be our keyframed version.
What is required now is at the frame where the physics ball hits the ground, drag the 2nd ball down to the ground also and keyframe it's location.
Do the same at the frame where the physics ball rises to it's maximum bounce height. Take the 2nd ball up to that height and keyframe it again.
Repeat the process throughout the bounces. When played, the 2nd ball won't be falling and rising anything like the physics model, but it should arrive at the ground and maximum bounce heights at the same frame as the 1st ball.
Select the 2nd ball and go to the Graph editor, padlock out all strips that are not the 2nd ball's Z axis location graph.
Make a 3D viewing window, say at top right so you can see what you're doing when you start shaping the curves.
At extreme left select the Z axis strip so it's highlited, then move the arrow back into the editing window.
The z axis' blue curve should be quite prominent. Press the Home key to center it all.
The bouncing characteristics are determined by the shape of the curves and can if required, be varied to suit any particular scenario.
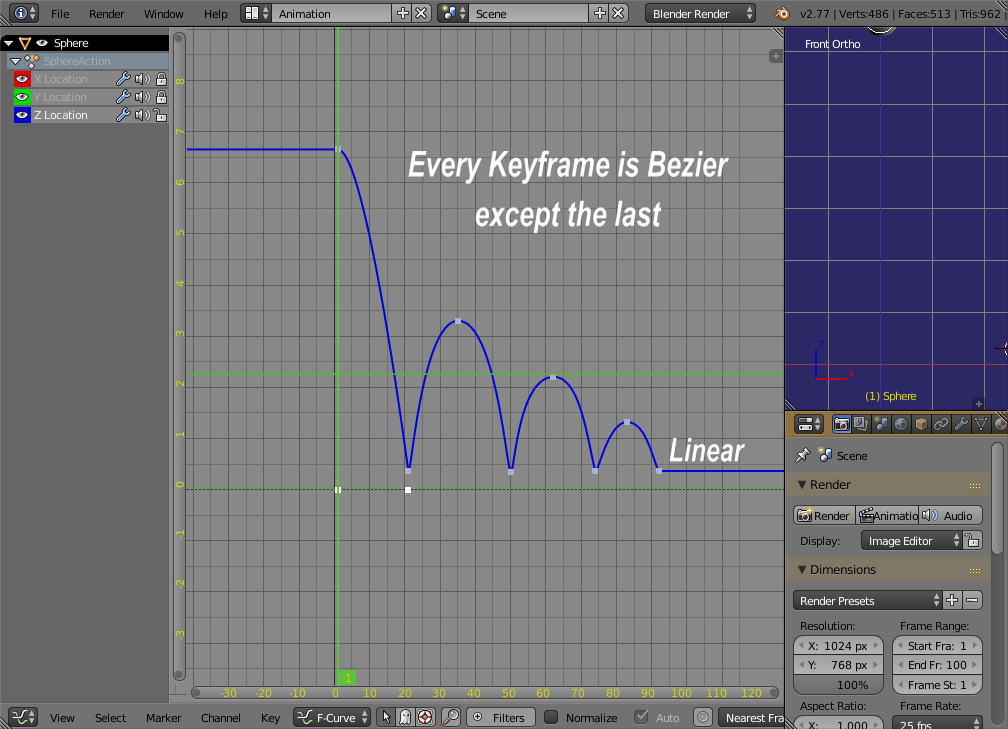
As we are going for a natural bounce here, emulating the physics ball's bounce is simply a matter of using each keyframe's handles to reshape the curves so the 2nd ball more or less echoes the 1st ball's movements.
At the ground collision frame, a sharp Vee shaped curve is required and one that places the 2nd ball at the ground level, not above or below. It has to descend and not slow down as it approaches the ground, rather be ripped back upwards rapidly on contact.
At the top of the bounce, it's the opposite situation. Our ball must slow down and pause slightly before falling again. This is more easily achieved by stretching the top keyframe's handles out to about a third the distance to the previous and next keyframes at each side, give or take. Keep the handles reasonably horizontal.
The falling side probably needs a little more handle length than the rising side.
Curves that look like steep hills seem to work best.

Once you get it looking right, you'll have a set of reliable bounce curves that can be used as 'Masters' for other projects.
-=================-
Importing 'Master Bounce Keyframes -
Simply append the keyframed Blendfile, go to the appended scene, (top scene menu) and select the 2nd ball, press CTL-C to copy it, animation and all, into the copy buffer.
Go back to the parent scene, get into the layer that's to take the bouncing ball and press CTL-V to copy it.
The ball will retain it's animation keyframes, along with it's other attributes. It will also appear in the Dope sheet.
Assuming the object that's to take these keyframes has no animation at all, select it's layer, then the object itself. Take the timeline cursor back to frame 0 (zero) and keyframe te object's location & rotation.
This will give it an appearance in the Dopesheet.
Go to the Dope sheet and padlock out all keyframe strips that don't belong to the new (unbounced) object.
We don't want to mess up anything that's not to be changed.
Press A in the title strips at left so no strips are highlited.
Select only your project's object, (not yet bounced) so it's header at left is all that's highlited. Select it's Z axis only and padlock out it's X/Y axis' and all rotation strips..
Place the mouse cursor in the Dope sheet's main window and press A until no keyframes are highlited.
Box select the imported (bouncing) ball's Z axis keyframes. Press CTL-C.
Set the timeline cursor to frame 1 and the mouse cursor into the new object's strip. (This shouldn't be necessary but you can do it anyway - a bit like blowing on the dice before they're rolled)
Press CTL-V and the copied keyframes should appear along the new object's Z axis strip and importantly - beginning at frame 1.
Run the animation and the new object should take on an identical bounce as the imported ball's.
The new object's curves can be varied to suit and once happy, the imported one can be deleted.
So too the appended scene.
-===================-
In the new project's Dopesheet, keyframes can be offset and varied to avoid 'mirrored' animation.
Curve handles in the Graph Editor can also be adjusted, again to avoid mirroring other objects that may be using the same imported keyframes.
