3
$\begingroup$

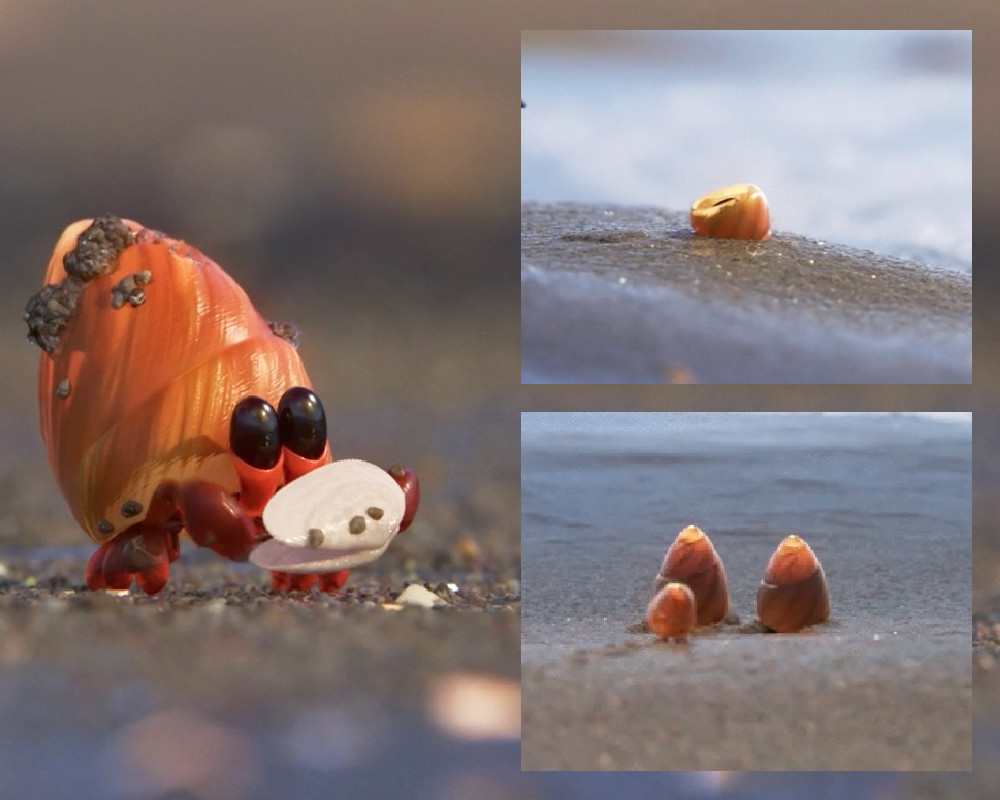
I am looking to replicate this hermit character from the Pixar short, Piper:

Hermit crab from Pixars Piper

I am currently working on the shell material and am struggling to get the translucency correct in order to replicate how light passes through it. I am using the new principled shader.

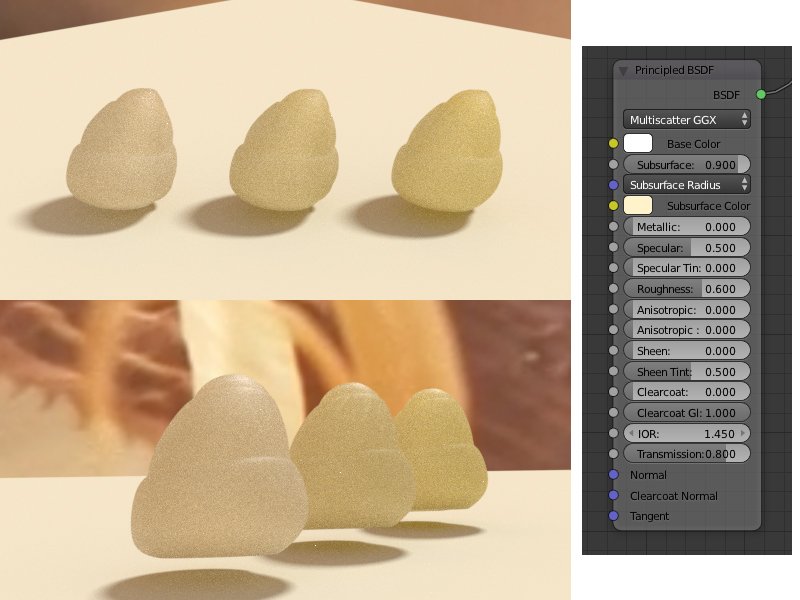
It looks to me that the material is a translucent milky white-yellow material covered with a more opaque glossy orange surface with all the colour and surface detail on it. This layer becomes thinner at the top and still lets some light through to be scattered for the backlit scenes. I have played around a little with the subsurface scattering and transmission to get the following results for the lighter layer:

Material tests

However it doesn't seem to behave correctly, in particular, the backlit effect of looking almost illuminated from within seems very hard to achieve. I wonder if anyone has any pointers on how they would go about recreating this material?

Many thanks, Ben

$\endgroup$
4
  • $\begingroup$ Im pretty sure you'd have to control most values via a texture map to achieve similar results, also maybe make the shell thinner on top. It's a pretty broad question, if you want share your shell and I'll take a look and see if I can make progress. $\endgroup$
    – Firewill
    Commented Jul 18, 2017 at 15:14
  • $\begingroup$ Yes, i have uv unwrapped the shell and am currently making some textures for color, normals etc. and i presume a map to mask the top layer will also be needed but I was more curious about the settings that would accompany those textures $\endgroup$
    – BenJacob
    Commented Jul 18, 2017 at 15:19
  • 1
    $\begingroup$ In addition to icYou520's answer, you need to consider lighting as well. It looks like from the pictures, you have the light pointed almost straight down where as the Pixar scenes have angled sun-light. The translucent pic is also backlit somewhat. $\endgroup$
    – bertmoog
    Commented Jul 18, 2017 at 16:39
  • $\begingroup$ Also, the shell is hollow, not solid. $\endgroup$
    – bertmoog
    Commented Jul 18, 2017 at 16:47

1 Answer 1

2
$\begingroup$

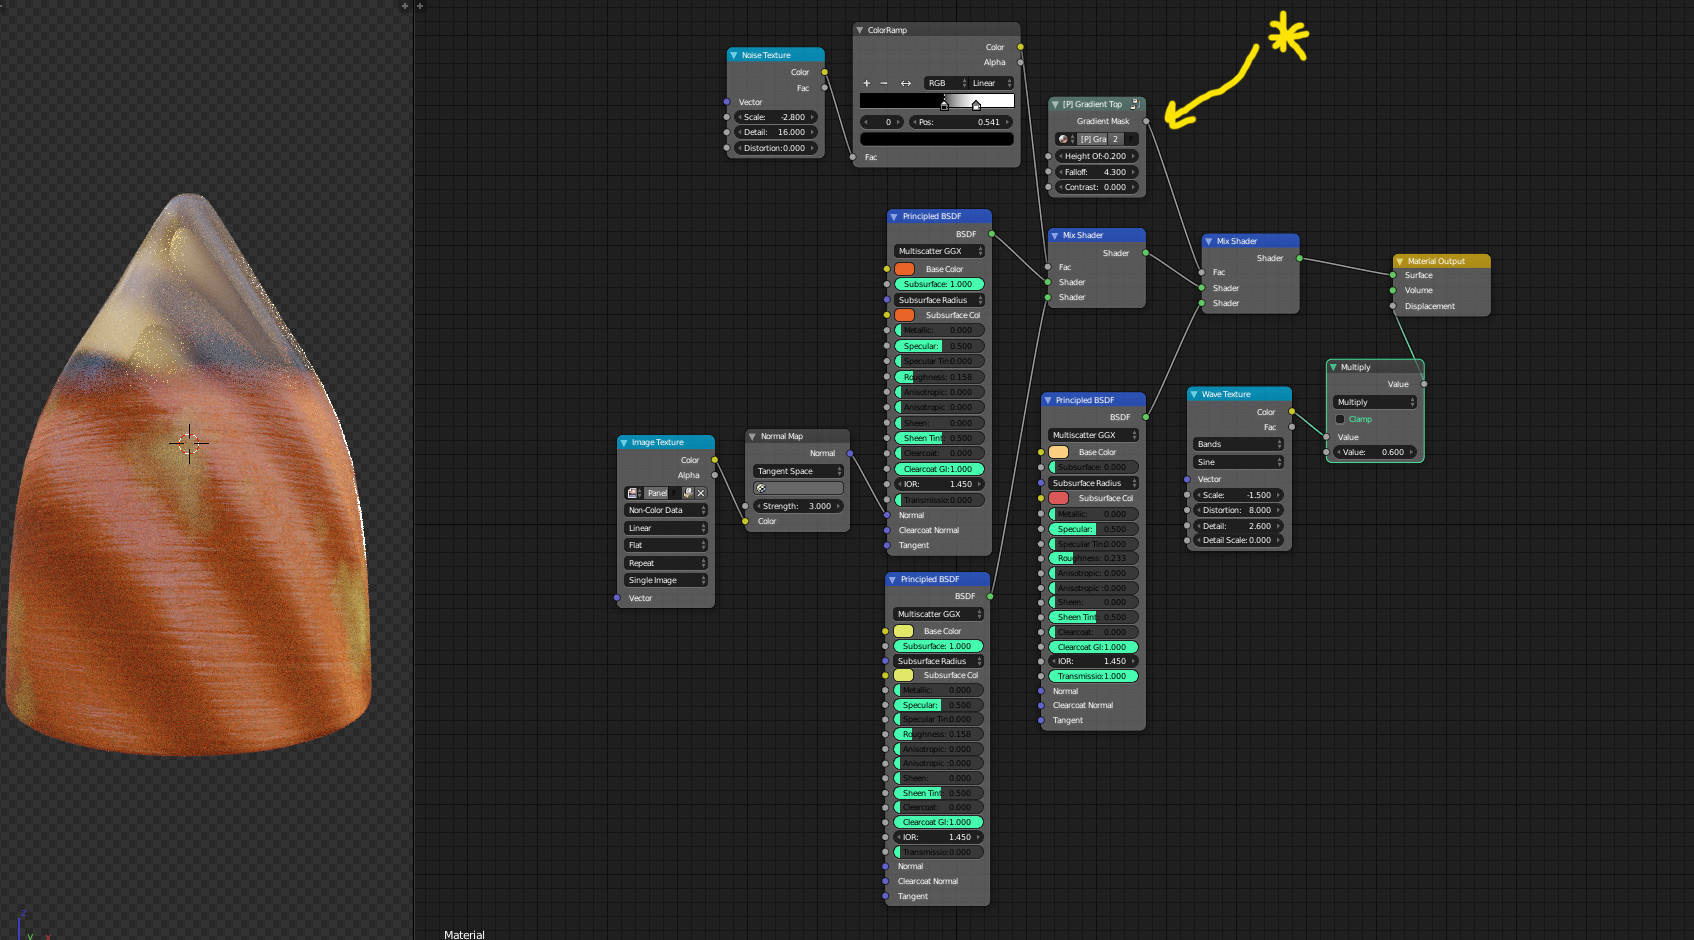
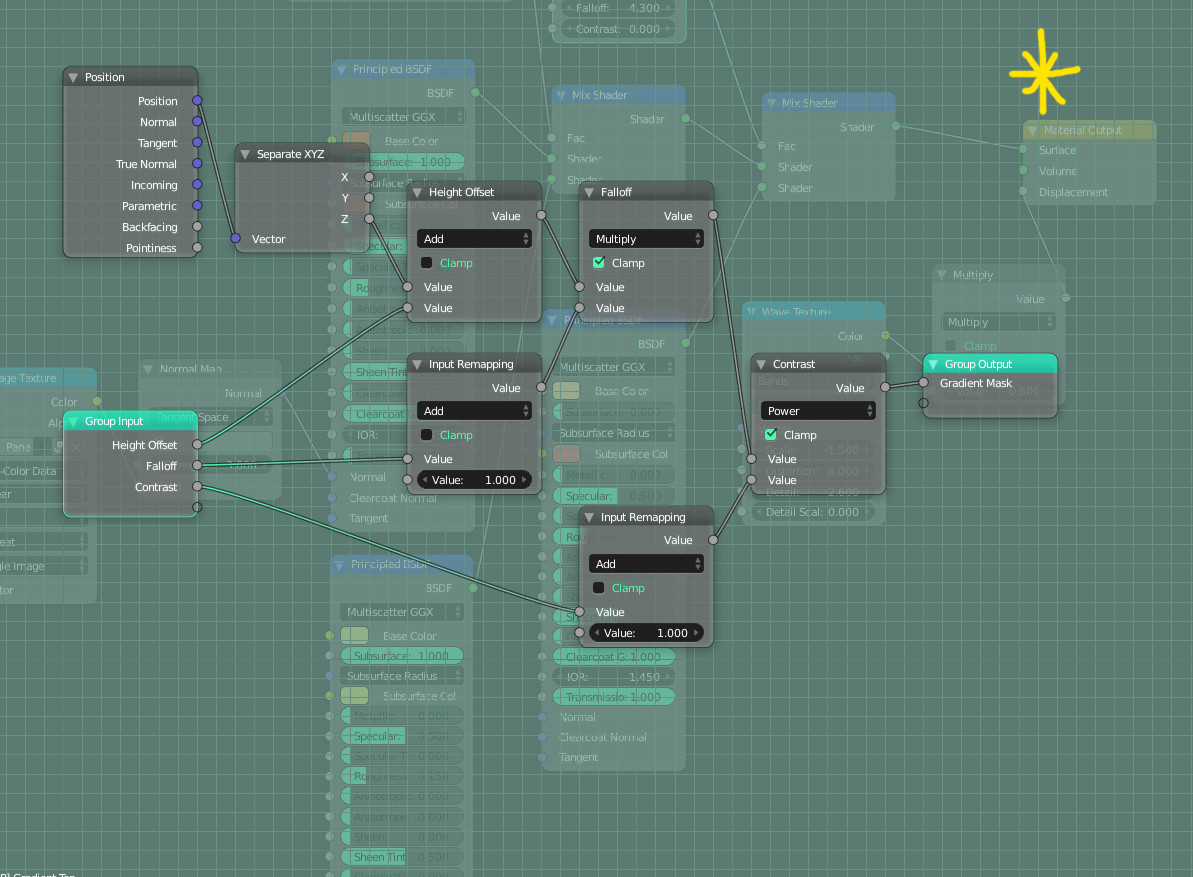
Ok, the trick here is to have a mask control the vertical falloff of your shader.

I dont have much time to work on this, but this should get you going in the right direction. I will also tell you what I would change.

enter image description here

enter image description here

  1. Getting the top translucent part : Your 1st shader should have the transmission all the way to 1 (for glass), then put a slight roughness on it.

  2. Have that mix in with another shader for the base of the shell, (we will get back to this)

  3. Have those two shaders mix with the "Gradient Top" node* (You will have to create this, I attached a pic how to do it.)

  4. The base of the shell will have 2 Principled SSS shaders, I believe I put the SSS radius to .1 for all of them, the higher the number the more transparent it becomes.

  5. I found a wood texture that I used for the grooves that I plugged into the principled shader. (I should of plugged it into both, I messed up. )

  6. I used a noise texture to have the yellow and orange broken up a little.

  7. Then for the bands I just used a wave texture in the displacement socket. I would rather model this instead and not even use the displacement.

**** maybe instead of a glass Princepled shader I would try a translucent/glossy shader and see how that looks.

*** Dont copy my settings exactly I did them real quick. Play around with the gradient top settings.

*** I probably wouldn't go with a noise texture to mix the two princepled shaders. It would be better to paint those by hand, so you can follow the curves.

Hope this helps a little.

$\endgroup$

You must log in to answer this question.

Not the answer you're looking for? Browse other questions tagged .