8
$\begingroup$

I've been looking for some HDRs to use in an animation, and I realize that they're going to be exceptionally expensive.

This is why I'm wondering if I can change the exposure of an HDR from within Blender to get everything I can out of one HDR. The purpose of an HDR is to have a High Dynamic Range. This means I should be able to scale the exposure of the HDR and still have varying depths of light.

Here's a comparison between a jpeg(left) and an HDR(right) as an example of how HDRs have broader depths of light when the exposure is changed:
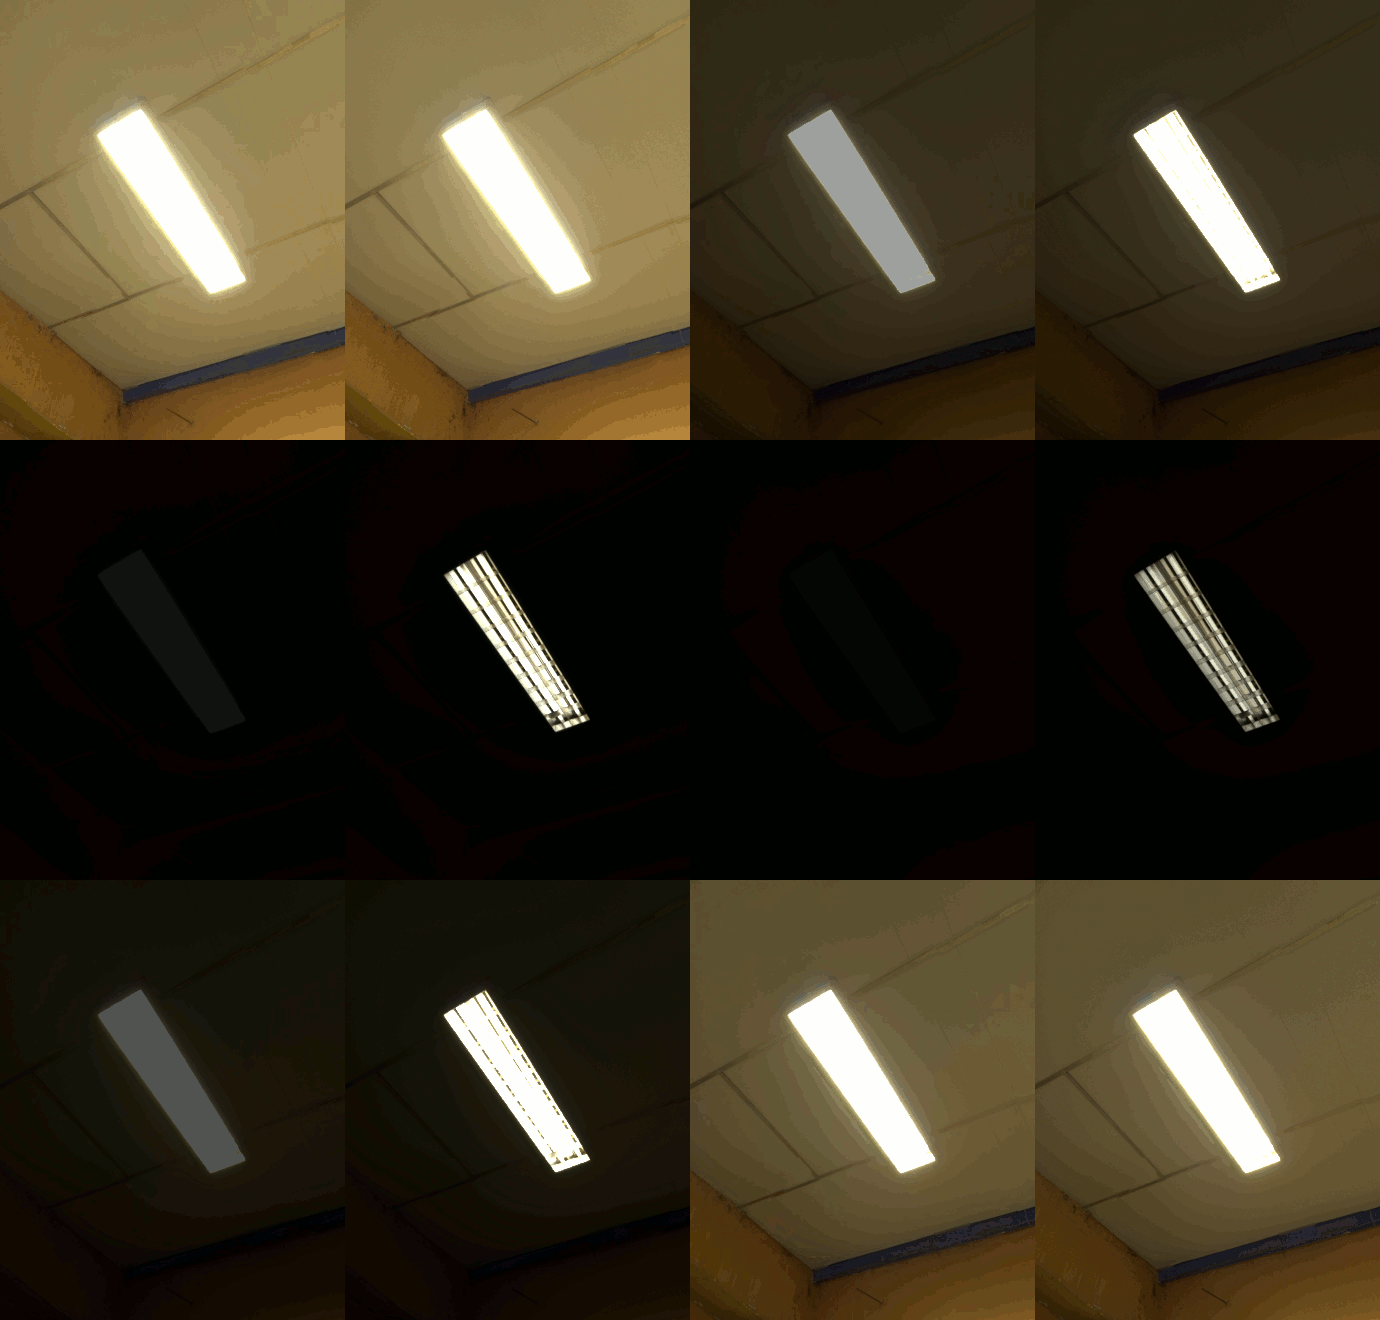
JPG exposure vs HDR exposure (Source: How to make your own HDRI)

Of course, this should already make sense if you're familiar with HDRs.

So I want to be able to use an HDR at multiple exposures. Is there any way I can change the exposure in Blender? I know there are some other programs that do that, but Blender should be able to do it.

Right now, I use the background node's "Strength" parameter to change the brightness, but that doesn't make the lighting of the objects in the scene darker or lighter respectively.

$\endgroup$
3
  • 5
    $\begingroup$ Using the strength value is the way to control the exposure. i.sstatic.net/MO2nq.gif Please add more information on what you are doing. $\endgroup$
    – user1853
    Commented Nov 8, 2016 at 5:40
  • $\begingroup$ Can you post an image of your current world settings and your node tree for world? $\endgroup$
    – user1853
    Commented Nov 8, 2016 at 14:43
  • 2
    $\begingroup$ Maybe you have some other lamps contributing to the scene, which aren't affected by changing the strength of the background shader (a separate light source). $\endgroup$
    – Greg Zaal
    Commented Nov 16, 2016 at 10:16

1 Answer 1

8
$\begingroup$

Given the answer of troy_s in this question here How to measure the dynamic range of an HDRi?, he states in the first paragraph that:

An F-Stop is a halving and doubling of light, relative to the exposure referenced.

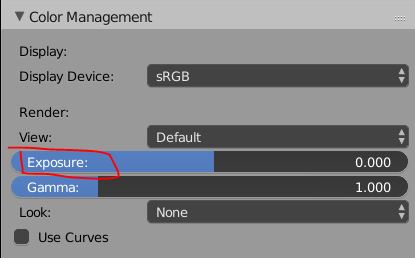
Now from my own trial and error testing in Blender, that's exactly what happens when you change the exposure value in Blenders color management settings:

exposure settings

If we now apply this thinking as a formula, for each color pixel this would mean to do the following for each color channel:

Pixel(x) = x * math.pow(exposure_value, 2)

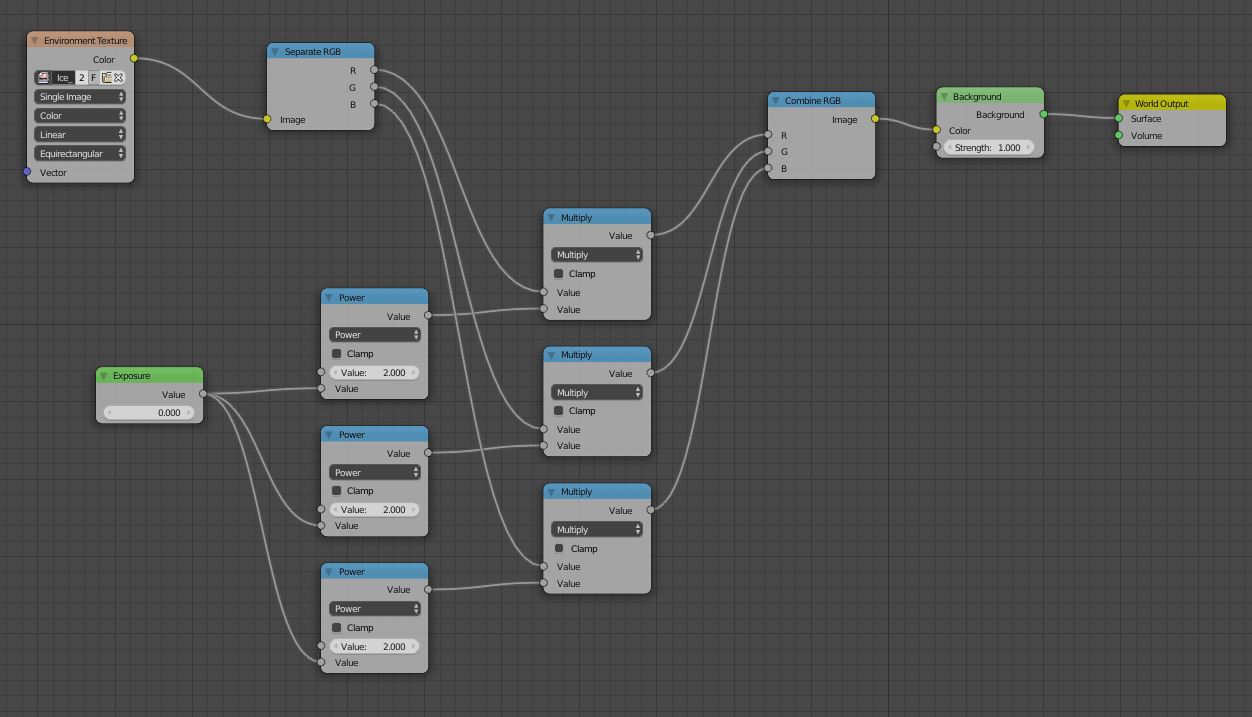
Transferred into nodes, this could look like the following Node setup:

node setup

In a world node tree, you would now have something as easy as this if you transfer it into a node group:

node group

You can find this node group, and also a similar one for the compositor to doodle around, in this Blend:

$\endgroup$
4
  • $\begingroup$ Why is there a ^2 before the multiply node? An F-stop isn't just multiplying exposure by 2? $\endgroup$
    – Mareck
    Commented Nov 16, 2016 at 14:14
  • 1
    $\begingroup$ @Mareck the way I understand it, each FStop change is a multiplication by two. So it means, increase one stop, it's A * 2. increase two stops, it's A * 2 * 2, so 2 to the power of 2, increasing by three stops is A * 2 * 2 * 2,... $\endgroup$
    – aliasguru
    Commented Nov 16, 2016 at 14:17
  • $\begingroup$ Ok I think I understand what you've done. The value you enter in your node setup is the number of stops not really the exposure itself, am I right? $\endgroup$
    – Mareck
    Commented Nov 16, 2016 at 14:33
  • $\begingroup$ @Mareck that's correct. I named it 'exposure' as the Blender UI uses this term a lot. $\endgroup$
    – aliasguru
    Commented Nov 16, 2016 at 15:27

You must log in to answer this question.

Not the answer you're looking for? Browse other questions tagged .