2
$\begingroup$

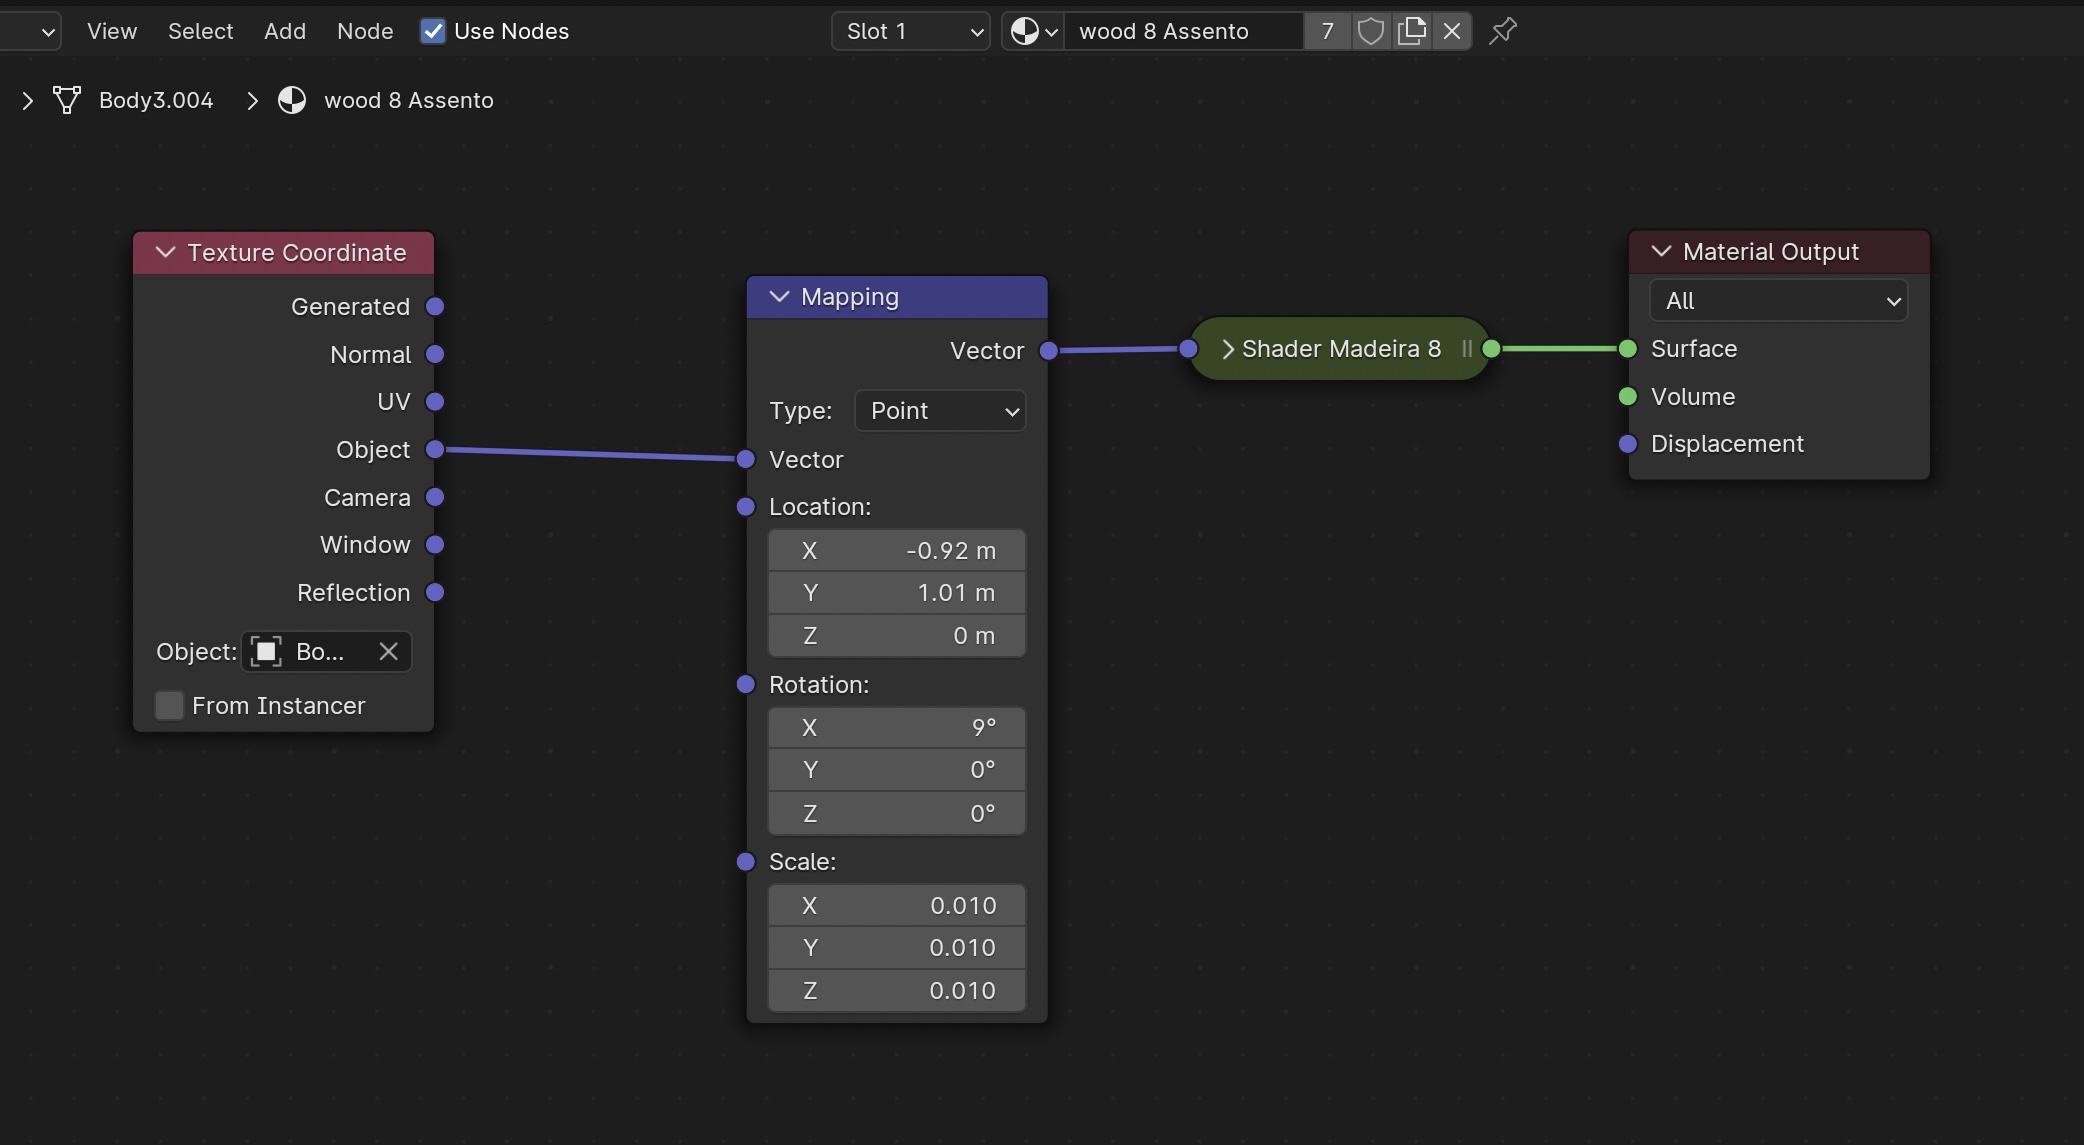
enter image description hereI’m a product designer getting into blender to do product renders and animations and being having issues with procedural materials workflow.

I recently bought Lance Phans’s wood shader and have been using it in a few furniture pieces. Those with some knowledge of furniture/wood know that when making realistic hardwood it’s very importante that the wood grains flow in a certain way. So for every piece of a furniture I duplicate the material, add a texture coordinate node and mapping node before it since every piece of wood needs to be oriented in just the right way.

Creating all these copy’s of the material ends up creating an issue where when I want to make an adjustment to the wood of the whole furniture I have to copy it into every different instance of the material.

Would there be a way to change the settings of the shader and have it be applied to all the pieces of the furniture without changing the way it’s mapped?

It is also very important for me to be able to manually orient the shader to the part but once It’s oriented be able move/rotate the whole furniture without changing it’s mapping.

$\endgroup$
10
  • 2
    $\begingroup$ In the Shader Editor, you can create a node group and use this same node group in each material, any change in this node group will be replicated in each material, I don't know if it could be useful $\endgroup$
    – moonboots
    Commented Dec 7, 2023 at 7:58
  • 2
    $\begingroup$ Using vertex colors or Geometry Nodes, you could encode the location and orientation of each part (with respect to the virtual timber) as attributes of its mesh. Those attributes could be passed into your shader, as adjustments of the overall texture coordinate. Does that sound about right? You could randomize the locations ,say, along the log to ensure parts are al cut from different stock, but with a similar character. $\endgroup$
    – Robin Betts
    Commented Dec 7, 2023 at 10:04
  • $\begingroup$ Thank you very much @moonboots, node group fixed my issue! $\endgroup$
    – Maroleiro
    Commented Dec 7, 2023 at 14:05
  • $\begingroup$ Thanks you for your reply @Robin Betts, your solution makes sense to me theoretically but as a beginner I will have to do some more research to put that into practice! $\endgroup$
    – Maroleiro
    Commented Dec 7, 2023 at 14:06
  • $\begingroup$ I'll make some kind of answer out of that, then $\endgroup$
    – Robin Betts
    Commented Dec 7, 2023 at 17:30

2 Answers 2

1
$\begingroup$

Here's a first shot at 2 Geometry Nodes tools which may help.

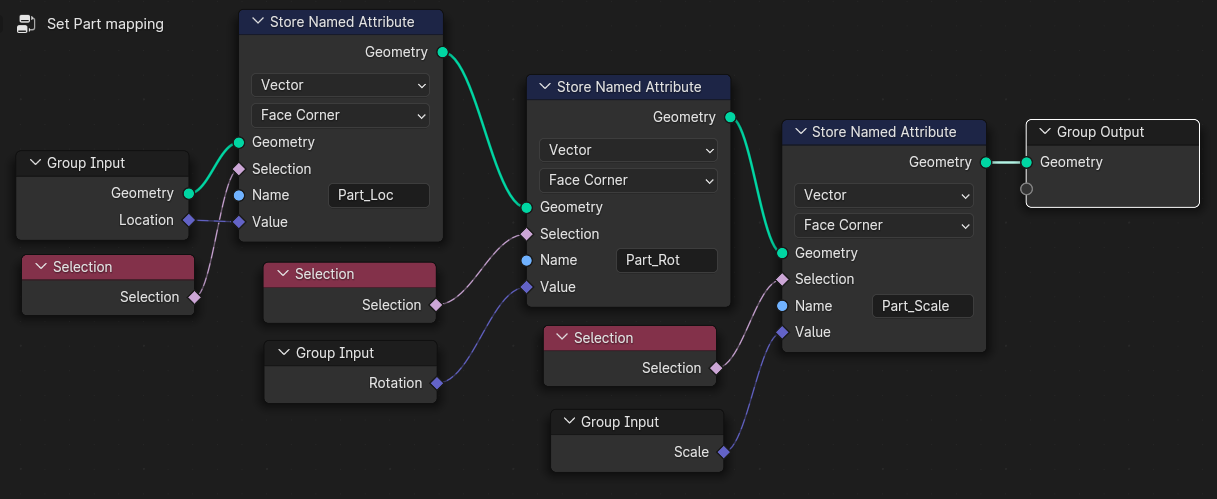
Set Part Mapping

Which will store a mapping of object-space, per-face, on the mesh:

enter image description here

Usage: In Edit Mode, select all the faces whose mapping you want to set (as if using the Mapping node in a shader-tree ) and set the Location, Rotation and Scale in the tool's 'Adjust Last Operation' (F9) panel.

Because it's a pain having the mapping reset every time you want to tweak it, there's also..

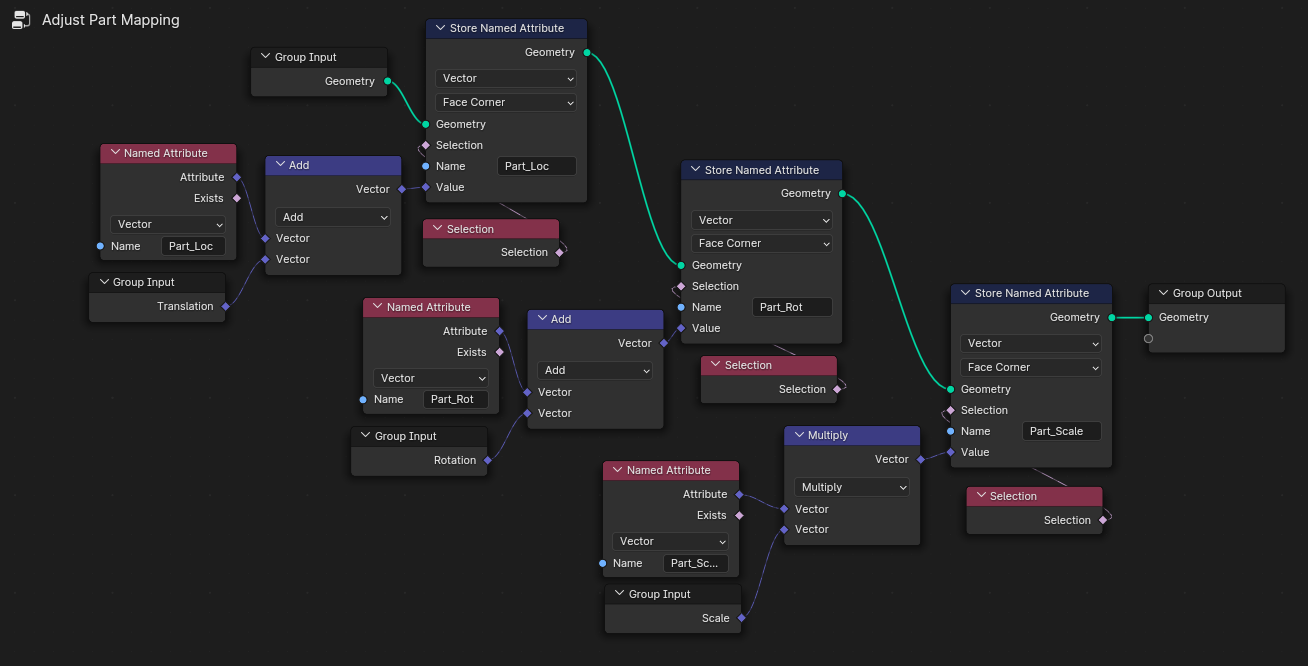
Adjust Part Mapping

.. which will add to the existing Location and Rotation. and multiply the existing Scale of the per-face mapping:

enter image description here

.. again, select the faces you want to tweak, and enter the adjustments in the F9 panel.

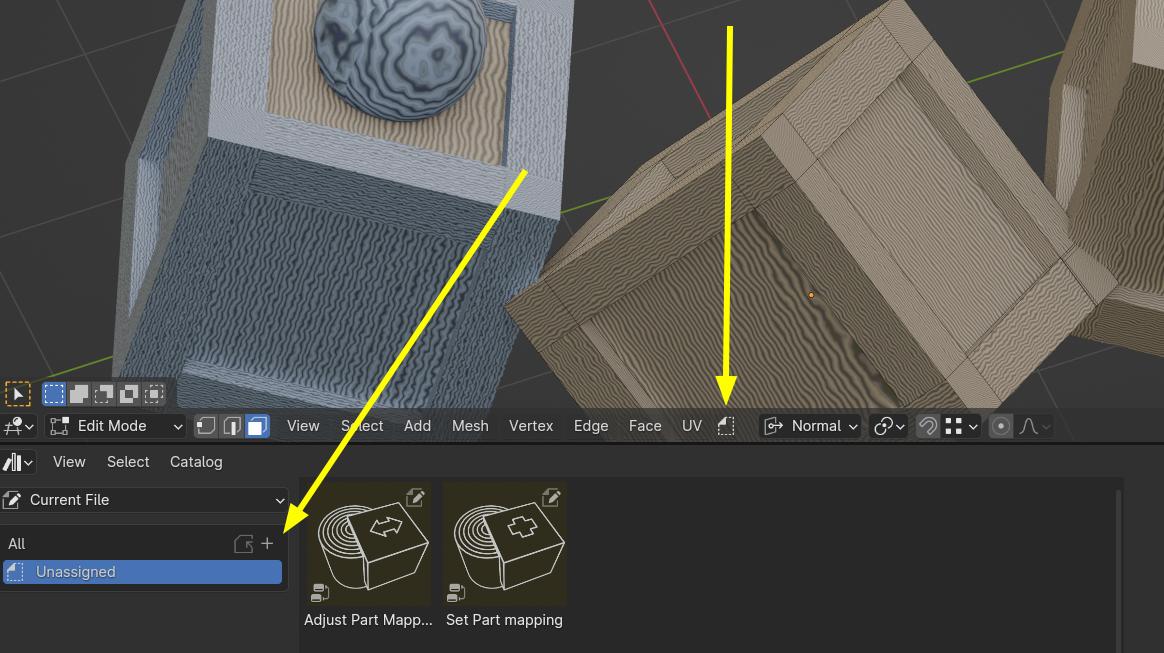
To begin with, in the absence of an Asset Catalog, the tools will appear in the header above the icon shown below:

enter image description here

By clicking the '+' indicated by other arrow, you can create a catalog and drag the assets into it.. then your tool menu will have a name.

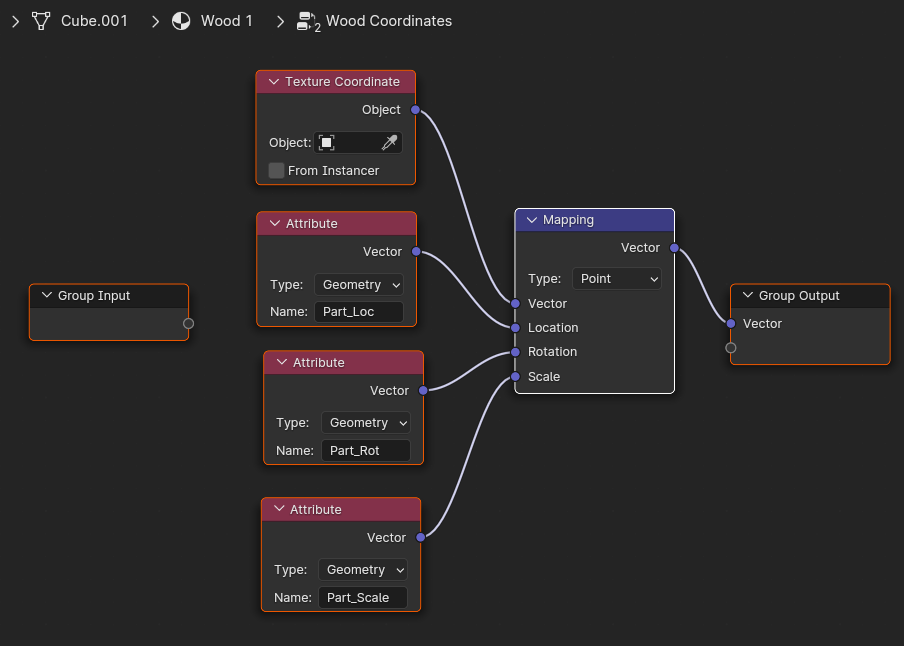
You can then use a per-face-mapping group, picking up the stored attributes instead of Object texture-space. The faces will carry the mappings around with them:

enter image description here

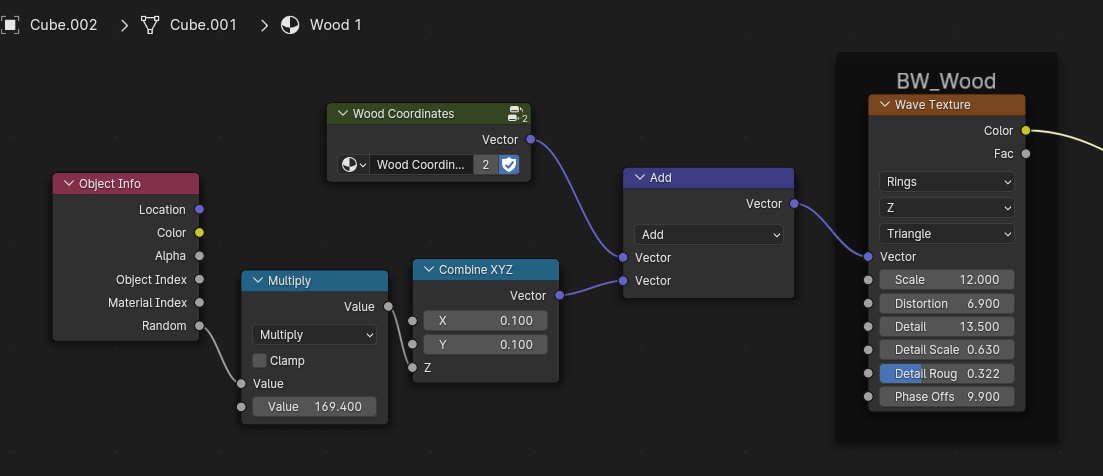
Once grouped up (Here, as 'Wood Coordinates'), you can substitute that for Object space.. even if various alignments belong to the same object. (The crates in the illustration further up are single objects with different alignment of grain on different parts) and the mappings can be picked up by different woods.

enter image description here

Above, for example, a bit of random shift up and down the virtual log is used to create variation between duplicate objects.

It's all a bit like having a 3D UV map, for procedural textures.

$\endgroup$
1
  • $\begingroup$ This is the first time I've tried sharing GN tools. I hope it works. If there's a more elegant way to bundle them along with their catalog, please comment here.. it's not clear to me from the manual. $\endgroup$
    – Robin Betts
    Commented Dec 8, 2023 at 19:35
2
$\begingroup$

In the Shader Editor, you can create a node group and use this same node group in each material (ShiftA > Group > NodeGroup), any change in this node group will be replicated in each material.

$\endgroup$

You must log in to answer this question.

Not the answer you're looking for? Browse other questions tagged .