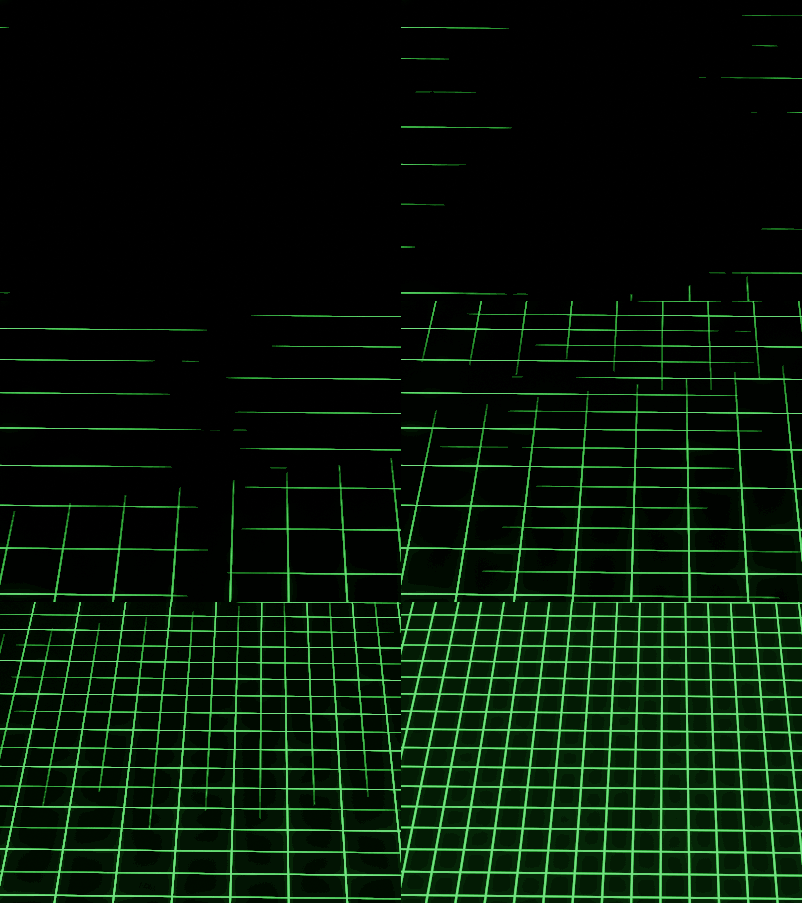
Here is an approach with the shader. It also uses layered images and does basically what you mentioned in the question.

You have an image with lines and a mask that hides a part of the image. The change of the mask's offset creates the animation. At first, the mask hides everything. Then it reveals the lines over time. Some distortion and rotation for the mask are used to create the illusion of the individual speed of the lines.
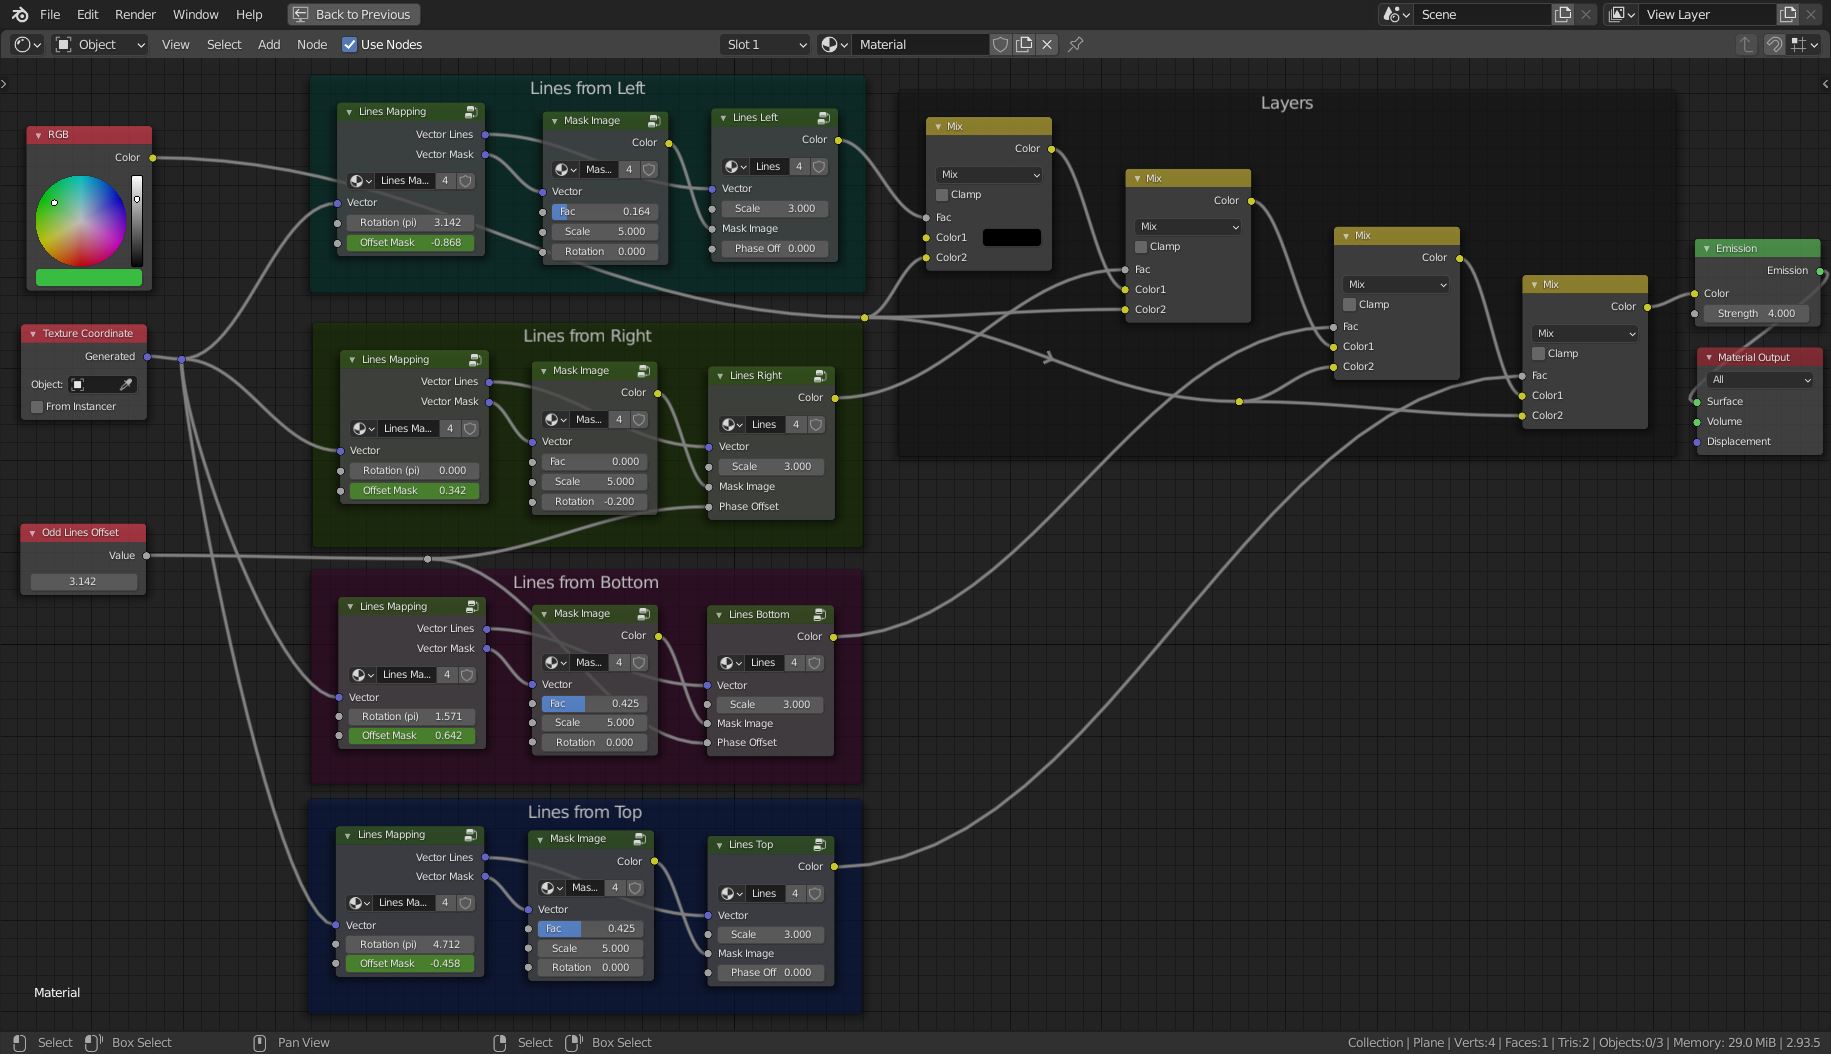
To make a grid you need at least two layers, one vertical and one horizontal. For the effect like in the video, you need four layers so that the lines interlock. The four layers are rotated by 90°, 180°, and 270°. Please note that group input slots use pi/2 (1.5708) for 90°, pi (3.14159) = 180°, and so on. You can enter pi/2 directly into the input field.
Shader Node Setup

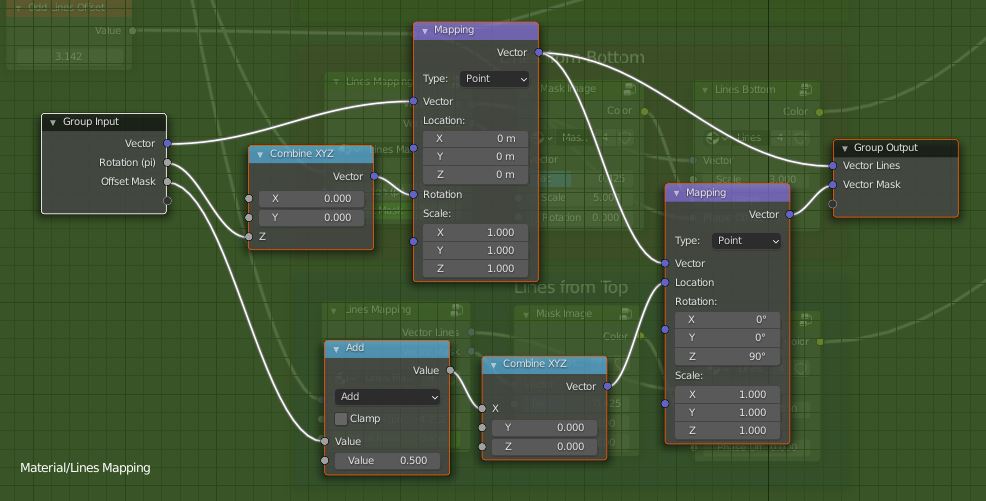
Mapping Group
The first group calculates the mapping vectors for the lines image and the mask. The image is rotated. The procedural mask (a Linear Gradient) needs to be rotated by 90° compared to the lines and is moved by a given offset for the animation.

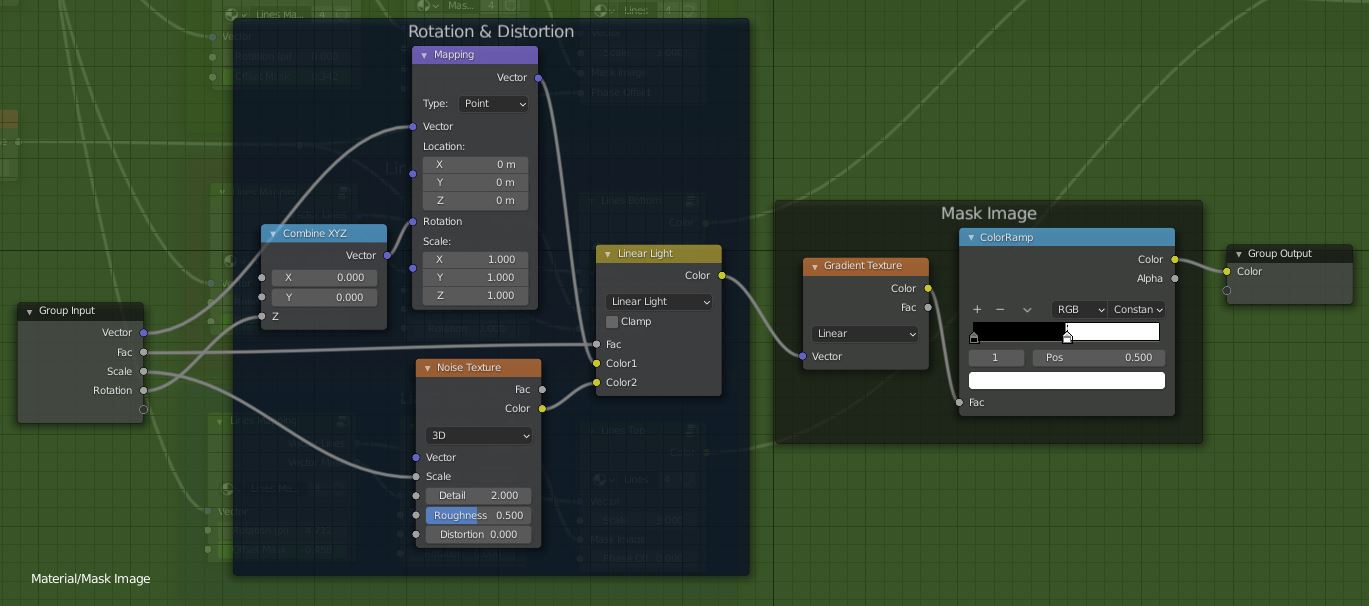
Mask Image Group
The mask is a black and white image (Gradient Texture). In fact, there is no gradient. One side is just black and the other one plain white. For a more interesting transition, the image can be rotated (lines will run with a diagonal offset) and distorted by Noise texture.

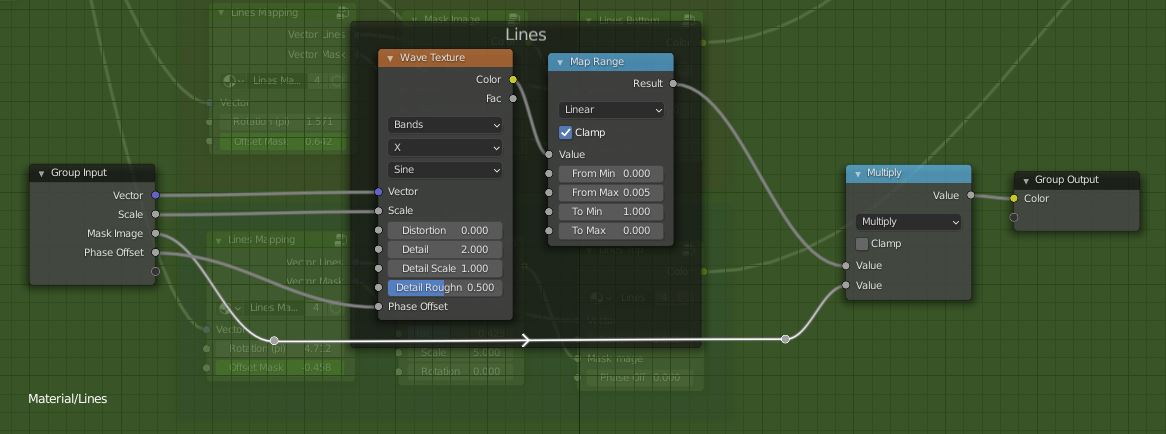
Lines Group
This group just creates a procedural image of lines with help of the Wave Texture node. And uses the given mask to hide/cut the lines that should not be seen yet. The From Max value is the width of the lines.

Animation
For the animation just keyframe the Offset Mask value of the Lines Mapping group for each layer. Note the values range from 0 to 1 or from -1 to 0, depending on the direction/rotation of the layer. If the mask is rotated or distorted you might increase the values a bit more to reveal all lines.


