2
$\begingroup$

I have a simple 2D shape outline imported from a .svg file and converted to a mesh.

enter image description here

This shape has been populated with loads of very elongated triangles, which are not very practical for future editing. Instead, I would like to populate it with nice evenly-sized and not excessively elongated triangles.

I have been able to remove the existing subdivisions with a limited dissolve: enter image description here

I have then tried a couple of options. "Fill" is a slight improvement but still not great: enter image description here
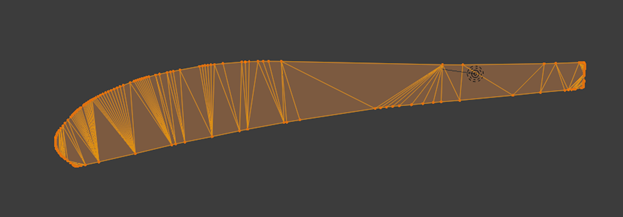
The best I have managed is using the "Simplify" brush in Sculpt mode. With Dyntopo selected, constant detail, I do a flood fill and get this:

enter image description here

This is getting closer to what I am after, but note that the outline has now been distorted. If I apply the brush manually, I can avoid the edges but then only partially solve the problem. I could use a higher level of detail for the "simplify" but then end up with a lot of excess triangles.

I would like a way to produce something like the bottom image, but keeping the outline as unaltered as possible from the original. Is there a simple way to do this? There is probably a simple answer, I am quite new to Blender.

$\endgroup$
2
  • $\begingroup$ I don't think you can lock vertices from changing when using dyntopo in that scenario. What you could do is to solidify the plane temporarily and then use Remesh modifier with some option like new Voxel remesh or Sharp to keep original shape, then Triangulate modifier $\endgroup$
    – Mr Zak
    Commented Dec 17, 2020 at 16:48
  • 1
    $\begingroup$ Instead of flood filling the surface use grid fill blender.stackexchange.com/questions/184984/… $\endgroup$
    – susu
    Commented Dec 17, 2020 at 17:56

2 Answers 2

2
$\begingroup$

@susu has a good suggestion in the comments which has worked well for me.

  1. Remove the face so that we just have the outline of edges and vertices.
  2. Subdivide some of the longer edges so that the vertices are roughly evenly spaced
  3. Face -> Grid fill (with all vertices selected)
  4. Face -> Triangulate faces

Result: enter image description here

$\endgroup$
1
$\begingroup$

I ran into this question while trying to do this exact thing and I found a solution which works very well, while preserving the exact geometry of the border of your face.

My method is as follows:

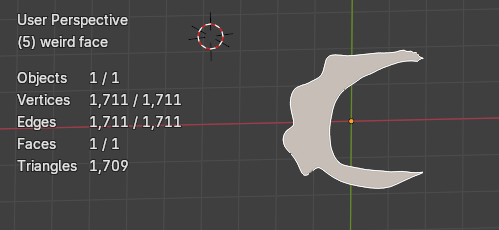
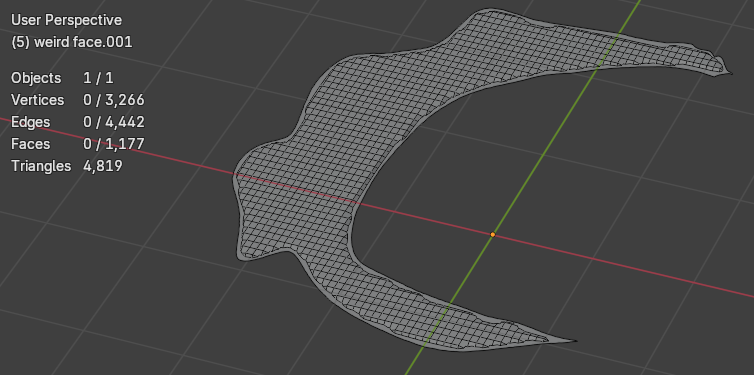
Start with a face. Here's the one I'm testing on, a vaguely crescent moon shaped 1711-gon.

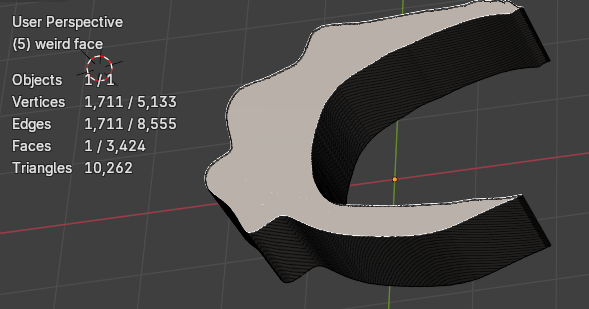
  1. In Edit Mode, separate the face from the object it's attached to into its own mesh. (Just select the face in face select mode, and press P > Selection, or right click > Separate > Selection). Then switch to editing that object. After doing this, I have my 1711-gon face all by itself.

  2. Select the one-and-only face, press E to extrude it, and give it a comfortable amount of thickness. After doing this, I have an irregular 1711-gon prism.

  3. Go back to Object Mode and duplicate this object (Shift+D, then ESC to cancel moving it so it's on top of the old one). I now have two of my 1711-gon prisms.

  4. Apply a remesh modifier to one of them. This will break the face into smaller polys, and the density of those polys can be configured by adjusting the remesh settings.

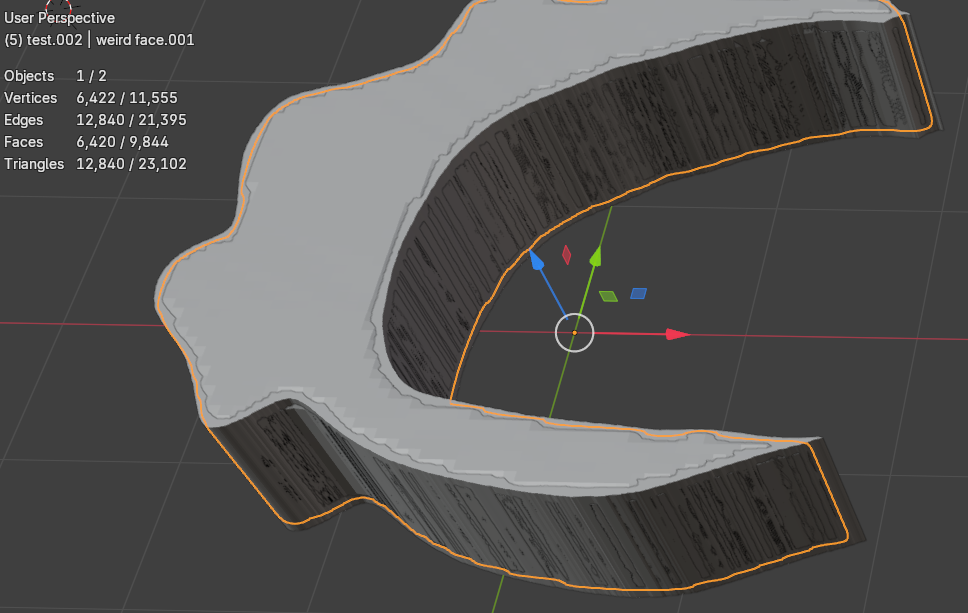
  5. Use the object move tool to offset the remeshed copy of the object from the unmodified one, so that the remeshed one is just barely sticking through the top face, like so:

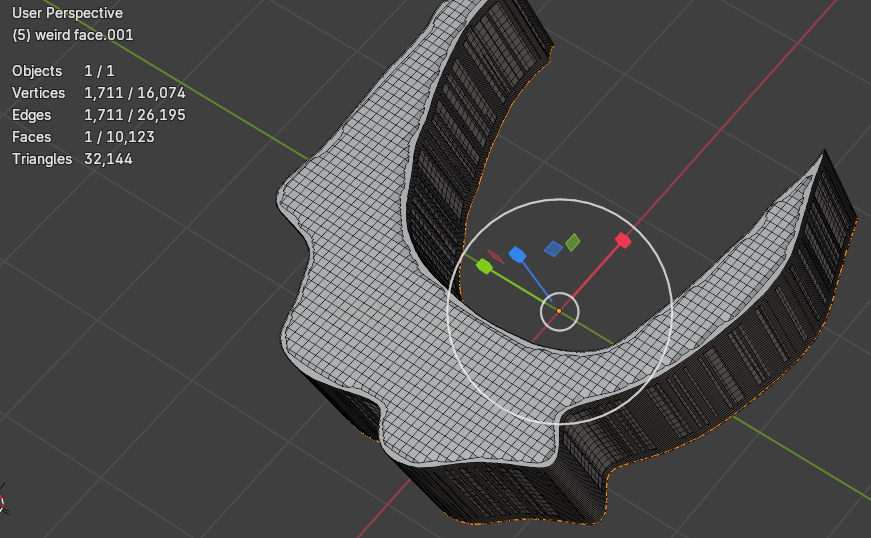
  6. Now, use a boolean union modifier to combine them together. Go ahead and apply both modifiers, and delete the spare object. Go into Edit Mode, and you should see something like this.

  7. "Unextrude" the prism (Delete all of the geometry except for the top faces) - you should be left with the original face (whose geometry you want to preserve exactly), with the remeshed copy bulging through the middle of it.

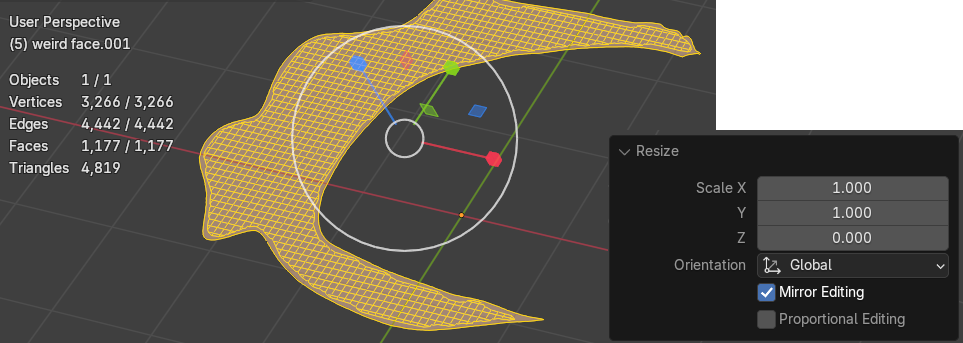
  8. Now select everything and scale it in the normal direction with a scale factor of zero, this will perfectly flatten it.

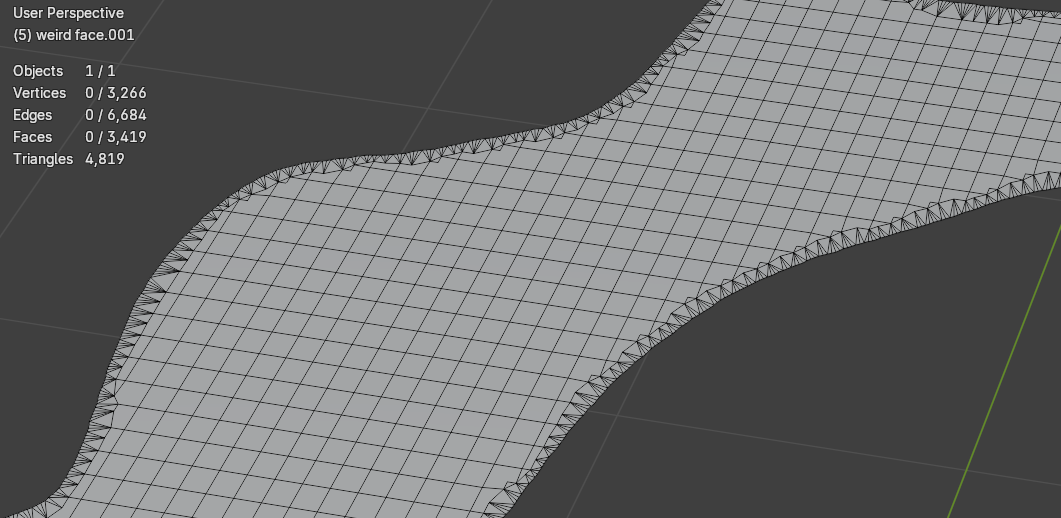
  9. Finally, select the long thin faces around the edges (there should only be a few of them, so just do it by hand), and in face-select mode, run Face > Triangulate Faces. This will turn those straggler weird edges into triangles. This has turned my 1711-gon into a surface with the same border vertices, but comprised of 3419 polys.

  10. Now that you have broken your face into easier to manipulate polys, you can merge it back into the object it came from, and sculpt/edit further.

As seen in the example, this will work with concave shapes, high vertex shapes, non-edge-loops, any nonsense at all, without any trouble - as long as your starting face is flat. (If it's not you can use the same flattening trick in step 8 at the beginning to flatten it out). It doesn't give you a great deal of control over the grid pattern you will get on the resulting face - I am assuming you don't care, and you only want to be able to sculpt on the face without changing its shape.

$\endgroup$
3
  • $\begingroup$ Thanks for sharing! I would not have thought of that - it's kind of convoluted - but a very clever way to make sure that the border is completely preserved. $\endgroup$ Commented Aug 19 at 7:19
  • $\begingroup$ It's also much more robust than grid fill, which starts to fall down with concave shapes $\endgroup$ Commented Aug 19 at 7:21
  • $\begingroup$ Yeah! that's actually why I wrote it - I tried grid fill, and it choked because I wasn't working with an edge loop. It seems like a great option, provided you are in the specific situation in which it works. :P $\endgroup$
    – Ryan
    Commented Aug 20 at 9:00

You must log in to answer this question.

Not the answer you're looking for? Browse other questions tagged .