0
$\begingroup$

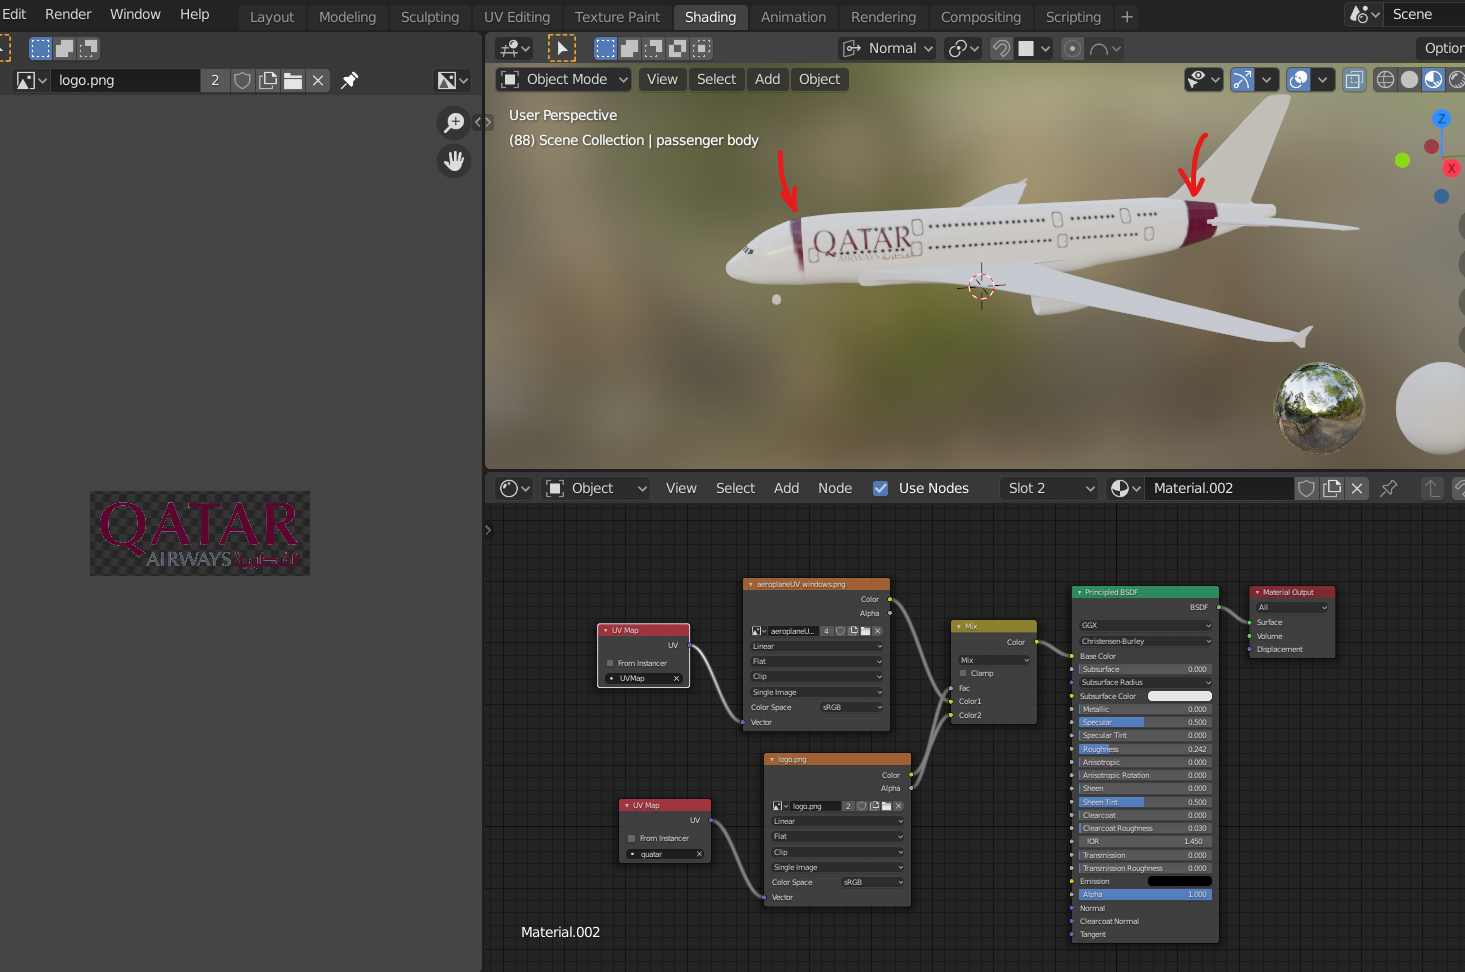
I would like to apply two different textures on the same face. I a window textures over which I would like to put a letter texture. I watched many tutorials but many are old. Moreover trying to apply a different texture on the same face after UV unwrapping seems to be impossible. To add clarity I am adding images.

enter image description here

ok, all I want is those purple bars to disappear as shown in the image. I tried everything I simply couldn't achieve it.

[Note to moderator: I checked for this over the stack overflow many are just old and difficult to understand I would like the answer for blender versions 2.8+]

$\endgroup$
6
  • $\begingroup$ The setup in shading nodes is just the same as it was in 2.7x versions. Only editor is called Shader editor now. It could be a bit different for different render engine. Related blender.stackexchange.com/questions/2100/… $\endgroup$
    – Mr Zak
    Commented Jun 17, 2020 at 14:45
  • $\begingroup$ If what you want is to get rid of the red "letters" on the sections it does not belong, make 2 different materials, one with the letters and one without, and assign the one without to every face on the plane except where you want the logo to be. For the section where you want the letters, use the "letter" material. OR, if you just want one single image for the whole plane, check your UV maps to make sure there are no overlaps, or stretching beyond 1001 space. $\endgroup$ Commented Jun 17, 2020 at 14:52
  • $\begingroup$ thx for the comment, Can you pls elaborate. I want the logo Qatar over windows texture $\endgroup$
    – JacksonPro
    Commented Jun 17, 2020 at 14:58
  • $\begingroup$ There are a lot of factors that determine where an image gets placed on a model, including the faces that it is applied to, the scale of the image, and most importantly, the UV maps. It looks like from your picture, for example, that you have 2 different UV maps contributing to your image. Without seeing your file, it is very hard to tell where the issue is. I don't know what UV maps you have applied to your model, nor what they look like. The only thing I can suggest is to look at/play with your UV maps - anything else would be just guessing on my part. $\endgroup$ Commented Jun 17, 2020 at 15:07
  • $\begingroup$ ok just added .blend file $\endgroup$
    – JacksonPro
    Commented Jun 17, 2020 at 15:15

1 Answer 1

3
$\begingroup$

A common setup for attaching 2 textures to one face is to mix them in the shader graph. The setup below shows a very basic setup for 2 diffuse textures mixed together to form one. If your "superimposed" image (the letter in your case) has an alpha, you can connect it as a mask for the mix factor to place one image cleanly on the other. However, if it does not have an alpha mask, a general purpose (b&w) mask can usually be created pretty easily by converting the color map to b&w and using that. If you end up needing instructions for how to do this, I will be happy to add them.

See image below:
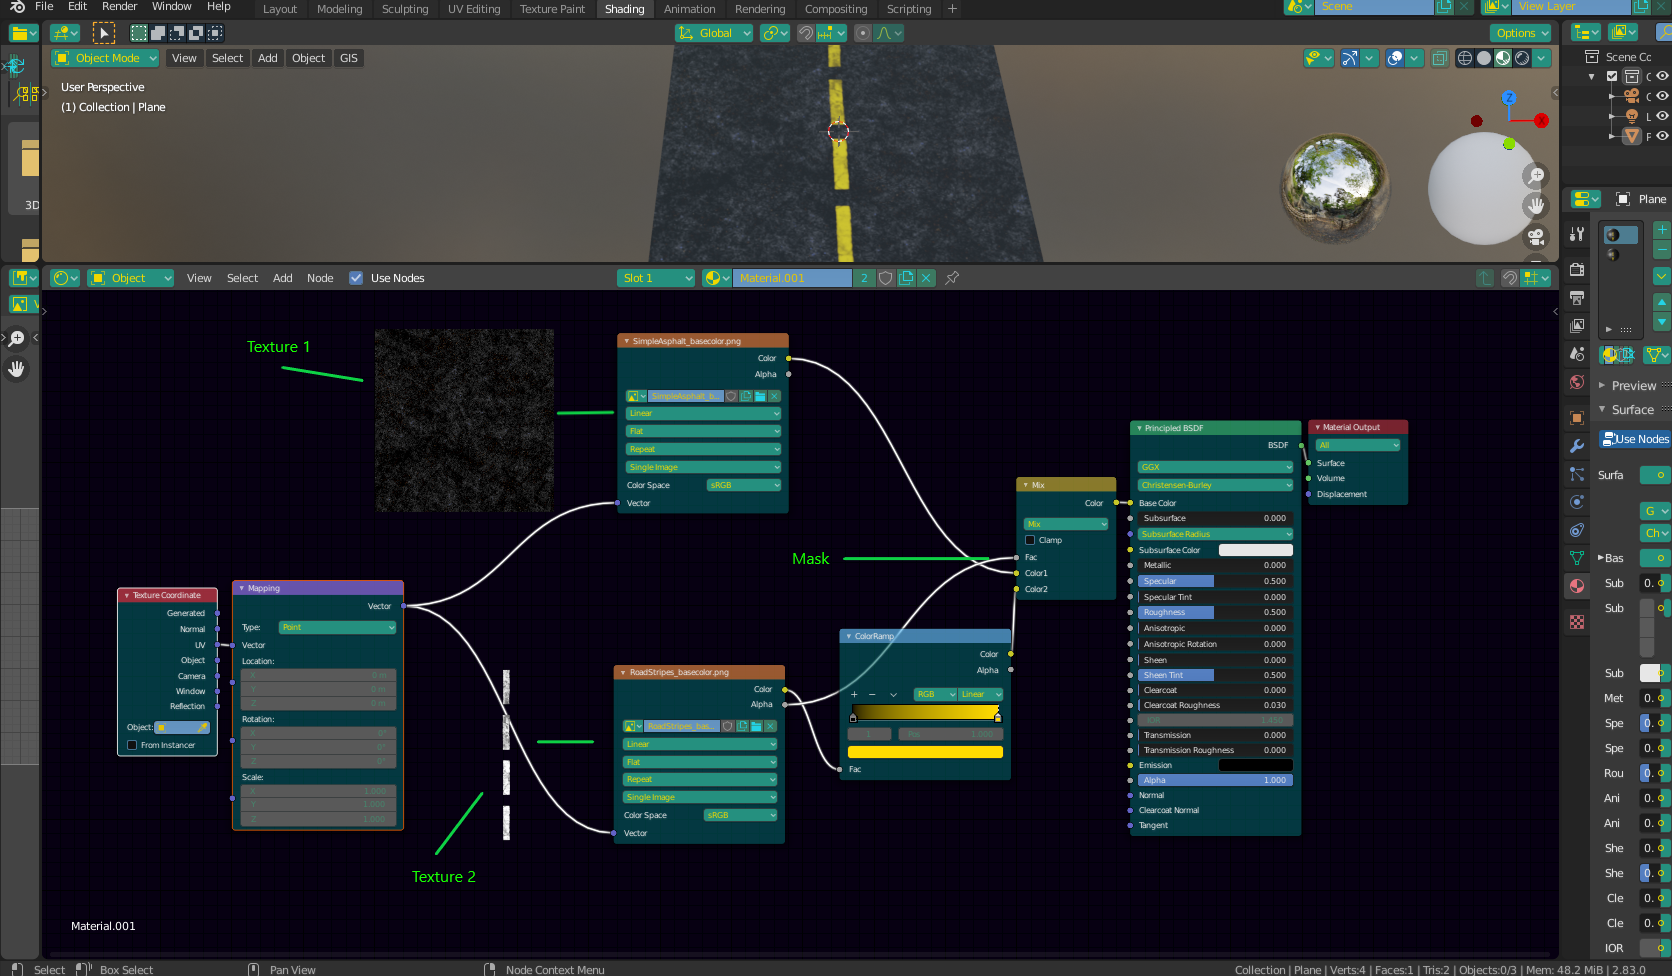
TexCombine

EDIT - Hey, I checked out your .blend file, but unfortuately, it didn't come wuth any images. Often it doesn't matter, but in this case, where the positioning of the one image is important, I need to see that image. To pack all the resources into the .blend file, go File > External Data > Pack All Into .blend. If you send me the file with the images, I should be able to help.

See below:
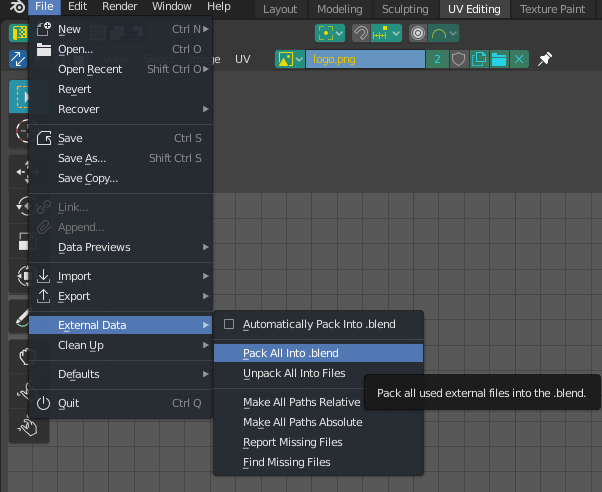
PackFiles

EDIT 2 - Hey. The problem was rather simple, you have UV islands in a place where they are getting info from the letter logo. See the image below.
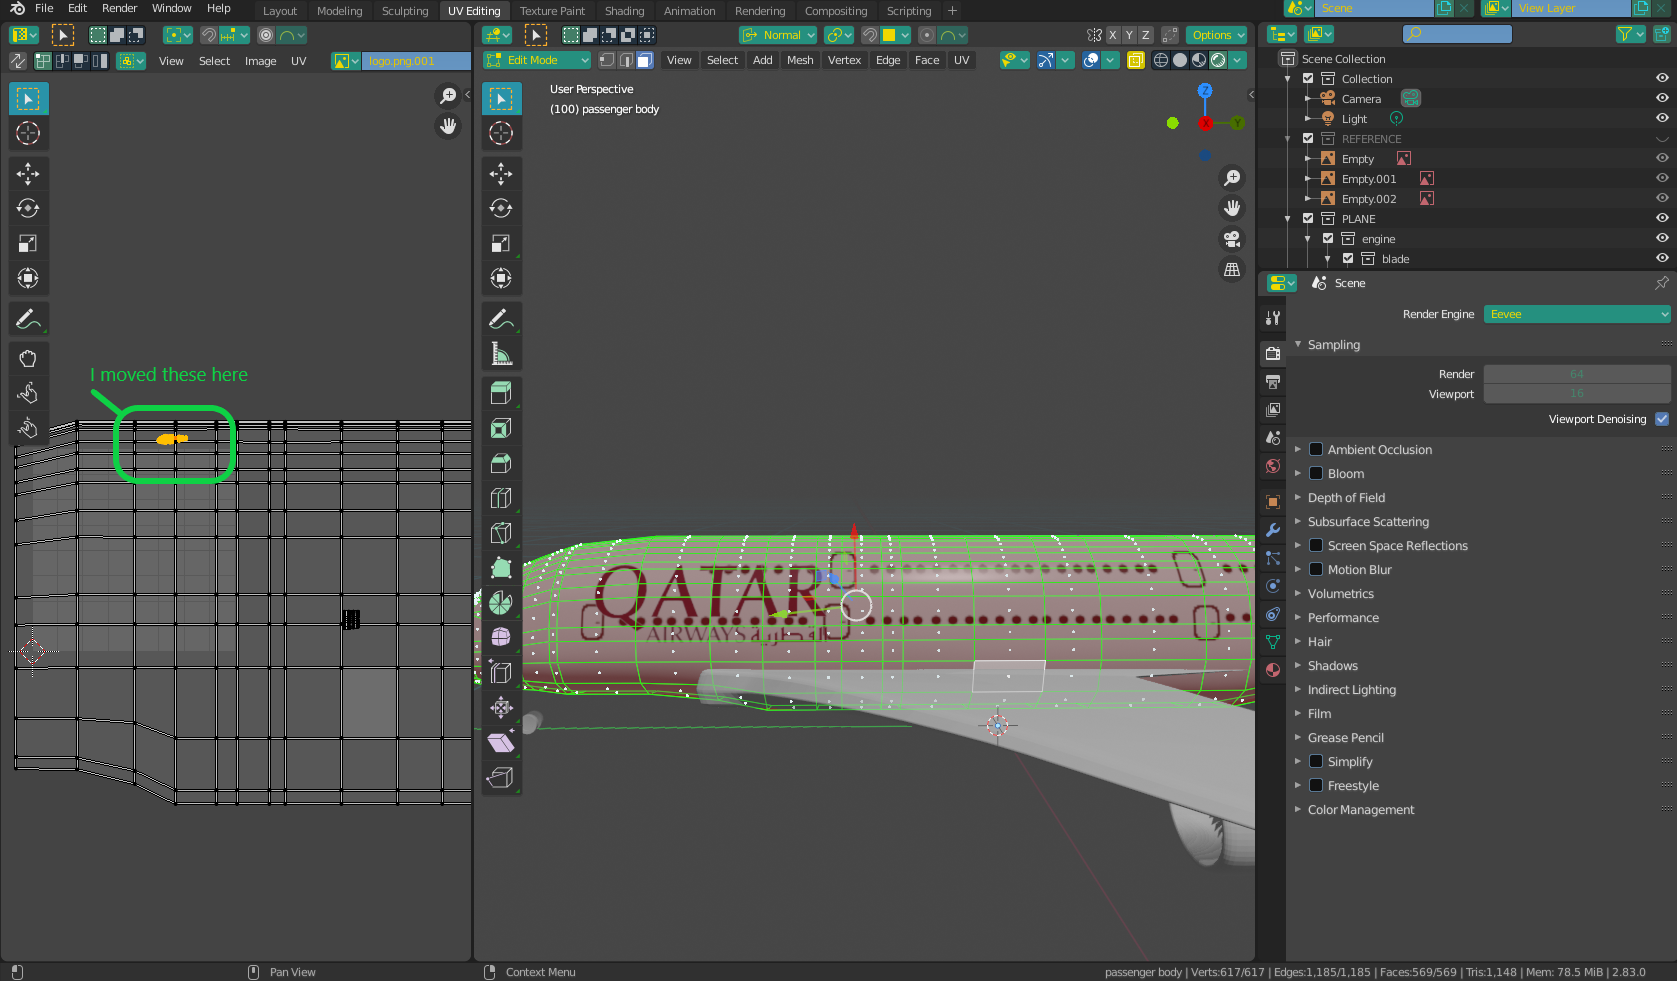
Plane

I'll also upload the .blend file, but i'm not sure it will work becaus I had trouble packing the textures. At least you can see where I placed the islands.

File is here -

Hope this helps

$\endgroup$
4
  • $\begingroup$ thx for the answer, I have added an edit can u pls look into it $\endgroup$
    – JacksonPro
    Commented Jun 17, 2020 at 14:51
  • $\begingroup$ Yeah, I added a comment to your question. Look up there ^ $\endgroup$ Commented Jun 17, 2020 at 14:55
  • $\begingroup$ Ok, I updated my answer (EDIT 2) $\endgroup$ Commented Jun 18, 2020 at 3:21
  • $\begingroup$ thank you very much :) $\endgroup$
    – JacksonPro
    Commented Jun 18, 2020 at 5:00

You must log in to answer this question.

Not the answer you're looking for? Browse other questions tagged .