3
$\begingroup$

I am doing a pre-visualization of an art installation. It looks a bit qwirky ;) It is to remember the fall of the berlin-wall etc. etc.

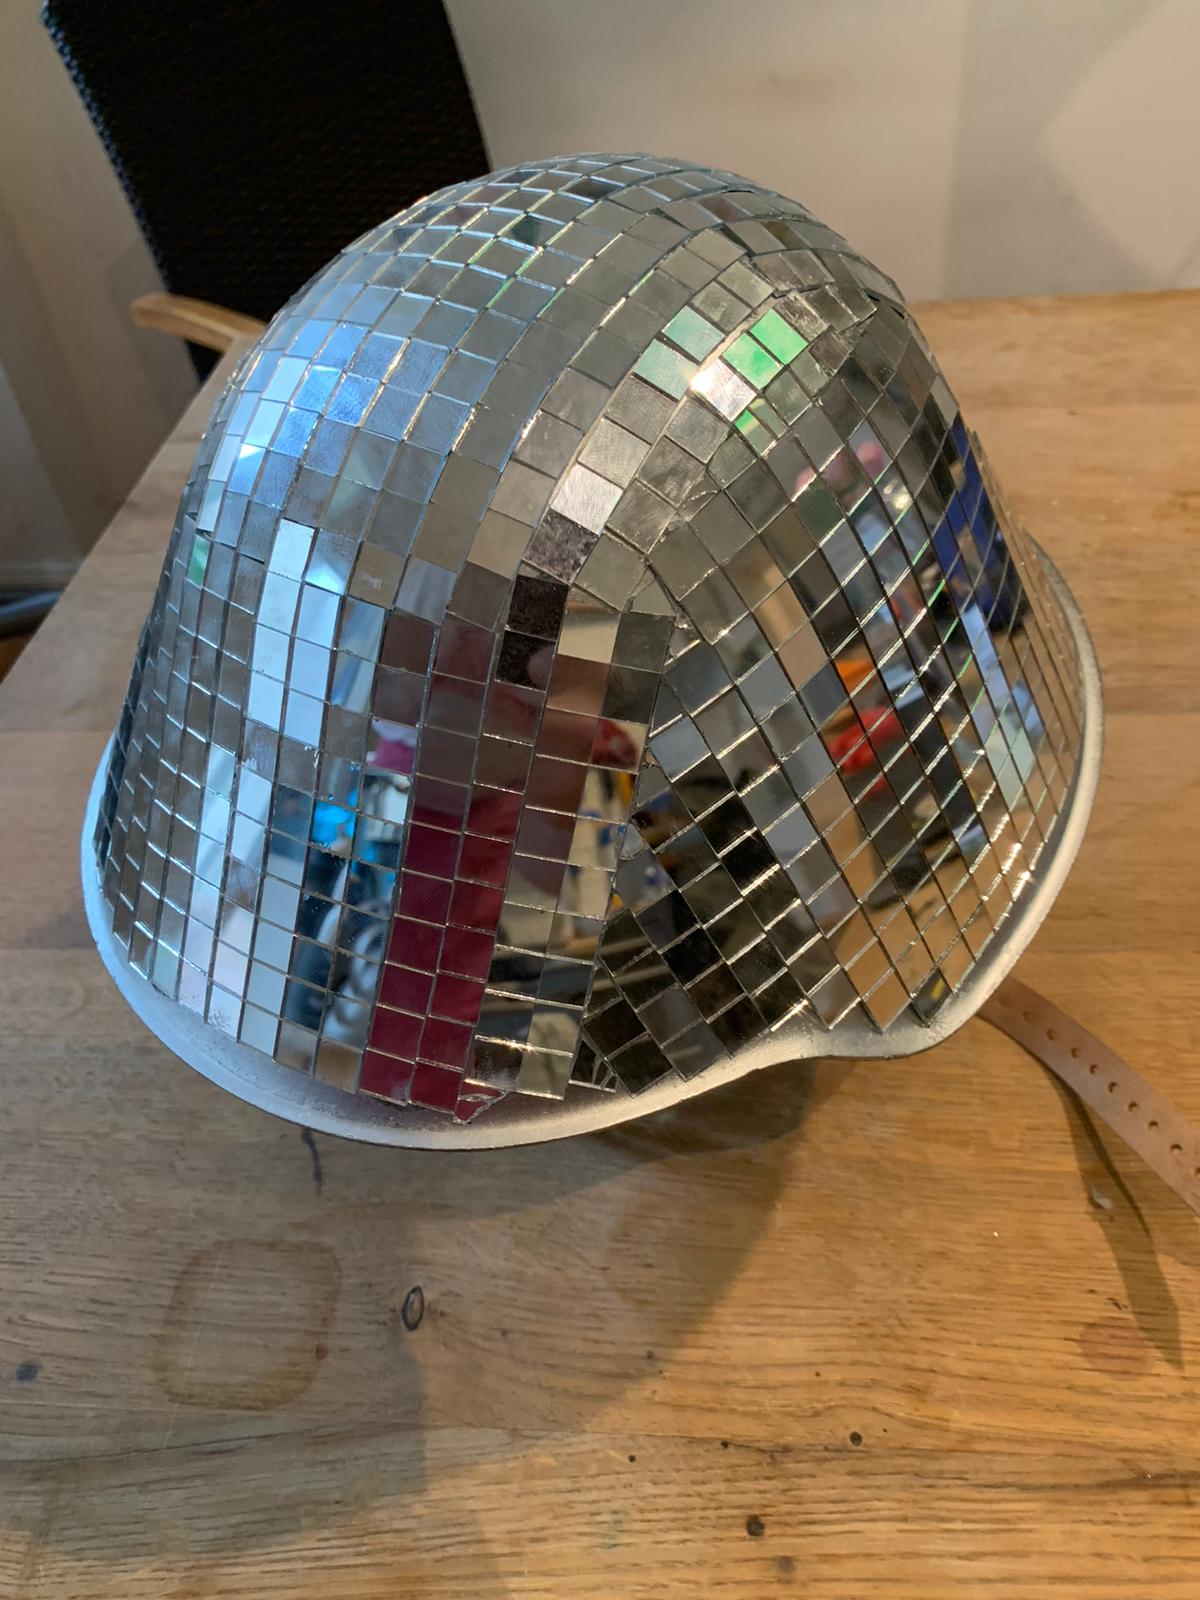
So it will be old helmets plated with small mirrors arranged in a very large ball / flower.

BUT the question is, how do i get the tiny mirrors to spread evenly without clipping into each other on the mesh evenly? I wanted to do that effect for a long time already on a couple of projects.

I thought i could instanciate the micro mirrors onto the surface with a particle emitter and use the normals of the surface etc. OR alternatively spawn at each vertices a mirror plate. Yet it would be very hard to make them even like a disco ball.

Do you have any ideas? here is a video of the status quo (sorry for the quality) VIDEO of the status quo

The first original helmet looks like this: enter image description here

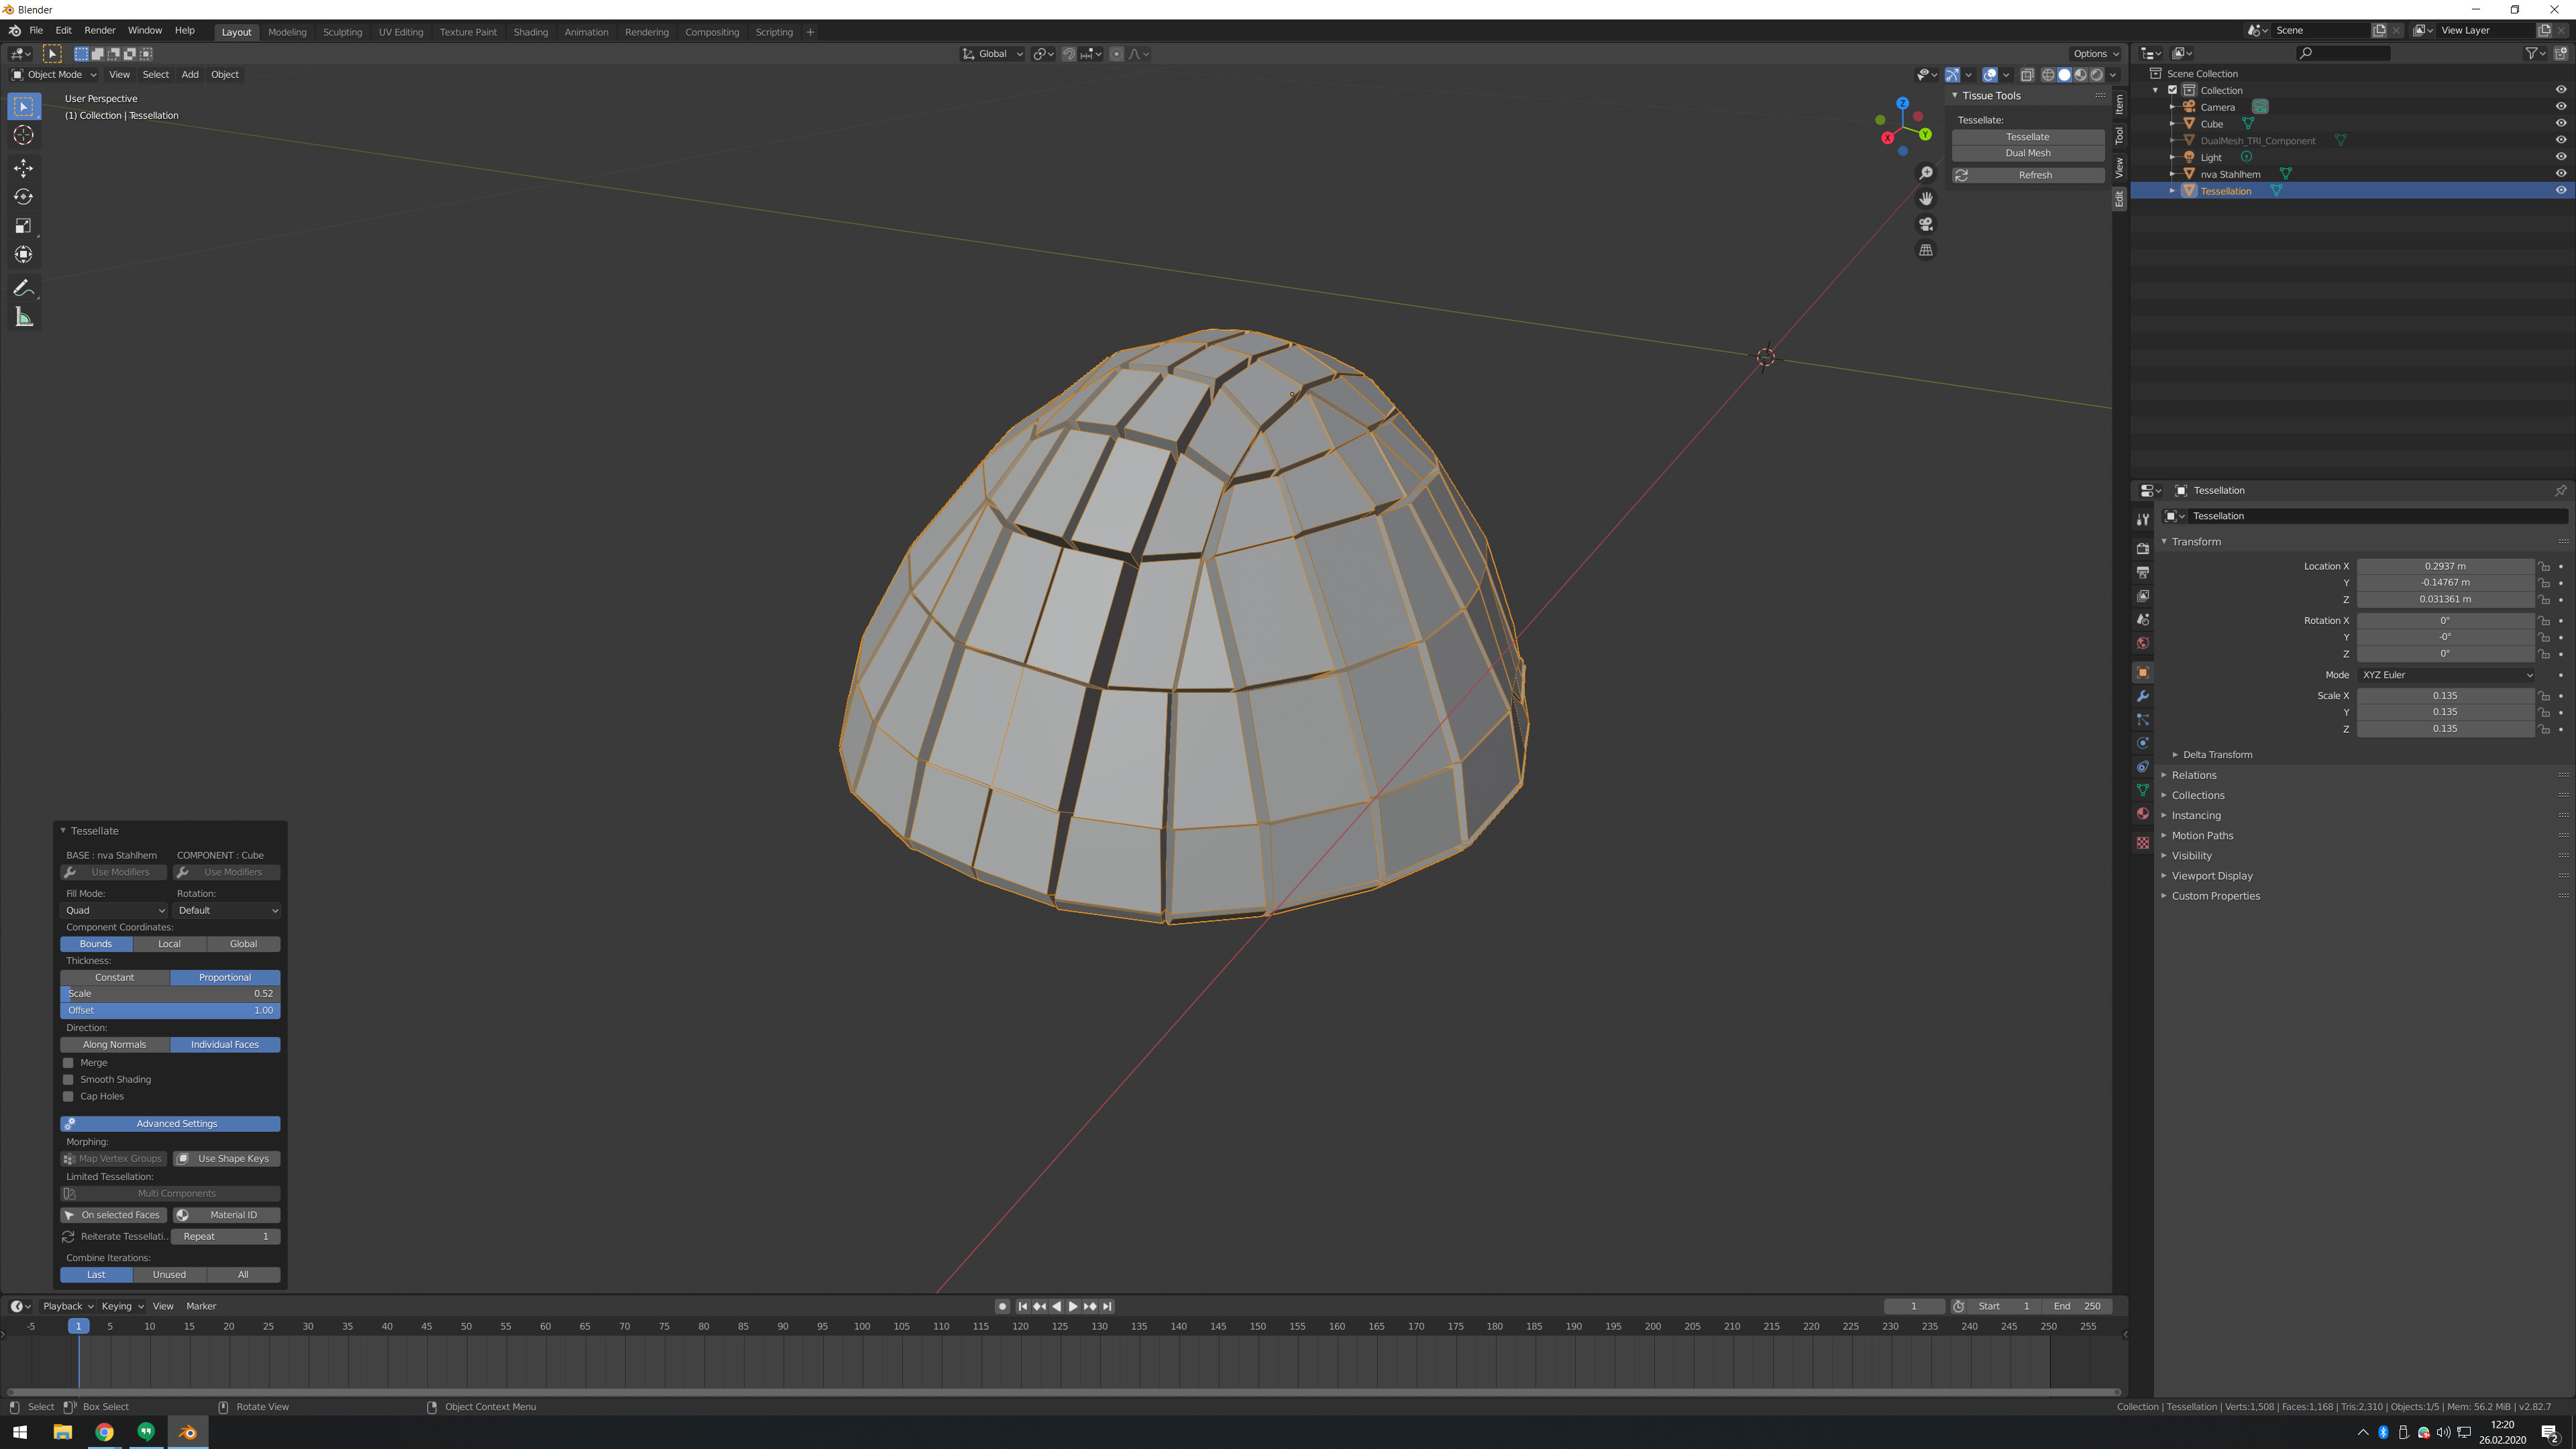
i tried your question. Though i think from the method it is very much like extruding individual faces right? Not entirely sure how it does it ;D to be honest.

here is the result, i believe because of the (rather unclean) mesh topology I can not go that route if I would have to make all faces evenly first. enter image description here
MAYBE: i could use something like cloth simulation? I could make a "fabric" (just joined mirrors as plane ) and stitch it to the surface? Does anyone has experience with it?

$\endgroup$
4
  • 2
    $\begingroup$ Hi. Does it need to be nearly random like in the video or more regular, like in the picture above? $\endgroup$
    – lemon
    Commented Feb 25, 2020 at 11:57
  • $\begingroup$ Hey, rather as closely and tight packed as possible. I wanted it pretty similar like the post beneath by @thibsert. $\endgroup$
    – Avion32
    Commented Feb 25, 2020 at 14:04
  • $\begingroup$ Is this for images only, or do you need an actually displaced model? $\endgroup$
    – Robin Betts
    Commented Feb 26, 2020 at 17:54
  • $\begingroup$ hey, sorry im not entirely sure what you mean ;D (@RobinBetts) I would say actually displaced model. Im trying to re-create the real look of placing tiny mirror plates onto the helmet. EDIT: ah, i think i know what you where referring to. Its just for renders, no animation with the tiles or so. So it can be fixed mesh, $\endgroup$
    – Avion32
    Commented Feb 28, 2020 at 15:03

3 Answers 3

4
$\begingroup$

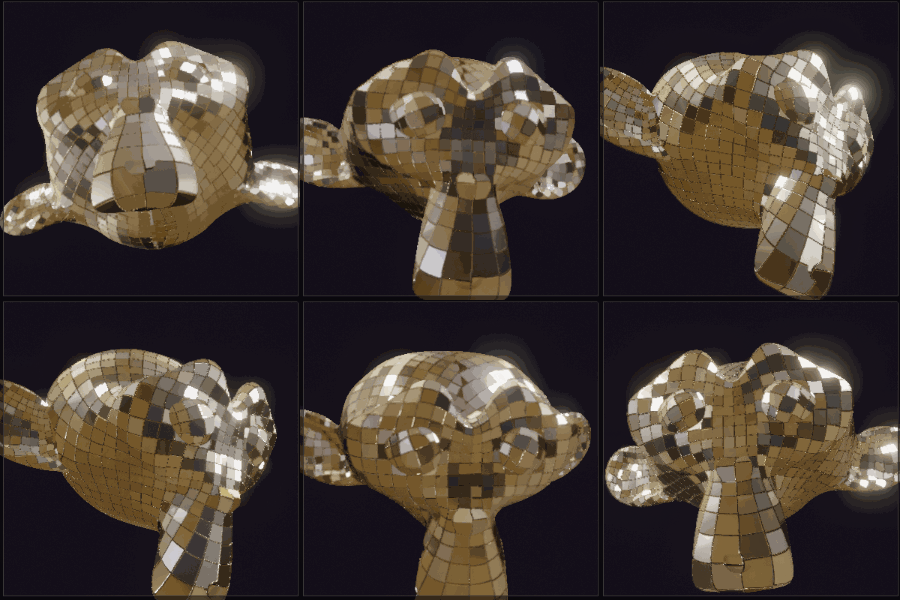
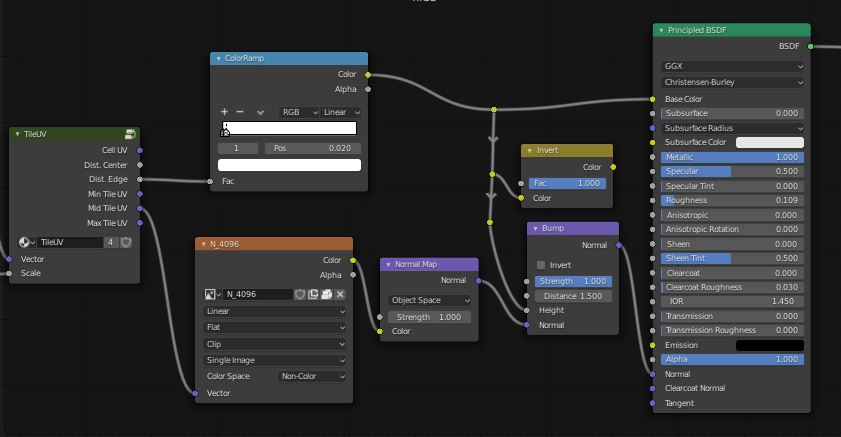
This is a partial shader-only solution, which may be good enough for your visualization.

enter image description here

It depends on a 'Tile UV' node group, available in the download.

'Tile UV' splits a given UV space into square cells, tile size given by the 'Scale' input.

Its outputs are:

  • Cell UV, UV coordinates within each cell, -0.5 to 0.5 in X and Y
  • Dist. Center, the distance of the shading point from the center of its cell
  • Dist. Edge, the same for the edges of the cell, here used to put the cracks between the tiles
  • Min, Mid and Max Tile UVS, which return the locations of the Min. Mid. and Max. X and Y of the shading point's cell in the original, given, UV space.

The steps to applying the shader to your object would be:

  1. UV unwrap the object. The shape/distribution of the tiles will depend on your seams, UV islands and how you straighten / distort them. You could do this while looking at just the Base Color branch of this material, to see how your squares/fragments are coming out. This example just uses the default unwrap of Suzanne, you can see the tiles swell in her mouth region.

  2. Having settled the map, bake an image of the object's object-space normals for it to use: one way.. with the object at the origin and aligned the world, plug the 'Normal' output of a Geometry node into an emission shader, and bake the 'Emit' from that into a floating-point image, with your UV map active, using Cycles, 1 sample.

You can then use that normal map, as shown in the node tree, to look up the normal at the center of each tile, and use that for the normal of every shading point in the tile.

enter image description here

'Partial', because so far. this is only a Bump/Normal effect. Building the tree to create actual flat-per-tile displacements would be a bit more involved, and need you to bake a position map, too. I don't know how well it would come out - you'd either need very high-res geometry to displace the model, or use Cycles to get the renderer to do it, but If you wanted it, given time, I'd have a look at that.

$\endgroup$
5
  • $\begingroup$ I'm not gonna pretend I understand what's going on here... but Wow! $\endgroup$ Commented Feb 26, 2020 at 21:51
  • $\begingroup$ @JachymMichal I'm a bit stuck, I don't know where to go into more detail without making the answer too long $\endgroup$
    – Robin Betts
    Commented Feb 27, 2020 at 8:08
  • 1
    $\begingroup$ Robin Bestt again! $\endgroup$
    – lemon
    Commented Feb 27, 2020 at 8:16
  • 2
    $\begingroup$ @lemon Nahhh, we need Rich Sedman to come along and put perfectly flat, beveled, slightly scratched glass on the tiles, randomize their rotations without overlaps, cut triangles out neatly, and throw in some procedural thumbprints for good measure :D $\endgroup$
    – Robin Betts
    Commented Feb 27, 2020 at 11:00
  • 1
    $\begingroup$ @RobinBetts oh my, THAAANKS! This actually does the trick. I can this way get around the mesh topo. How do you come up with this crafty solution. ;D Super helpful, also on other project i might say. Cool solution. $\endgroup$
    – Avion32
    Commented Feb 28, 2020 at 15:09
6
$\begingroup$

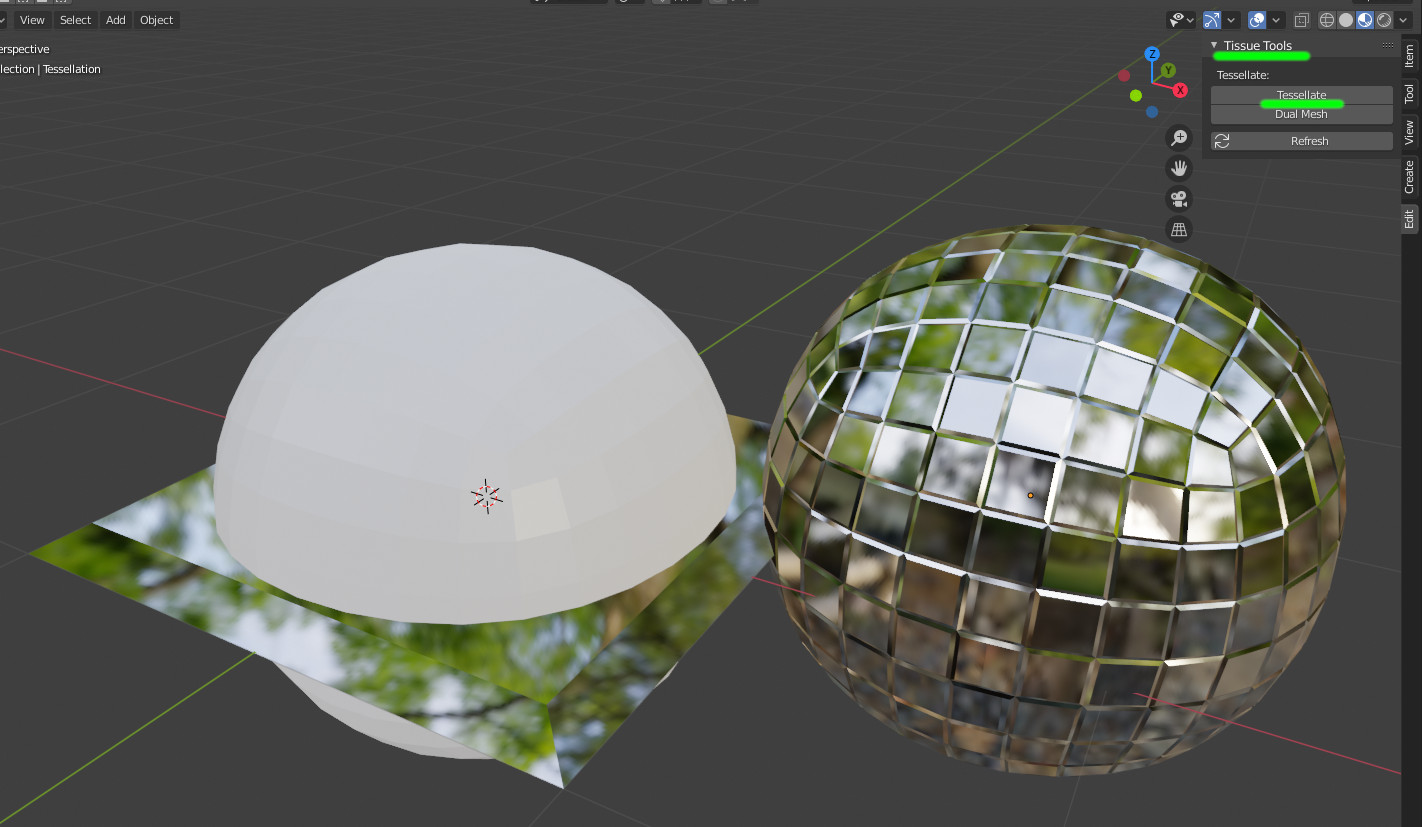
You can use the Tissue addon.

enter image description here

The addon will tesselate a given shape on a mesh.

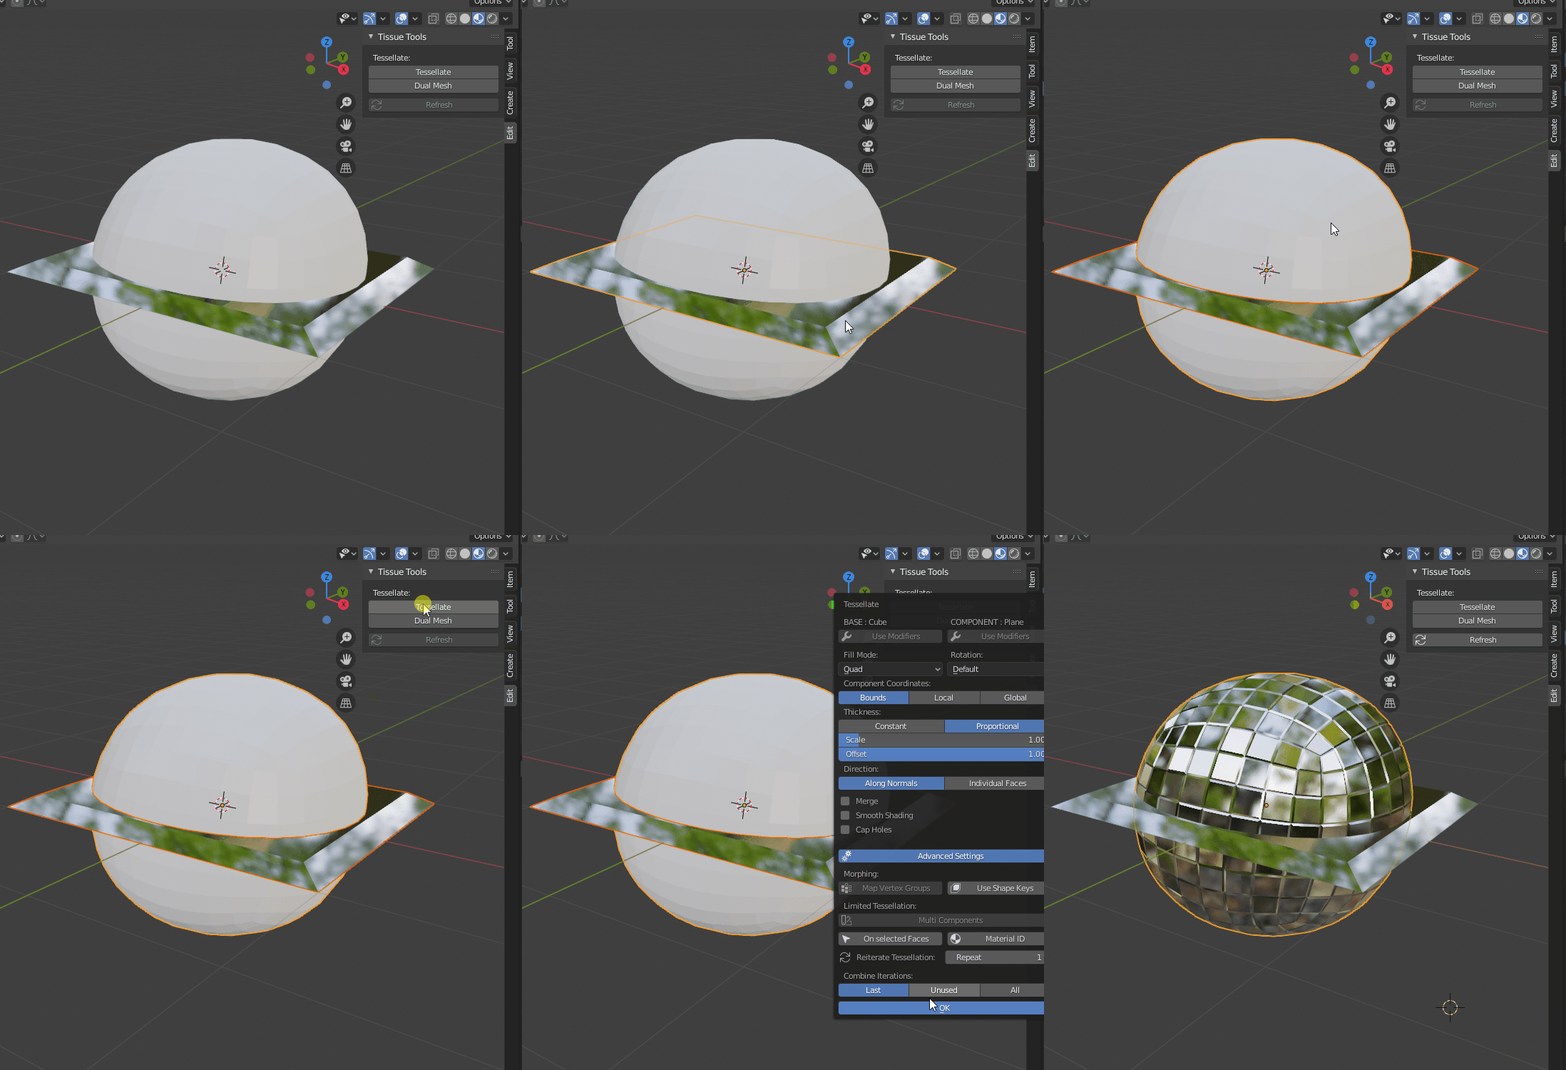
Select a tile, shift select your mesh, and use 'tesselate':

enter image description here

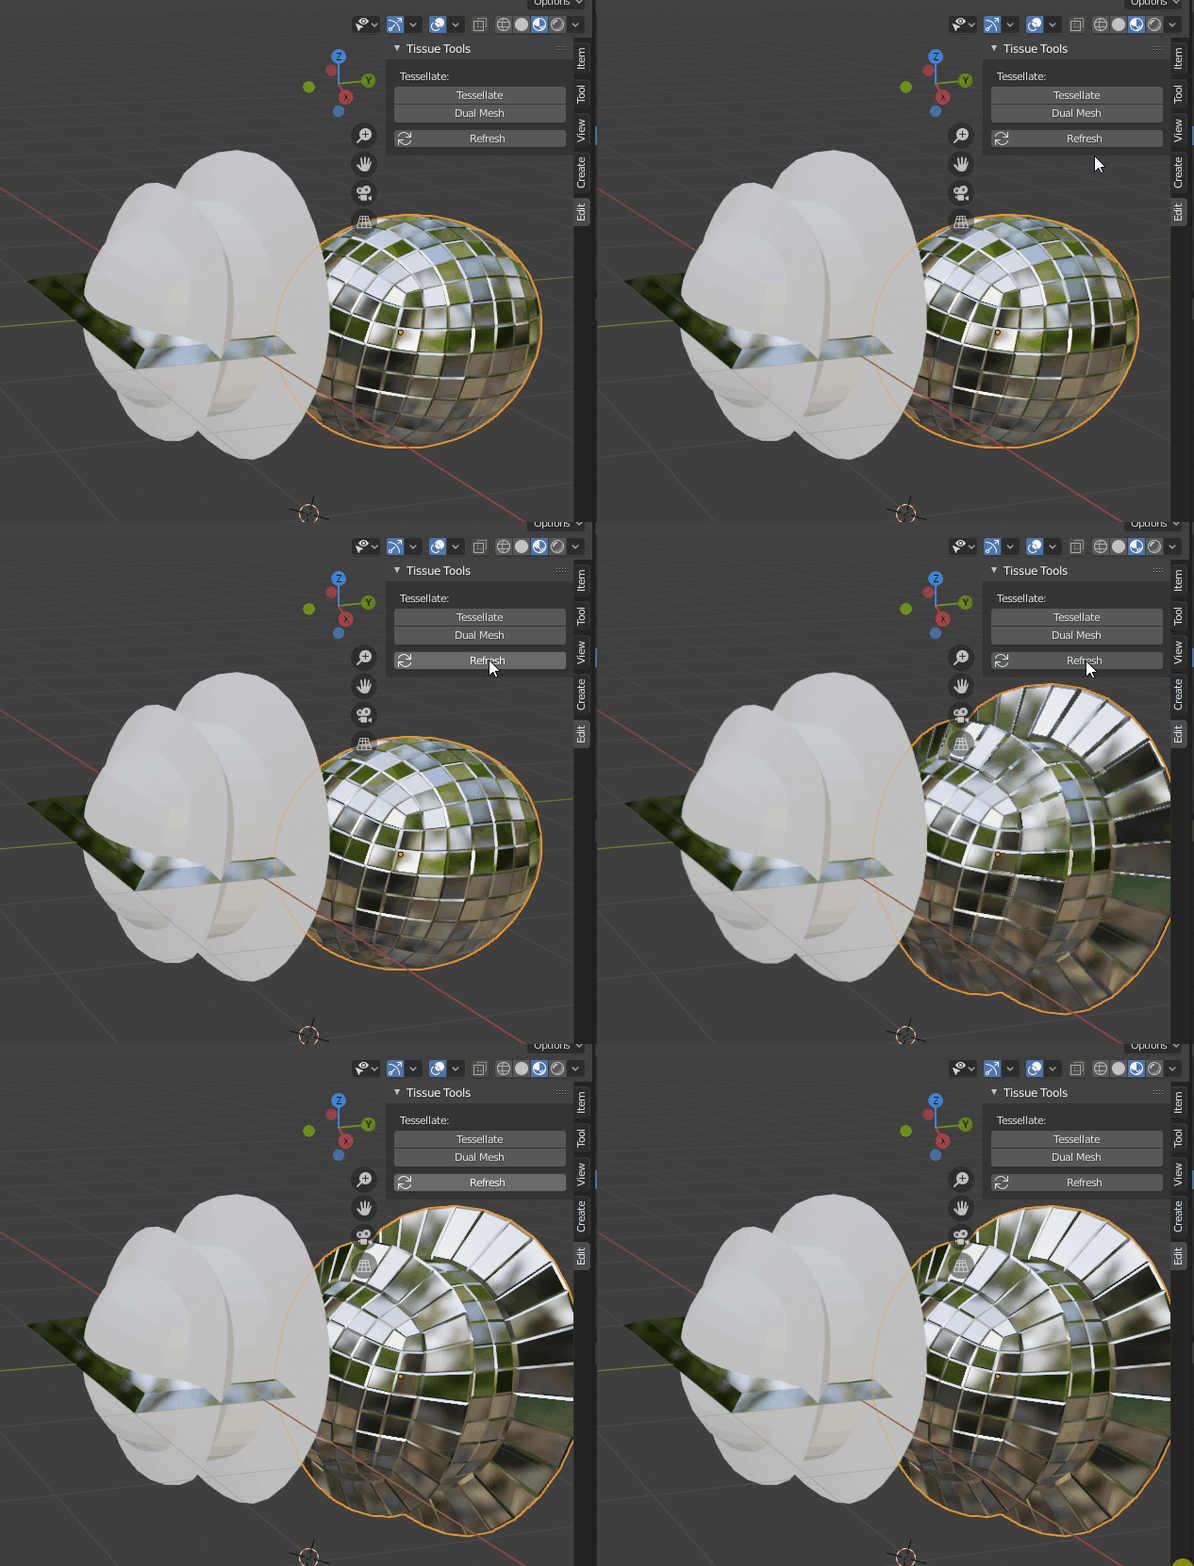
From that, if you want to modify the original mesh, you can come back to the tesselation and refresh it.

enter image description here

$\endgroup$
0
3
$\begingroup$

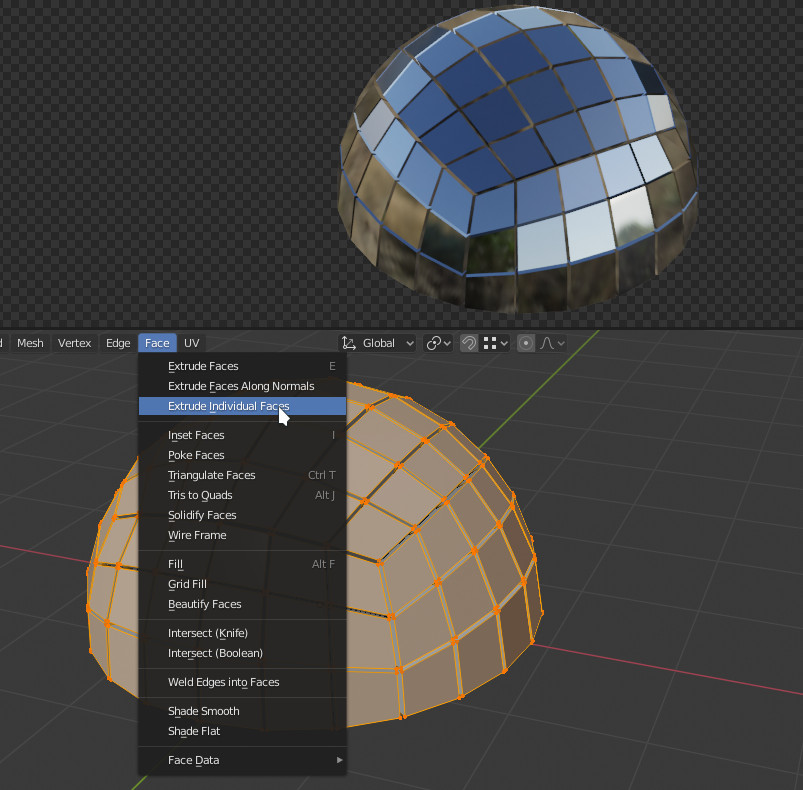
If the models geometry allows it, you can try that : enter image description here

In Edit mode, select every face you want a mirror on. In the Face menu, select Exrtude Individual Faces, and move your mouse to give the mirrors some depth. Give them a nice shiny material and you're done.

$\endgroup$
2
  • $\begingroup$ hey, thanks for the reply, i was originally going for that. But then I would have to re-do the mesh topology entirely for quads. (in 3dsmax poly modeling this would be super fun and easy, in blender i am somehow not at ease like that. ) BUT i wanted to try to see how it will look with the actual mirrors (you can buy them as smal quadratic plates... $\endgroup$
    – Avion32
    Commented Feb 25, 2020 at 14:03
  • $\begingroup$ hey, i replied to your solution but the response got deleted. Basically it is quite similar to individual face extrusion. Because of my (really shitty) mesh topology this will look horrible ;D. I thought about using something cloth related? Like making a matt of small mirrors and then let blender stitch it onto the surface? $\endgroup$
    – Avion32
    Commented Feb 26, 2020 at 16:41

You must log in to answer this question.

Not the answer you're looking for? Browse other questions tagged .