6
$\begingroup$

I have a Voronoi Texture node and I want to animate a seamless loop of it moving around the mesh (last frame connect seamless with the first frame).

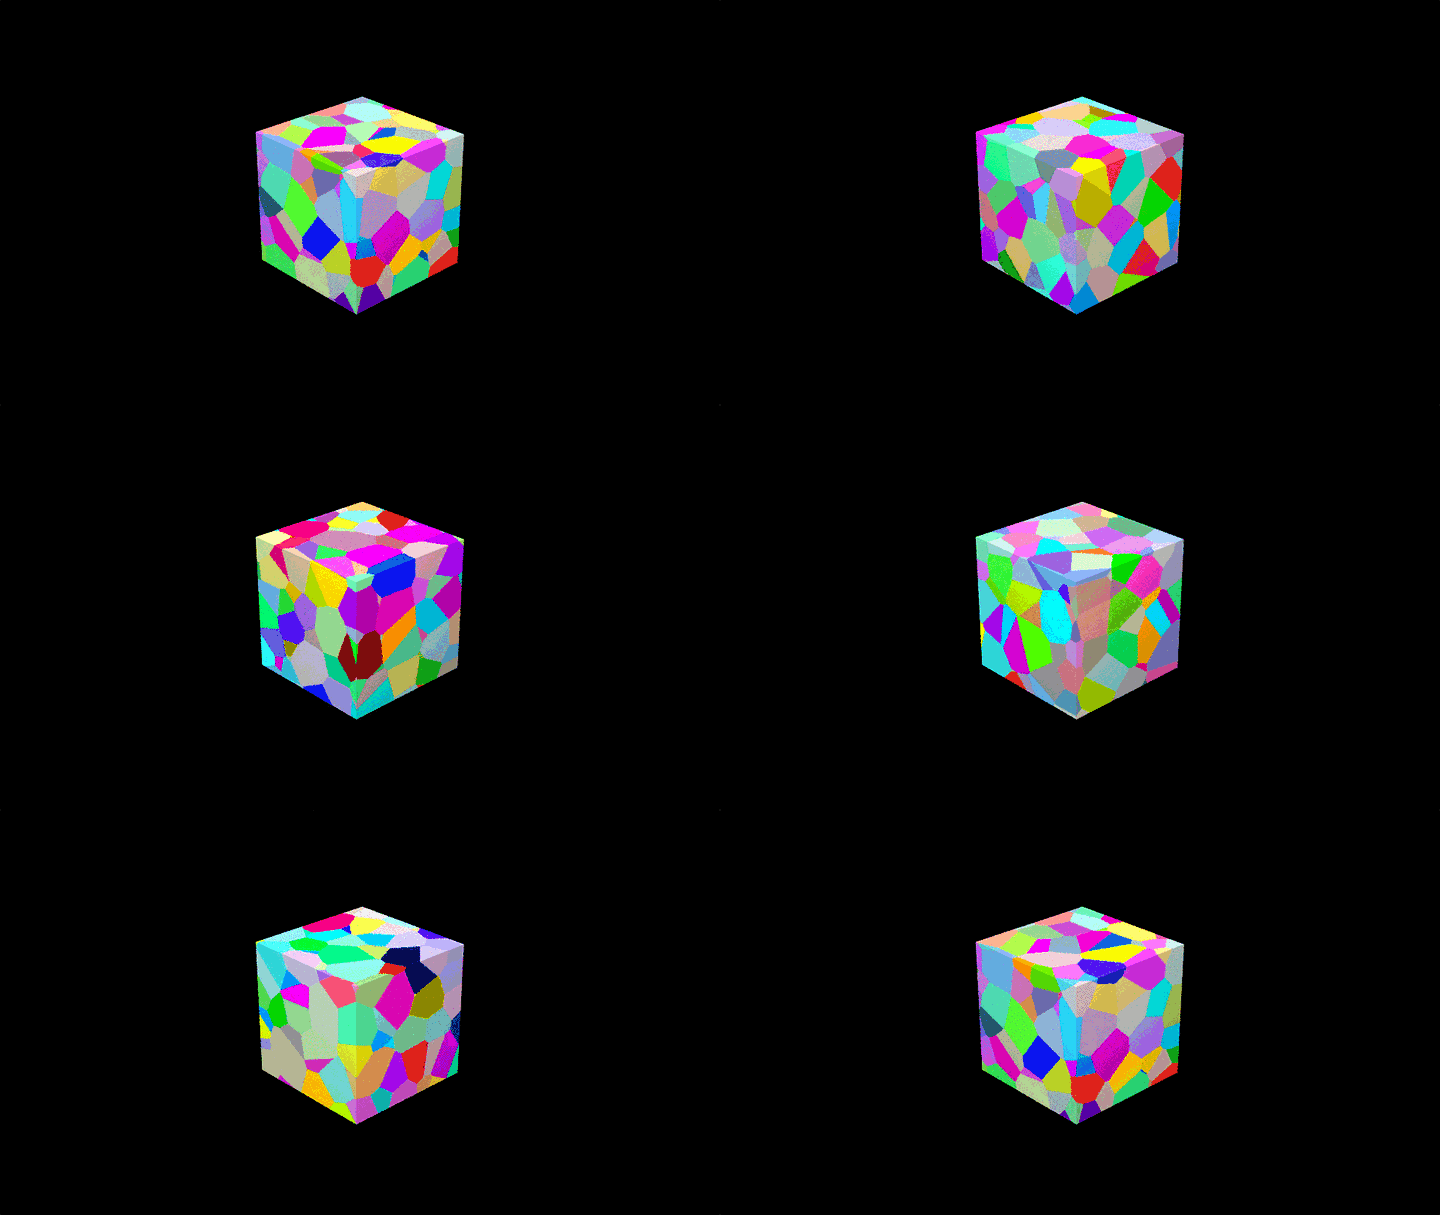
enter image description here

I set a keyframe in the Location parameter of a Mapping Node at frame 1. Then I change and keyframe Z to 1 at frame 30. But the result isn't seamless.

enter image description here

How can I make this texture move so the end connects with the start?

$\endgroup$
2

3 Answers 3

4
$\begingroup$

As Voronoi uses a random location for each cell, it doesn't repeat (thought it has simetries). For making a seamless loop with it, one must tweak the voronoi algorithm so that the random function loops after some vector. This is best done in OSL (with nodes it will become a monstruous setup).

Here's a variation of the original code, in order to loop in the Z coordinate after a fixed number of cells:

color cellnoise_color(point p)
{

    float r = cellnoise(point(p[0], p[1], p[2]));
    float g = cellnoise(point(p[1], p[0], p[2]));
    float b = cellnoise(point(p[1], p[2], p[0]));

    return color(r, g, b);
}

void voronoiLooped(point p, float e, int zloop, float da[4], point pa[4])
{
    int xx, yy, zz, xi, yi, zi;

    xi = (int)floor(p[0]);
    yi = (int)floor(p[1]);
    zi = (int)floor(p[2]);

    da[0] = 1e10;
    da[1] = 1e10;
    da[2] = 1e10;
    da[3] = 1e10;

    for (xx = xi - 1; xx <= xi + 1; xx++) {
        for (yy = yi - 1; yy <= yi + 1; yy++) {
            for (zz = zi - 1; zz <= zi + 1; zz++) {
                point ip = point(xx, yy, zz);
                /*
                In the next line, we set the Z coordinate to the Modulo of zloop.
                This will make vp to repeat itself, because ip[2]+(n*zloop)=ip[2].
                The original line is:
                point vp = (point)cellnoise_color(ip);
                */
                point vp = (point)cellnoise_color(point(ip[0], ip[1], mod(ip[2], zloop)));

                point pd = p - (vp + ip);
                float d = dot(pd, pd);

                vp += point(xx, yy, zz);

                if (d < da[0]) {
                    da[3] = da[2];
                    da[2] = da[1];
                    da[1] = da[0];
                    da[0] = d;

                    pa[3] = pa[2];
                    pa[2] = pa[1];
                    pa[1] = pa[0];
                    pa[0] = vp;
                }
                else if (d < da[1]) {
                    da[3] = da[2];
                    da[2] = da[1];
                    da[1] = d;

                    pa[3] = pa[2];
                    pa[2] = pa[1];
                    pa[1] = vp;
                }
                else if (d < da[2]) {
                    da[3] = da[2];
                    da[2] = d;

                    pa[3] = pa[2];
                    pa[2] = vp;
                }
                else if (d < da[3]) {
                    da[3] = d;
                    pa[3] = vp;
                }
            }
        }
    }
}

shader node_voronoi_texture(
    float Scale = 5.0,
    point Vector = P,
    int ZLoop = 10,
    output float Fac1 = 0.0)
{
    point p = Vector;

    float da[4];
    point pa[4];

    voronoiLooped(p * Scale, 1.0, ZLoop, da, pa);

    Fac1 = fabs(da[0]);
}

Using the default ZLoop=10 means that the pattern will repeat when moving the coordinates in multiples of 10 units in the Z axis.

$\endgroup$
2
  • 1
    $\begingroup$ Thank you, it works great! If I link scale and zloop I can animate the loop from 0 to 1. The only drawback is that I can't render in the GPU because custom OSL is CPU only. $\endgroup$
    – Hammer Art
    Commented Mar 3, 2018 at 20:52
  • $\begingroup$ it's still possible to make this with nodes (although there's no access to the cellnoise function, and basic noise doesn't have an uniform range). The problem is the three dimentional loop, that requires 27 splits one for each neighbouring cell. It can become even more difficult if you need anything bigger that F0, as sorting in GPU is tricky. $\endgroup$
    – Secrop
    Commented Mar 4, 2018 at 13:46
13
$\begingroup$

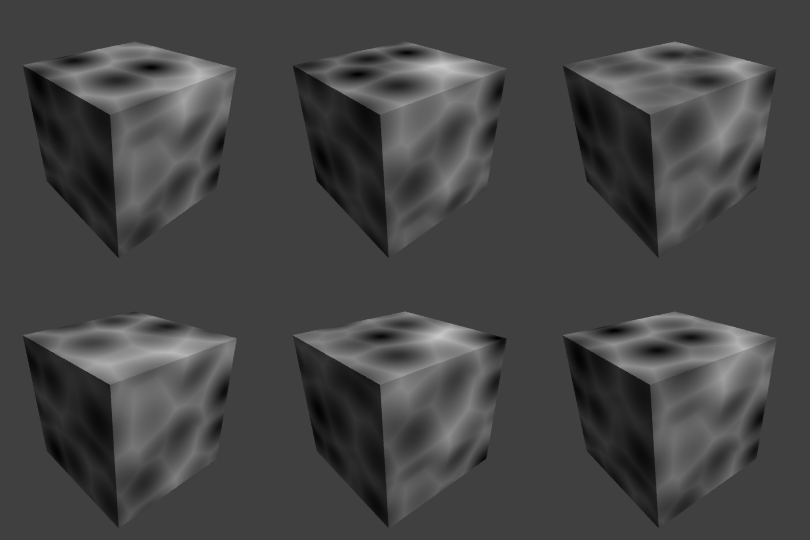
A procedural texture can be made to appear continuous, repeating and seamless by blending with another section of itselfto hide the 'seam'.

Final result :

animated

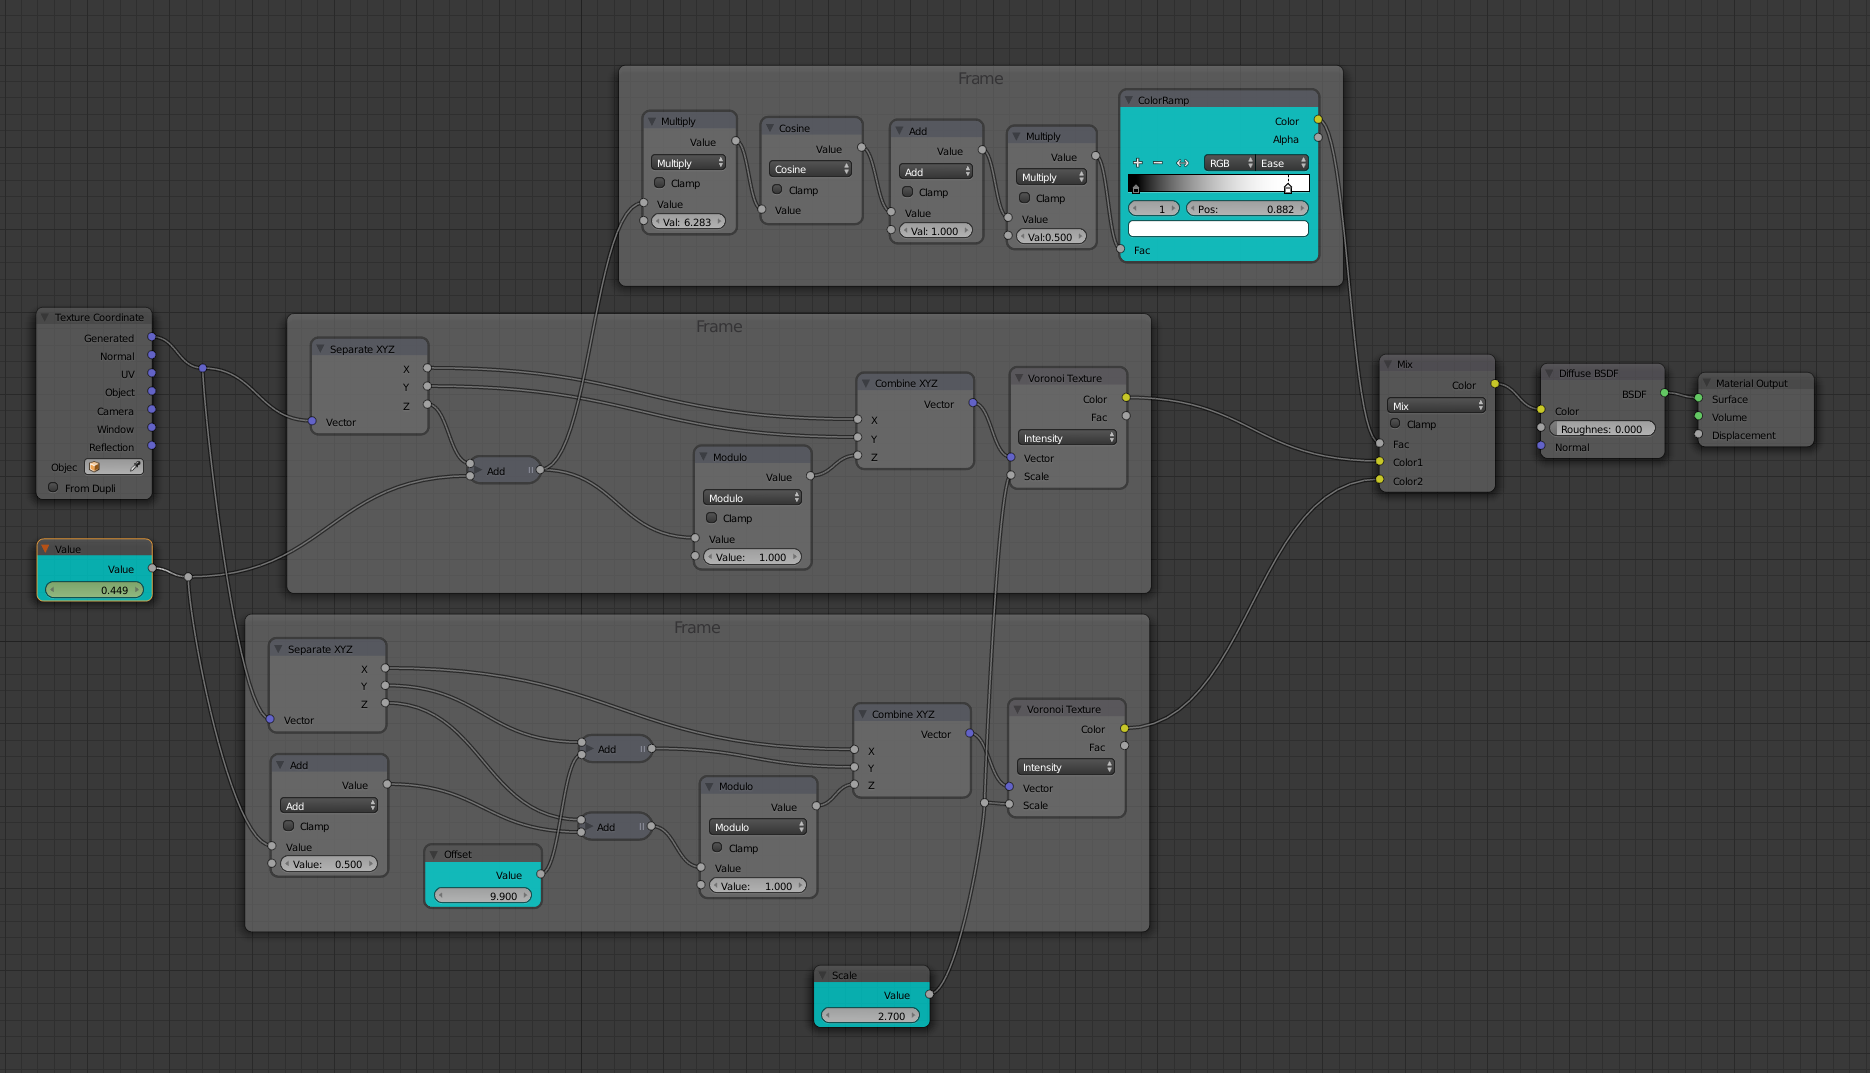
This can be achieved with the following nodes :

nodes

Note the nodes marked in Cyan which can be used to animate/adjust the texture to get pleasing results (to make the transition unnoticeable).

The first (Value) node allows the Z coordinate to be animated. The texture will be repeated every 1.0 unit (in this case it's using Generated texture coordinates and the blending occurs in the Z direction) by way of the Modulo function - use the Scale and an optional Mapping node to affect how big a section is repeated.

The Offset input node can be used to adjust which alternative section of Voronoi to use to blend over the seam - adjust this to choose a suitable section of texture that is as similar as possible to help hide the transition. The Scale of the Voronoi can be adjusted with the Scale input value.

The amount of blending between the textures can be adjusted via the Color Ramp node - moving the Black and White points closer or further apart will vary the sharpness of the blend between the textures.

Note that you can add a Mapping node immediately after the Texture Coordinate node and vary the scale to change the spacing of the repeat. Similarly, this same method would work with other textures such as Noise, Musgrave, Images, etc. - however, very regular textures (such as Brick, Checker, etc.) will likely produce noticable artifacts - this method works best with fairly 'organic' textures. Equally, you could use an Image Texture if desired.

Note also that since this is produced using standard nodes it will still be able to be rendered using GPU (not possible with OSL).

Blending between the textures occurs based on a Cosine function which is carefully scaled (note the Multiply nodes set to 2*pi) to be at a maximum (1.0) at the seam of one texture (at 0.0 and 1.0) and a minimum (0.0) at the seam of the other (which is offset so its seam occurs at 0.5). By mixing between the two textures in this way, the seam is always invisible.

Blend file included

$\endgroup$
3
$\begingroup$

Simple rotation works in some cases too. Rotate texture arround X or Y axis with some distance can give you an illusion of vertical texture movement. Texture rotated 360 does the trick - loop animation.

  • add Empty a bit far from Cube location on X axis (in this example 7m)
  • frame 0 - add keyframe Rotation zero for Empty on Y axis
  • frame 250 - add keyframe Rotation 360 for Empty on Y axis
  • use Empty as Object for Texture Coordinates

enter image description here

Notes:

  • Advantage - easy to do, great for "random" loop in all axis
  • Disadvantage - in this particular case - shorter distance of Empty let you use less frames or slower animation, but also more visible center of rotation
$\endgroup$

You must log in to answer this question.

Not the answer you're looking for? Browse other questions tagged .