6
$\begingroup$

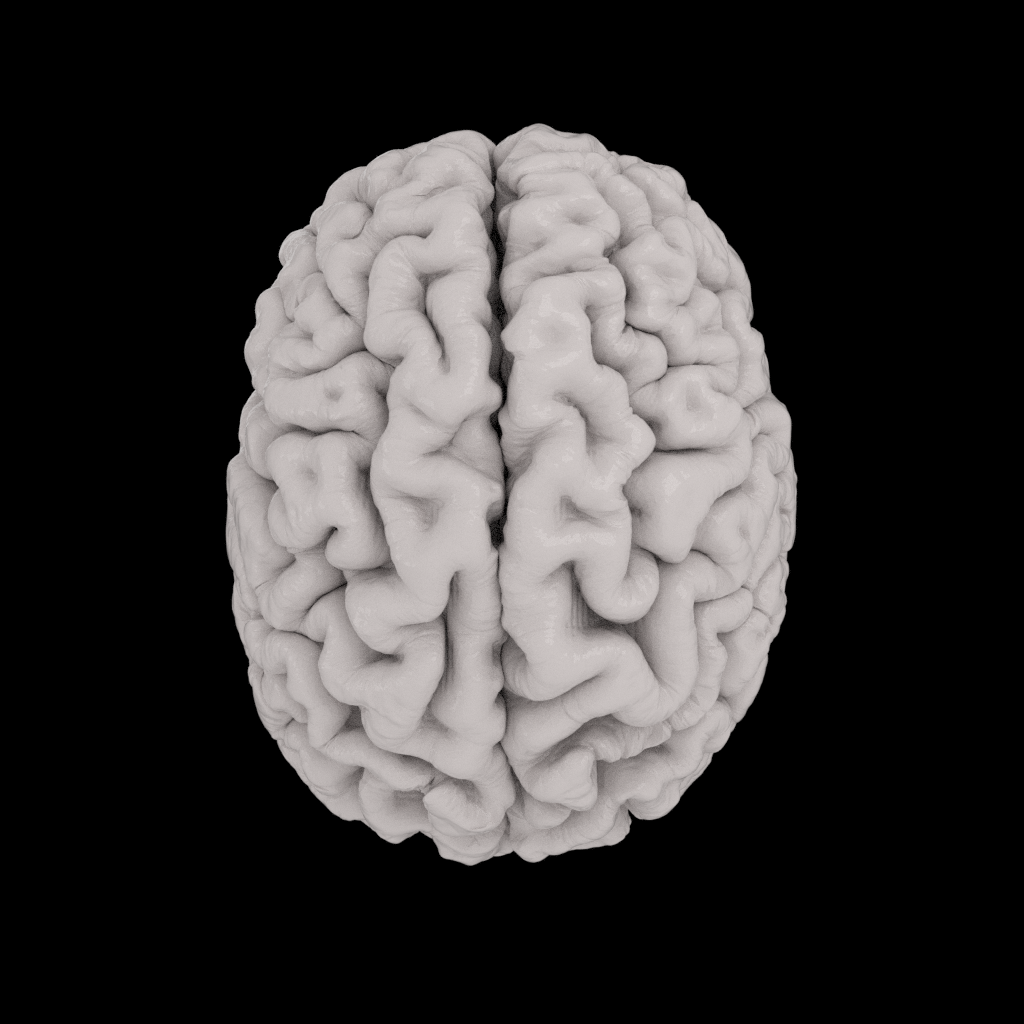
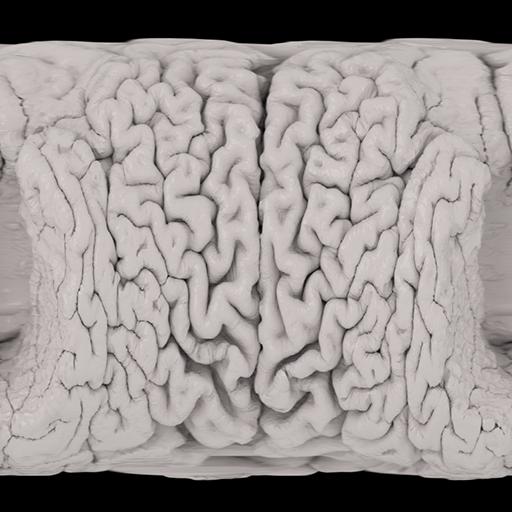
I'd like to render an "inverse" panorama. That is, rather than render from the center of a sphere or cylinder outward, I'd like the camera to "unwrap" the object. I was able to simulate this by rendering a thin slit whole rotating the brain 360 degrees, the stitching the output together. It's very slow because Cycles recreates the BVH tree, etc for each 1 pixel strip. I would also like a spherical projection rather than cylindrical so the top and bottom are shown.

Any ideas how to do this faster / better?

Original object: enter image description here

Unwrapped rendering: enter image description here

$\endgroup$
2
  • 2
    $\begingroup$ If I understand your example image, It's almost like exporting a UV unwrapped baked texture? $\endgroup$
    – Jeff Lange
    Commented Sep 6, 2017 at 23:09
  • $\begingroup$ @JeffLange, exactly. I tried to unwrap and bake, but it was too slow. $\endgroup$ Commented Sep 8, 2017 at 0:52

1 Answer 1

9
$\begingroup$

You can use the Bake function in the Cycles Render properties panel to achieve this by effectively rendering the scene from the point of view of a surface wrapped around your object.

The 'Bake' option is usually used to capture the visual appearance or properties of a surface in the scene where those properties are unlikely to significantly change (eg, its Ambient Occlusion, the lighting of a diffuse surface, shadows, etc.). This way, that surface's appearance can be quickly determined at render time without having to repeatedly re-trace those rays over and over again for each frame.

When baking an image, blender projects the camera rays directly towards the surface along its surface normal - rather than projecting them from the camera towards the surface - and this can be used to effectively turn any surface into a camera.

The key is to use a Glossy surface to bounce the ray back towards the surface being imaged. This way the baked image isn't how the surface appears but is, instead, what the surface sees when looking along its Normal - ie, it acts as a distorted camera that can take on any shape.

Blender projects camera rays to the surface along the surface normal.
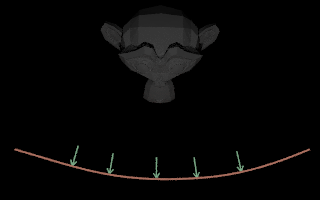
camera rays along normals

The glossy surface bounces those rays back along the surface normal.
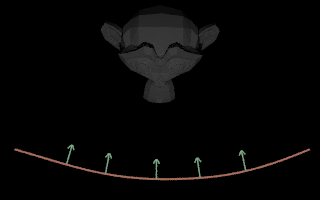
rays bouncing back

The rays hit the target, imaging it from the point of view of the surface.
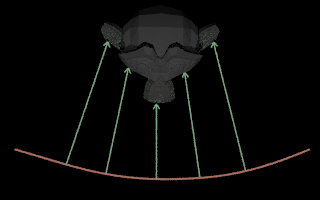
rays hitting target

To create such an "inverse panorama" create a new mesh surrounding the object - eg, a sphere for a spherical projection or a cylinder for a cylindrical projection. The mesh should be Smooth shaded rather than Flat shaded.
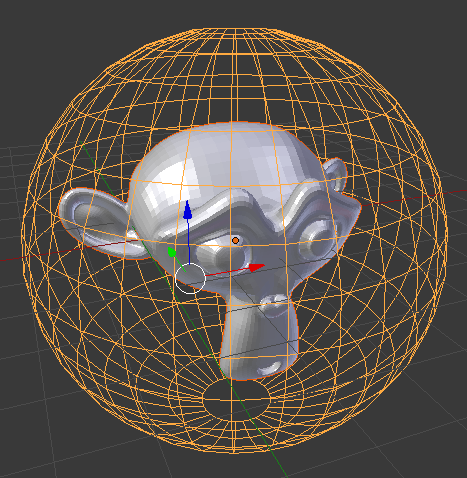
sphere around monkey

Flip the Normals so that they point inwards towards the target object.
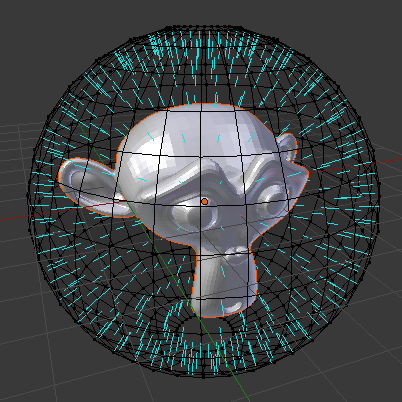
flipped normals

Unwrap it using a suitable projection method (eg, Sphere Projection for a sphere, Cylinder Projection for a Cylinder)

Setup the material (note the unconnected Image Texture for the bake)
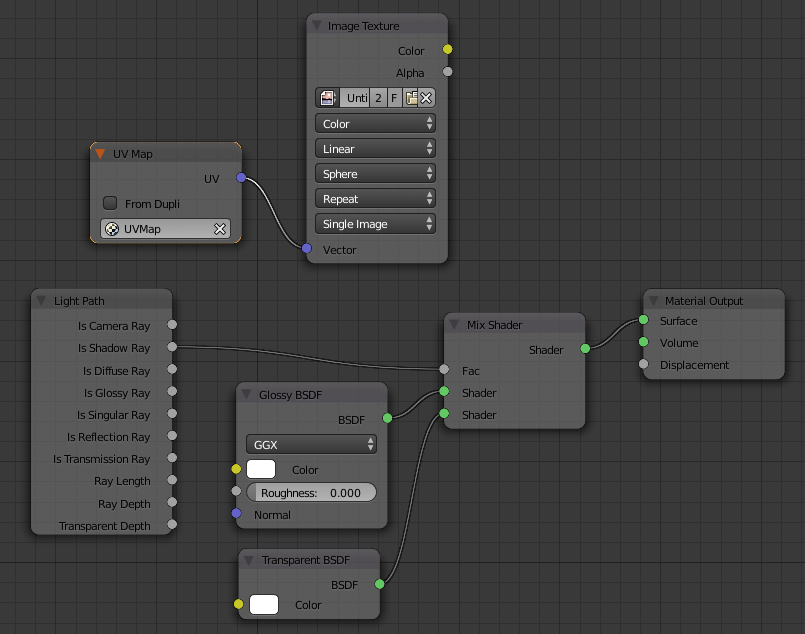
material

Note that the above material is a mix of 100% Glossy and 100% Transparent - reflective to all rays except those used to determine shadows. This way the surface reflects all incoming rays coming from the direction of the target object back to the target, but any rays from lamps placed outside the baked mesh are allowed to pass through. This allows lights to be placed around the target mesh outside the surface used to image it.

Select the surrounding surface (sphere) and click on the Image Texture node in the material to select it (this sets the 'destination' for the bake) and click 'Bake'.
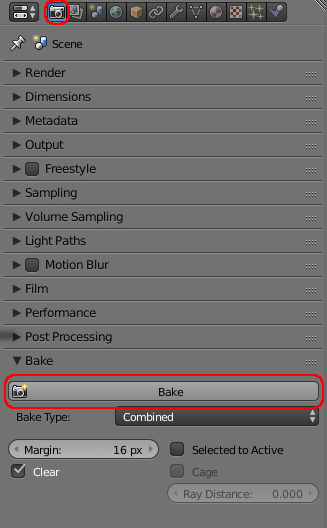
'Bake' option

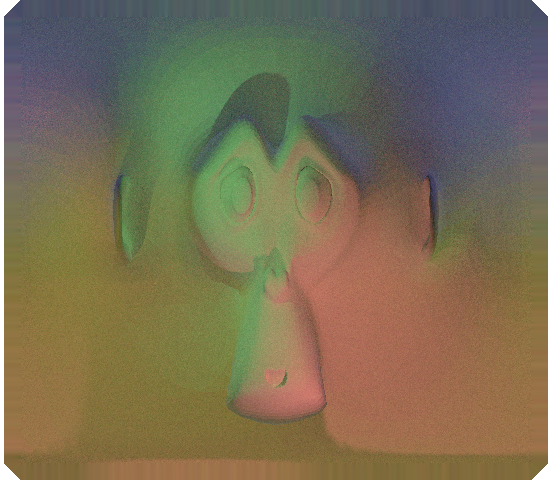
This produces results such as the following :

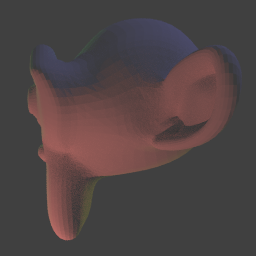
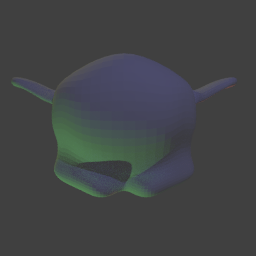
The oringial object : front side top
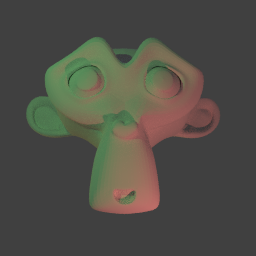
"Inverse Panorama" bake to sphere

Blend file attached

$\endgroup$
4
  • $\begingroup$ Minor comments, in the downloaded .blend, baking complained about Uninitialized image "Untitled" from object "Sphere". This is easy to fix by creating a new image of the desired size, and setting the image node to "bake" to it. Both the sphere and the image node needed to be selected (Blender 2.78 / MacOS). The bake can be resized by scaling the UV map over an image. $\endgroup$ Commented Sep 8, 2017 at 15:34
  • $\begingroup$ Glad to help and thanks for your comments. Looks like I'd accidentally unpacked the image and had also reduced the size of the UV map to speed up the bake while testing and forgot to put it back before uploading the file. I've amended the answer and re-submitted the .blend to fix it. $\endgroup$ Commented Sep 8, 2017 at 16:34
  • $\begingroup$ The 'unwrapped' image looks grainy, while the renderings look nice. Is this a matter of bumping up the number of samples? or are there other tricks? $\endgroup$ Commented Sep 8, 2017 at 20:19
  • $\begingroup$ Yes - you may need to increase the number of samples considerably. I'm unsure why exactly this is but perhaps it's just a symptom of the additional bounce since eveything is effectively viewed through a mirror. Also, ensure Reflective Caustics is switched on (is should be anyway, by default) since the whole bake is effectively One big caustic. If using Branched Path Tracing then just increasing the Glossy samples can help a lot. $\endgroup$ Commented Sep 8, 2017 at 21:48

You must log in to answer this question.

Not the answer you're looking for? Browse other questions tagged .