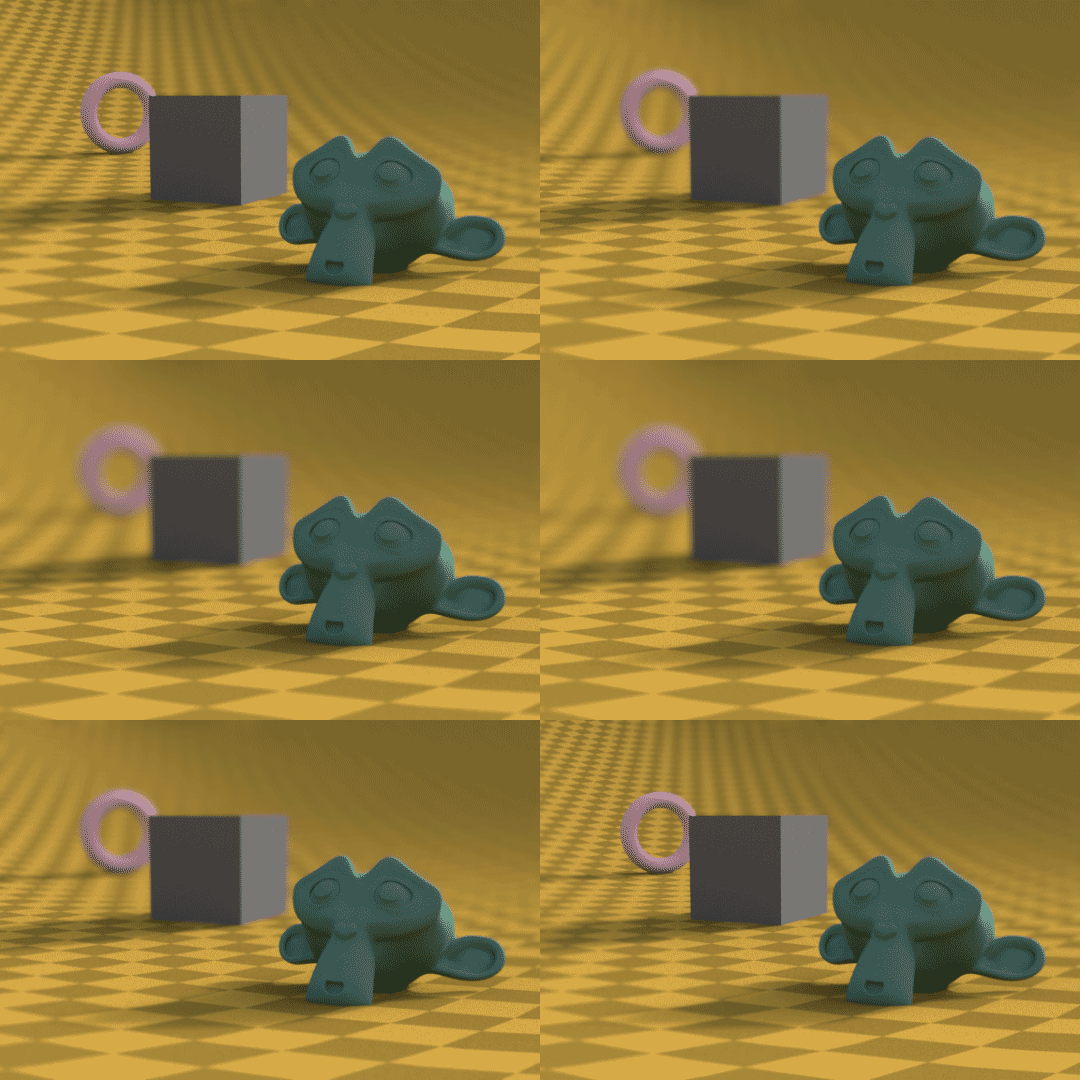
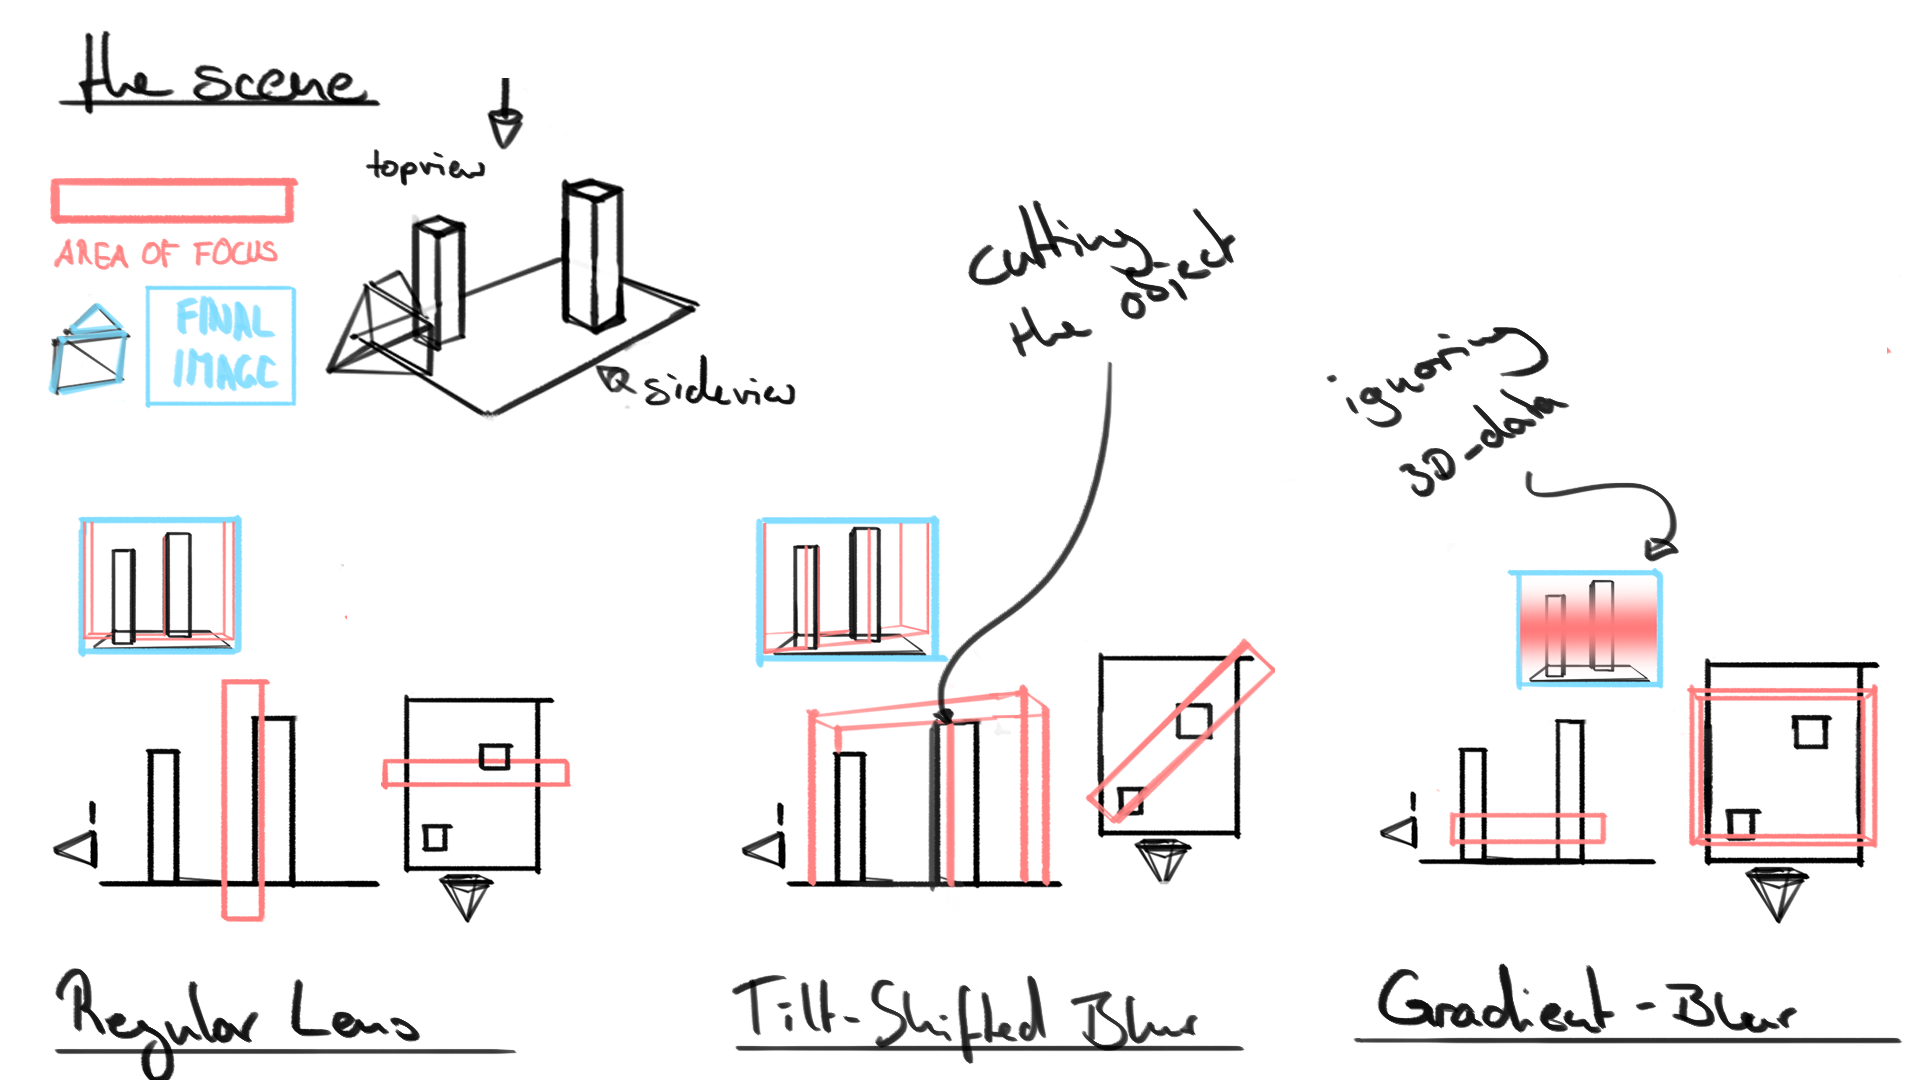
 I basically want to rotate the DoF-Plane just as a real tilt-shift lens does, so that the depth influences the blur and not a gradient. Is there a way to recreate this effect in blender?
-
$\begingroup$ Have you tried playing with the Shift settings for the camera lens? $\endgroup$– user1853Commented Aug 26, 2017 at 20:19
-
$\begingroup$ @cegaton you can only shift there, you can't tilt $\endgroup$– yannCommented Aug 26, 2017 at 20:59
-
$\begingroup$ Indeed, you cannot rotate the sensor/film plane $\endgroup$– user1853Commented Aug 26, 2017 at 21:02
-
2$\begingroup$ Please could you elaborate on this question - what specific effect are you trying to achieve (I don't know much about the operation of tilt-shift lenses) - preferably with a sample image or diagrams. I suspect this will be possible with creative use of Refraction shaders. $\endgroup$– Rich SedmanCommented Aug 26, 2017 at 21:45
-
$\begingroup$ @RichSedman photographyconcentrate.com/tilt-shift-introduction $\endgroup$– user1853Commented Aug 27, 2017 at 3:54
2 Answers
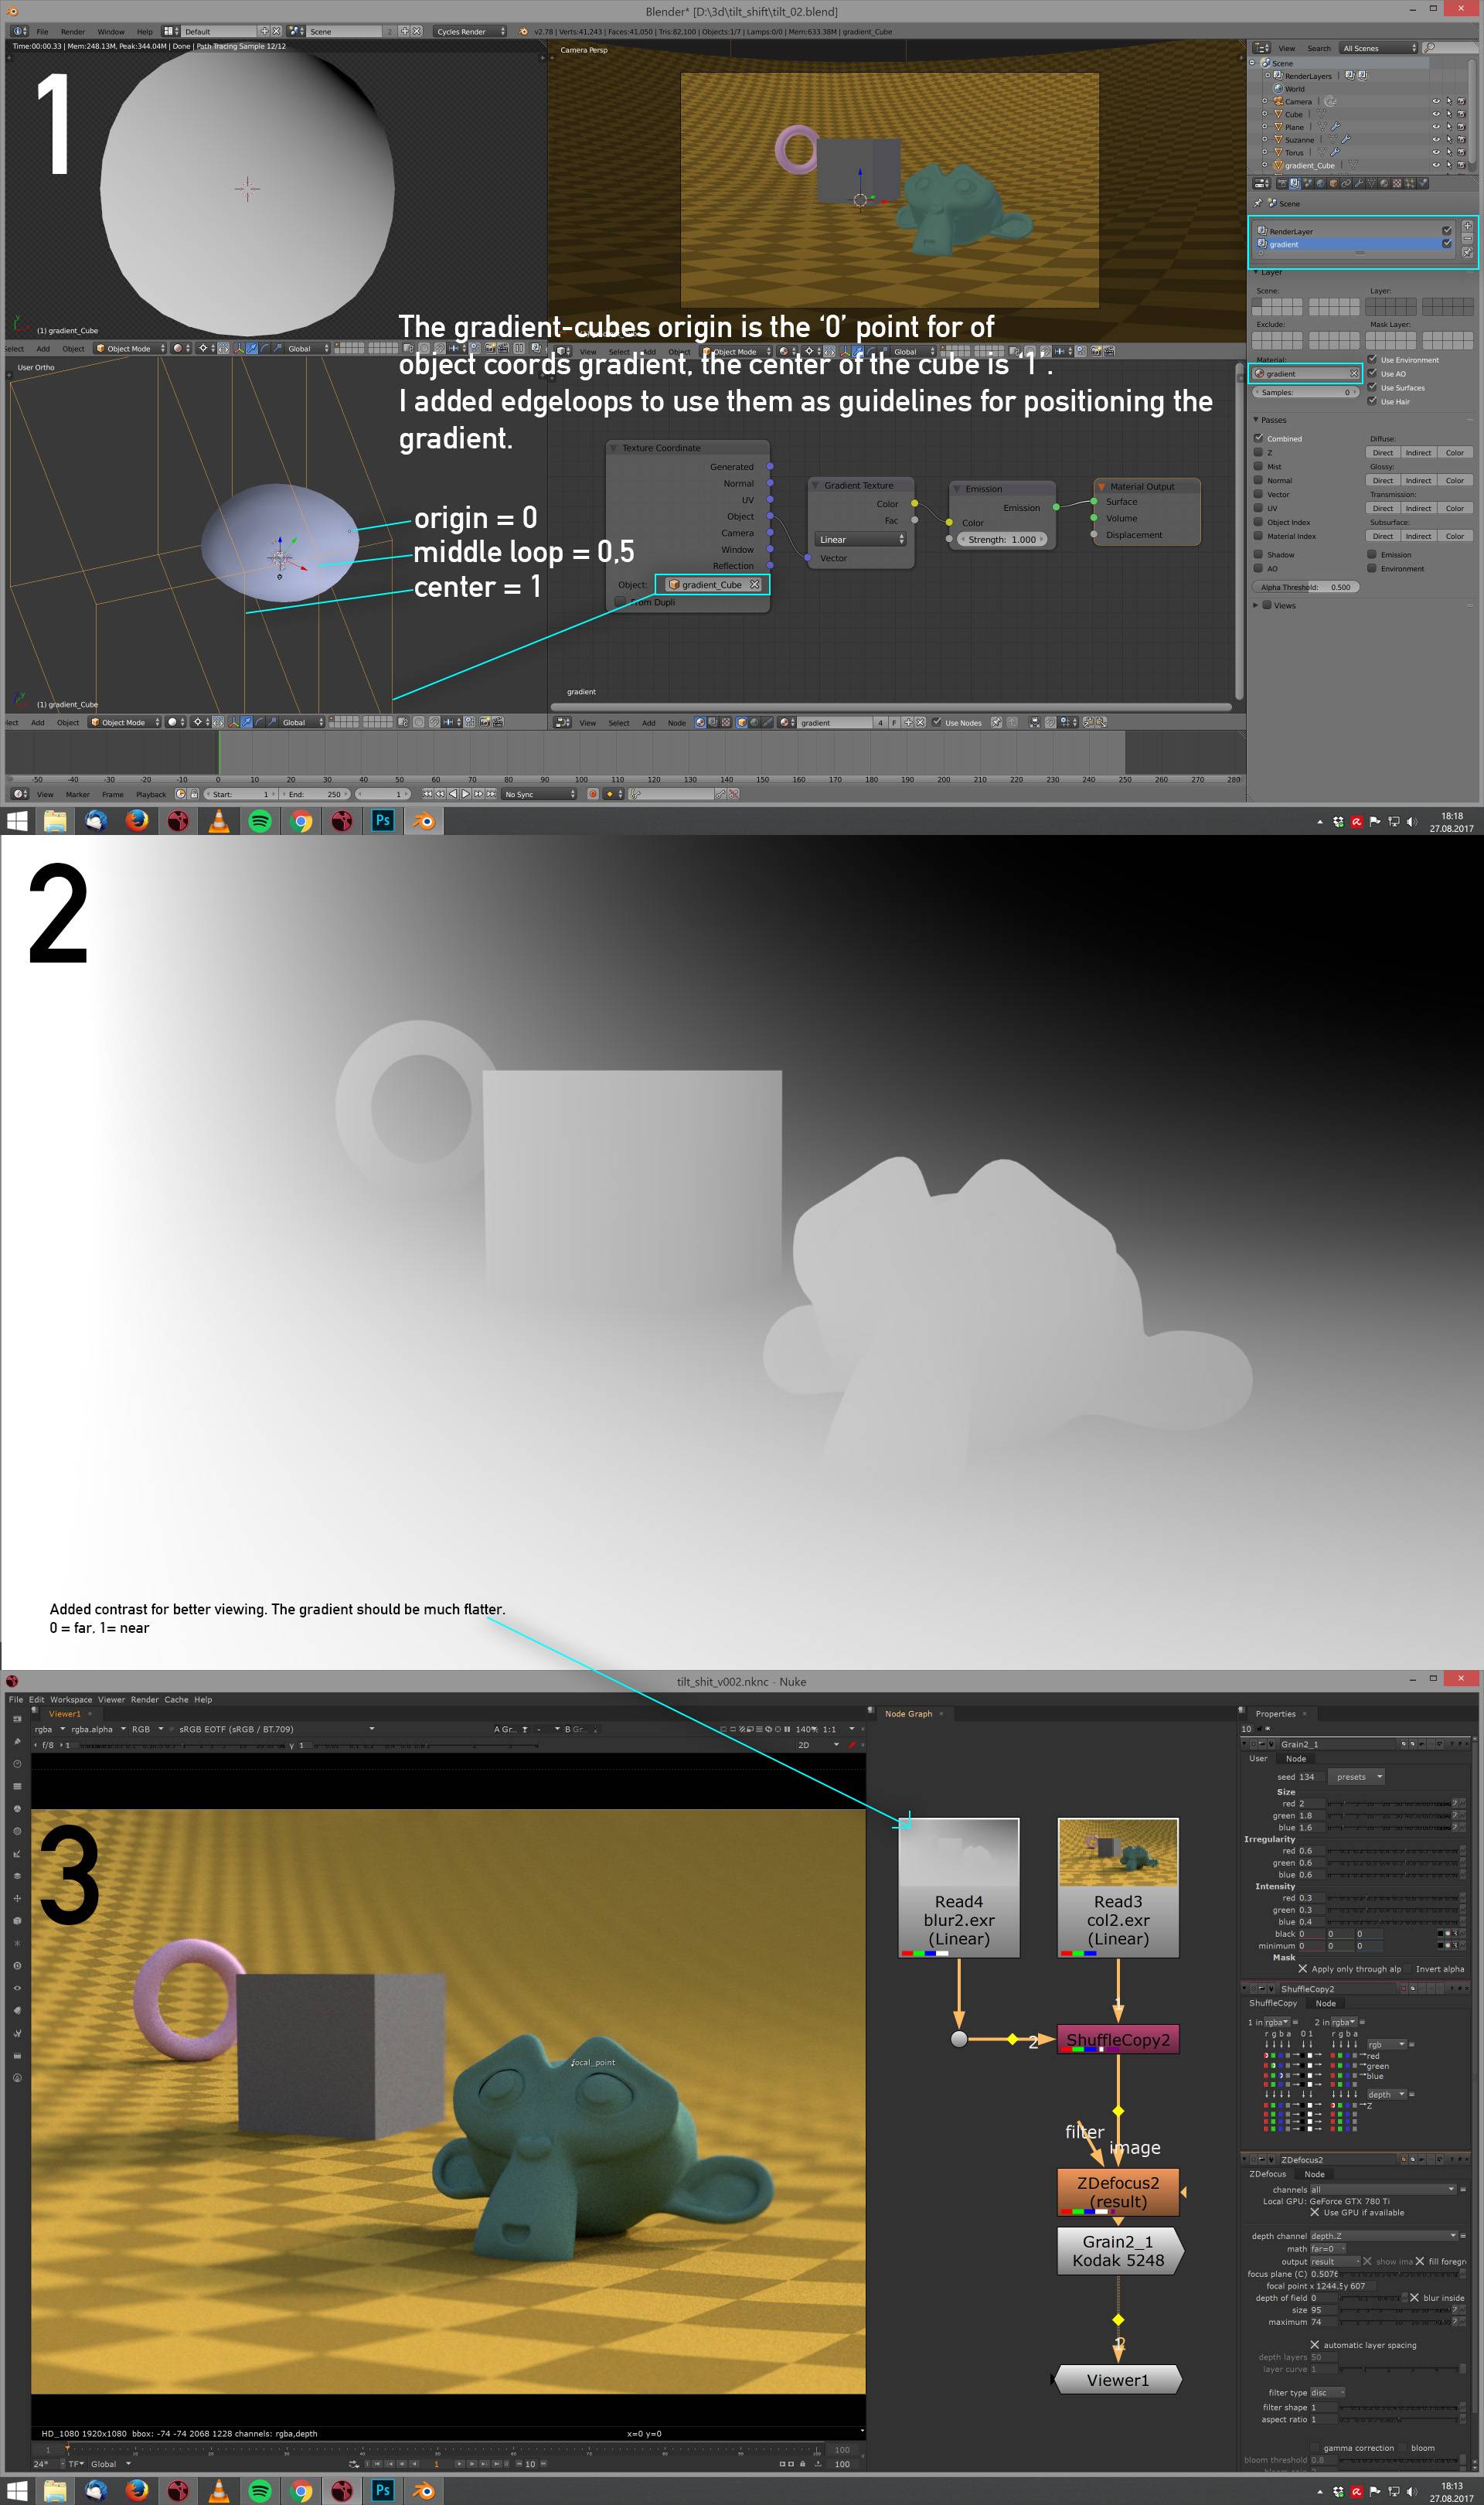
I want to provide an alternative to cegatons answer. This is an attempt to reproduce the behavior of a real Scheimpflug. The focus plane is supposed to "cut" objects. When you create the focus plane in post however, it doesn't intersect with the objects. To mimic this behavior, follow these steps:
- Create a Cube in your scene, name it "gradient Cube" or similar, it will control the falloff of the gradient. In the object tab, disable all cycles visibility options (camera, diffuse, ..., shadow) to make it completly invisible for the renderer. Create a second RenderLayer ("gradient"), add a material to it, with the nodesetup shown in image 1. In the TextureCoordinate node choose your gradient cube as object input. Position the cube so that the middle grey (~0,5) of the gradient follows the desired Scheimpflug. The farthest visible point from camera should be black (0), the neares white (1).
- Render the image. Save each RenderLayer to OpenEXR, 32 Bit float. I added the contrast only for illustrating that the gradient now "cuts" the objects. The actual gradient is very flat.
- I would recommend not to use the blender Defocus. It produces horrible artifacts. I used Nuke non-commercial, which is free to download/use with some restrictions in functionality. Read both renderlayers. Shuffle them together, take RGB from the beauty pass and shuffle the R channel of the gradient layer to Z(depth). Insert ZDefocus, choose the focal point. To round it off, introduce some grain. (the out-of-focus areas looked too smooth)
-
$\begingroup$ Yesss! Thank you so much! This is exactly what I was looking for. Sorry for checking the wrong "right-answer" first $\endgroup$ Commented Aug 27, 2017 at 18:44
Tilt Shift lenses are used for two main purposes:
To alter the plane of focus and thus have greater control on the depth of field (Scheimpflug principle)
For perspective control.
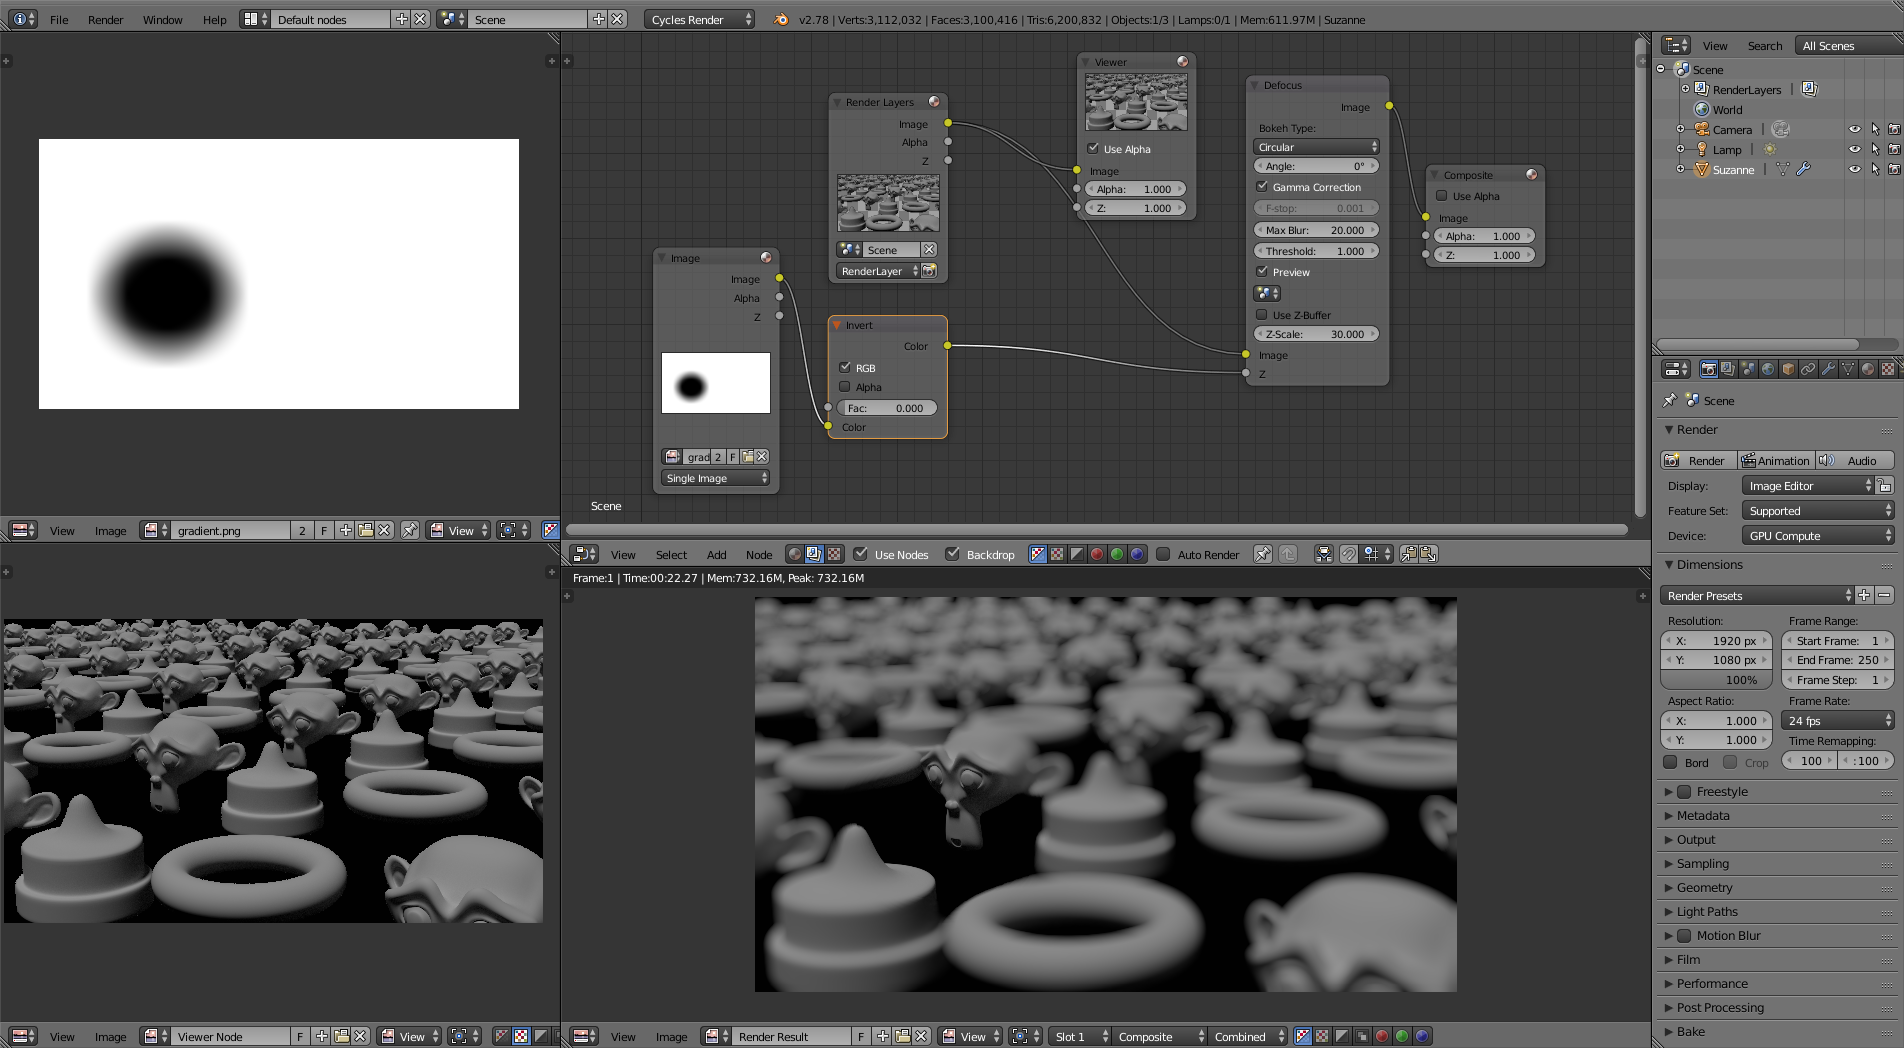
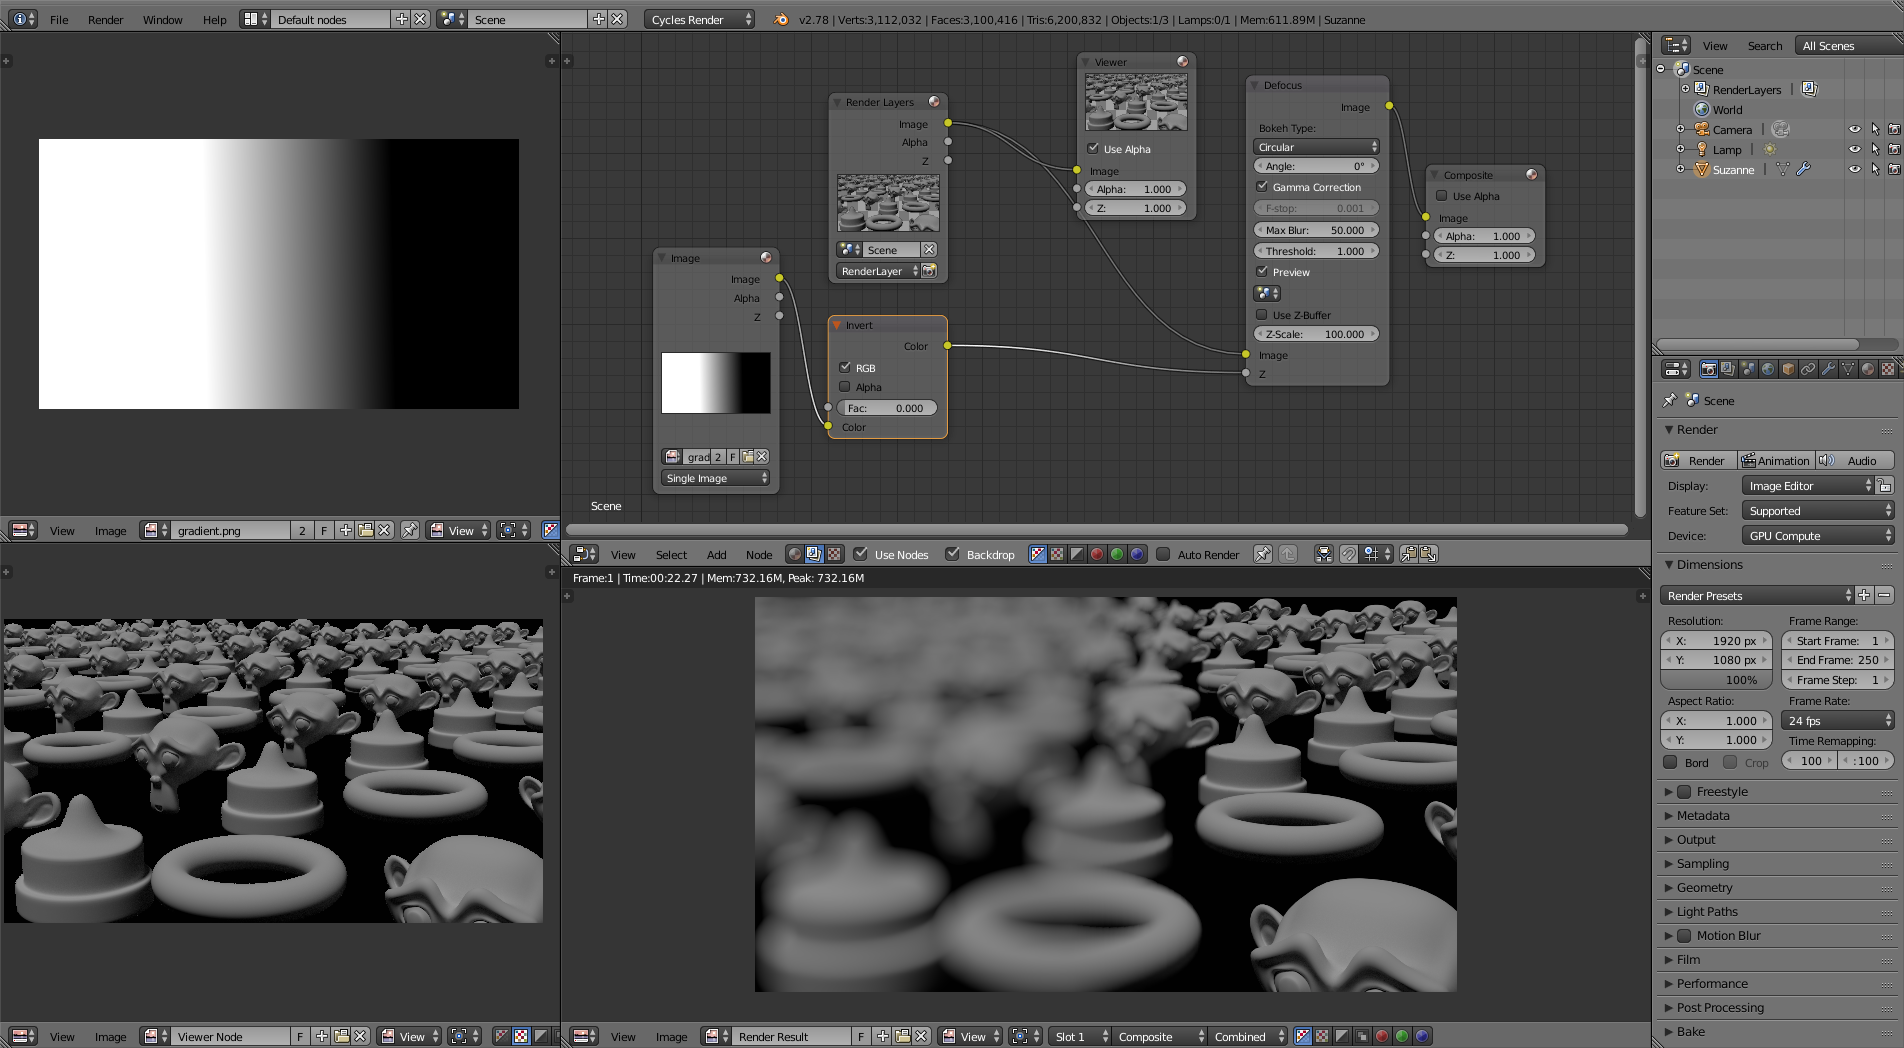
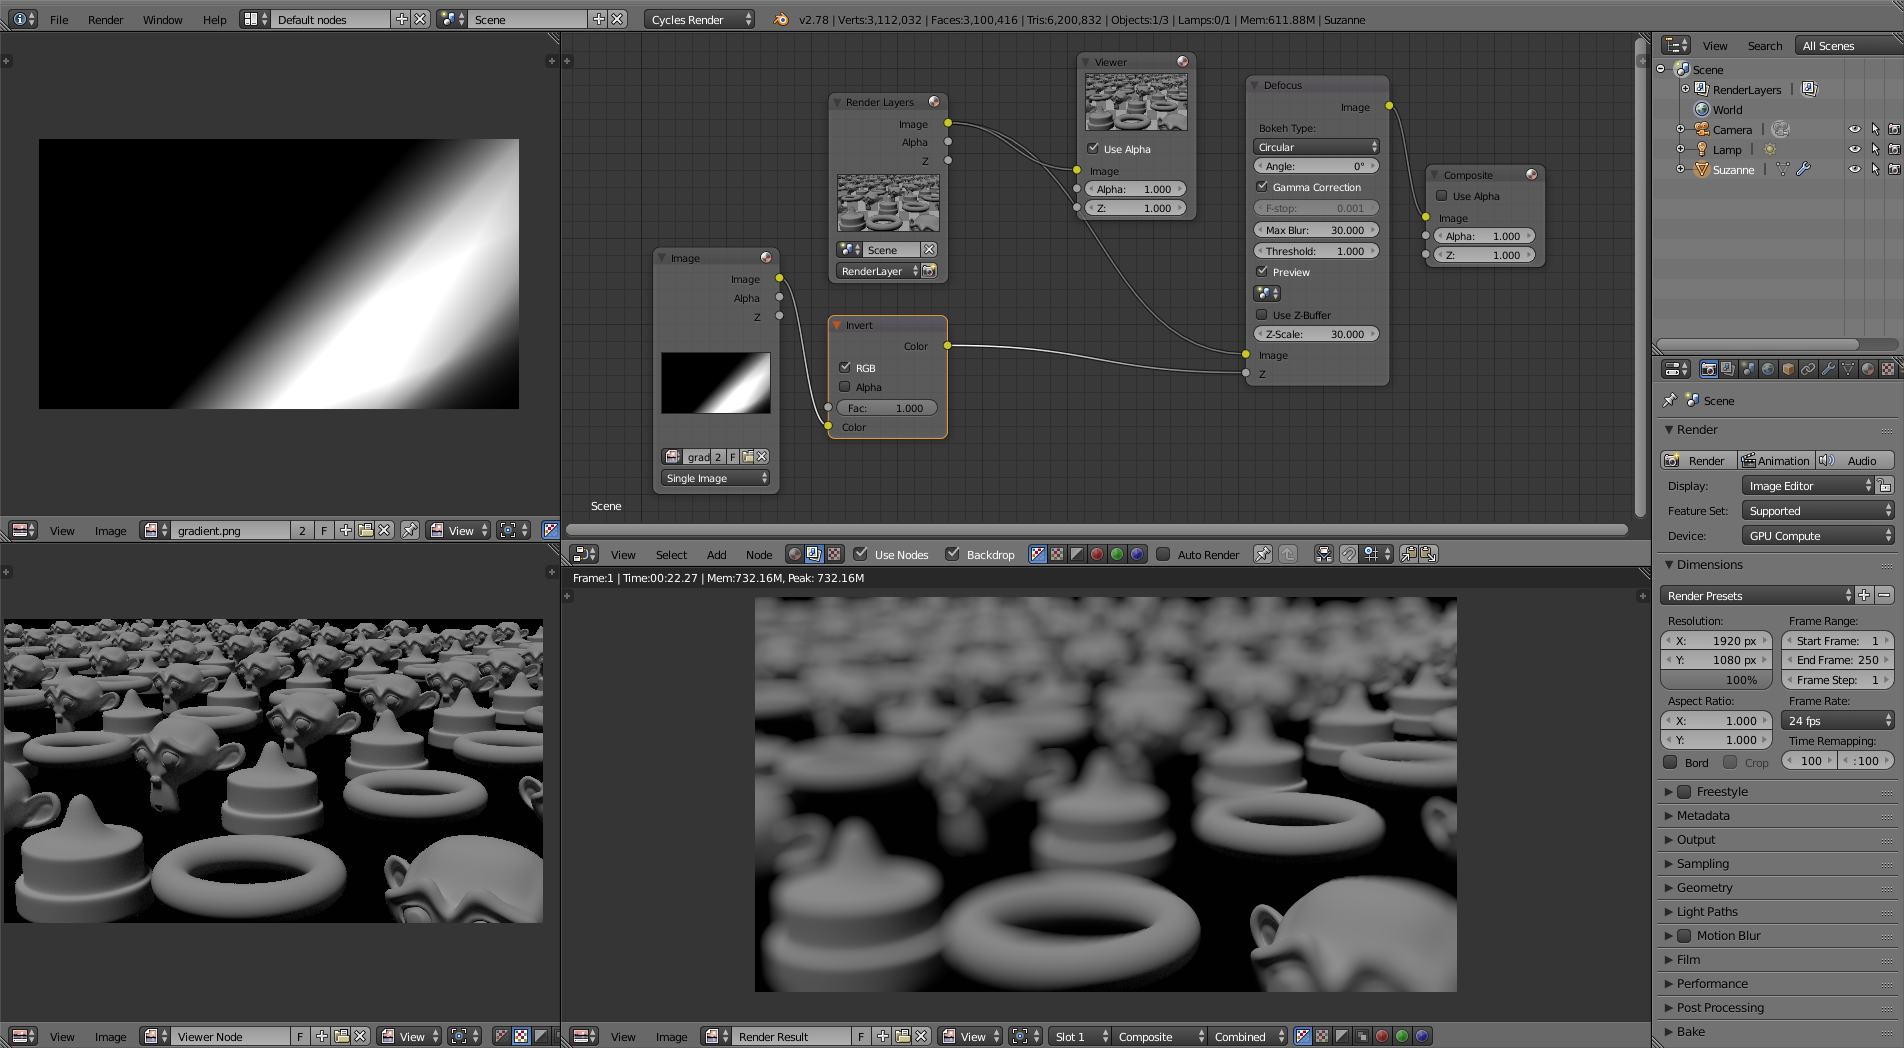
In regards to the Selective Depth of Field effects, you could fake them in the compositor using a black and white image connected to the Z-Pass socket of a Defocus Node. That way you can affect whatever portion of the image you want.
(click on the images to enlarge)
For Perspective control
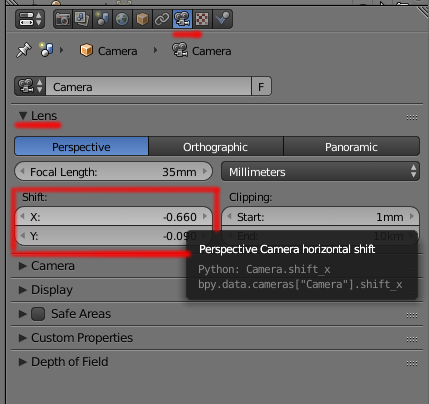
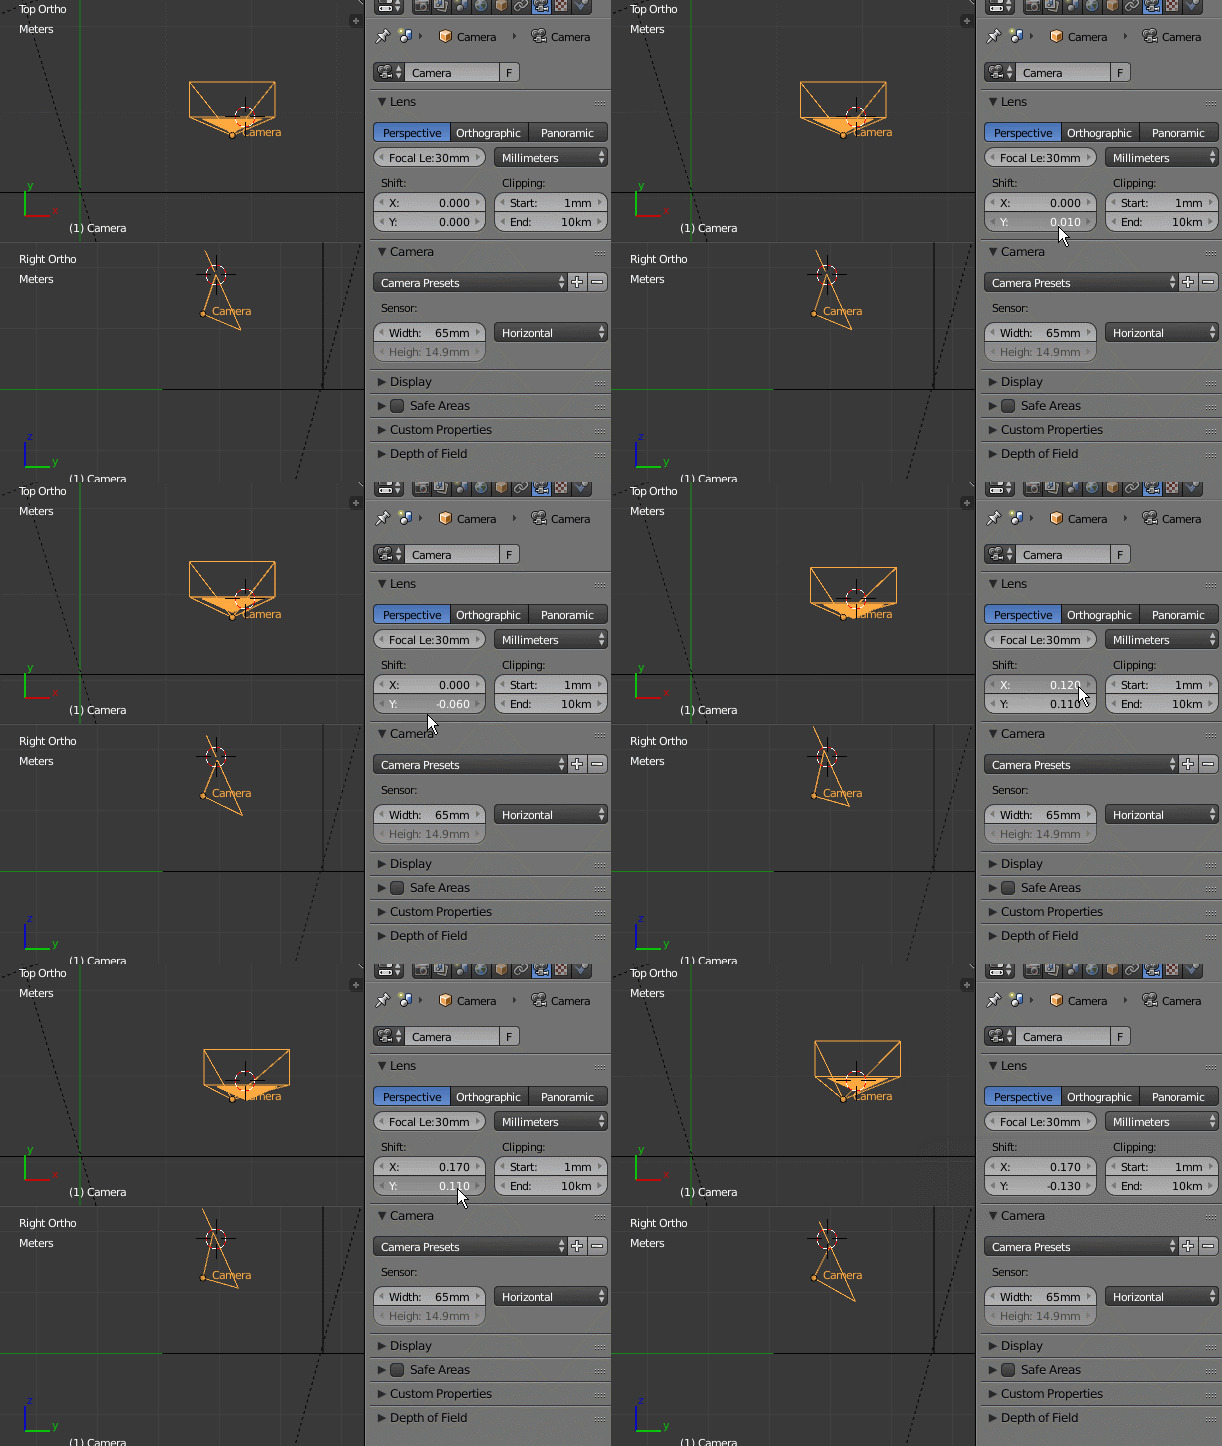
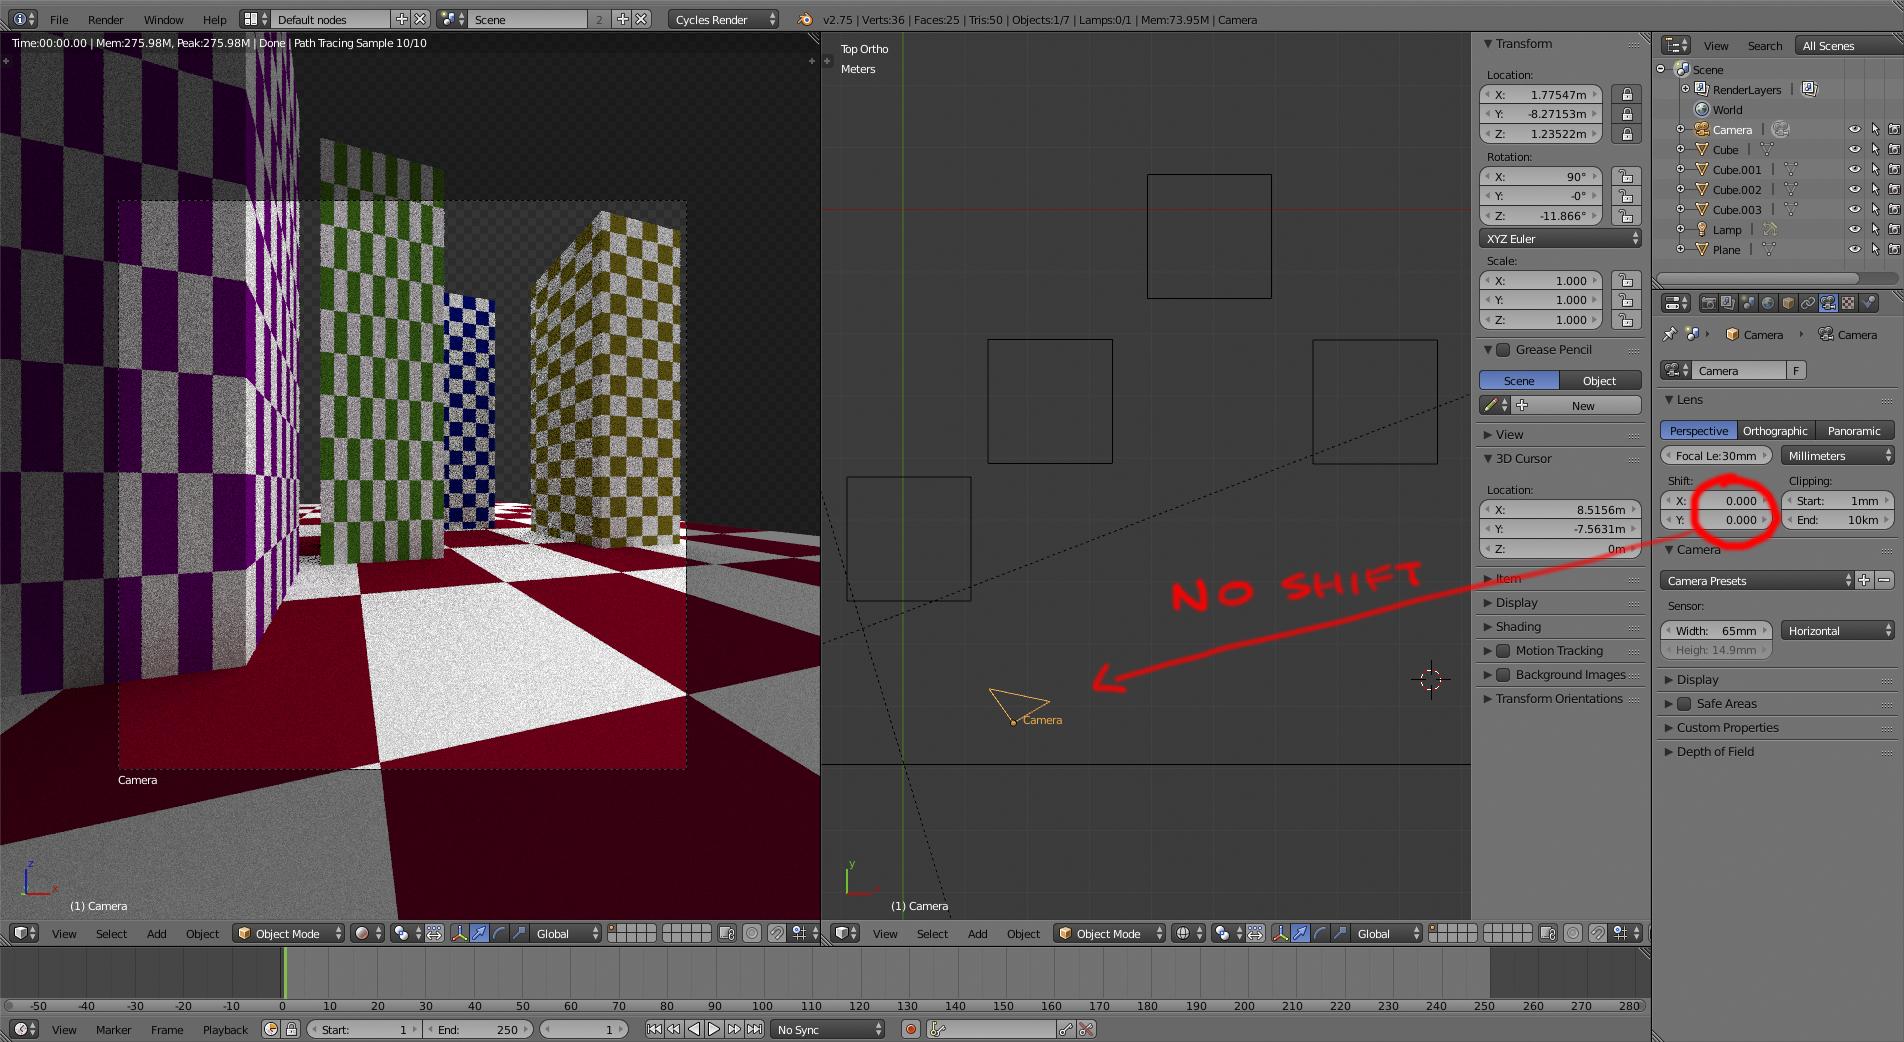
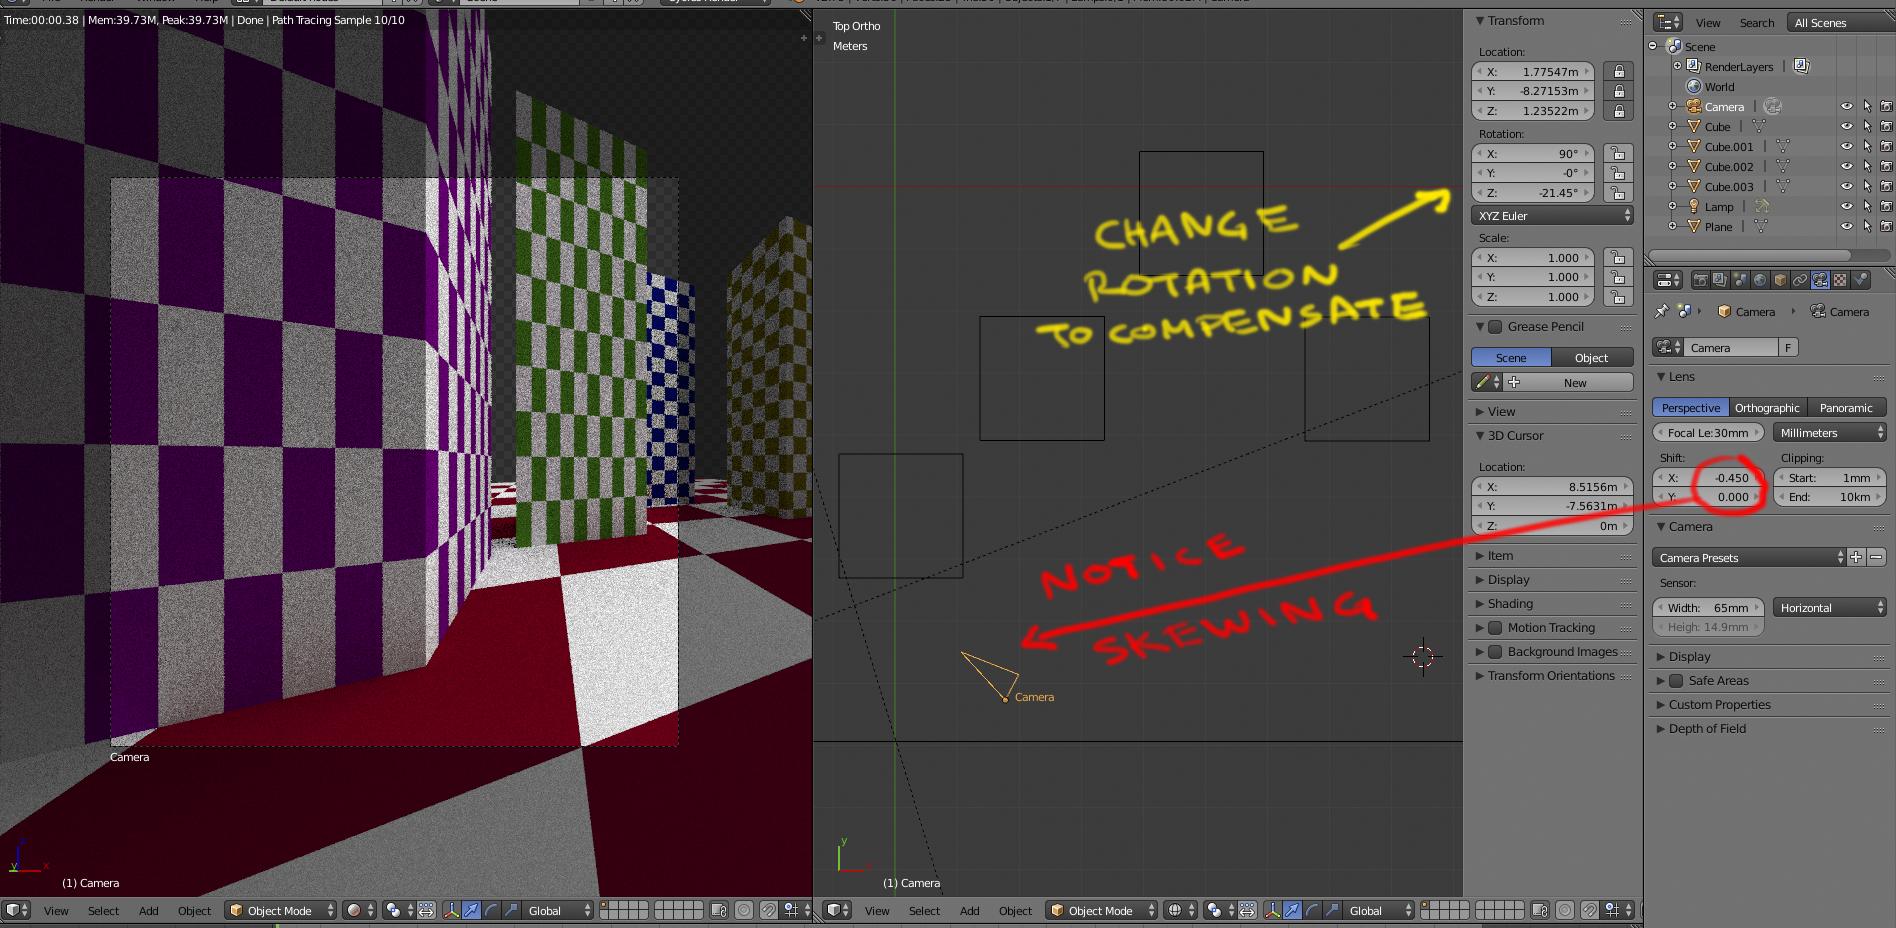
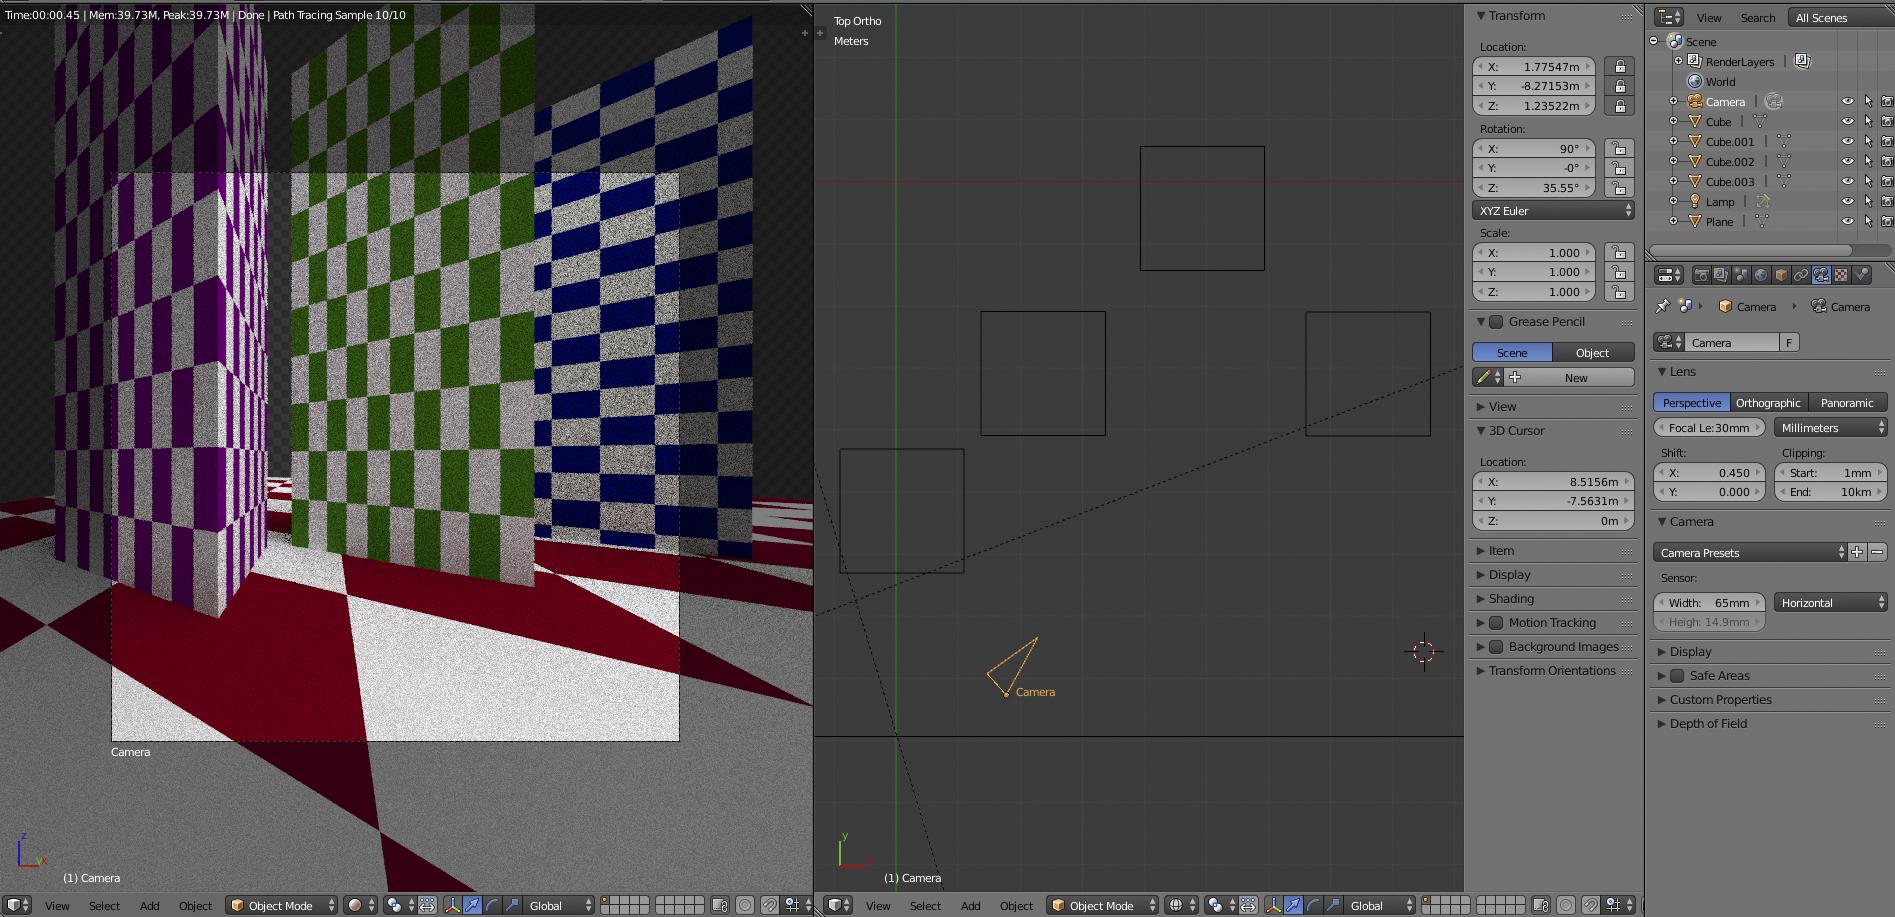
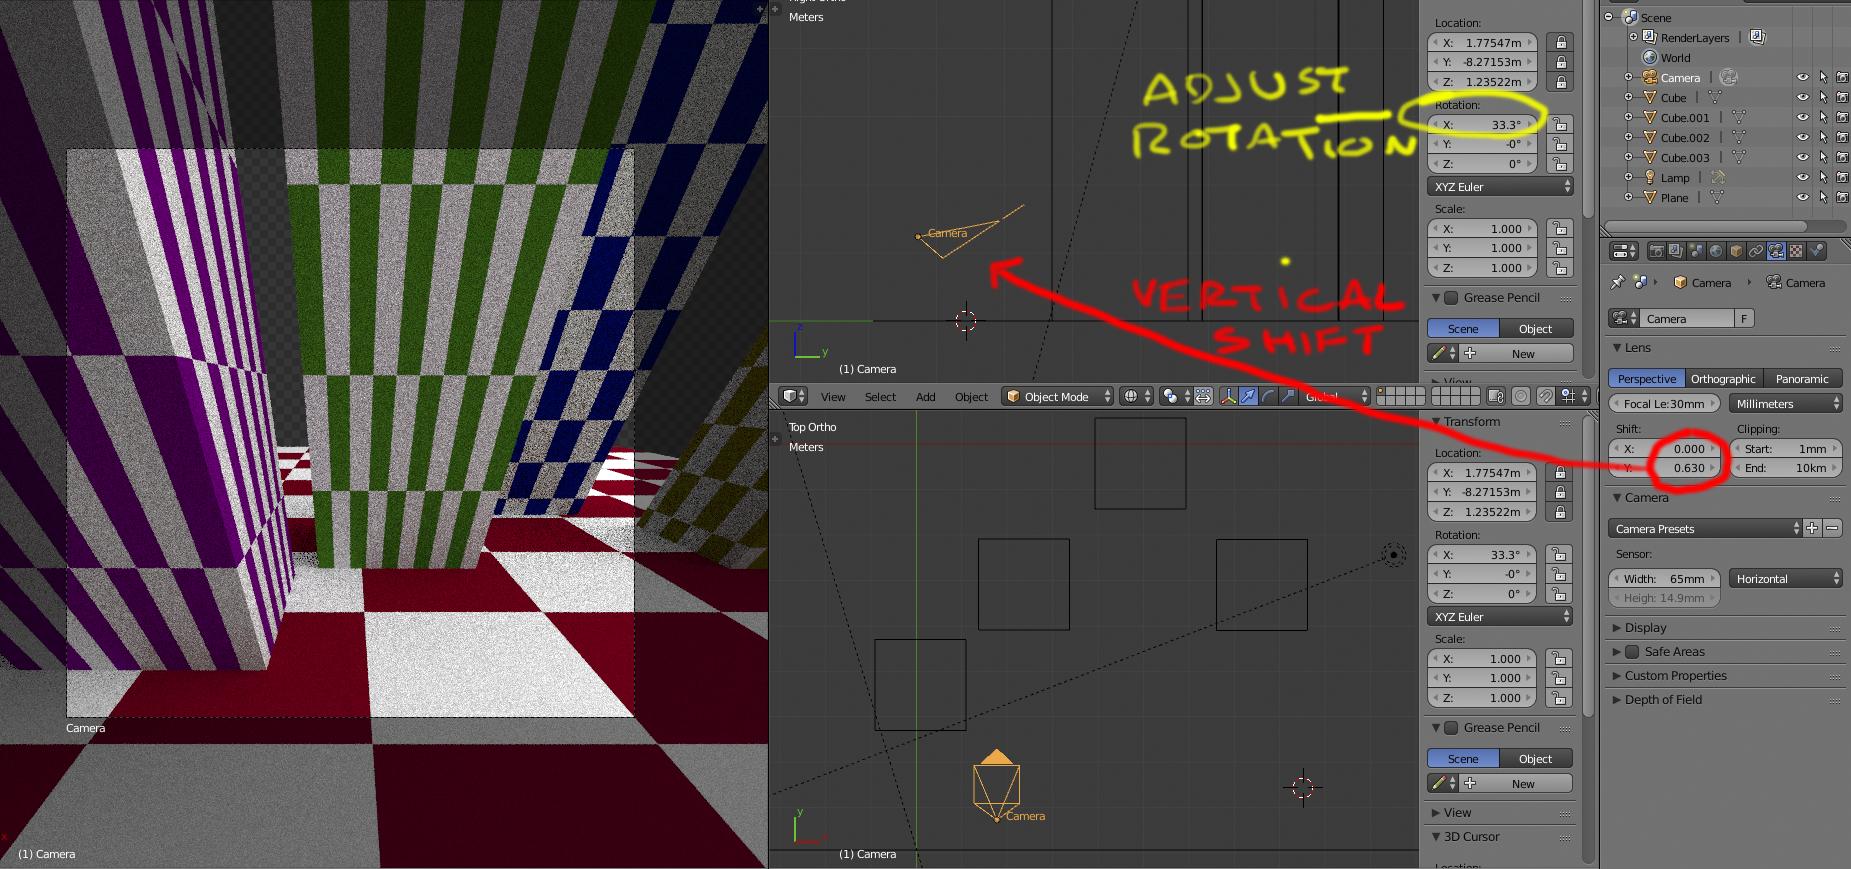
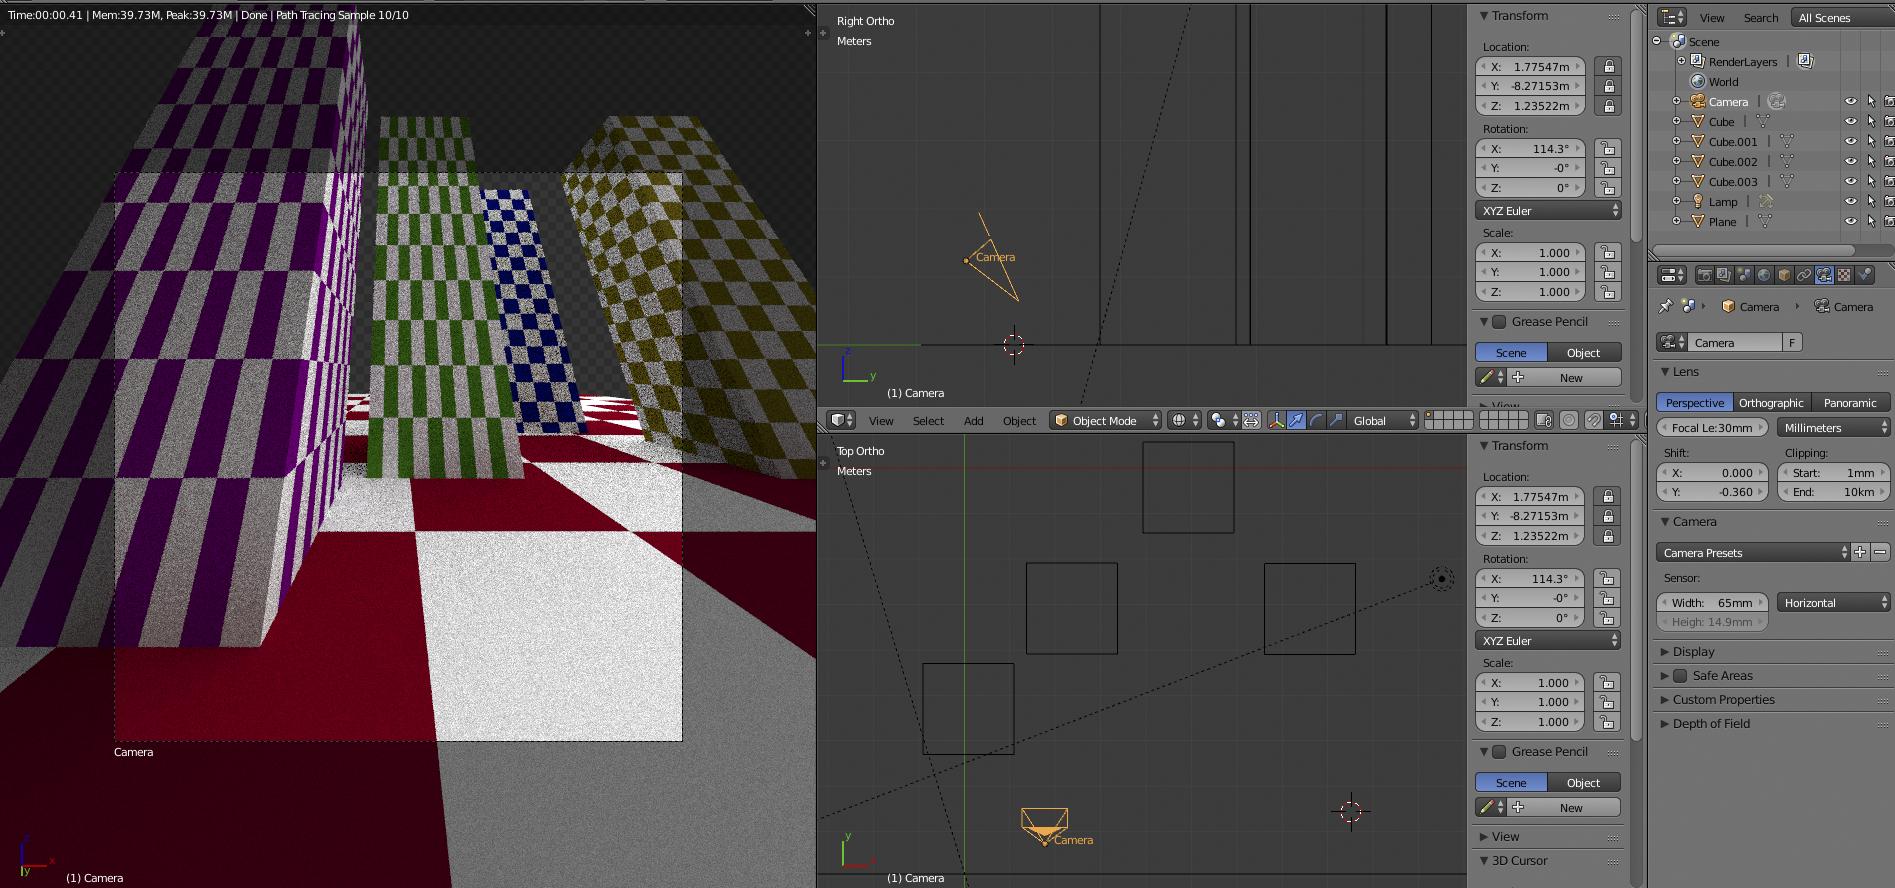
You can alter the relation between the lens and the focal plane using the SHIFT values for the lens. That will give you the same control you'd get on a studio camera. Note that shifting is done parallel to the camera plane, there is no way as far as I know, to rotate the camera plane from the lens plane.
This example show the same scene, with the same lens, WITH THE CAMERA ON THE SAME PLACE, and how shifting affects the perspective (I was trying to keep the object on the left in the frame to magnify the effect):
-
$\begingroup$ Alright after trying it out: this is not what I was asking for. Here you only apply a gradient-masked blur to the image which is what I don't want. $\endgroup$ Commented Aug 27, 2017 at 18:27

