2
$\begingroup$

enter image description here

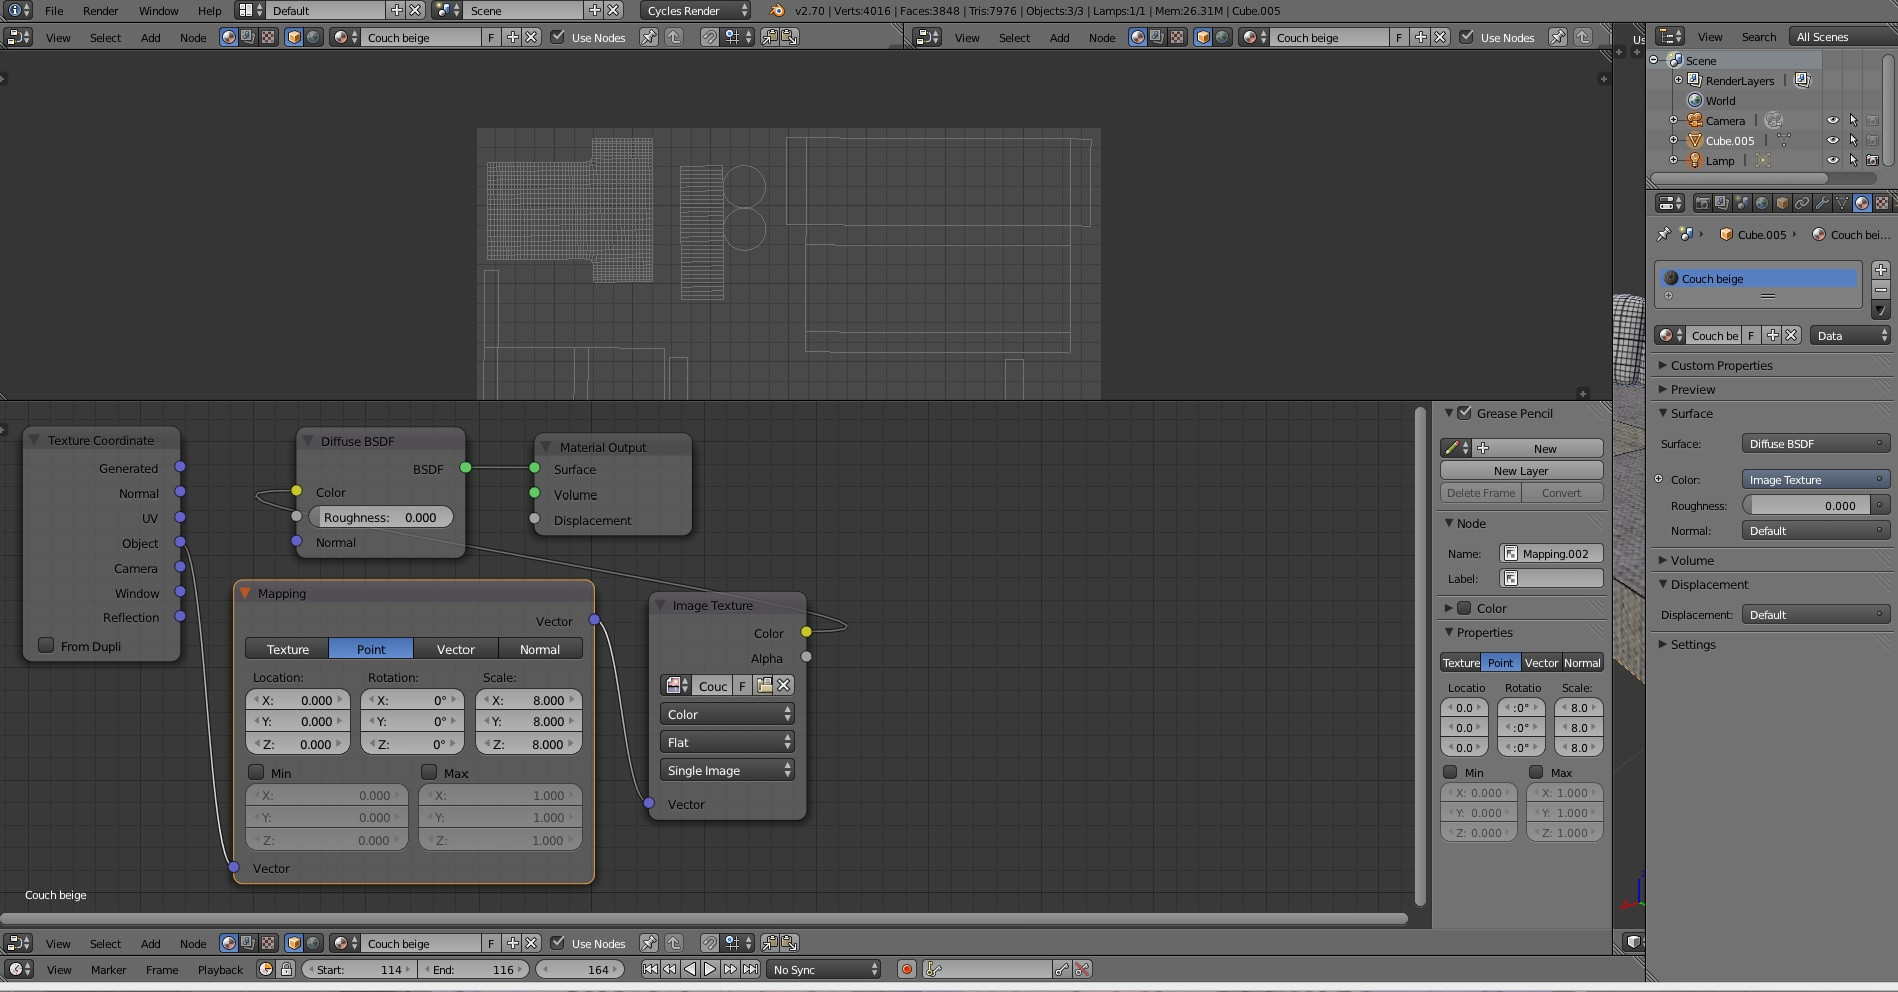
SO basically my texture is showing off way to big and when i tried to fit all my unwrapped parts in the 2D editor, i had to scale them very small which caused this problem.

I have red somewhere else that i had to do: Add>Vector>Mapping and change the scale. I tried to connect the cables as the pictures showed (I have plugged it into UV now, not object as the pic shows btw) , but im sure i am missing some plugs here.

What else needs to be done?

Appreciated if it could be explained in clear steps, im only a beginner.

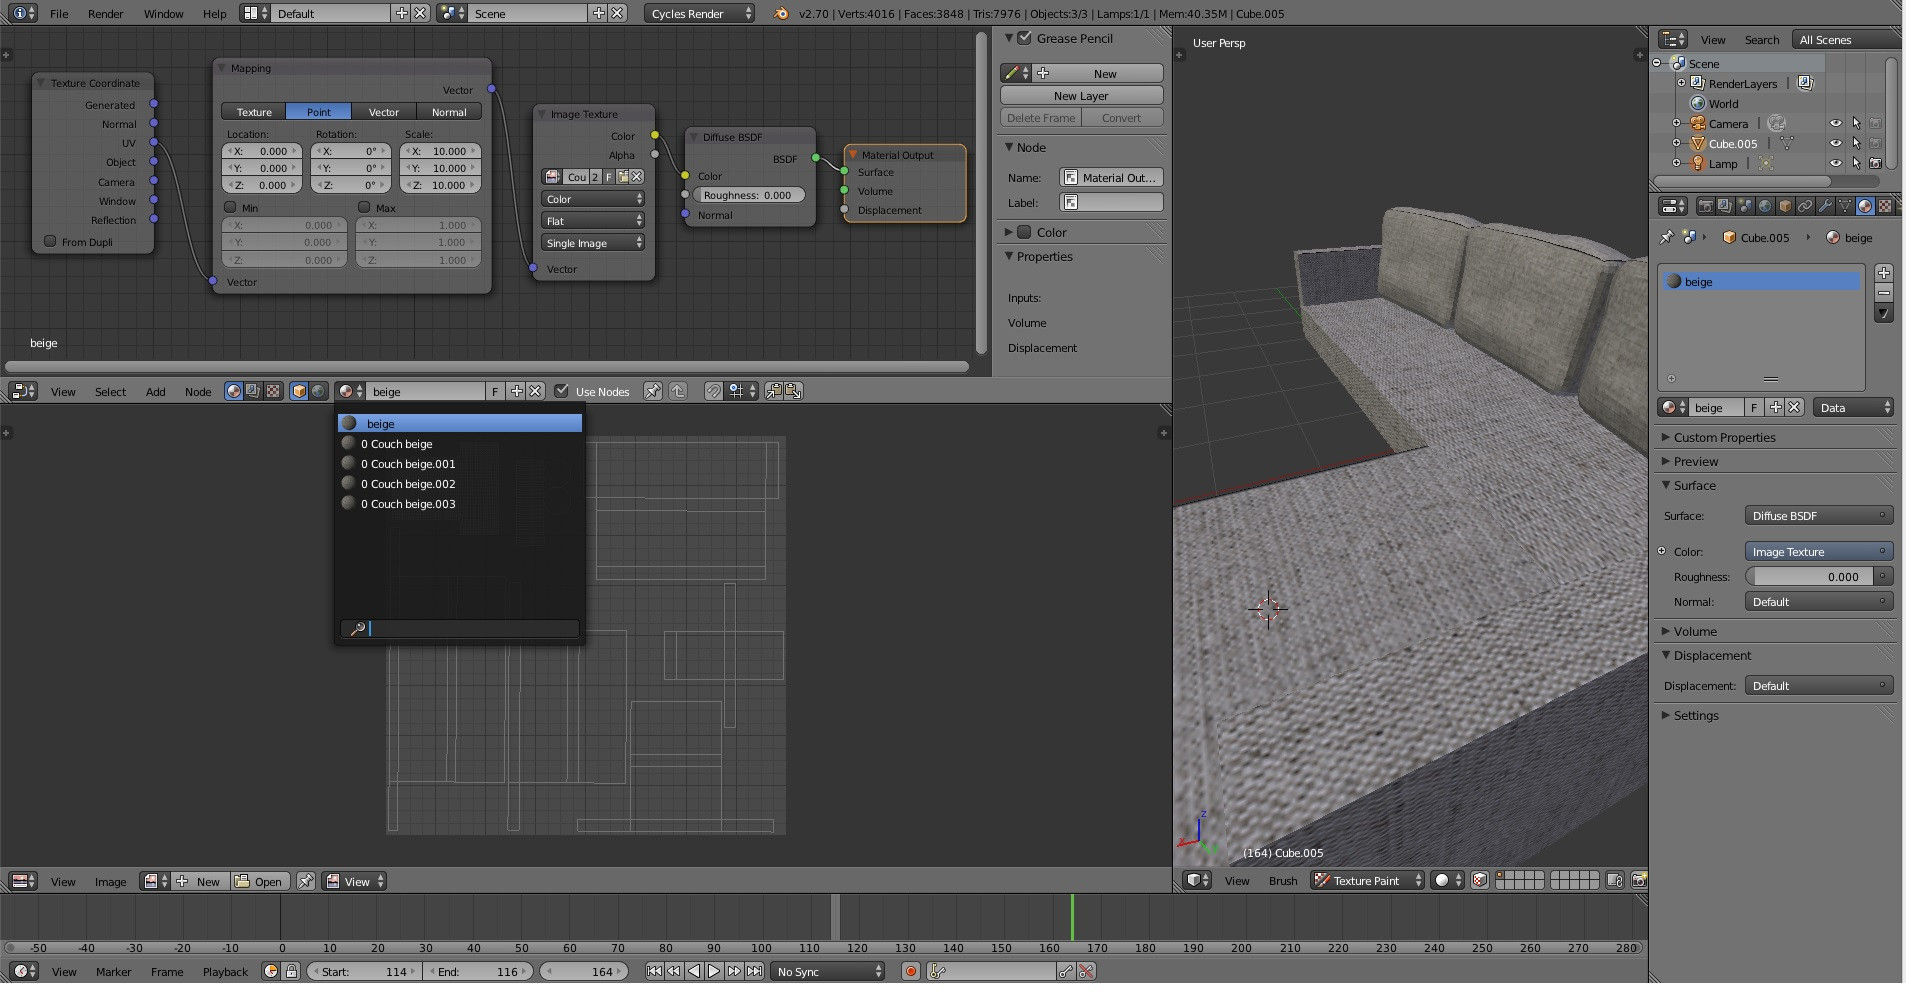
EDIT: here to show the multiple UV maps.. at least i think they are :)

enter image description here

$\endgroup$
15
  • $\begingroup$ well if you have as you mentioned already plugged the UV output socket into the normal input of the mapping node, it should work already. Just a matter of finding the right scale values. One showstopper might be the objects themselves, if the scale was not applied before unwrapping you might get distorsion. $\endgroup$
    – aliasguru
    Commented Oct 9, 2016 at 14:44
  • $\begingroup$ I changed the scale in 8, 10, 8000, 0.5, 00.5 but nothing changes. You mean scaling the objects in object mode with ctrl+A? I did that otherwise the UV editor wouldnt show them as the correct unwrapped model. I really dont get what is stopping me here. The pillows looks fine though since i didnt scale them so much as the other parts to fit in. $\endgroup$
    – Fur
    Commented Oct 9, 2016 at 15:29
  • $\begingroup$ Do you have more than one UV Map on this object? Or more than one Material? That would make sense: You'd be changing and tuning a material which isn't assigned to any face. $\endgroup$
    – aliasguru
    Commented Oct 9, 2016 at 15:34
  • $\begingroup$ How do i check both? I think i do have multiple UV maps, but dont know how to delete them. About materials i have no idea. ( I have edited my first post with a picture of the multiple Uv maps.. i think.. i only need the first one named 'beige'). $\endgroup$
    – Fur
    Commented Oct 9, 2016 at 15:50
  • $\begingroup$ well that's materials, not UV maps. I've tried an answer below, maybe that points you the right way $\endgroup$
    – aliasguru
    Commented Oct 9, 2016 at 16:13

2 Answers 2

3
$\begingroup$

It could have multiple sources, two of them I could think of at the moment is that you have:

  • more than one material in the Material Slots, and you're editing one that is not assigned
  • more than one UV Map on the object, and the one which is currently renderable is empty

To check the material assignment, you can use the Material Tab like this:
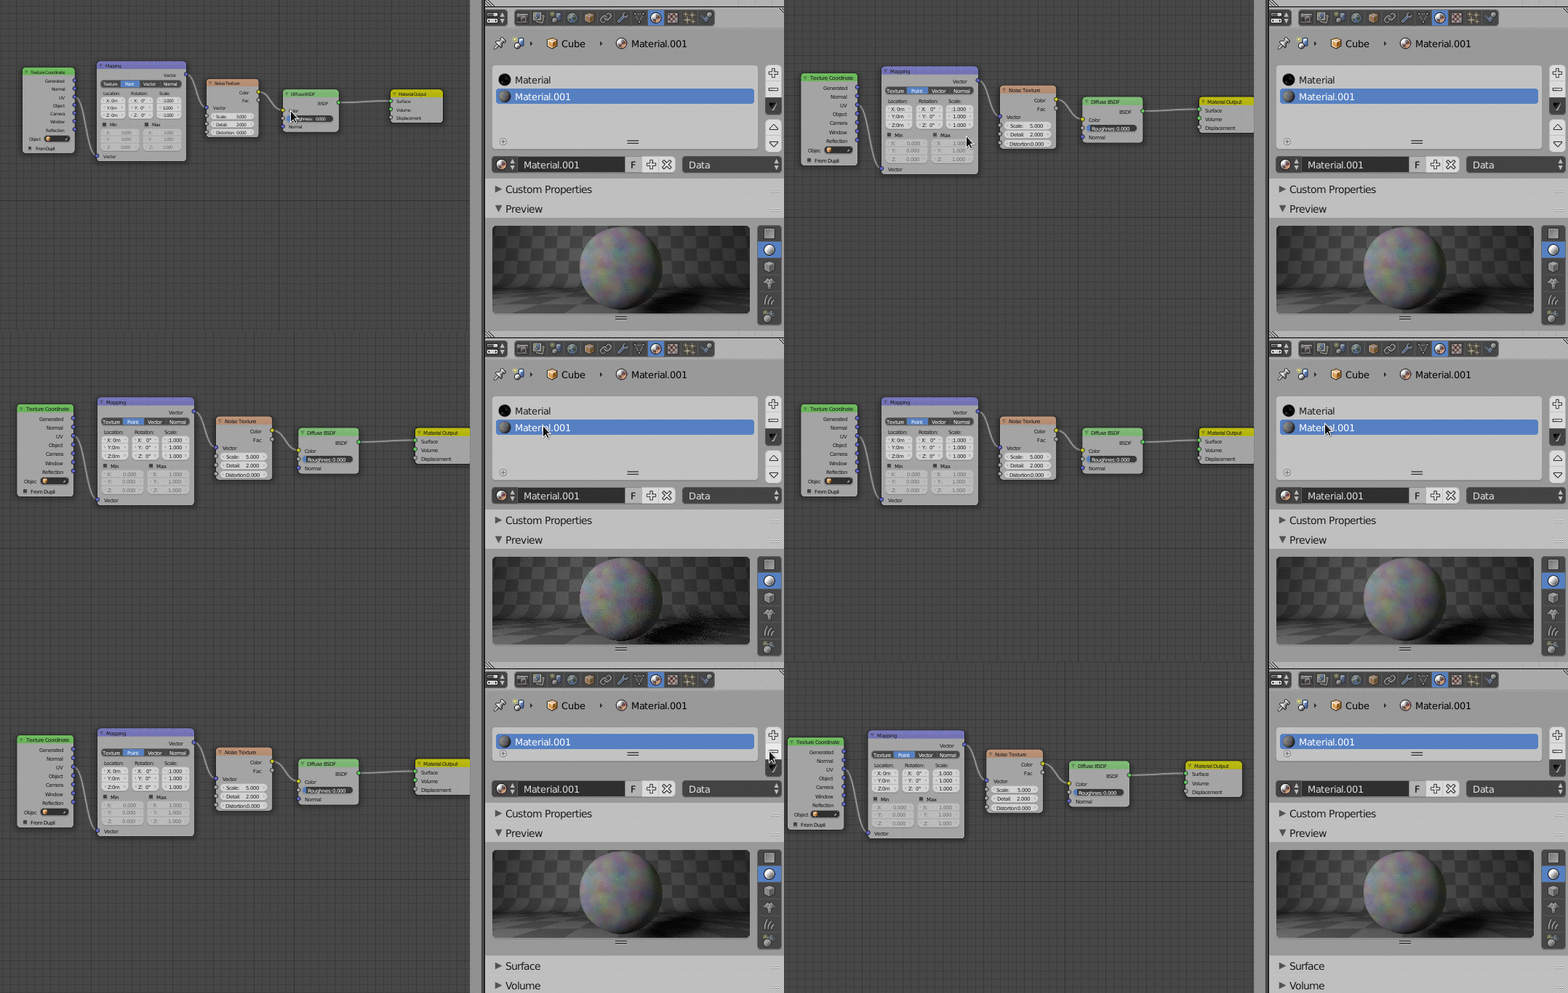
multi Material

To check the UV Maps, you can use the Mesh Data Tab, UV Maps section:
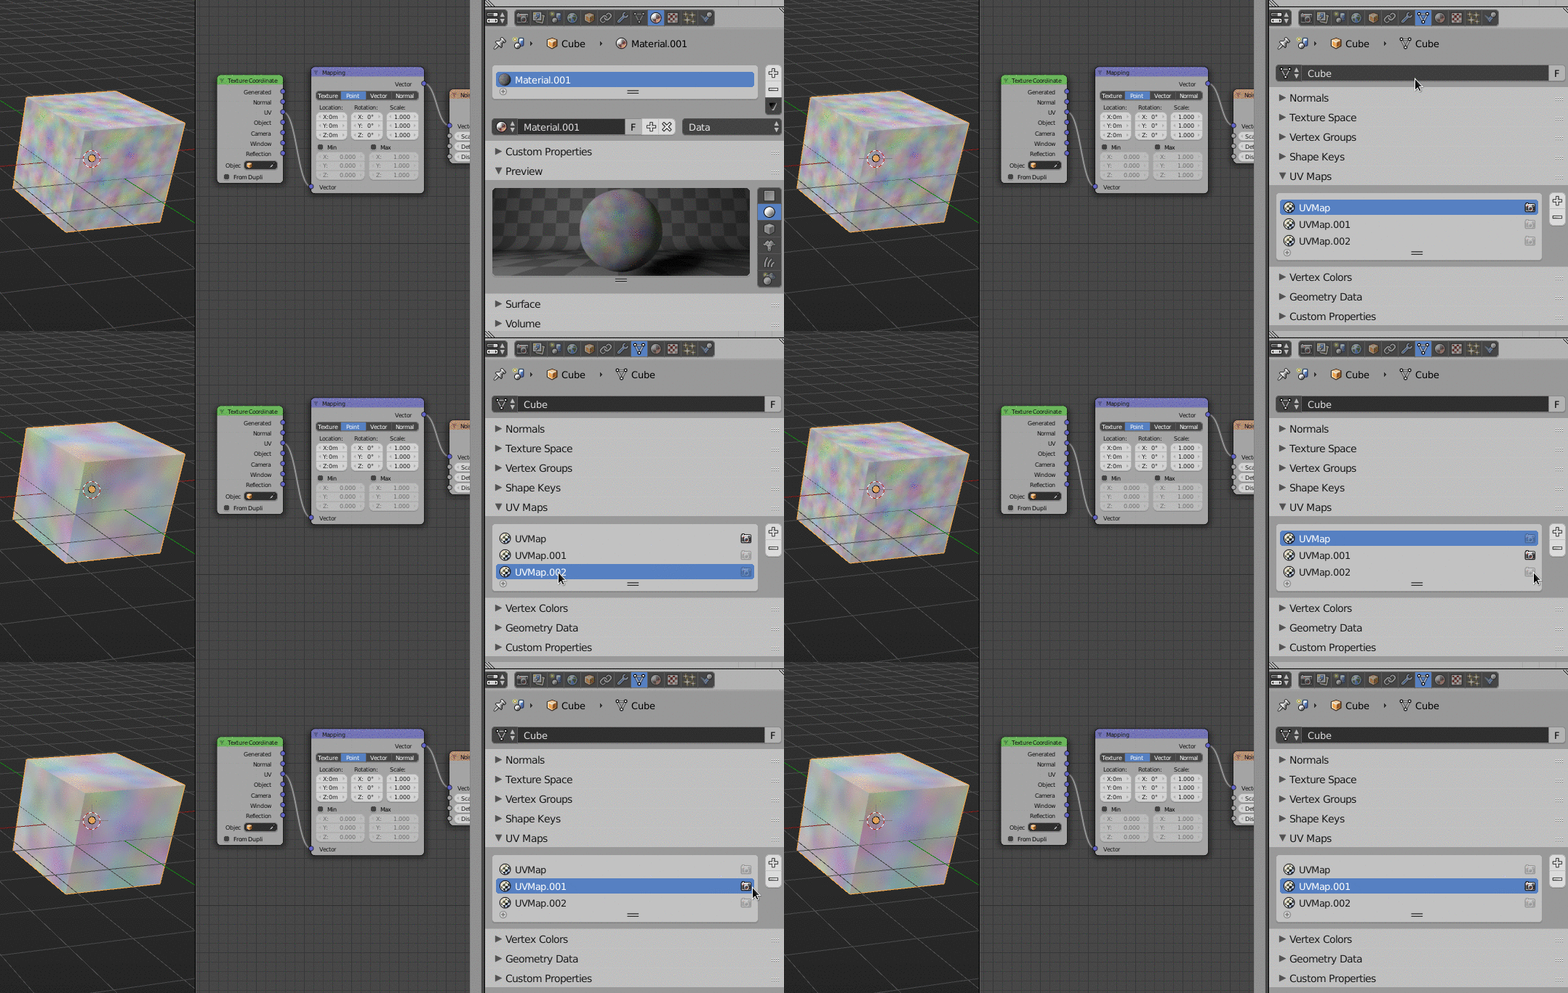
multi UV

Regarding the UV map, the one with the camera icon behind is the one that is sent down the material tree when you plug the UV output socket somewhere. To choose a different UV Map you can use the dedicated UV Map node:
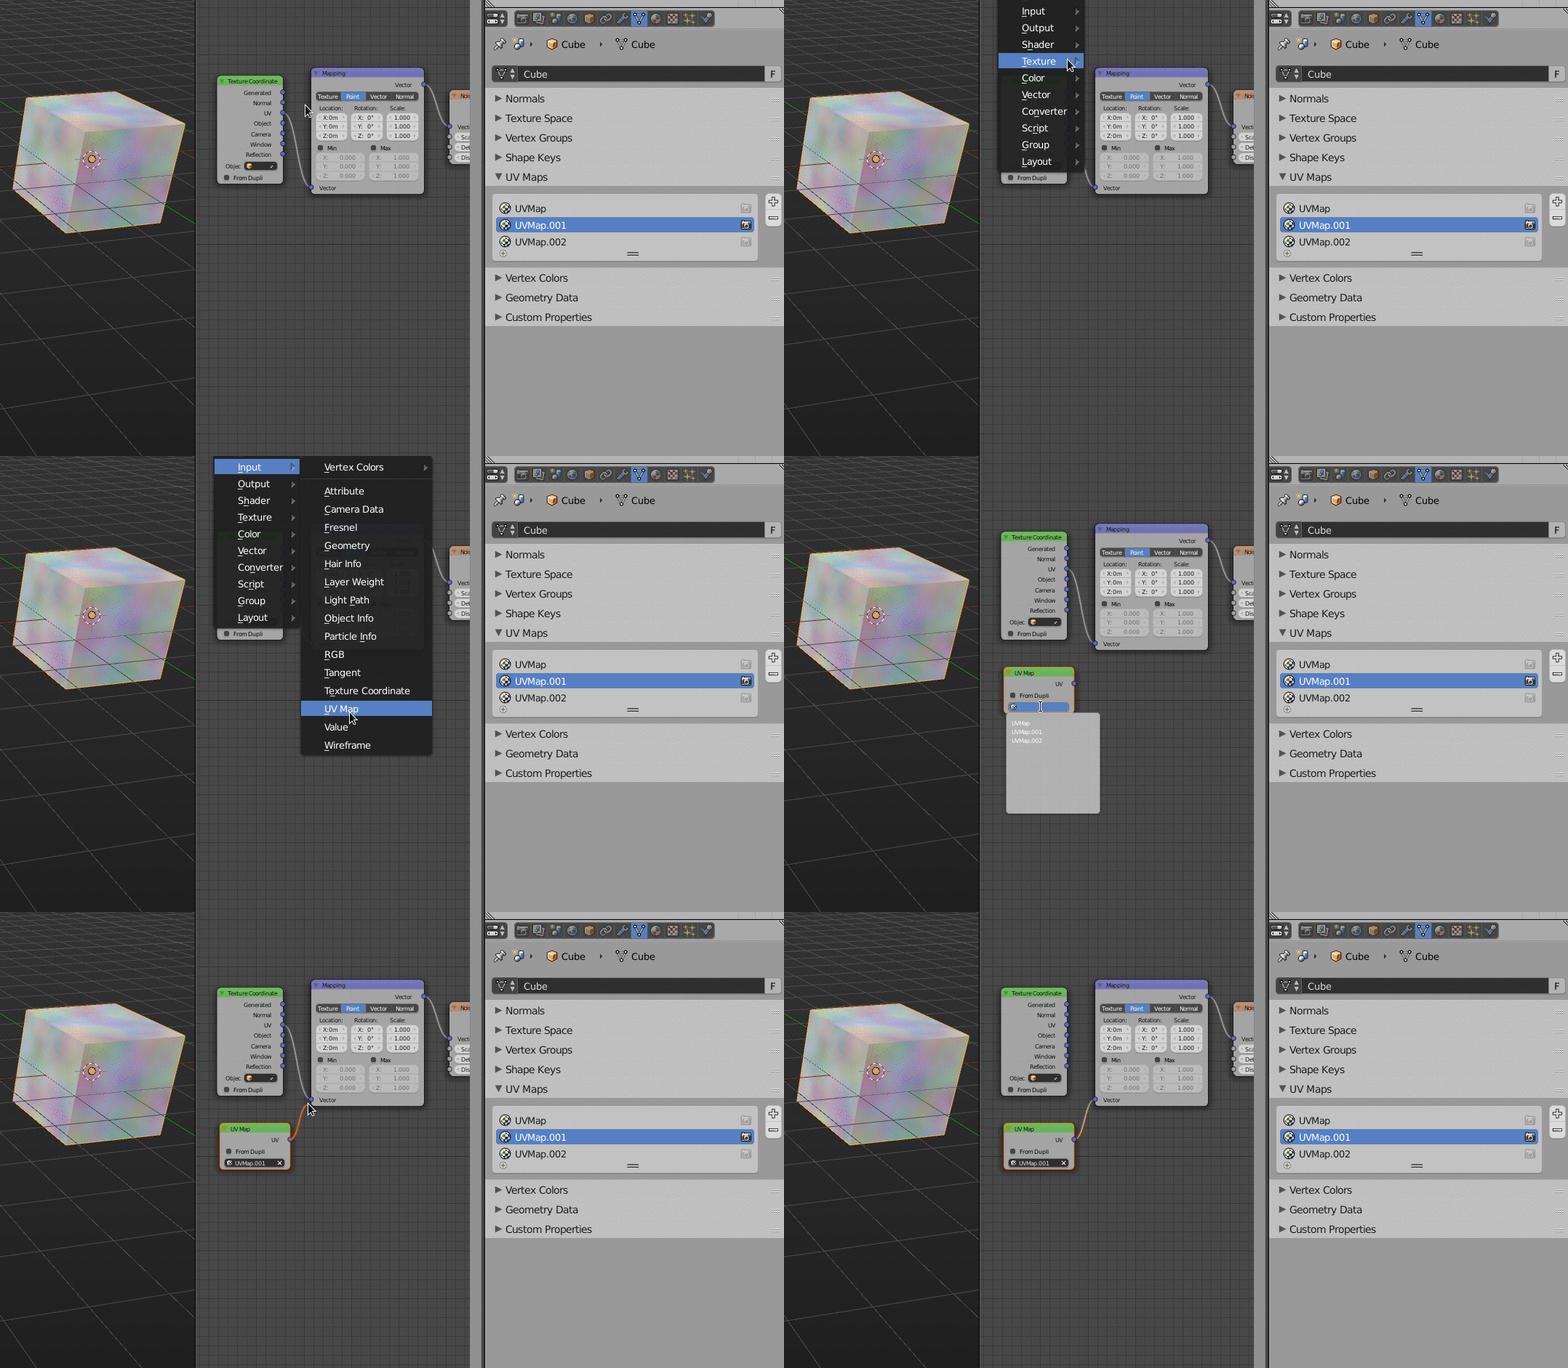
UV chooser

EDIT: One more option

This happens frequently: There is a difference between Texture Preview and Material Preview. Material Preview tries to replicate the look of the final material as close as possible, so it tries to evaluate the whole node tree. Texture Preview on the other end was designed more for texturing game assets, where mapping nodes would not be so important (I guess). Texture Preview shows you what the selected texture node in the node tree would look like if the image was mapped onto the UV space without any mapping happening. See this little explanation here:
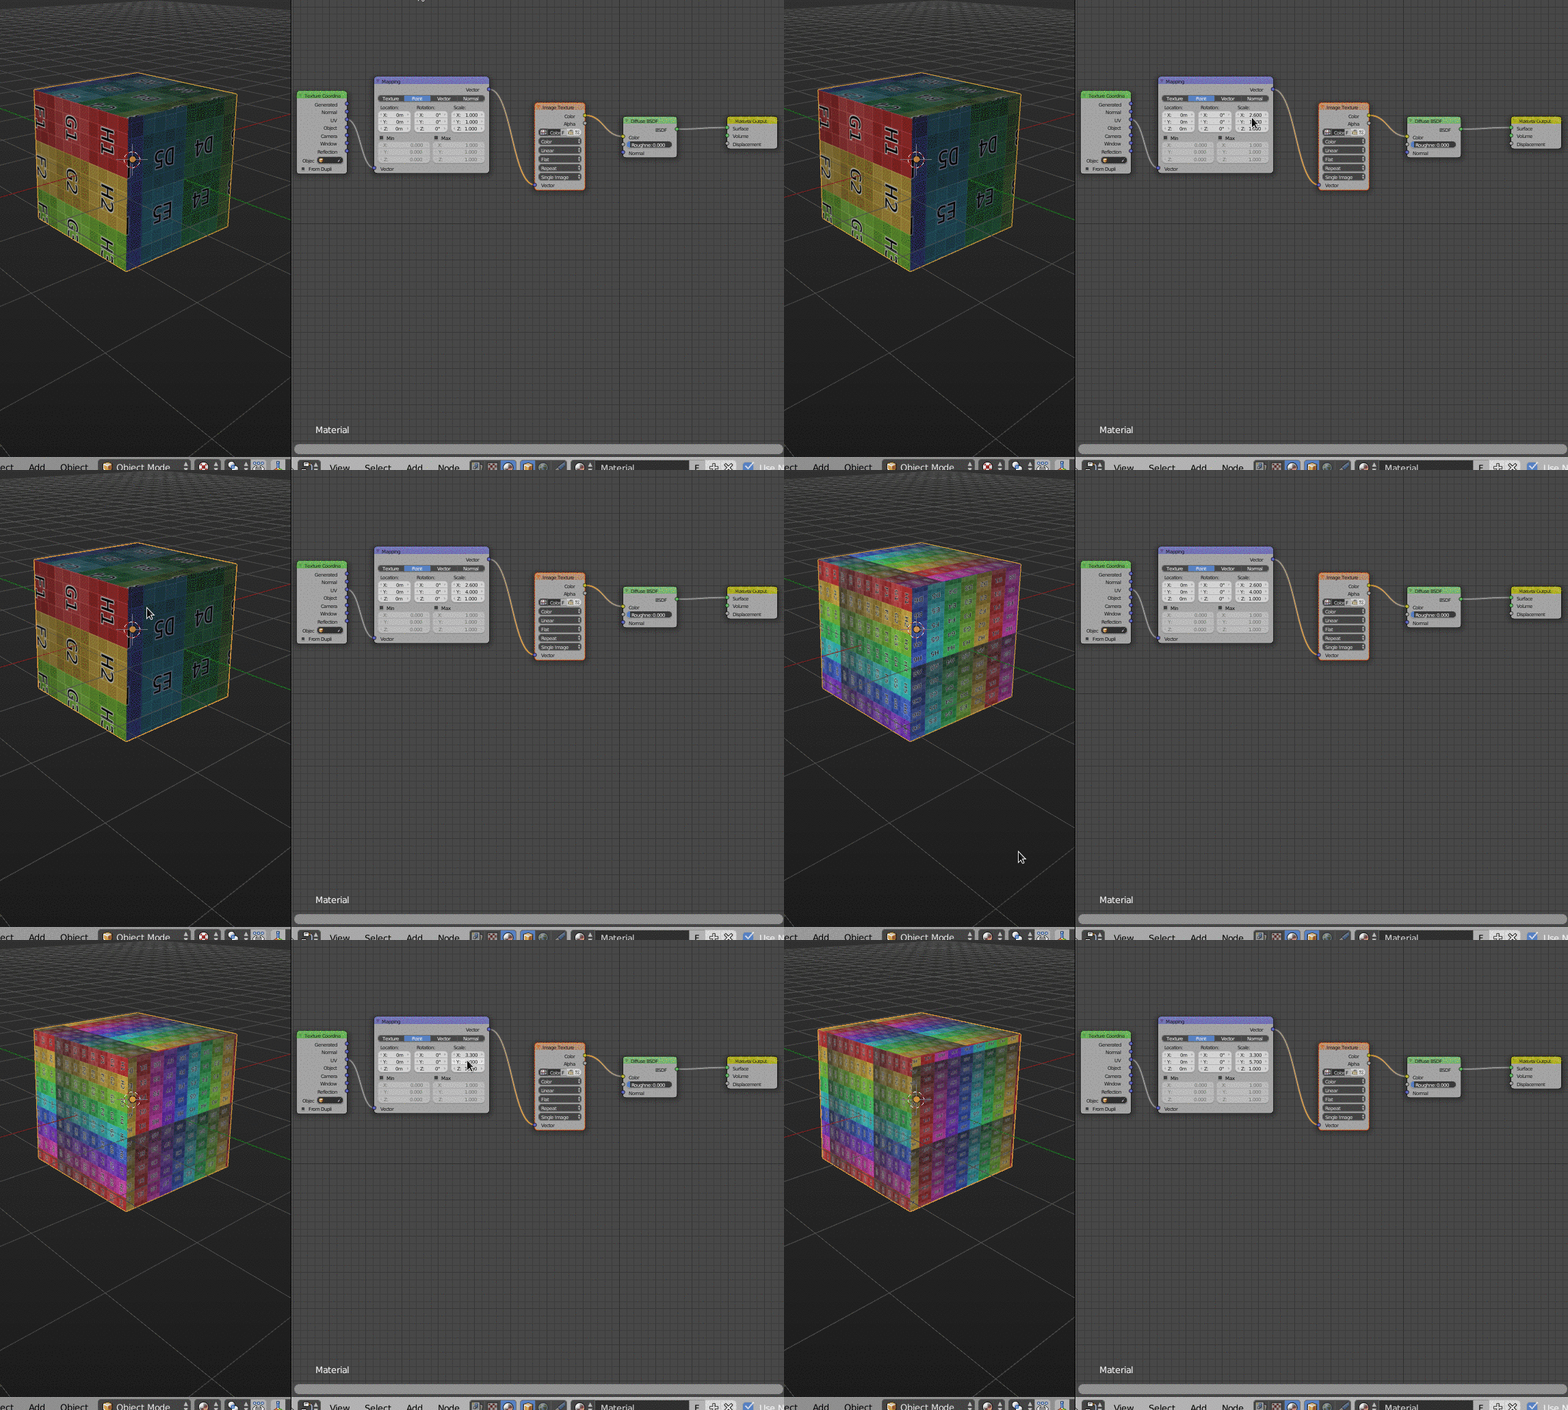
Material Preview

$\endgroup$
2
$\begingroup$

On a side note it is advisable, to load your image into the uv editor to see how the geometry matches the image.

The node setup is correct. Changing the scale values of the Mapping node will change the scale of the texture. This will work with object and with uv coordinates.

change texture scale mapping node

$\endgroup$

You must log in to answer this question.

Not the answer you're looking for? Browse other questions tagged .