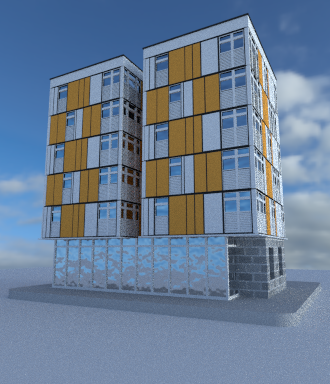
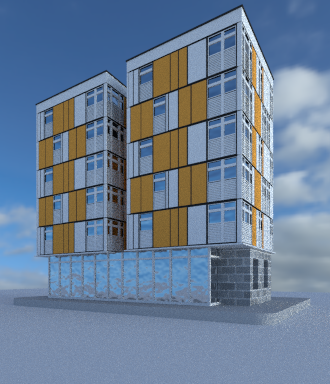
Two-point perspective render is very popular for rendering architectures. In Yafaray, there is an Architect Camera to do this.
Is there any way to achieve this in BI and/or Cycles?
Two-point perspective render is very popular for rendering architectures. In Yafaray, there is an Architect Camera to do this.
Is there any way to achieve this in BI and/or Cycles?
It seems this is not possible to do the same way as Yafaray, however you can do it with camera positioning and tweaking the Shift values.
From the wiki:
Two Point Rendering
Normal architectural rendering is called two point rendering; when vertical lines are parallel, and horizontals, if followed out to the side, converge on one point, and receding or depth lines converge to a second point.
Architects often like this Two-Point rendering, so that the sides of their buildings are completely vertical and don't appear to be falling inward. This is also quite nice for compositions and schematics, given that the lines of the paper you print on and the screen you view with are also straight.
Previously to get a 2-point perspective, you had to aim the camera level to the horizon, however this resulted in the top half of the building being cut off and the horizon being in the exact middle, which looks very boring. Architectural photographers use 'shift lenses' to solve this problem. Shift lenses shift the image to another place on the film. Two Point Horizontal Render This technique works well for high buildings as well as for normal sized objects.
Most of the time, the two vanishing points are horizontal and depth lines, with the vertical lines parallel. However, some titles are done with the horizontal lines parallel, and the vertical and depth lines having the vanishing point. This dramatizes and exaggerates the massiveness and height of the title.
To get this effect, position the camera at ground level, centered, angle the camera upward, and shift the render passpartout down. In the example, the camera is rotated 30 degrees upward, at ground level with the title. A bright key light with a short falloff provides dramatic lighting that is bright in the middle and falls off toward the sides, further enhancing the depth.
To achieve 2-point rendering:
Use a short wide angle lens camera, say with a Lens Size of 10 mm placed close to the building, or a long lens farther away from the building. These differences affect the depth of the building render, with longer lenses making the building appear thinner and less dramatic or distorted. The example uses a 40mm lens.
Position the camera off to one side of the object, vertically halfway up the building to minimize distortion of the vertical building edges. You may alter this vertical (Z value) position to be slightly higher than ground level or higher than the top (if you want to see the top of the object or building). To show the front bottom corner of the building jutting out, raise up the camera.
Angle the camera to be looking away from the building and directly level at the horizon - not pointed up or down (note the 20 degree Z angle in the example). This should make the vertical lines parallel. The more the camera looks at the object, the closer the vanishing point for the horizontal lines, and perceived depth will increase as that vanishing point gets closer as well.
You may have to angle the camera slightly down (just 1 degree or so) so that vertical lines appear vertically up and down, both near and far. If the lines are curved, use a longer lens. With your 3D View set to Camera view, use the passpartout or pixels on your monitor to determine vertical.
Move the camera toward/away from the object until it appears near a corner of the render and is the right size.
Adjust the Shift: X and Y settings until your object is positioned properly.
E.g.:
With a normal camera setup:

With the camera setup as described in the wiki:
