Creating B/W Material Texture Masks in Photoshop (and GIMP)
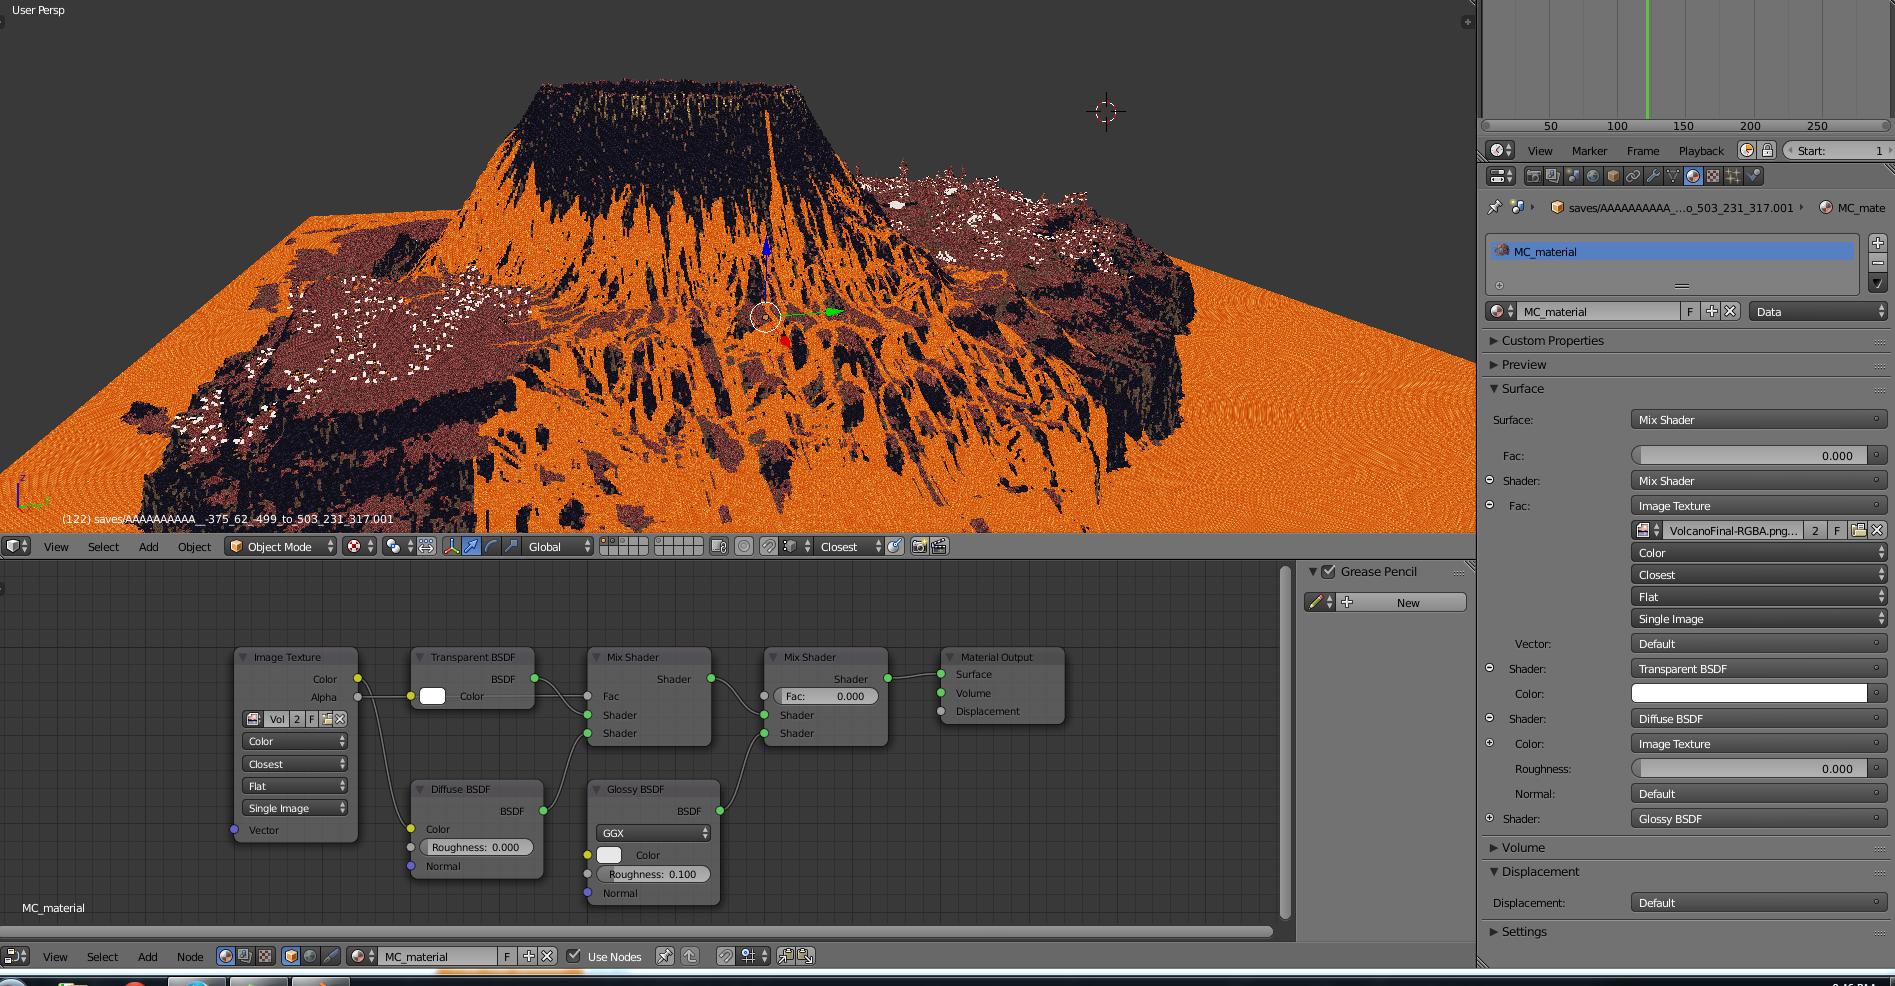
Using Black and White (B/W) Texture Masks allow you to assign different types of materials to different parts of an object's surface via a 2D Image Texture, rather than selecting which faces and vertices of a Mesh you want a specific Material to apply to, and assigning it to them in that way. This gives you the benefit of a much higher degree of accuracy and customisability, which you wouldn't normally have when manually assigning materials.
There are several ways you can do this, such as using Procedural Noise Textures inside of Blender, however for more customisation and for trickier textures I've found that using External software like Photoshop or GIMP to produce the best results in a short amount of time! :)
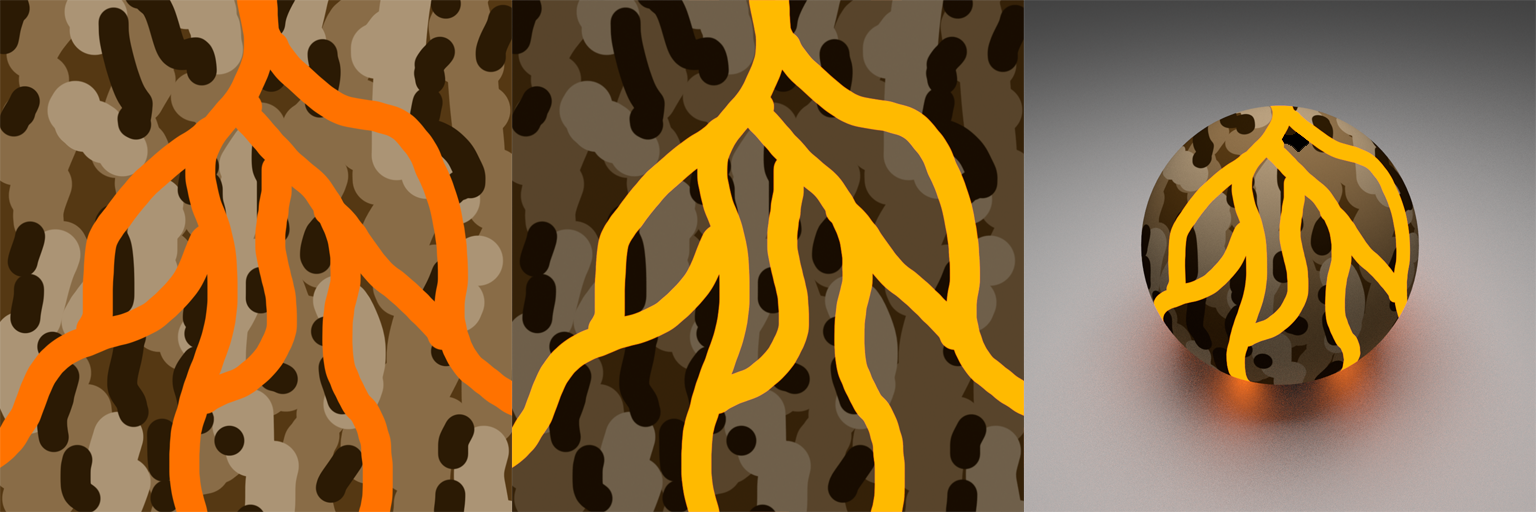
This is essentially the process we'll be taking here. Starting with the Original Texture, we'll create a B/W Texture Mask, and then use it when adding a basic Diffuse/Emission Material to an object inside of Blender.

Creating a Mask Using Photoshop
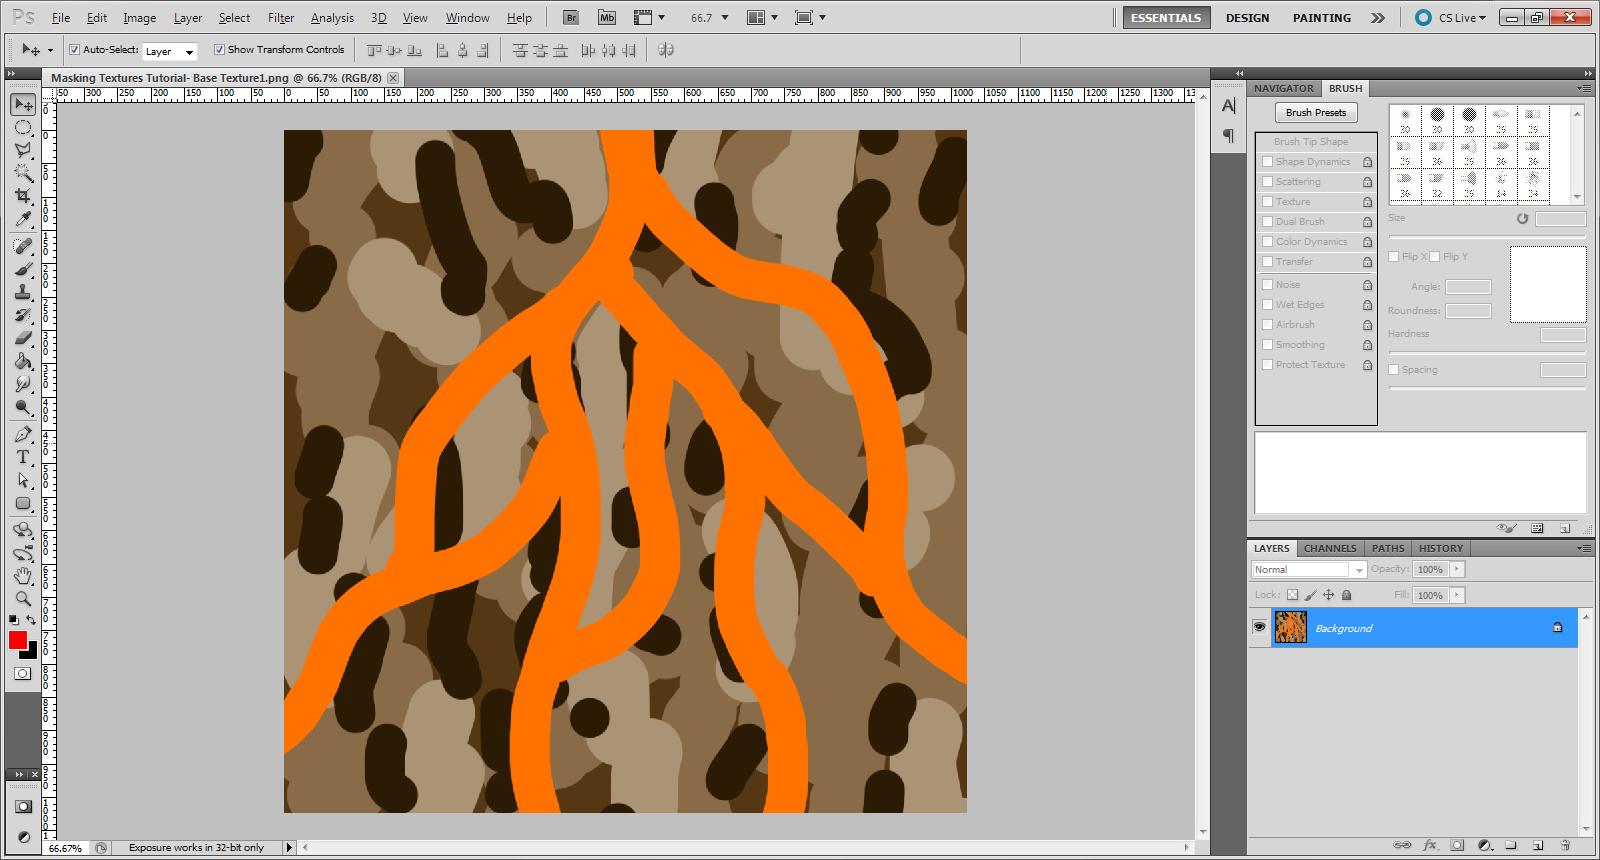
1. Begin by opening up the base texture in Photoshop.
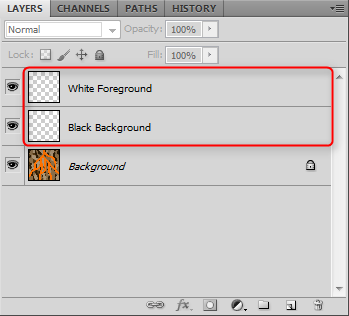
2. Add in 2 New layers above the base texture, for sake of clarity I've called them 'Black Background' and 'White Foreground'. :)
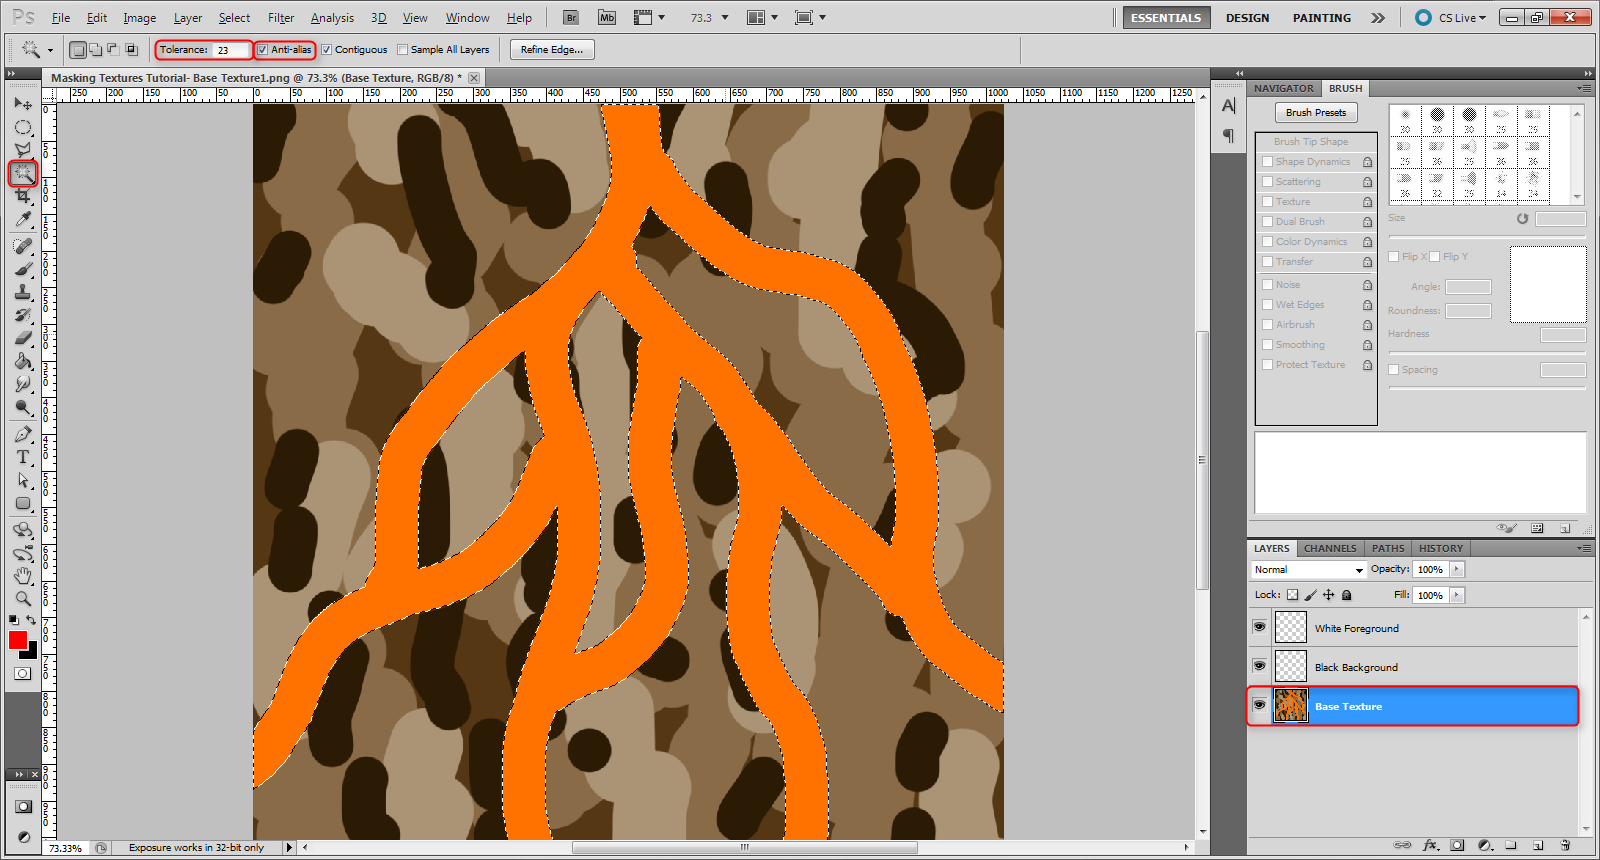
3. Using the Magic Wand selection tool from the Toolshelf on the right, and with this Base Layer selected (and unlocked), click the area of colour that you want a new material to be assigned to in Blender. In this case we'll select the Orange Lava colour. If the results are not how you want, press Ctrl+D to deselect the selection, adjust the Tolerance, and check Anti-Alias, before reselecting. This will help Photoshop refine and find all of the orange colour up to the edges of the Lava, and the selection will be smooth and non-jittery. You can also Grow the selection slightly if need be by going Select > Modify > Expand.
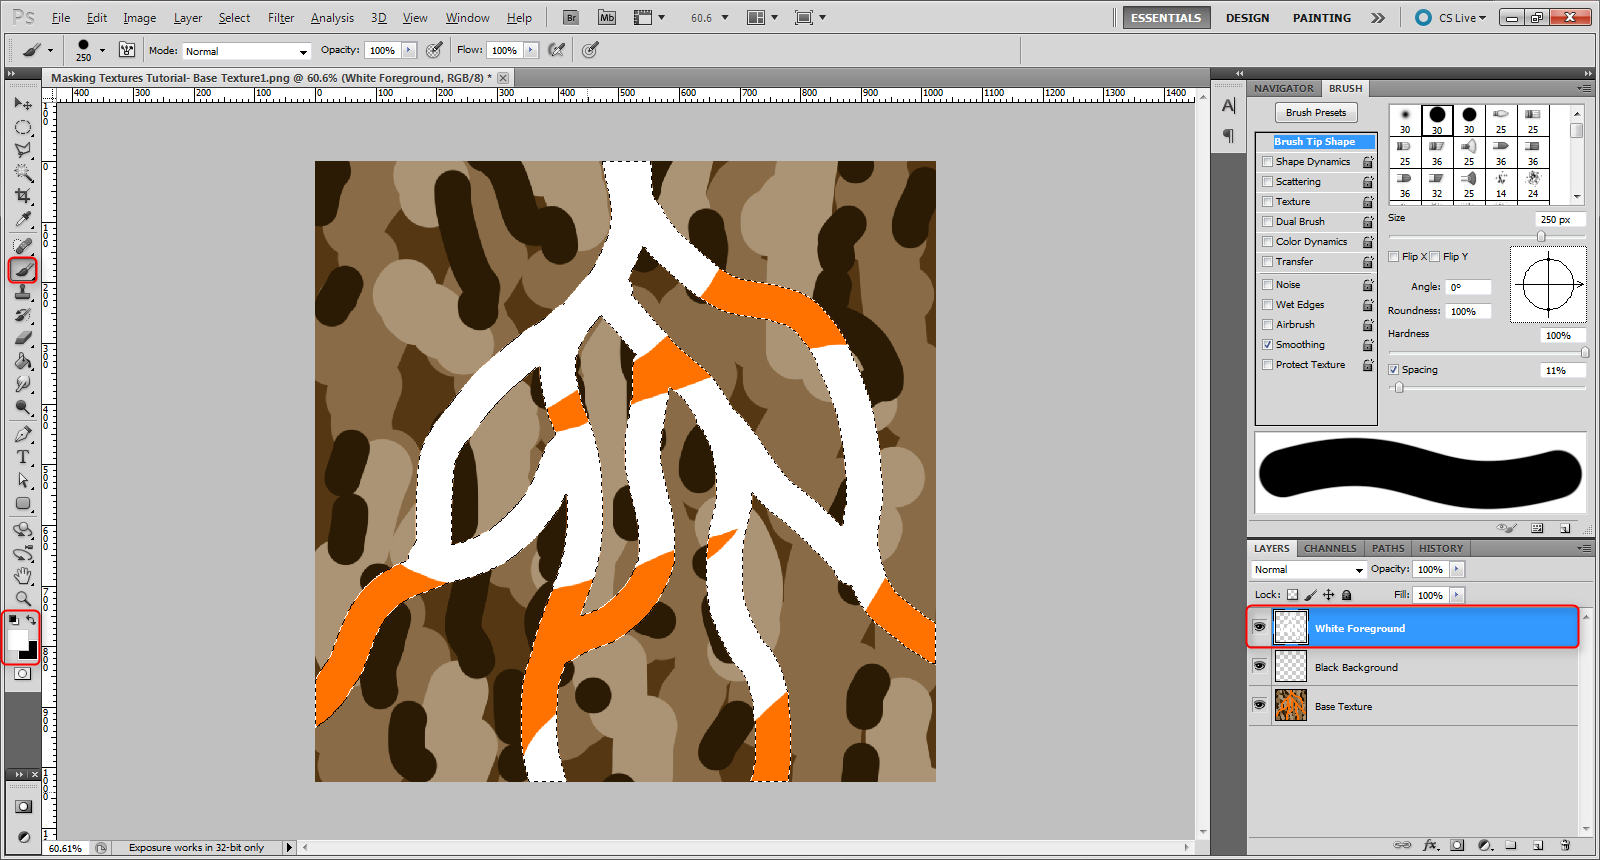
4. With the marching ant selection still active, select the 'White Foreground' layer, and grab the Brush tool from the toolshelf. Change the Foreground Colour to White and paint across the area inside of the ant selection. You shouldn't be able to see any of the Orange colour inside of the selection after painting.
5. Change the Foreground Colour to Black and hit Ctrl+D to deselect the ant selection. Select the 'Black Background' layer and grab the Paint Bucket Tool from the toolshelf. Use the tool to make this entire layer black.
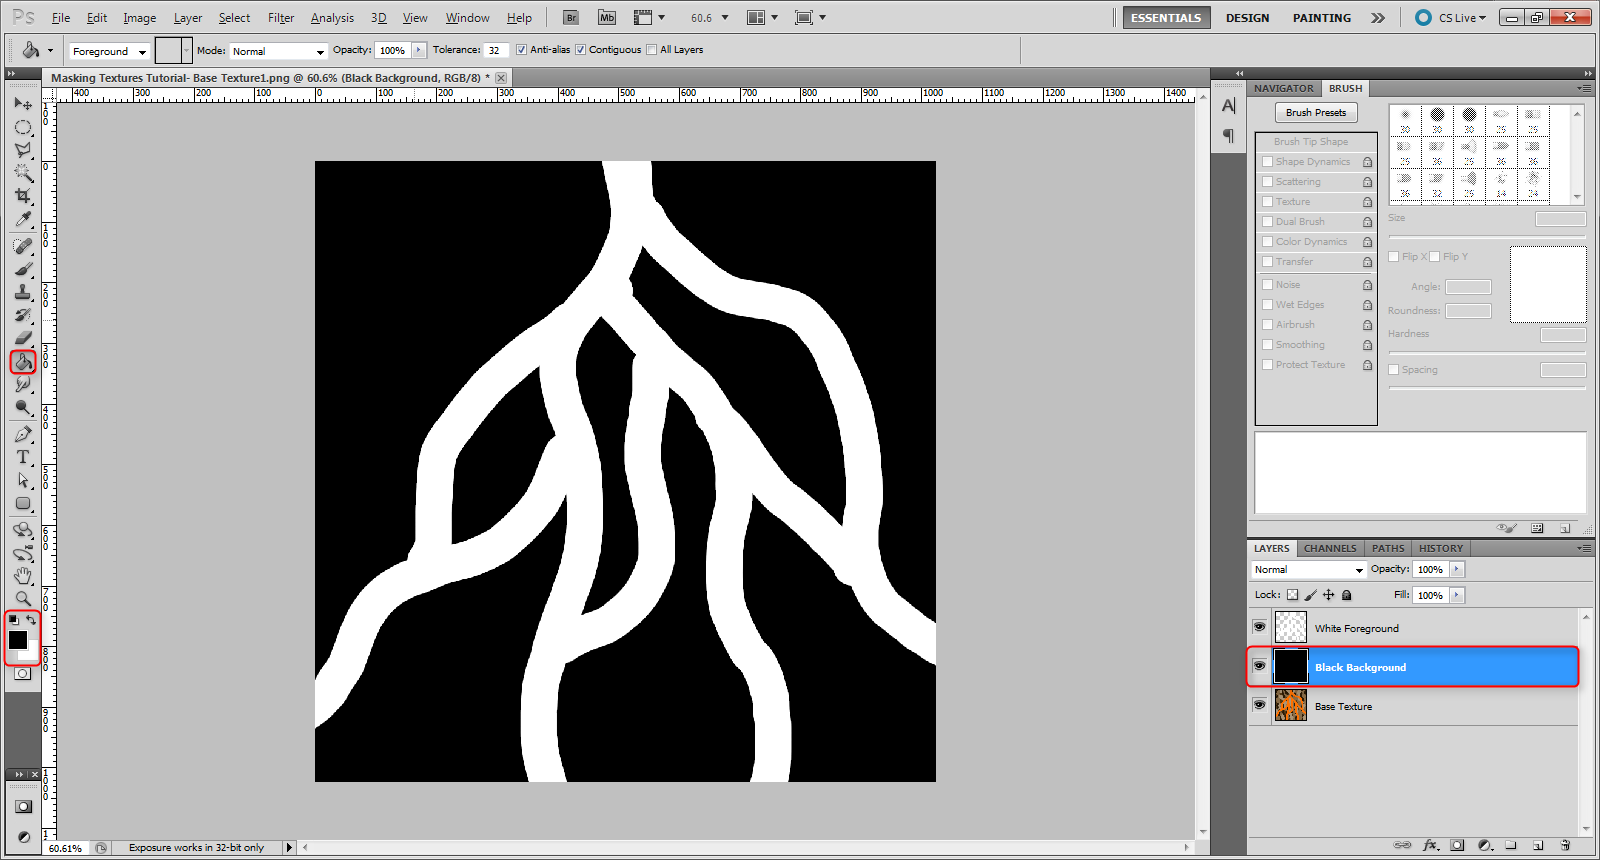
And there you have it, the B/W Texture Mask created in Photoshop. Save it out as a .PNG and you'll be ready to skip down to the Blender section below! :D
Creating a Mask using GIMP
The steps in GIMP are essentially the same as in Photoshop, however there are slight differences in some of the tools have different names, and hotkeys are varied.
1. Begin by importing the Base Texture and adding in the 2 Layers above it as we did in Photoshop.
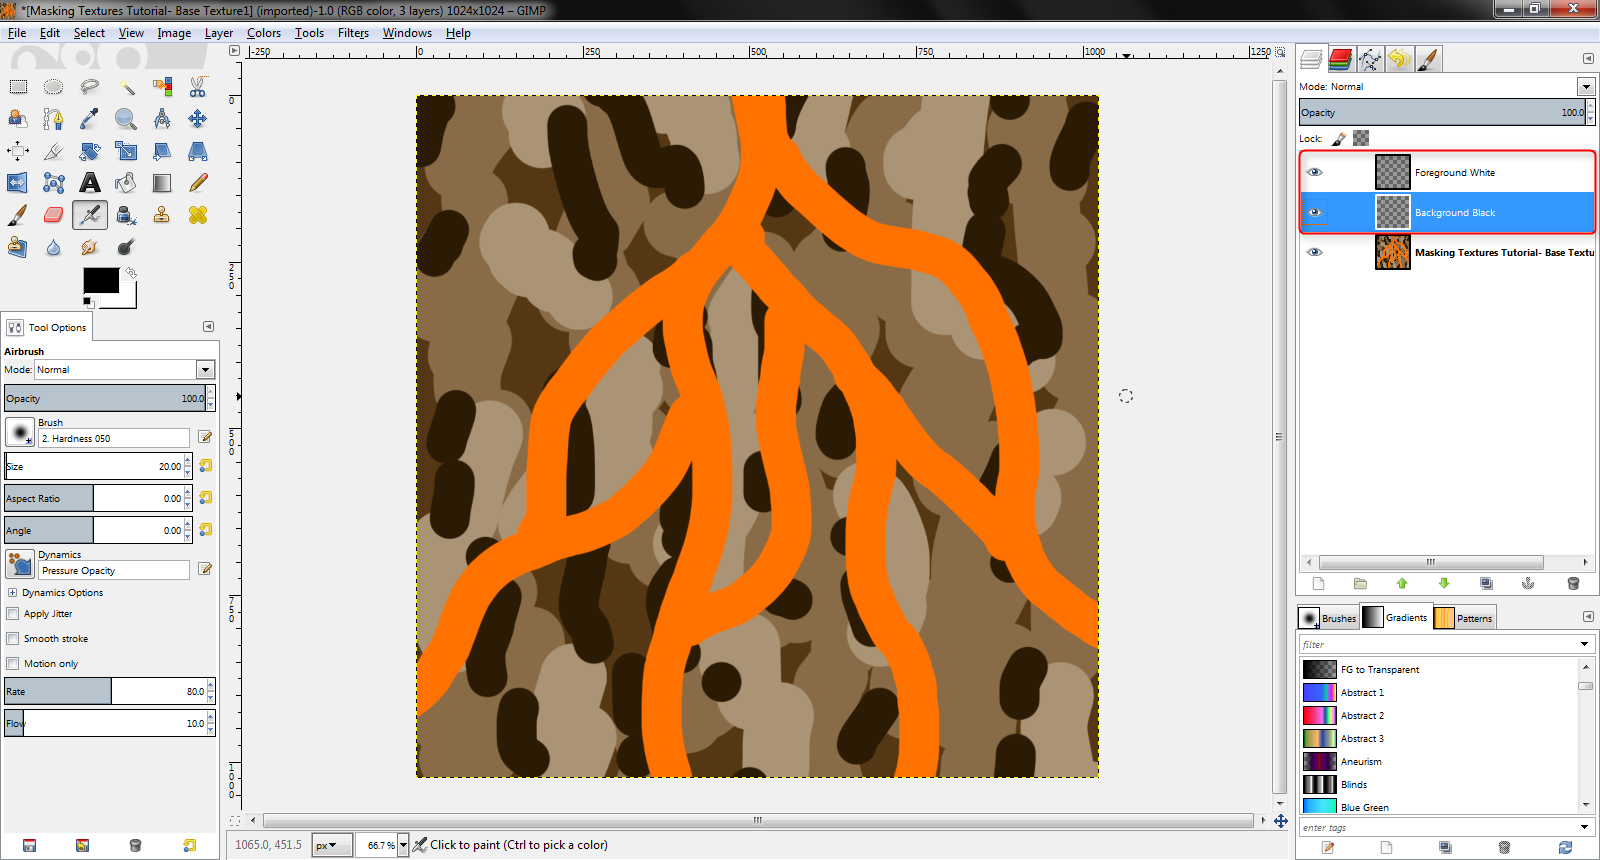
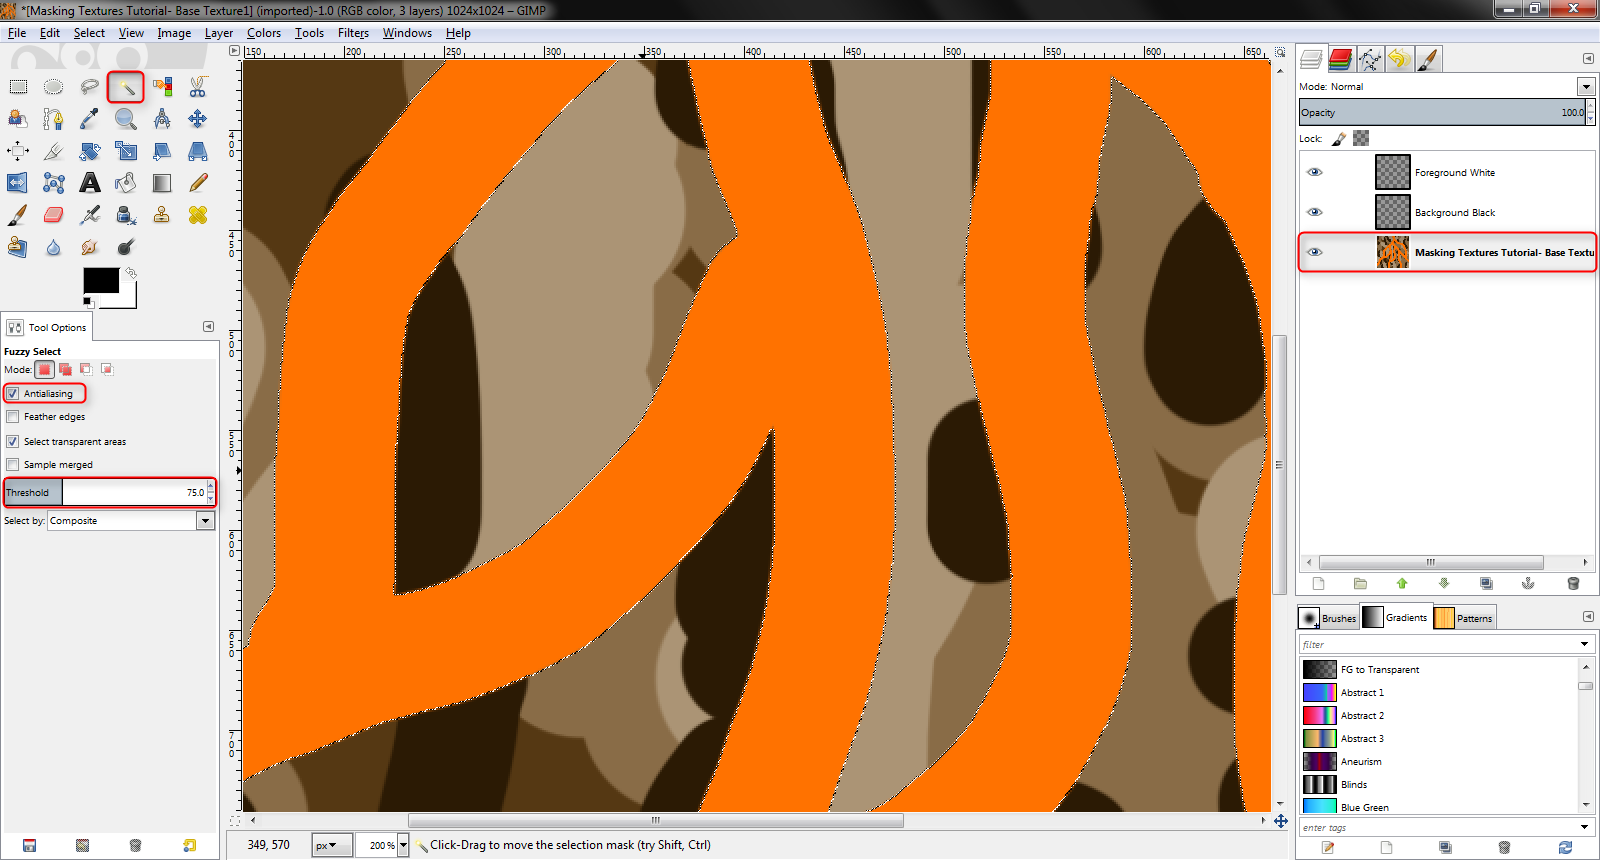
2. With the Base Texture layer selected, grab the Magic Wand tool, check Antialiasing and adjust the Threshold as necessary to so that all of the Orange Lava colour is selected when clicked. Adjusting this process is actually slightly easier in GIMP than Photoshop, as you do not need to deselect the marching ants selection each time, after adjusting the tolerance, you can simply re-click for an instant update! :)
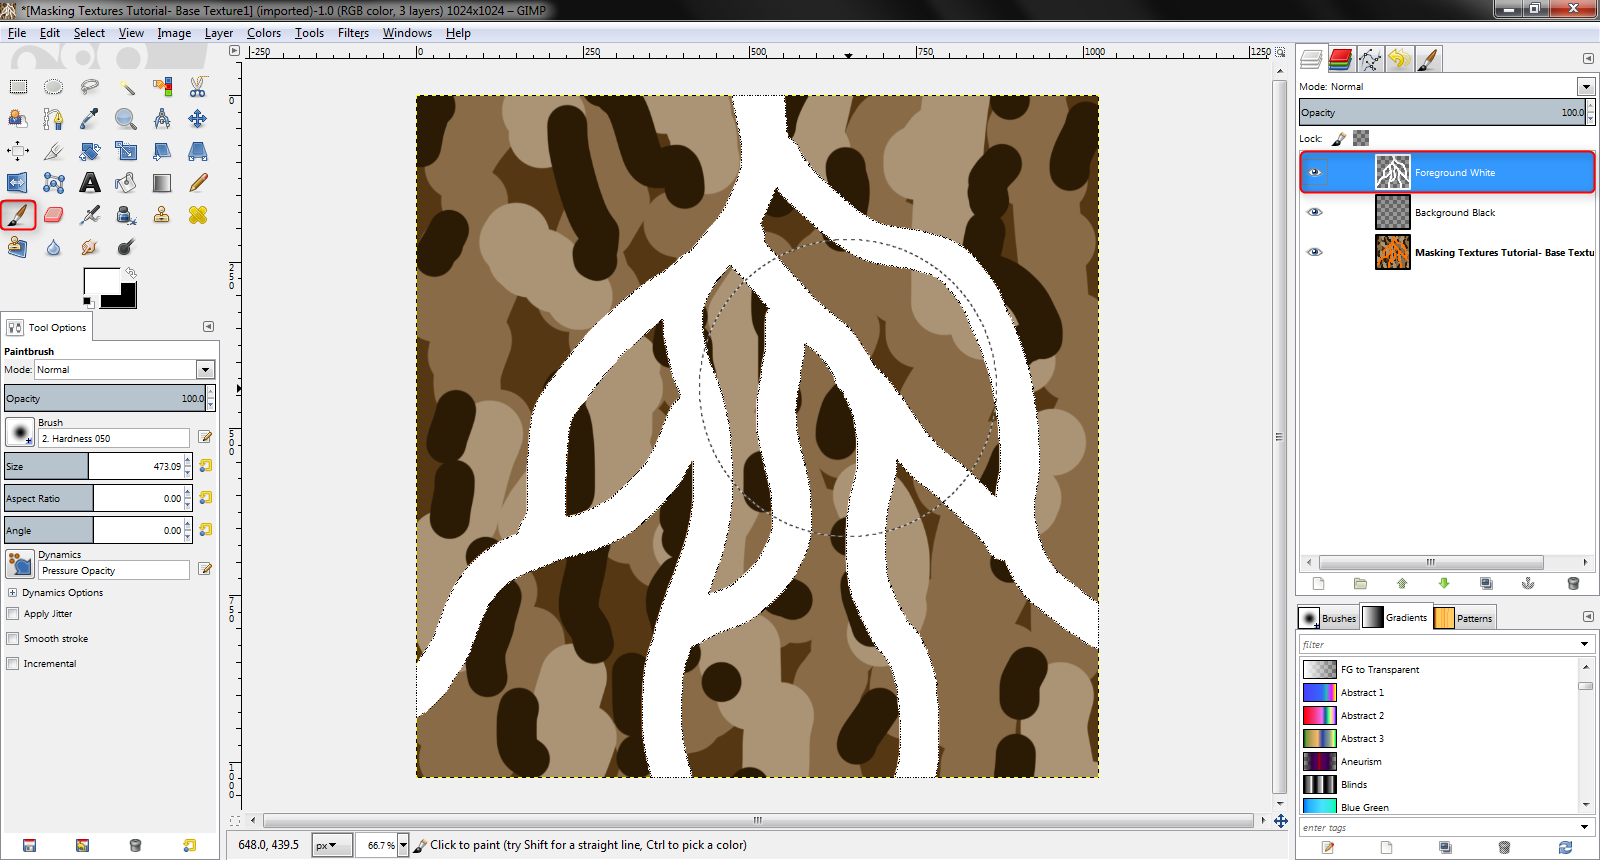
3. With the Foreground Colour set to white, and the 'White Foreground' layer selected, use the Paintbrush Tool to fill in the ants selection completely.
4. Finally press Ctrl+Shift+A to deselect the ant selection. Change the Foreground Colour to Black and with the 'Black Background Layer' selected, use the Paint Bucket Tool to fill it with a solid black.
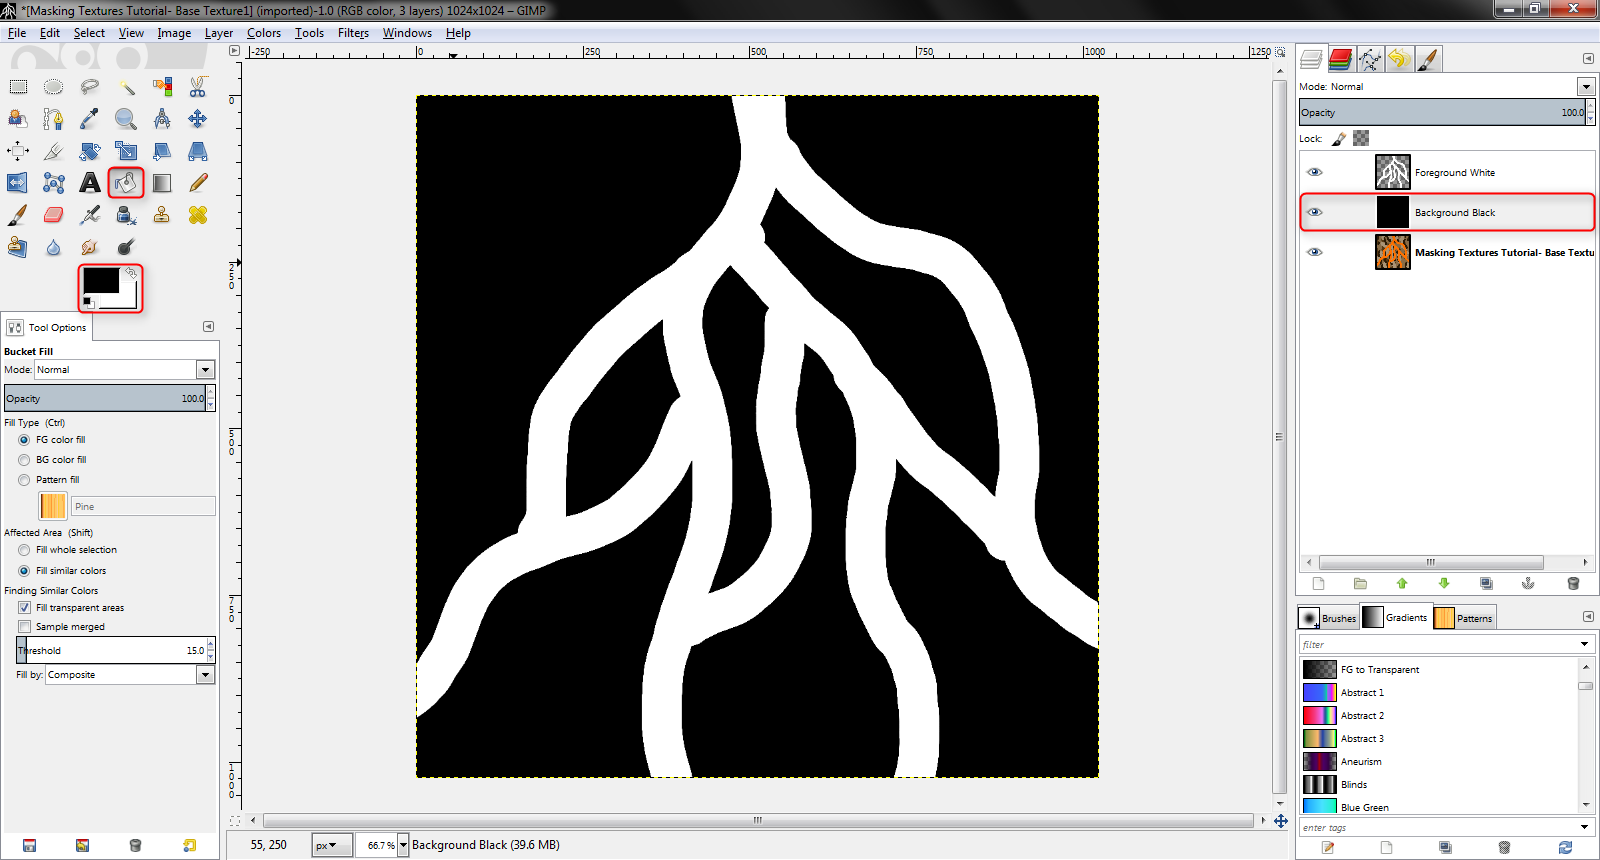
And there you have the very (far too ;) ) similar way of creating the B/W Texture Mask using GIMP. GIMP's way of saving is a bit more of a hassle than Photoshop's- you have to export it as a .PNG, rather than saving and changing the file type. Go File > Export to do this! :)
Using the Texture Mask to Affect Materials Inside of Blender
Whichever software you used to get here, you now have the original Base Texture, as well as the B/W Texture Mask. Read on to find out how to use these in Blender... ;)
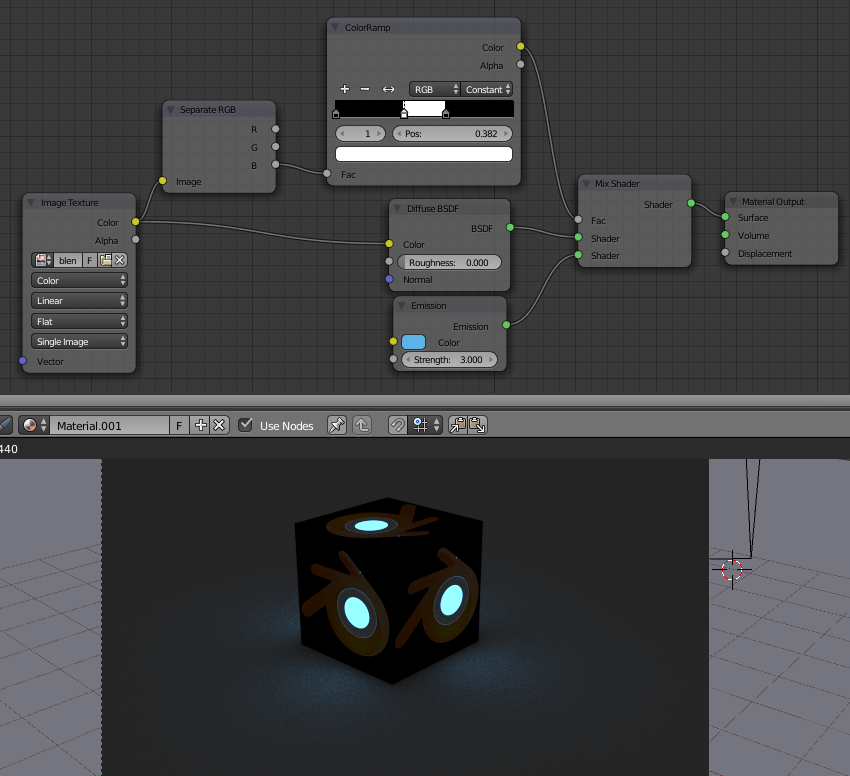
1. Jumping into Blender, for the sake of demonstration, I've set up a simple Sun Lamp and Orthographic Camera scene, and imported the Base Texture by using Shift+A > Mesh > Images as Planes. This will add the Texture into a simple material applied to the plain, with an Image Texture node plugged into a Diffuse BSDF. You can preview how this looks in Textured or Rendered Viewport Mode.
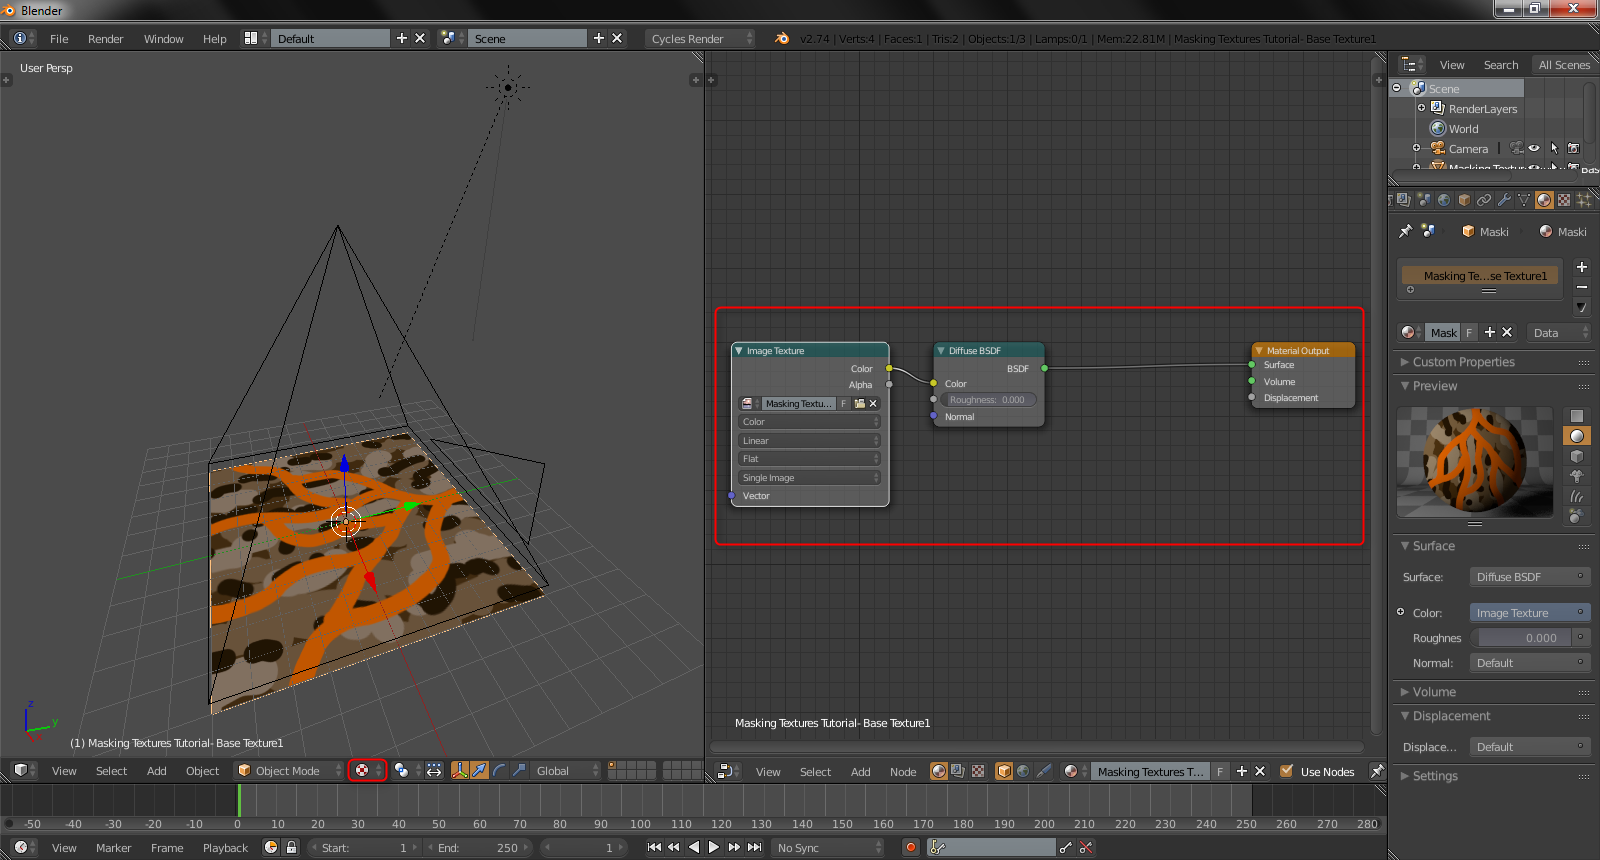
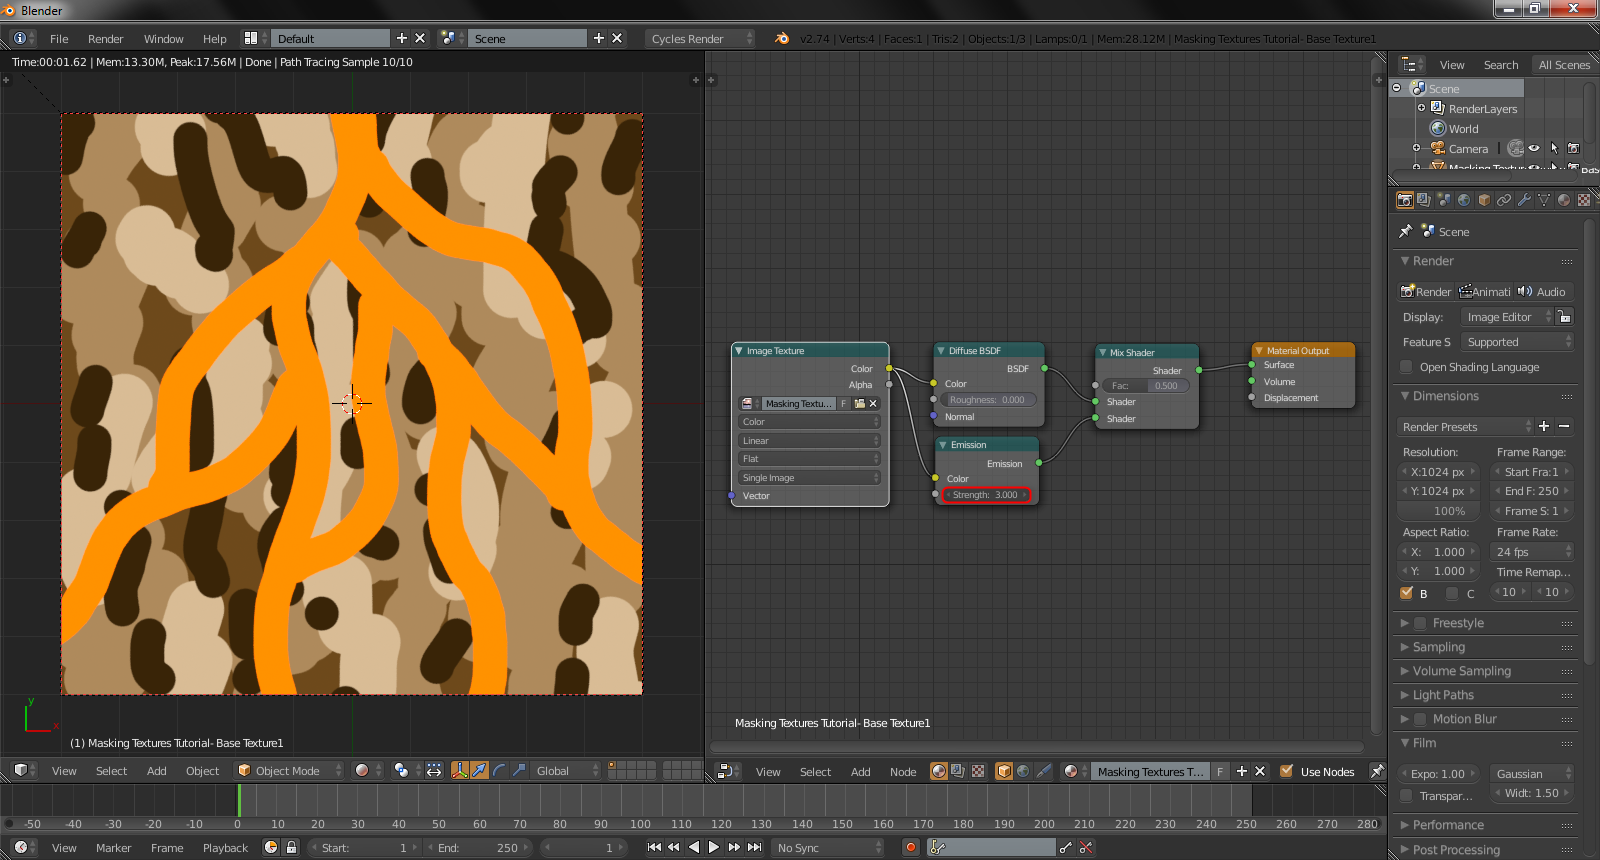
2. To begin, we'll mix together the Diffuse BSDF shader, with an Emission shader, via a Mix Shader Node. We can set the Emission Strength to 3.000.
3. Finally, add in another Image Texture node and open up the B/W Texture Mask. Plug the Colour output of this node into the Fac input of the Mix Shader. This will make all of the Black Values of the Mask correspond to the Top Mix Shader Input, and the White Values of the Mask correspond to the Bottom Mix Shader Input. If anything funky happens just add an Invert node, or flip the top and bottom Mix Shader inputs! :)
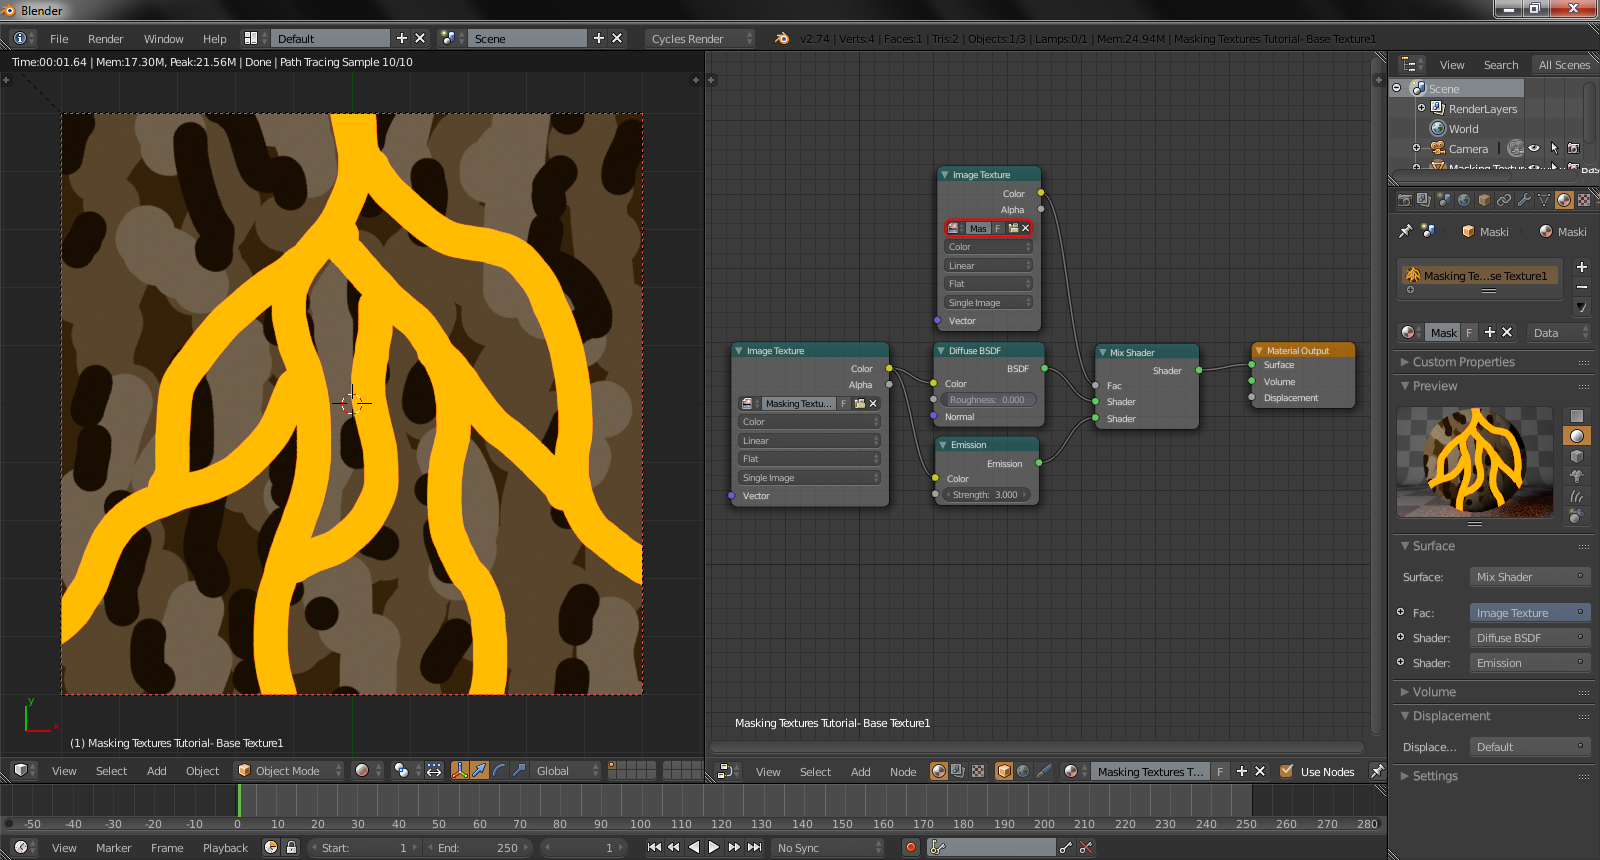
And we've reached the conclusion! A VERY simple end node setup for an insanely useful, and widely applicable process! :D
Hope it helps!! :)


 LMB on any node.