1
$\begingroup$

I'll apologize for asking this question up front, since everybody except me seems to get it, but all the tutorials I've found work with simple maps, and I am completely lost. I'm a forensic pathologist, and I'm trying to use blender 3 to demonstrate injuries. In this case there's a gunshot wound through the head, illustrated with a simple arrow, and incisions on the arms.

I'm trying to draw the incisions in the arms as simple red lines.

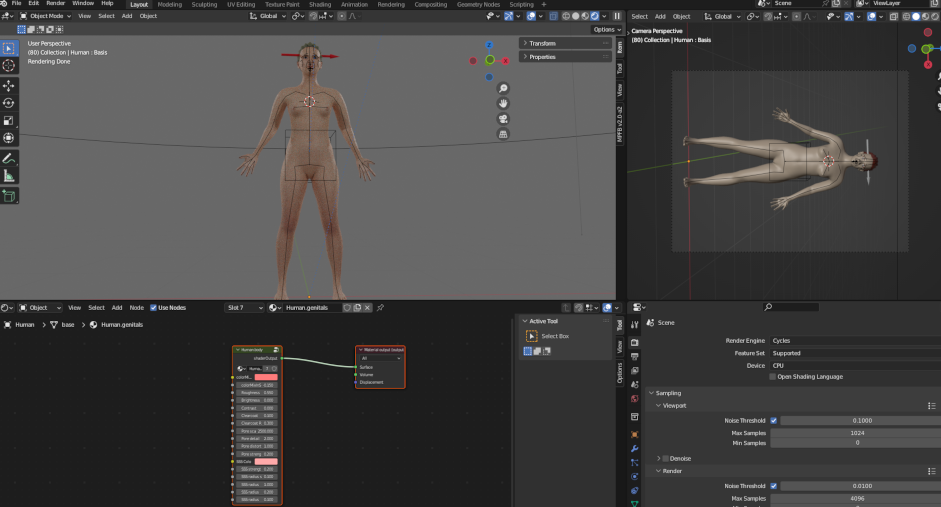
So, I have a human mesh generated in Makehuman. It's rigged, if that makes a difference. It has a mapped texture, and the map makes sense (of course):

enter image description here

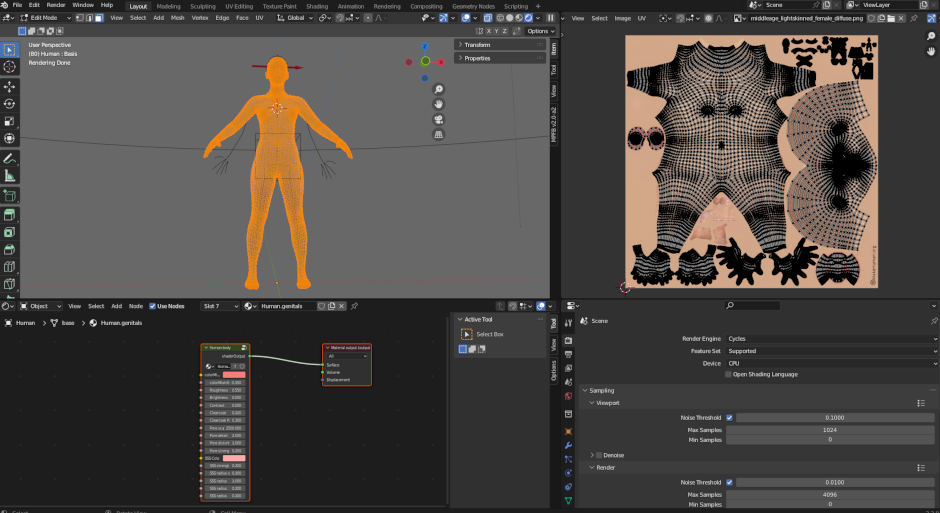
I go into edit mode, choose all the vertices, and open up the UV window where I usually show my camera view...

enter image description here

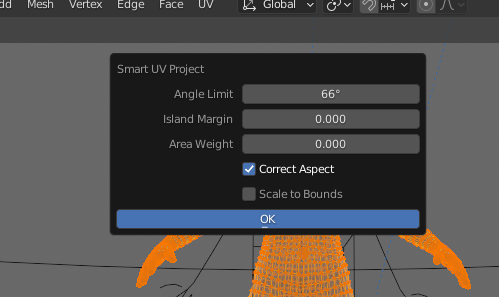
Now I choose the "Smart UV Project" option:

enter image description here

I use the default options, since I don't really know what they do -- but I randomly changed all of them and the results were different but not any better.

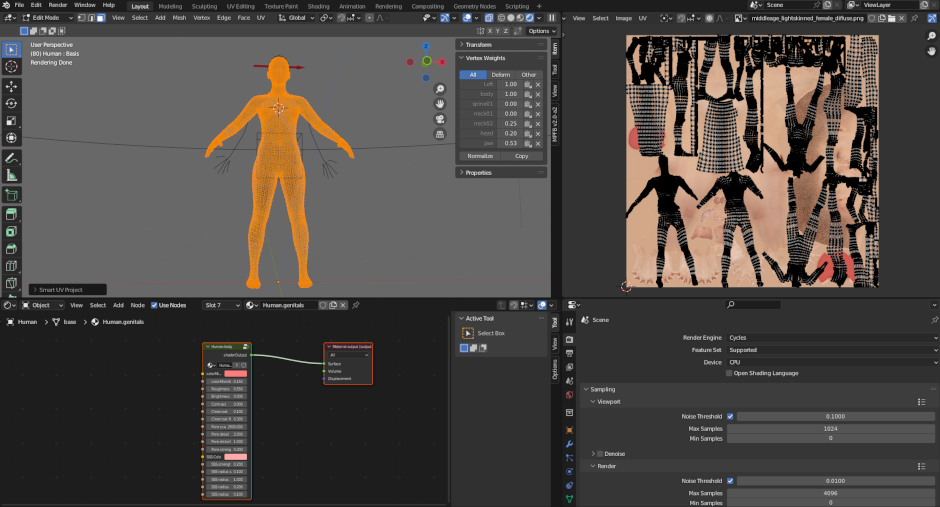
This results in the map being broken up and apparently thrown around randomly:

enter image description here

As an aside, I also just tried "UV unwrap." When I did that,the major part of the map stayed the way it was, but a number of small maps in the upper right corner got big and/or ended up all over the place.

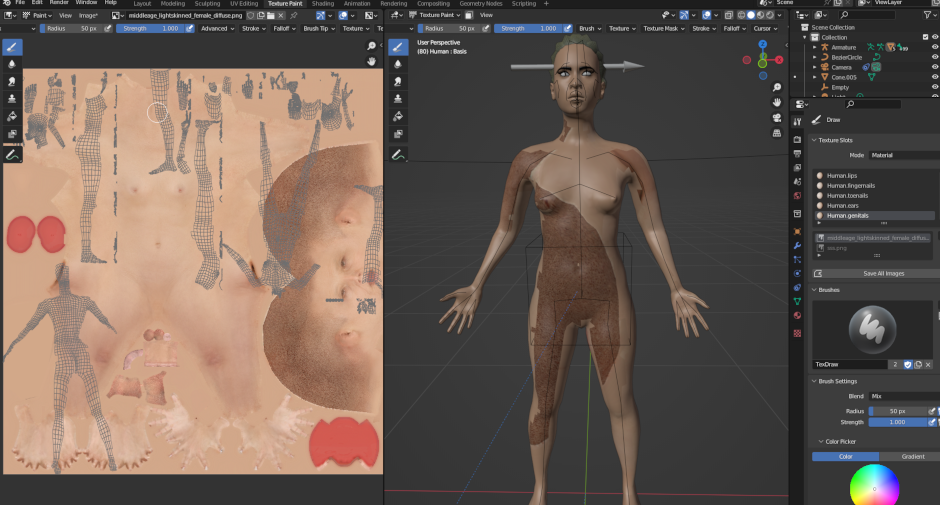
I thought "this can't be right," but I decided to try to texture paint anyway, just to see what happened. The answer was that the mesh reflected the wacky map and the brush didn't change anything, so I couldn't paint regardless:

enter image description here

So now I figure I'm at the end of a cascade of doing things wrong, but I'm pretty much at a loss.

Any help or pointers to a tutorial that addresses this would be greatly appreciated.

Thanks in advance!

$\endgroup$
3
  • $\begingroup$ What exactly do you want to do? The character model that you have is already UV unwrapped and textured. So I wonder why you want to do this again. If you just want to paint on the model (tattoos, wounds, markers) you can do this in the Shader Editor. Use a new image and mix it with the skin texture. $\endgroup$
    – Blunder
    Commented Oct 5, 2022 at 0:40
  • $\begingroup$ You not need unwrap the mesh for paint, import the model again and on paint options add new Base Color Texture, and paint it over. $\endgroup$
    – Leonardo
    Commented Oct 5, 2022 at 0:44
  • $\begingroup$ Yep, y'all nailed it. Thank you for the speedy and spot on help. See my reply to SlickRed below. $\endgroup$ Commented Oct 5, 2022 at 20:35

1 Answer 1

3
$\begingroup$

I don't think there is any need for you to unwrap the model (using either Smart UV project OR unwrap). From your screenshots, it looks like the human model you have comes with a perfectly serviceable UV map that can be used for texture painting.

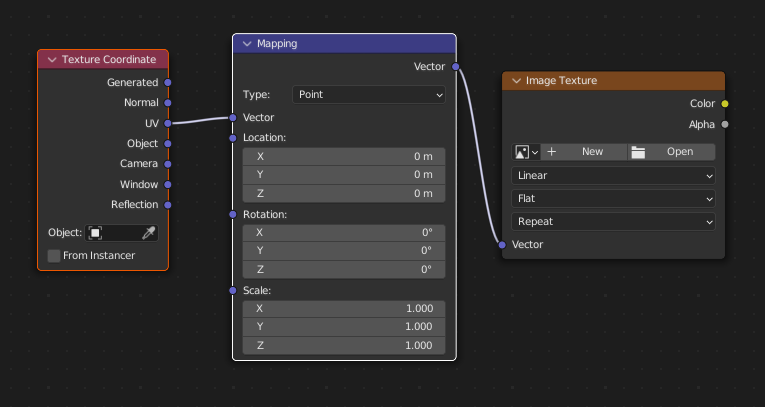
You should therefore be able to apply texture painting by setting up a material as follows:

enter image description here

This set up will use the UV map that comes with the model. Use the Image Texture node to create a new texture, then switch to Texture Painting and select the new image you created to start painting.

It also looks like your model comes with a pre-existing texture for the skin. (Apologies, I'm not familiar with Makehuman).

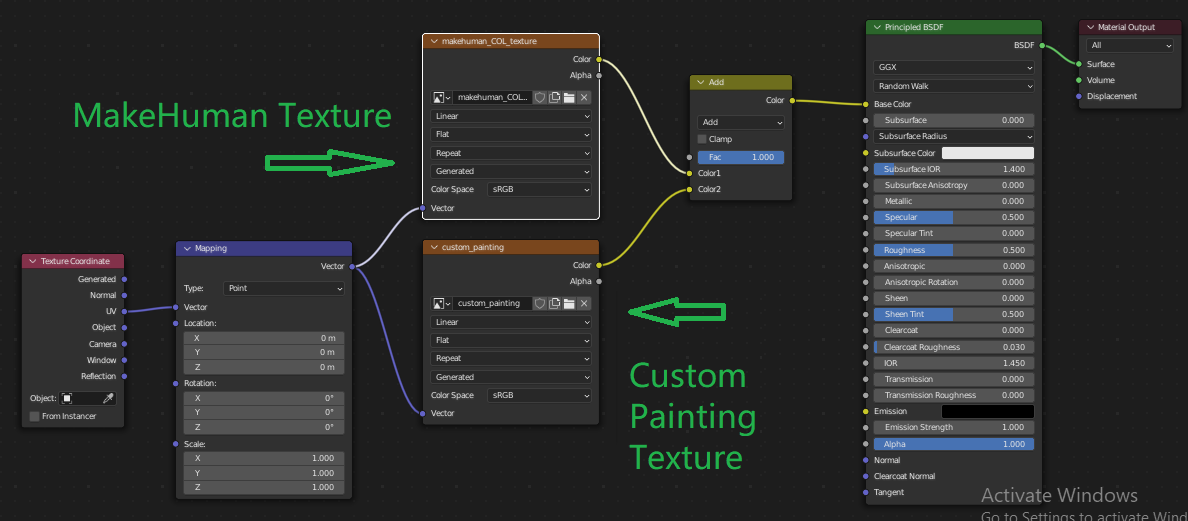
You will likely therefore want to set-up your material so that it ADDS color on top of the pre-existing texture.

Something like this:

enter image description here

$\endgroup$
2
  • $\begingroup$ This was perfect. Thanks. I still can't find a tutorial that shows this. The only change I made was that it works better with "color" as the mixing criterion rather than "add." When I opened up the human texture from makehuman it was a little confusing, mostly because of all the nodes dealing with subsurface scattering. It took me awhile to parse it. $\endgroup$ Commented Oct 5, 2022 at 20:51
  • $\begingroup$ Glad to help :) Yeah trying to make sense of an existing node-tree when you're new to material nodes can be a real headache. The main inputs on the principled BSDF shader that are used 95% of the time are Color, Metallic (either 1 or 0), Roughness and Normal. Roughness determines how shiny (or 'glossy') a material is (i.e. a mirror would have 0 roughness). Normal maps (connected to the Normal input) are used to 'fake' surface level details such as bumps/creases. The SSS nodes you referenced are used to add realism to the flesh, but are probably not required for your use case. $\endgroup$
    – SlickRed
    Commented Oct 5, 2022 at 21:38

You must log in to answer this question.

Not the answer you're looking for? Browse other questions tagged .