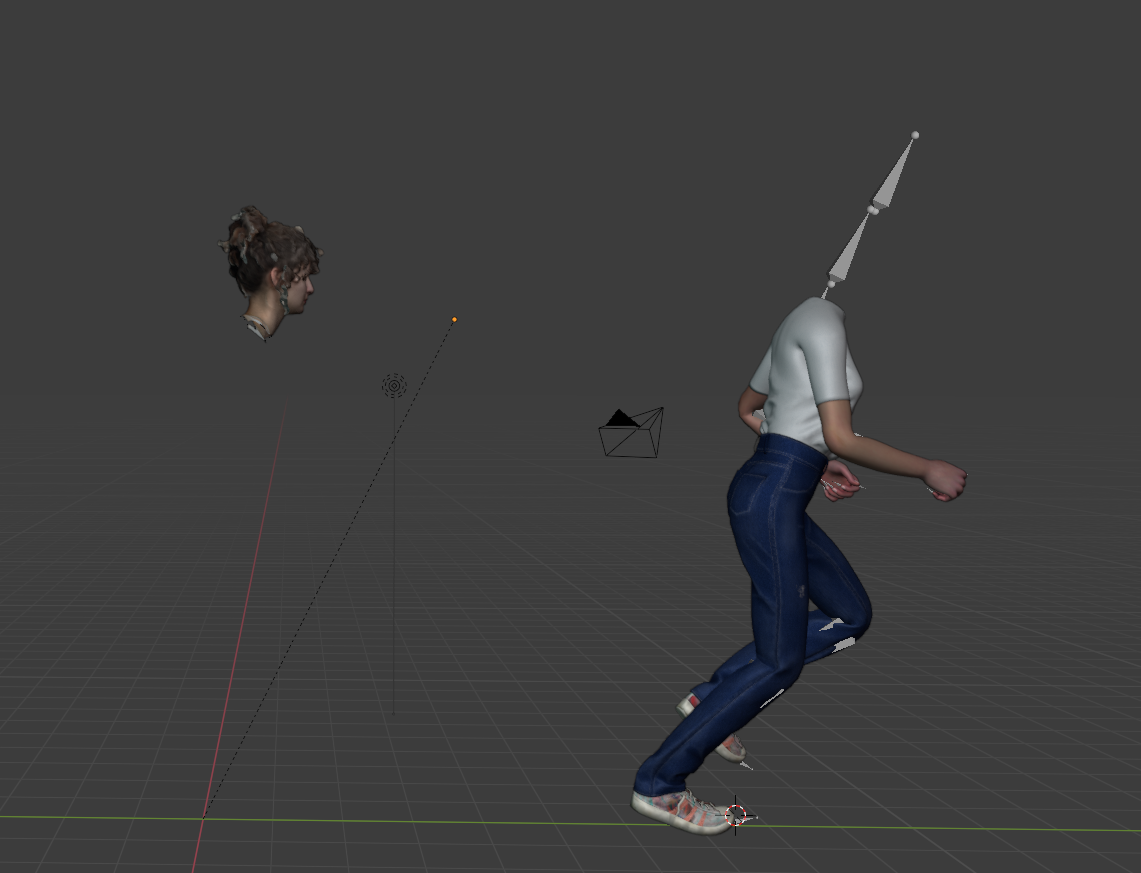
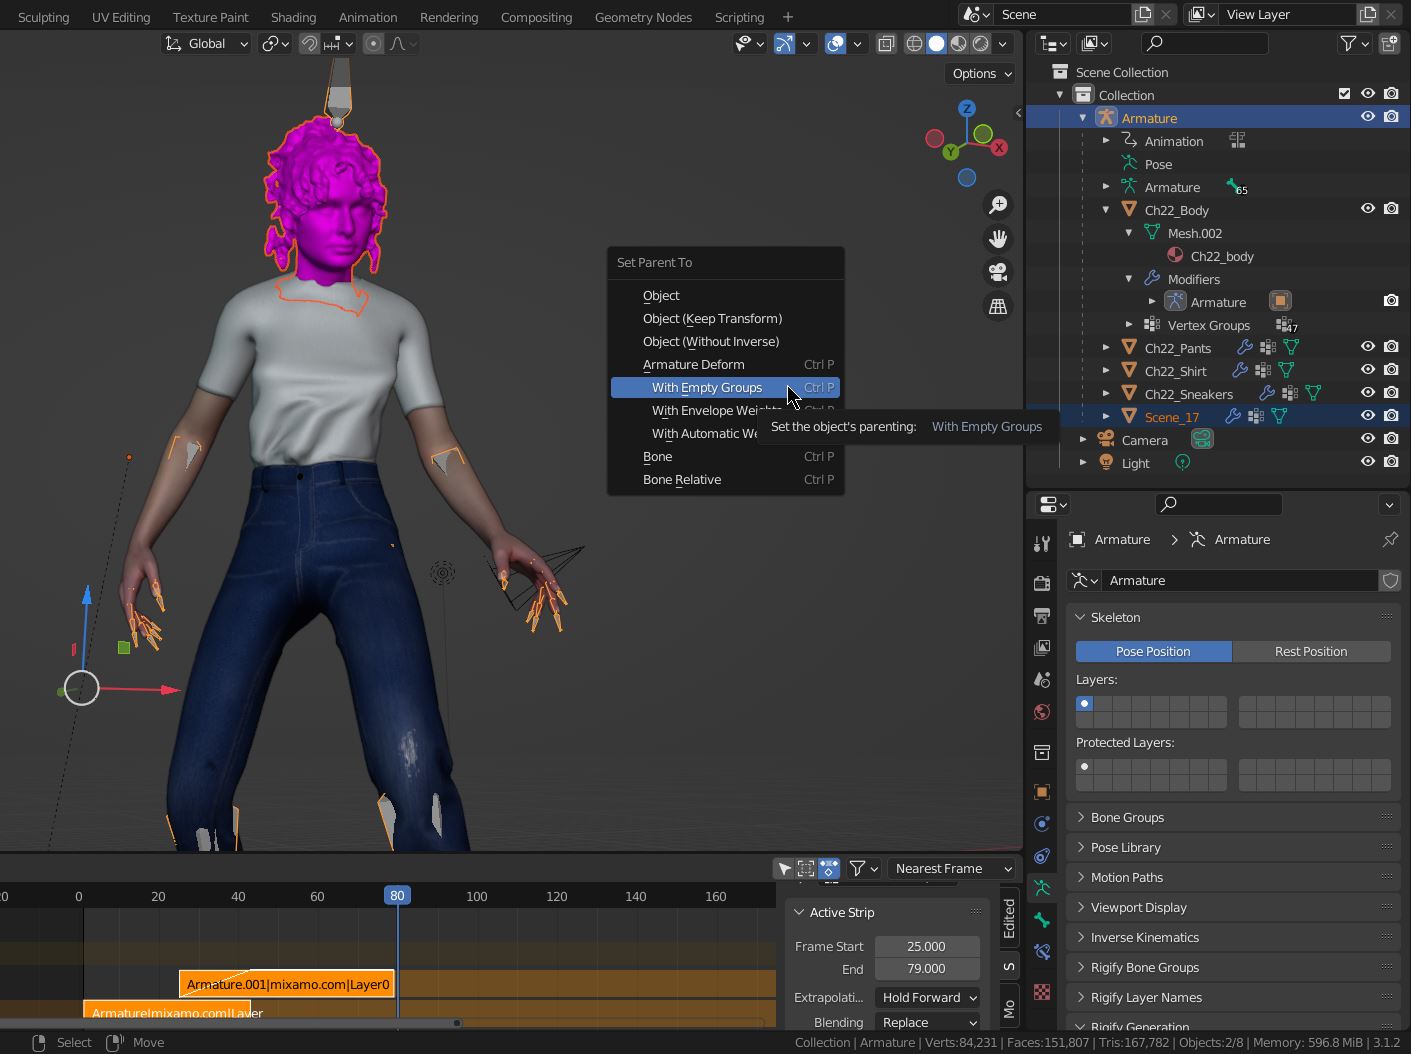
I added a mixamo character + animation and now I want to replace the head with my own. I removed the old head and tried to attach the new one with automatic weight and weight paint. The problem is the head stays in the same place while the rest of the body moves.
-
$\begingroup$ ...sorry I can't help you, but I would honestly strongly advise against trying to put your own head on a Mixamo model 🤔 $\endgroup$– quellenform ♦Commented Jun 10, 2022 at 21:42
-
$\begingroup$ Check the status bar if there is a yellow warning message "Heat Weighting: Failed to find solution for one or more bones" when you do the parent with automatic weights. It disappears after a few seconds. Also, check the modifiers on the head. There should be an armature modifier.. Check the vertex groups and the weights for the bones of the head object. If you don't mind sharing your head you can upload the blend file so we can have a look ;-) $\endgroup$– BlunderCommented Jun 10, 2022 at 22:12
-
$\begingroup$ @Blunder thanks, i'm new to blender. Here is a link so you can download the file we.tl/t-2A3JBzsqNy :) $\endgroup$– DonnaCommented Jun 11, 2022 at 12:06
1 Answer
The head does not follow the body because it has no weights in the vertex groups. The weights tell Blender how much influence each bone has on the mesh. Since there are no weights, nothing happens. Furthermore, it's not at the right spot.
Side note: The head looks like a 3D scan. This is not ideal for animation because it has a lot of geometry (=a lot to compute, which can slow down the work in the viewport) and the mesh is very messy. In this case, it will work in spite of this, because the head is only moved and not deformed, i.e. there are no facial expressions and no eye and mouth movements.
A common workflow for smoother work on the animations is to do a so-called retopology of the mesh or use a base mesh and just remodel the hair. Or do a quick and dirty remesh with Instant Meshes (not good for facial expressions). After simplifying the mesh, you still need to transfer the textures with Texture Baking.
Clean Up the Head's Mesh
flip the normals because the mesh is inside-out. Select the head, go to Edit mode (Tab), select everything (A), and use Alt+N > Flip (or the menu entry Mesh > Normals > Flip).
Note: The Recalculate Outside command in this menu does not work for your head. It will flip only a part of the faces and mess it up. You can check the result with the Face Orientation overlay. The head should be blue after you flipped the normals.select everything (A), and do a M > Merge by Distance to get rid of duplicated vertices and connect (almost) all mesh parts. A curl still will be separated but that's nothing to worry about.
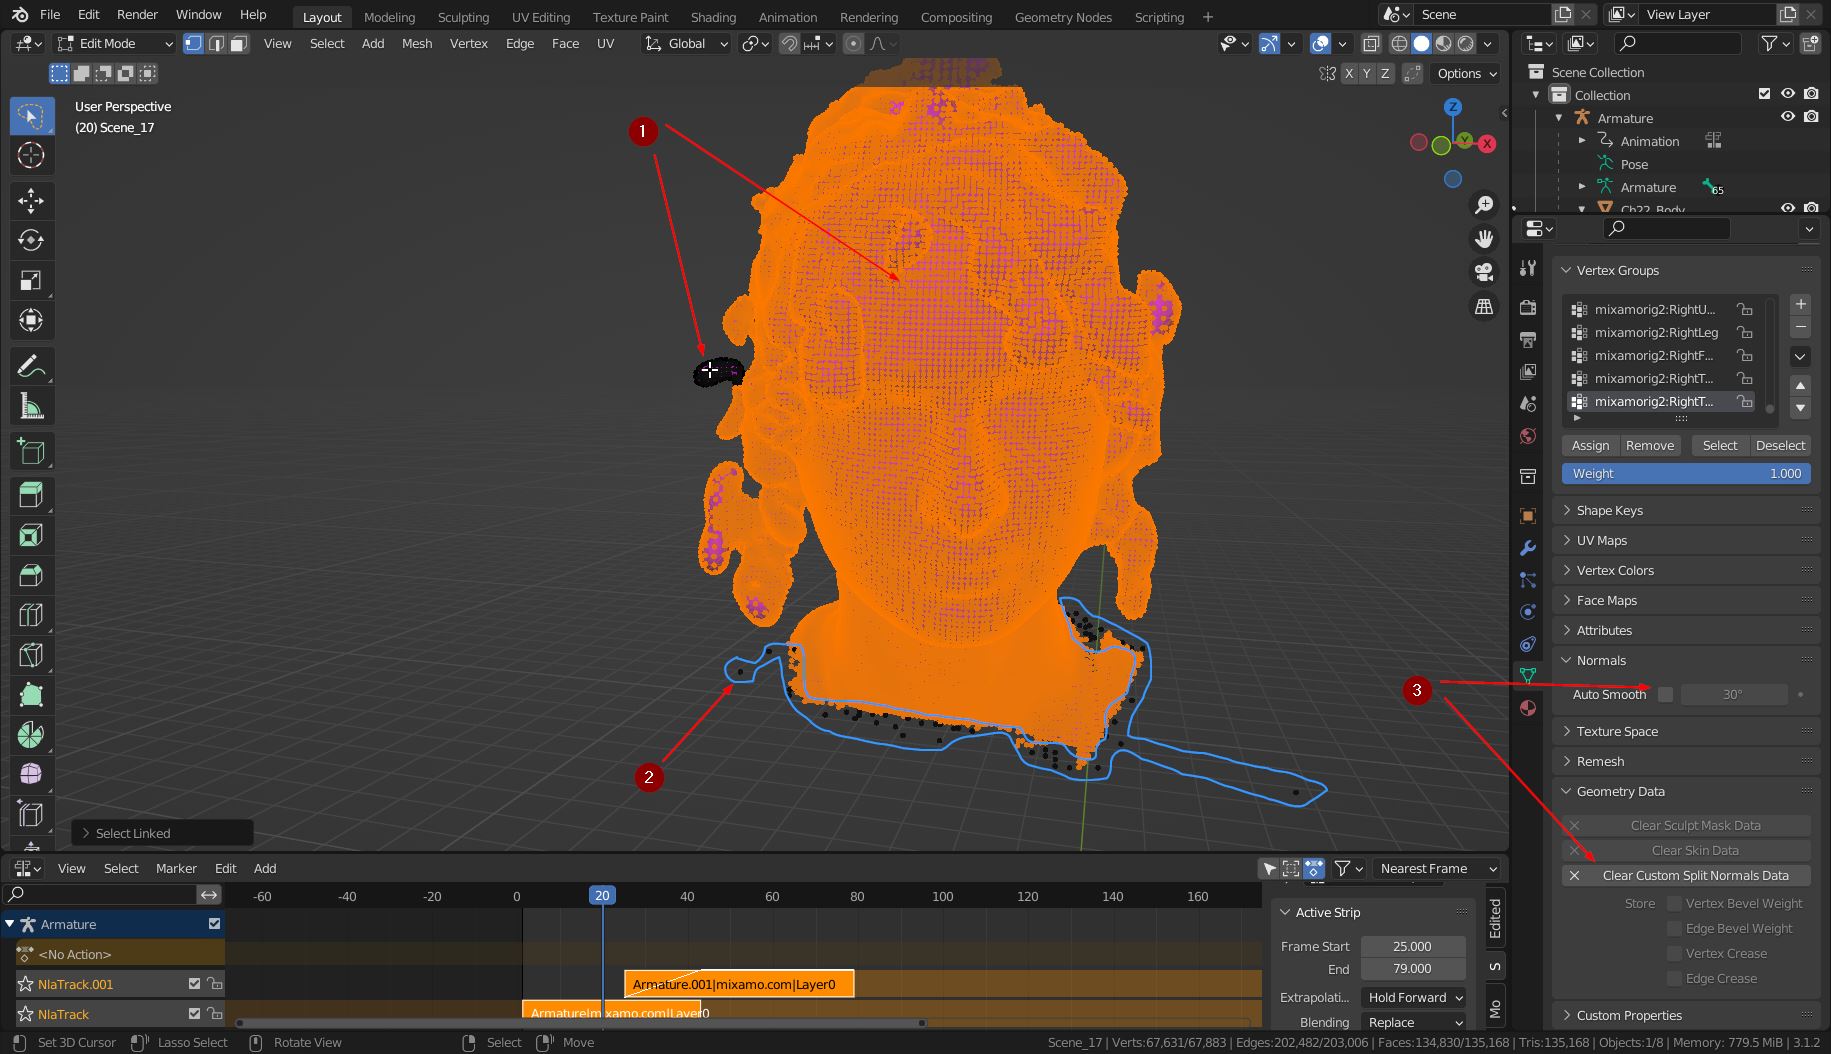
clear the selection (Alt+A) and select the head's mesh by hovering the mouse over the mesh and Select Linked (L) [(1) in the screenshot]. Repeat it for the curl on the left. Now you should have selected everything except the tiny loose islands floating around the neck [(2) in the screenshot]. To get rid of them invert the selection (Ctrl+I) and delete them with X > Vertices.
Switch to Object mode (Tab). To fix the bad shading go to the Object Data Properties tab [(3) in the screenshot] and untick the Normals > [_] Auto Smooths option to get rid of the bad shading. Blender now no longer uses the Custom Split Normals Data and you can delete it with the Clear ... button. This results in smaller file size.
Add the Missing Bone Weights
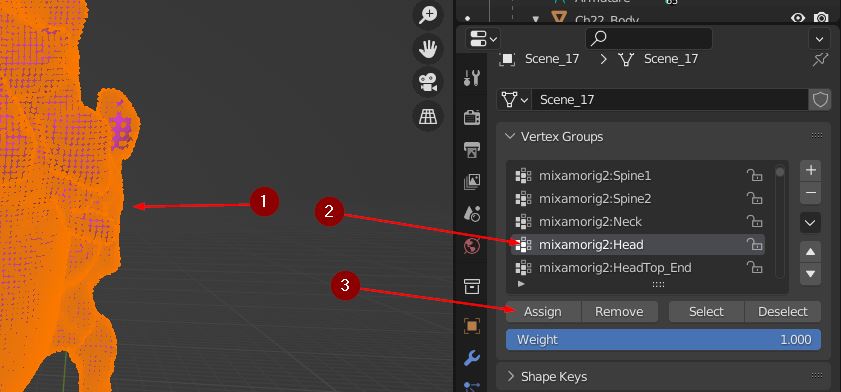
To assign the weights to the head
- Switch to Edit mode (Tab) and select the all of head's mesh again (A)
- scroll the Vertex Groups to find mixamorig2:Head. Select the entry and
- press the Assign button.
Put the Head On the Body
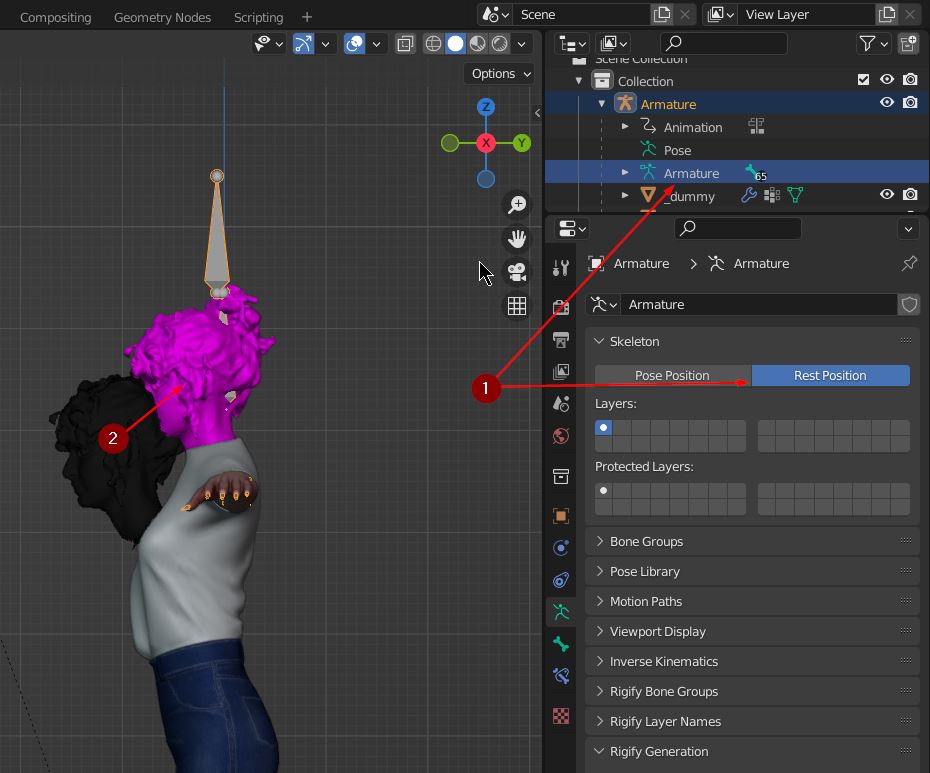
- In Object mode (Tab), select the Armature object and set it to Rest Position. This disables the animation for a moment.
- now switch to sideview (Numpad 3 or menu View > Viewpoint > Left) and select the head and move into position
Bind the Head To the Armature
- select the Head object, then the Armature. The order is important to have the armature highlighted in orange (=active object, will become the parent) and the head highlighted in red (=selected object, will become the child)
- Choose Ctrl+P > With Empty Groups to bind the mesh to the armature and keep the weights. This will also add an Armature modifier to the Head object.
- Switch the Armature to Pose Position
- Done. Run the animation :-)

