0
$\begingroup$

I have created a partial head from a sphere in Sculpting mode. Then I clicked on + and then General Layout (as per a Youtube video on sculpting). The video is a bit peculiar because he ends up having to delete several copies of the UV Sphere.

Next I added a UV Sphere (which appeared inside the head). I then switched to Wireframe and then proceeded to scale and move the UV Sphere to the right eye socket.

Then, with the sphere selected, and the 3D cursor positioned between the two eye sockets, I added a Mirror Modifier. But every time I do this the mirror image appears in the same space as the original sphere.

I saw in another post that one should select Object > Set Origin > Origin to 3D Cursor which I did and still I get the same thing. I want the mirror image to appear in the other eye socket.

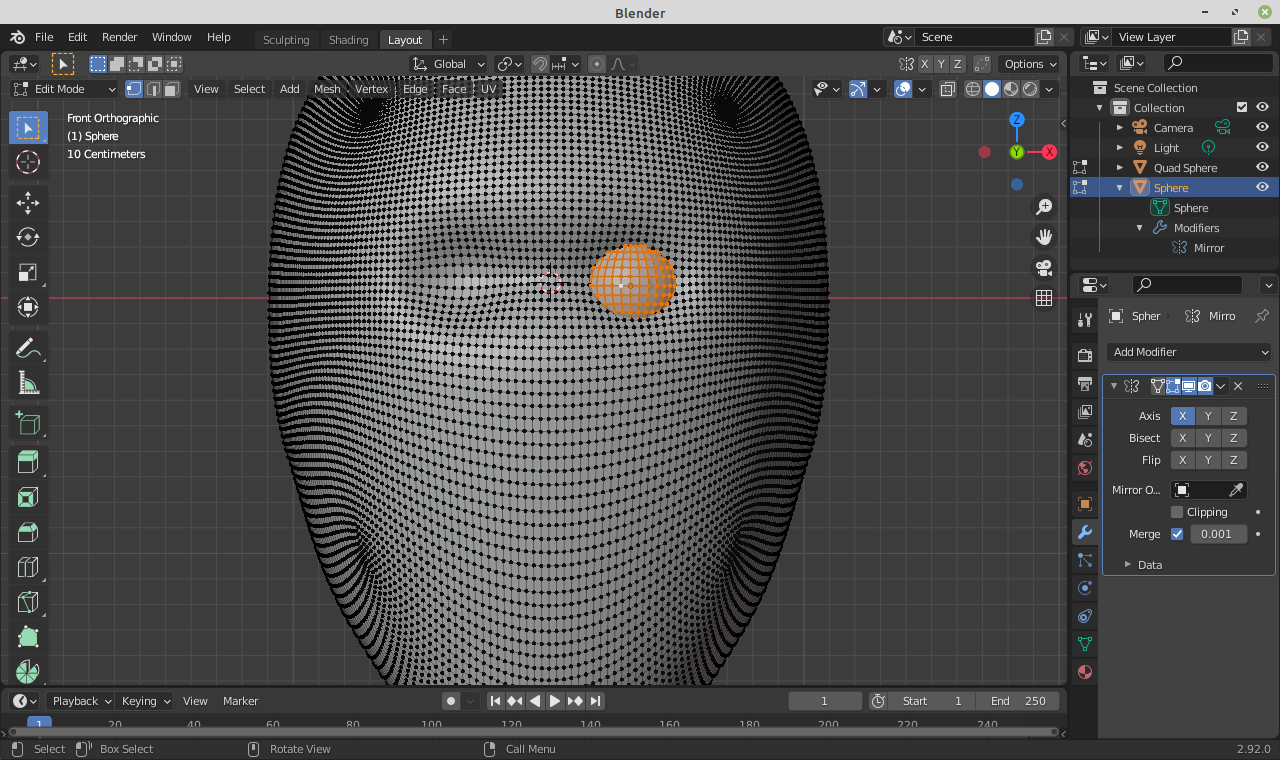
Mirror Modifier

$\endgroup$

1 Answer 1

1
$\begingroup$

I got it to work. It appears you have to select Object > Set Origin > Origin to 3D Cursor AFTER adding the Mirror Modifier.

Seems rather bizarre to me.

I would have thought you would set the origin first and THEN set the Mirror Modifier.

$\endgroup$
1
  • $\begingroup$ You can do it first. The important thing is that the origin for the object to be mirrored is centered on the Worldspace origin (or some other central point that you have specified and are aware of). Otherwise, either gaps or overlapping can occur. It makes no difference whether the setting of the object origin is done before or after the mirror modifier is created. So long as the modifier remains in place, that is. It's a different story if the modifier is applied, of course, because then its effects become permanent. $\endgroup$
    – R-800
    Commented Mar 14, 2021 at 1:38

You must log in to answer this question.

Not the answer you're looking for? Browse other questions tagged .