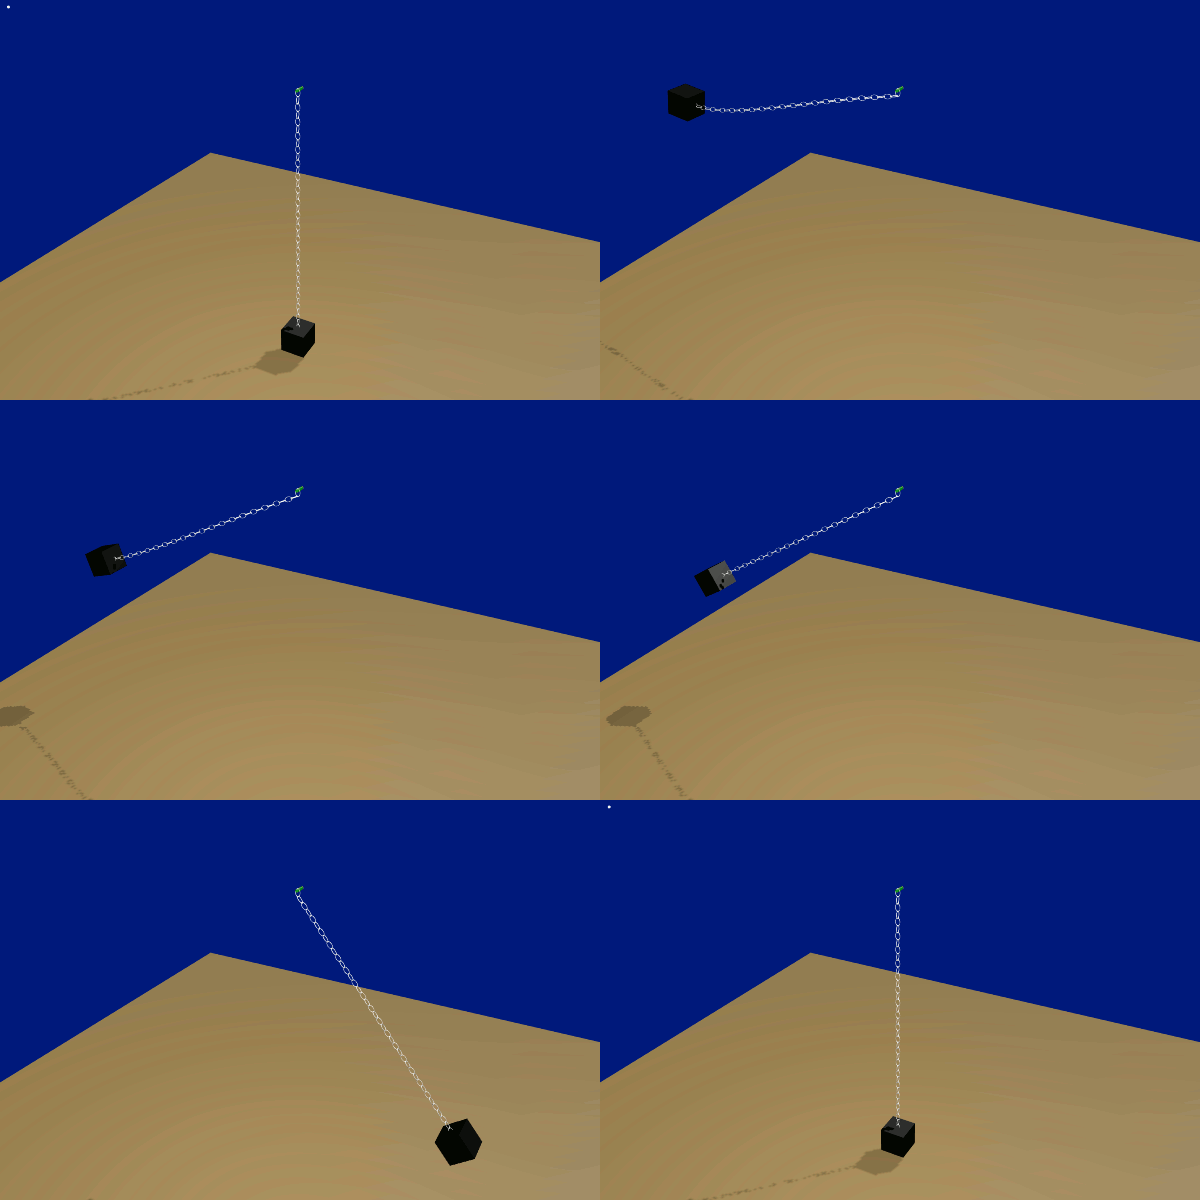
Whilst this was done in version 2.77a, from what I read, there are no significant changes with the physics engine in later versions. All 3 methods should therefore work in yours.
Swinging a chain can (if you're inclined) be reduced to a basic rotation transformation that doesn't require physics at all. Instead manually keyframe and time them appropriately to emulate how a pendulum would behave. That's covered briefly in Method 1 below.
A more ambitious version, one using physics and a curve modifier to 'loosen' the chain on the initial overswings is also included further below, along with it's Blend file. That's shown here -

This chain in all 3 cases was constructed as an array from a pair of mesh chain-links. One rotated 90 degrees along it's axis, then joined with the first. (CTL-J) Once arrayed and the array eventually "Applied", it will provide vertices for a weight object to be attached later. If the array isn't 'applied' there'll be no mesh at it's end to attach to.
There's also little need to keep the array active. The less modifiers operating in a project usually proves beneficial when other forces, constraints etc, are also to operate on a model later or concurrently.
Details - The basic (emulated) swing.
For a vertical swinging chain, essentially all that's required is to pivot the chain at the top link and rotate it firstly to the left, then to the right. Some 30 frames might be a typical spacing between swing peaks.
e.g. at frame start, rotate to the left some 16 degrees, keyframe that, advance another 30 frames, rotate the chain to 16 degrees on the right side and keyframe that. Set the interpolation to Bezier. (which is usually the default)
With one full swing keyframed, in the Dopesheet, those keyframes can be duplicated and slid to the right 30 frames on from the last. Do this for as many swings as required.
In the graph editor each swing's angle can be reduced a little but linearly, to emulate attenuation so the swings diminish over time and would eventually come to rest.
Check that the swings and timing look natural. (Use the Dopesheet and Graph editor to adjust timing between swing-peaks and behavior respectively )
That's about it for the simplest scenario.
Version 2 - Using Physics - (the Rigid Body Constraint --> Hinge)
Our chain will be the same and still pivoted from it's top link but swinging (hinging) under physics control this time.
With physics and in particular, 'Rigid Body' constraint, things don't always go according to plan and it's often best to use simple dummy (invisible) rigid bodies to get the physics behaving as required, then using those as parents for the real models.
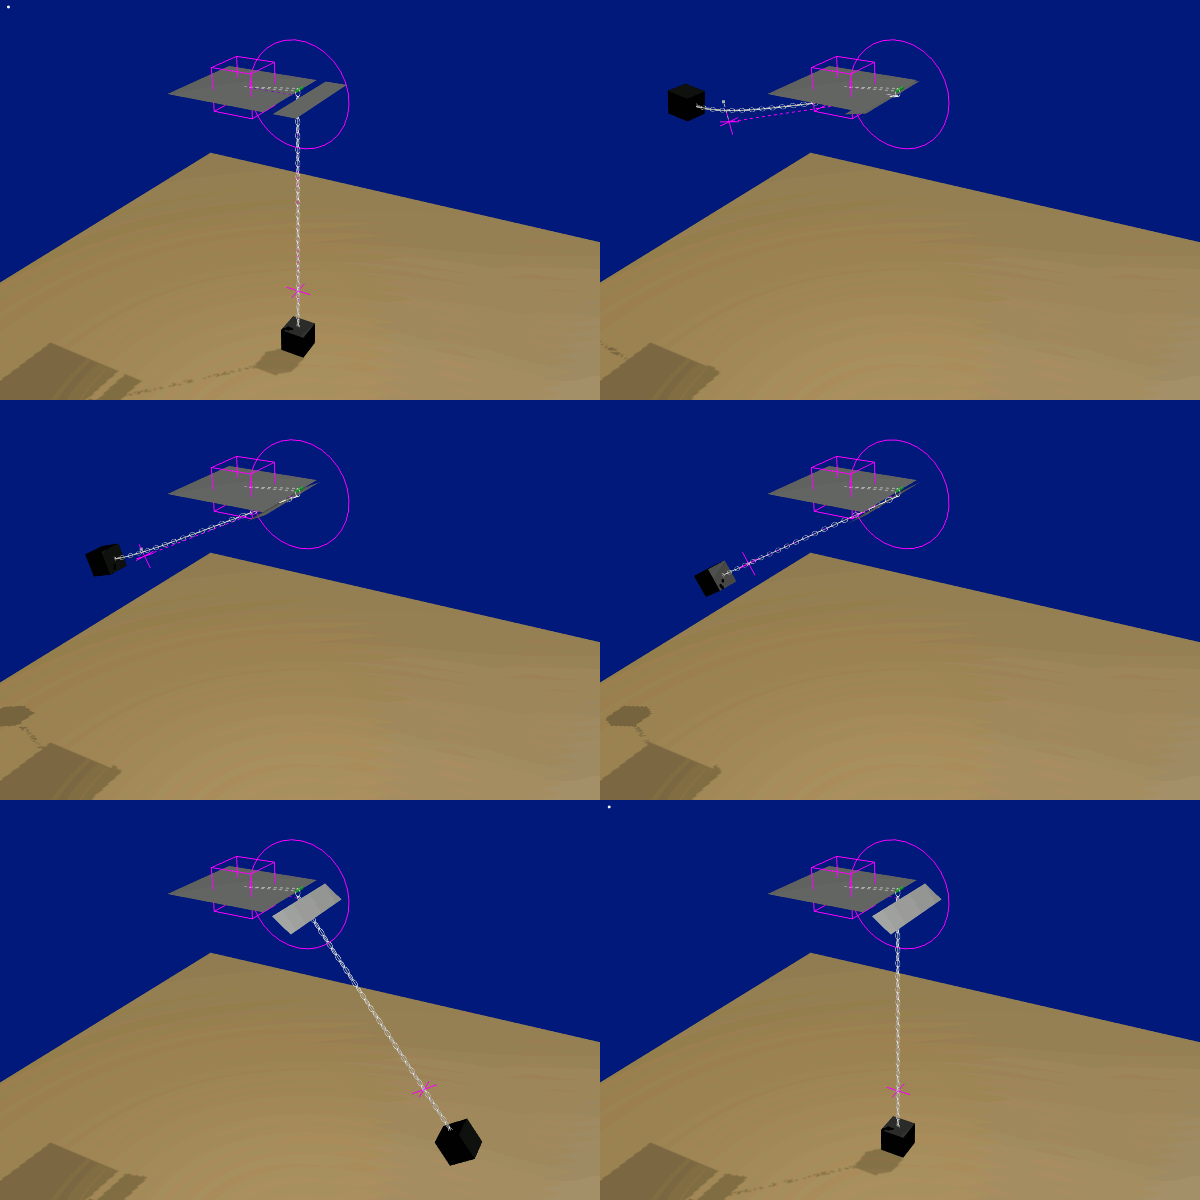
The dummies are the two planes. 'Plane West' & 'Plane East.' -

These can be scaled and moved in order to affect & tweak physics behavior without affecting your model(s).
The 'Hinge' option is used with the constraint. This will stop the active plane (plane east) from falling away from the other. 'Plane West' is a 'Passive' rigid body and 'Plane East' - Active and Dynamic.
This is what tells the engine which is to swing from the hinge point, (the constraint's Empty) and which is to stay put. Plane East will swing down, Plane West won't.
Once the swinging is behaving properly the dummies are then used as parents for the model(s).
If you don't want further antics, that's all that's required.
Please note - if Plane East doesn't swing and doesn't fall either, it tells you the constraint is working but it's Empty is pointing along the wrong axis. Rotate it to the other 2 axis' in turn. If you've set it up right, one has to work.
Version 3 - Bending the chain's length on excessively high swings
With the swinging sorted, should any bending be needed for the chain itself, that can be achieved by adding a curve modifier to the chain's mesh and using a 'Hook' at a lower control-point to bring about the bend.
Caution -
As the curve, chain, and added hook MUST maintain their relative positions to each other, a 'Handle' (parent Empty - the circle) is added as a common parent for all three. It must rotate from the same origin point as the chain and curve's.
It's the Handle-parent that holds them together throughout the swings. The handle is parented to Plane East, not the chain or the curve and hook.
Should a ball or other object be attached to the chain's end, that would need to be parented to the chain's mesh using the "3 vertices" option. This would force the object to swing at the same angle as the chain's end and appear properly attached.
Note - The curve is best without excessive control points at least along it's lower half.
Only one between the center point and lower end is ideal for this situation.
Moving this (with the hook) will affect the curve's end angle and subsequently the attached object.
In the example the curve's hook is moved a little to the right on the left swing and a little to the left for the right swing. (See dopesheet and graph editor) This bends the curve's end enough to angle the weight object, so it looks much like a playground swing that's being pushed too high.
The hook's deforming action should only be in effect while the swings are high and even then reduced with successive swings so there is none when the swings are back to a civilized angle.


