3
$\begingroup$

I'm trying to make a functional sequential channeling/masking without any external media. To make my point clear, I made this quick .blend where a traffic light goes to red > yellow > green when the input value rises.

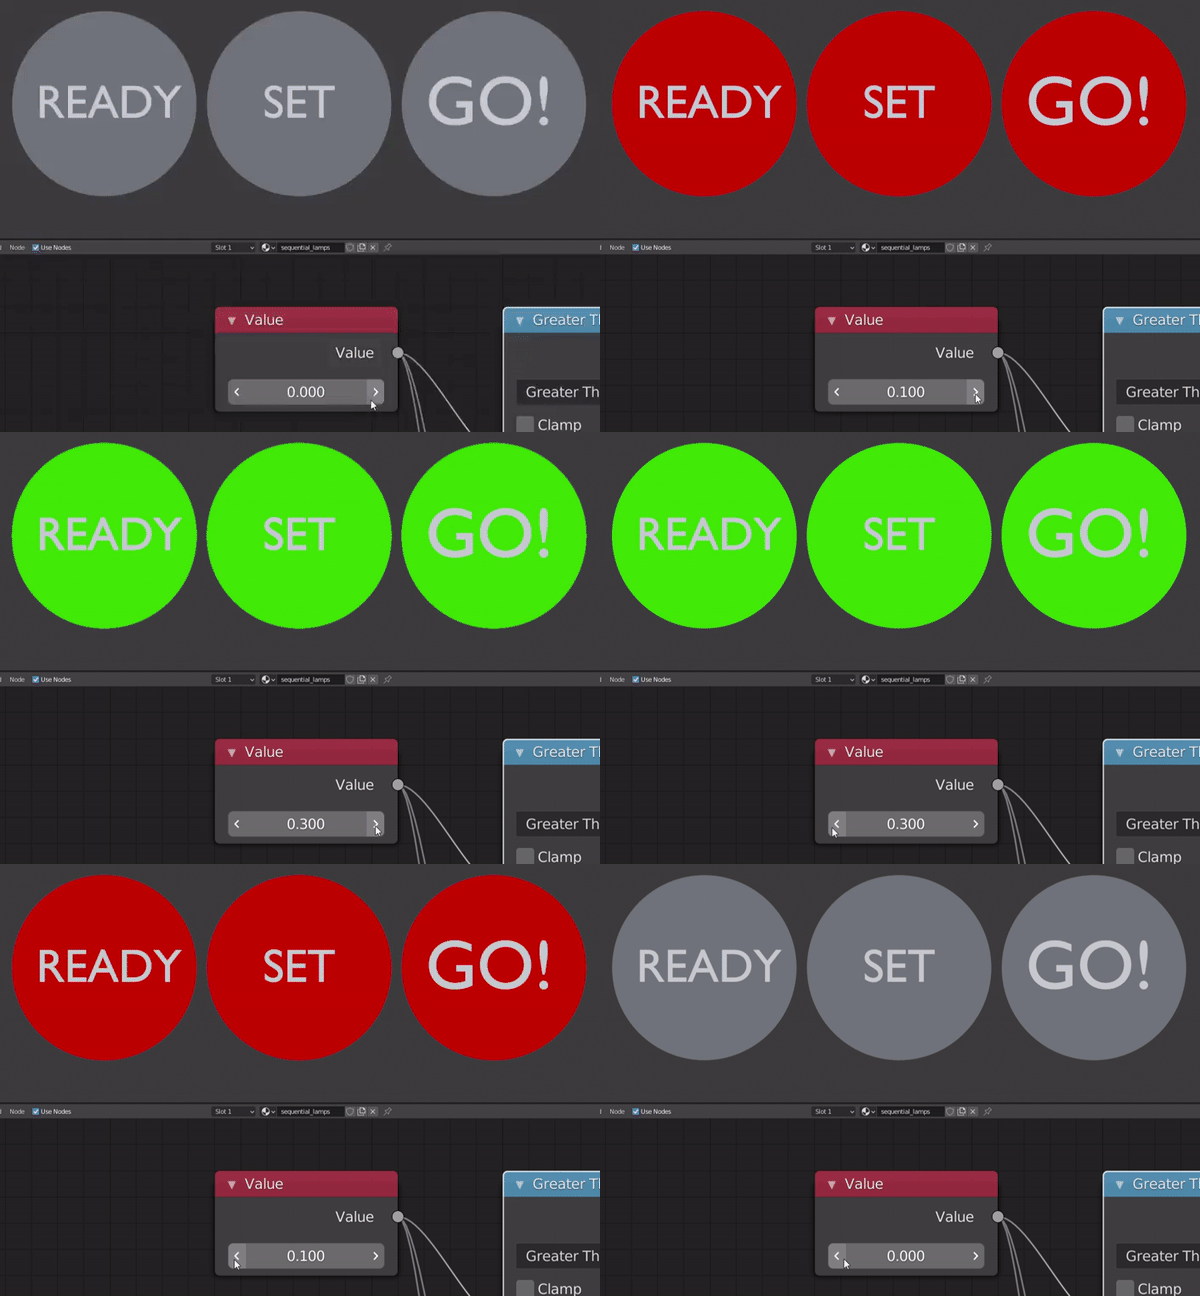
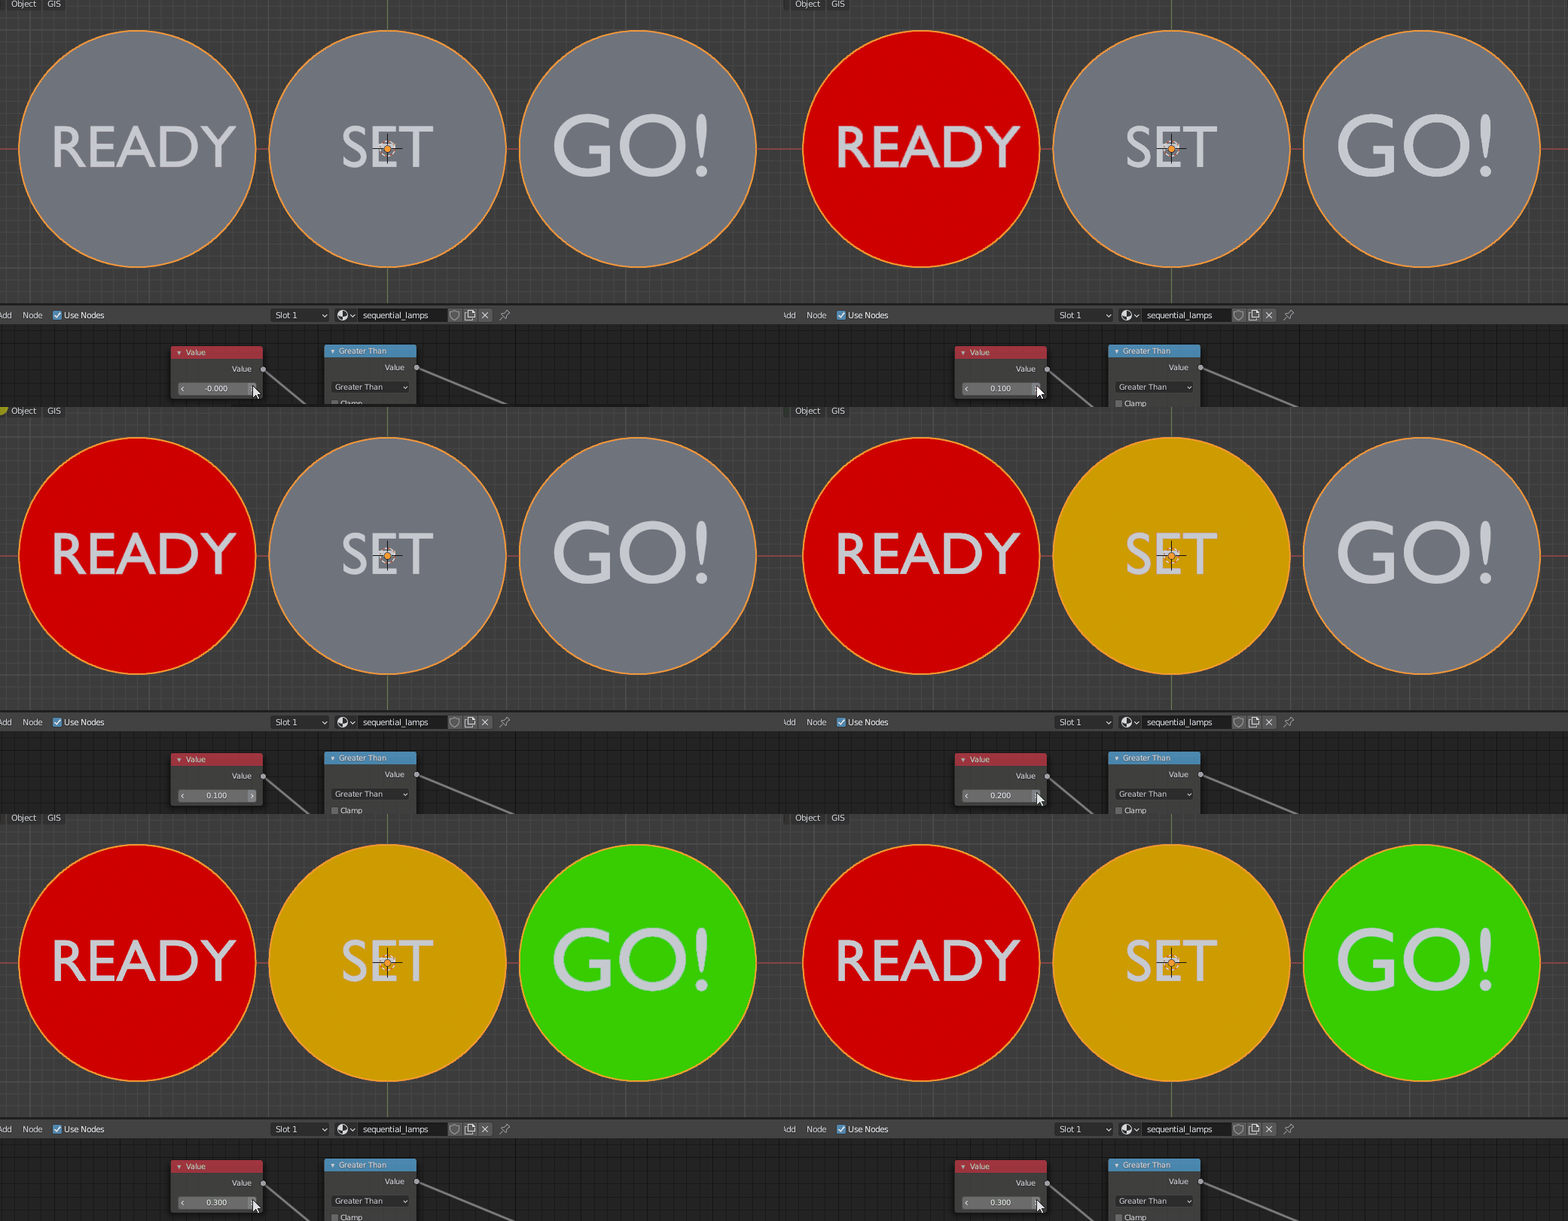
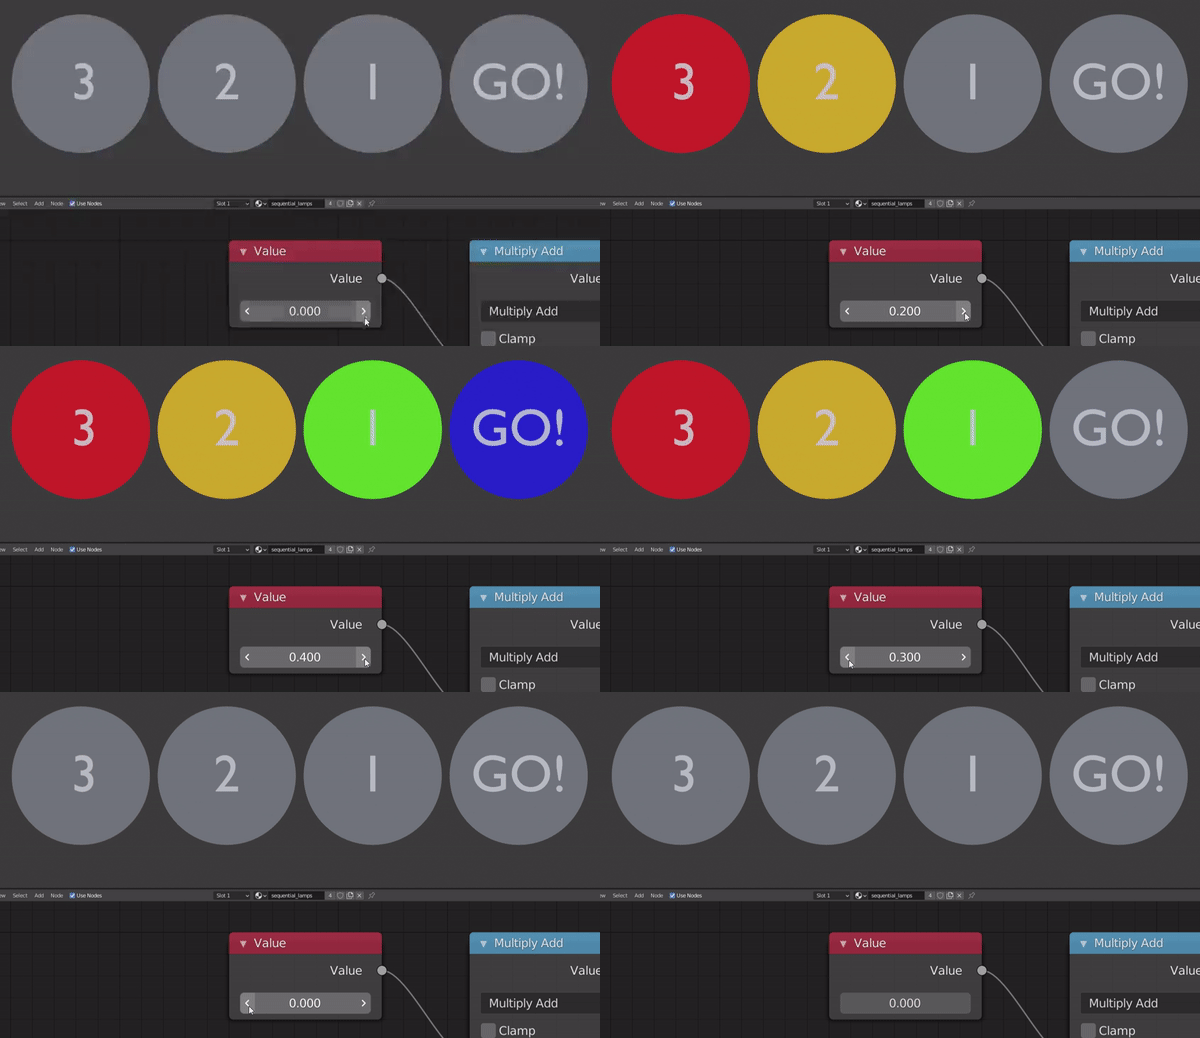
This is the effect I've got so far:

so far

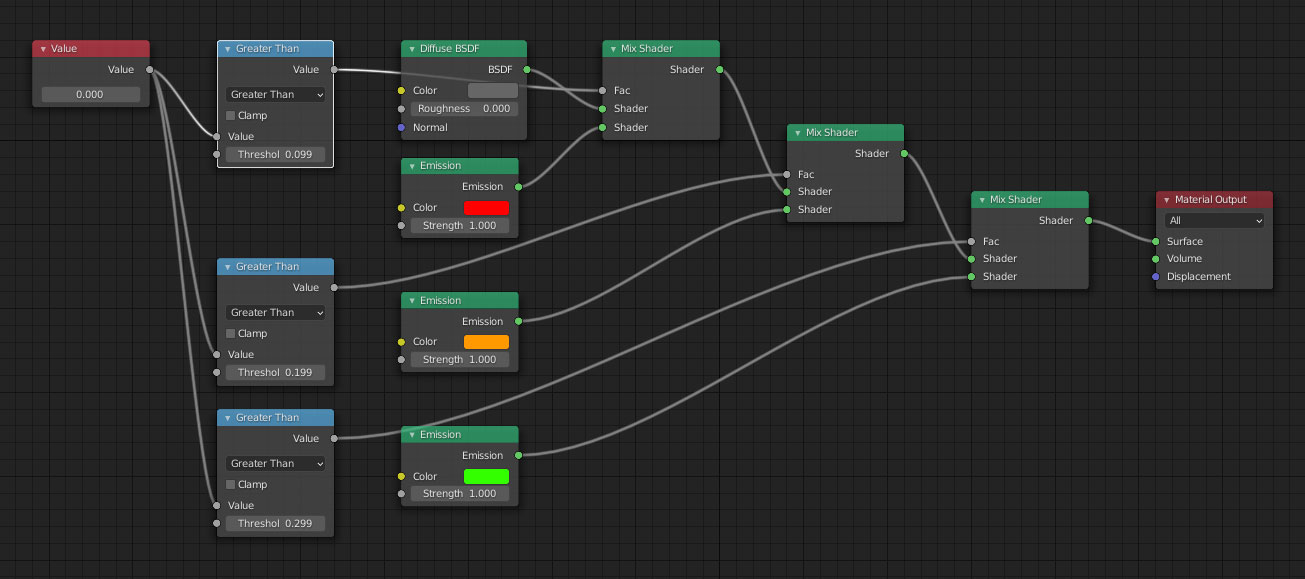
This is my node setup:

enter image description here

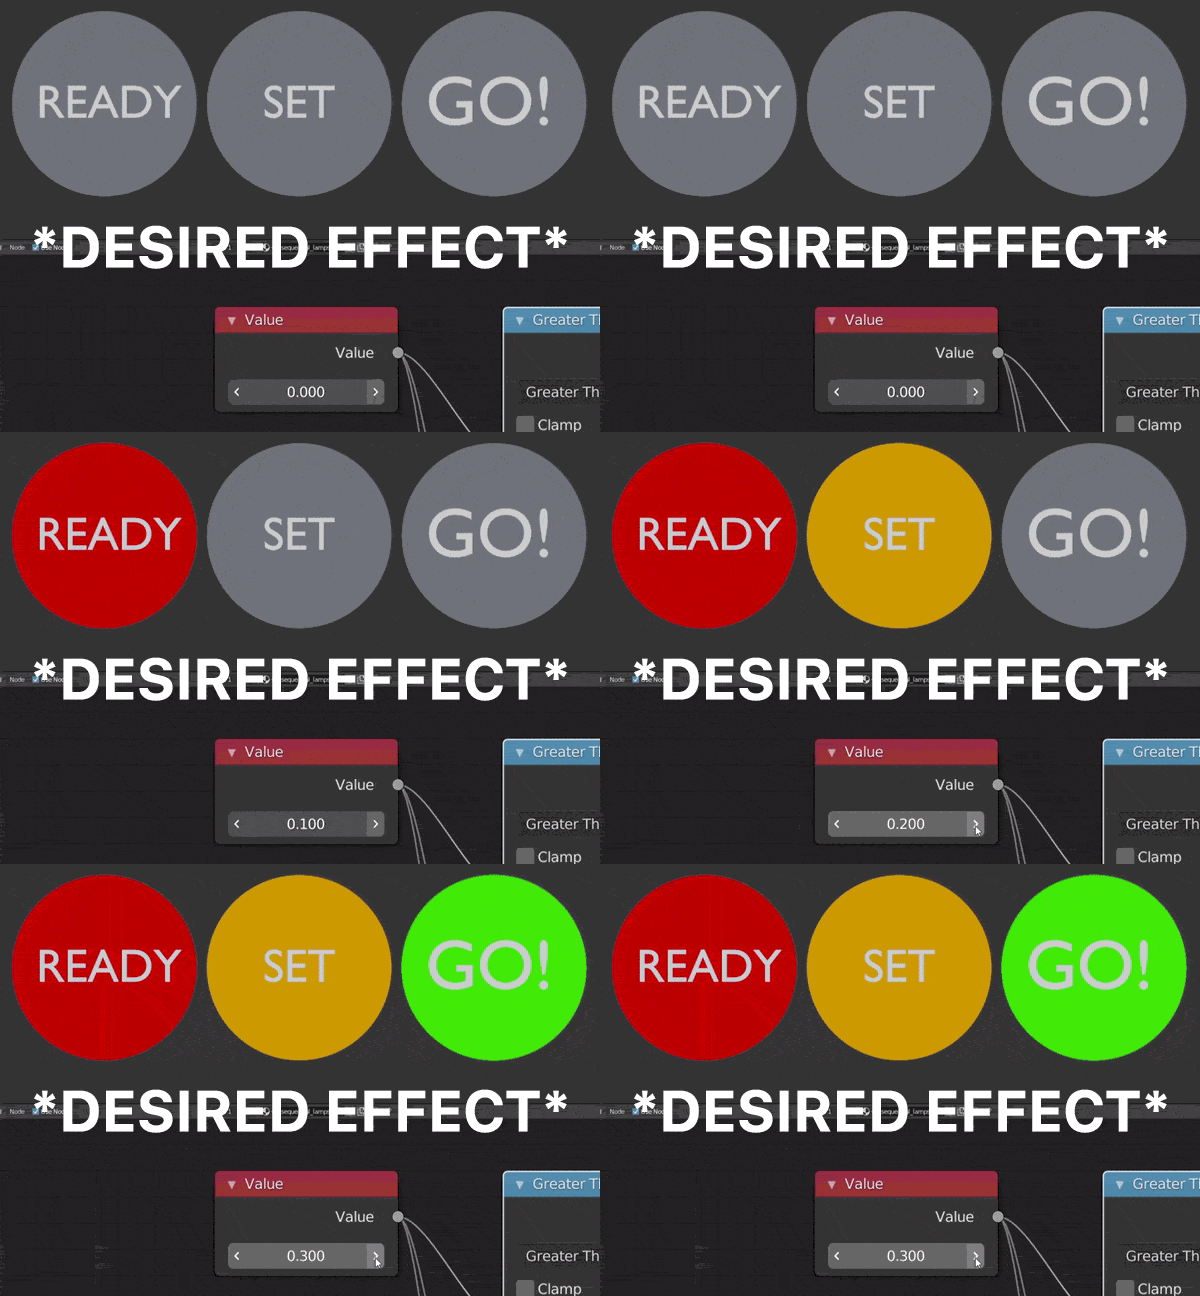
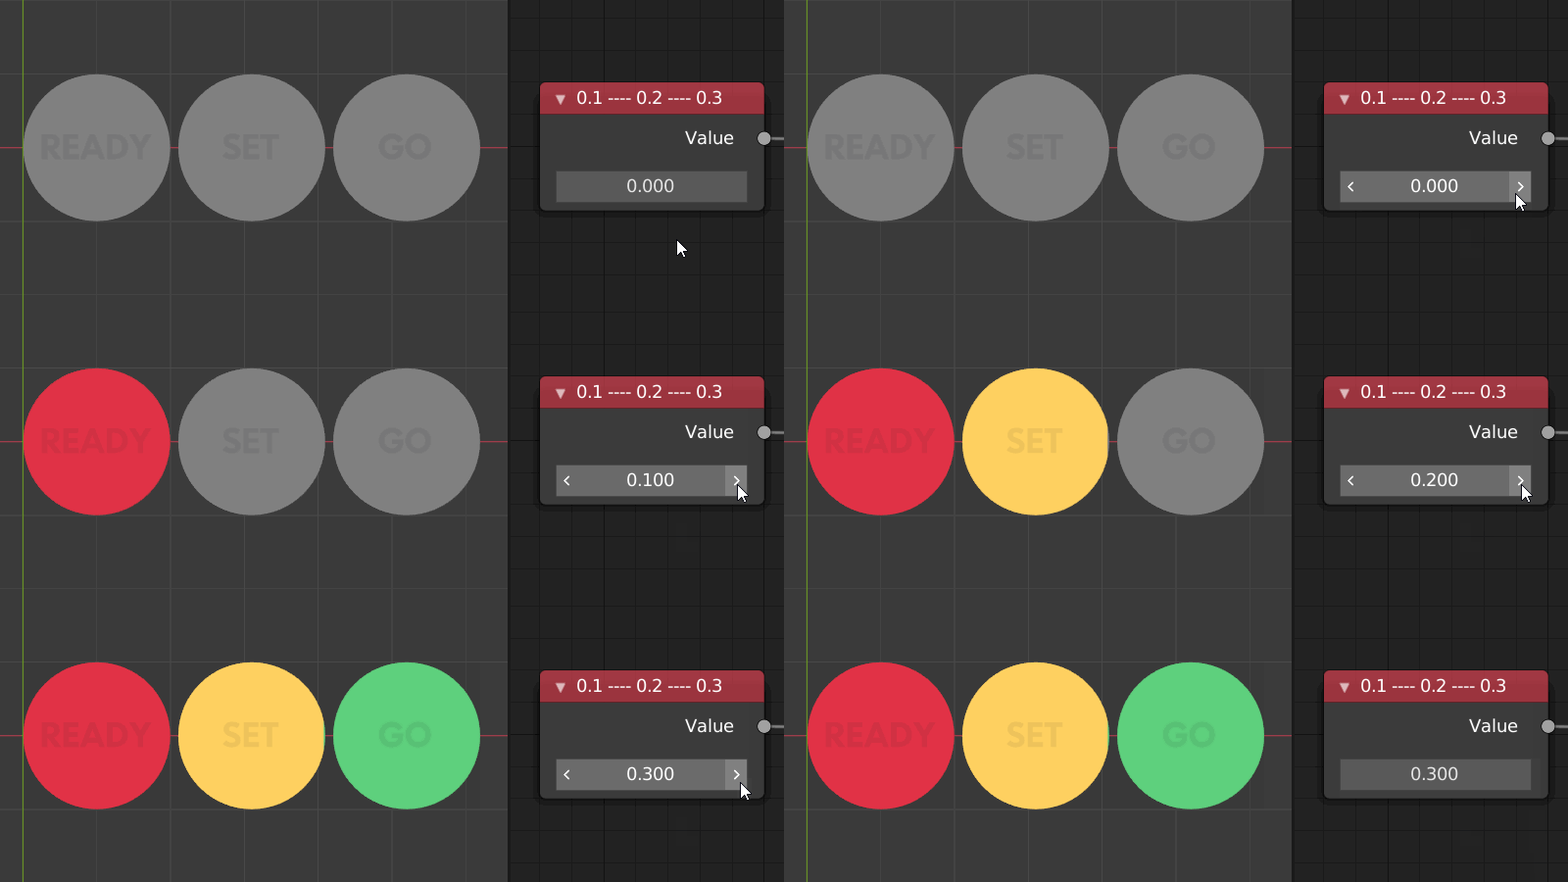
And this is the desired output:

desired effect

I know that in a PBR workflow I could just make an image for channeling/masking the output colors via UV mapping, but I wonder if I can achieve the same effect without external data

Objective:

  • Achieve the desired sequential effect with different color output on each element (see example above)

Rules:

  • No external media or UVs for channeling/masking (PBR workflow)
  • No external add-ons or plug-ins
  • No animation/keyframe use

Extra points for:

  • Optimizing node setup
  • Finding and explaining a better way to achieve the desired effect
  • Is there a binary value input? like an ON/OFF for each individual element instead of setting a math conditional by numeric values?

Thanks in advance for your help!

Edit: here's the original .blend file

$\endgroup$
1
  • $\begingroup$ Nice topic :) BTW Isn't that like only one light should lights at a time? $\endgroup$
    – vklidu
    Commented Sep 18, 2020 at 7:41

4 Answers 4

5
$\begingroup$

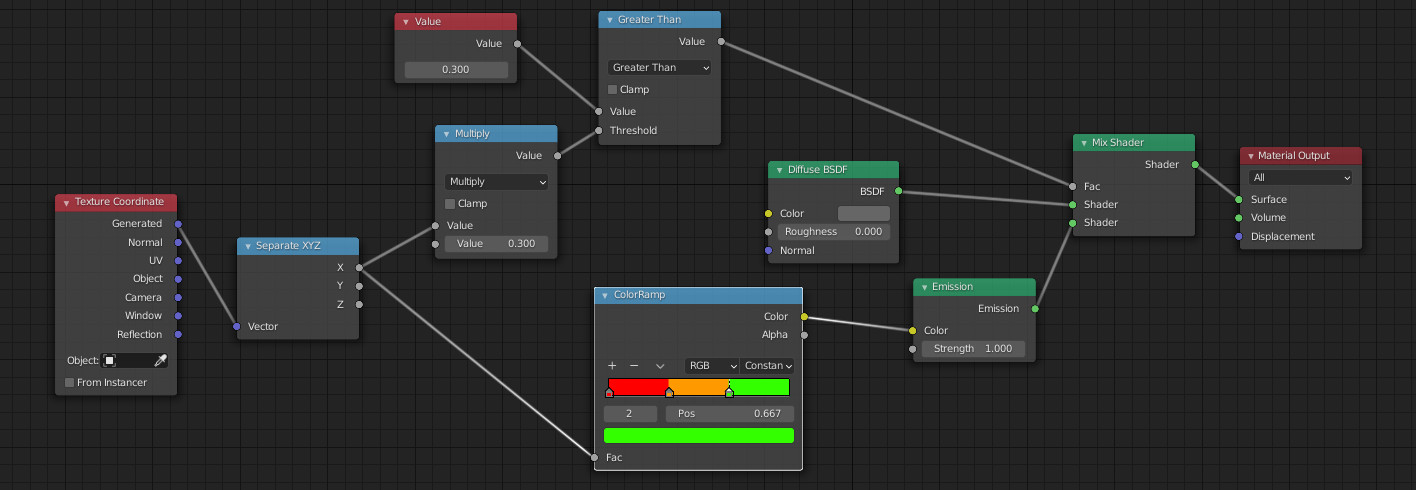
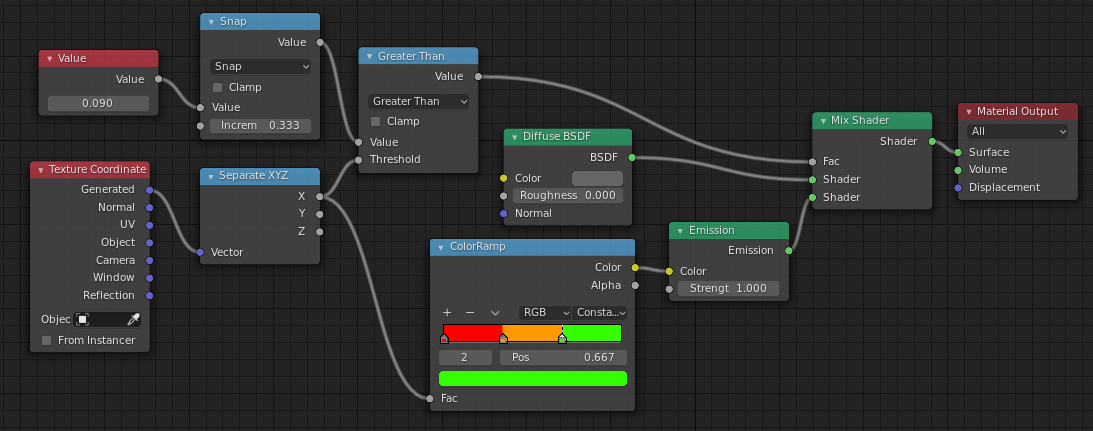
You can use "texture coordinate" input node and a "color ramp".

The X output is between 0 and 1. So if we split the color ramp in three constant steps at 0, 0.3333 and 0.6666 we'll have the color we want for the good disk.

For the grey part, we just compare the input value (0, 0.1, 0.2, 0.3) to X clamped into 0 and 0.3.

enter image description here

enter image description here

$\endgroup$
4
  • 1
    $\begingroup$ Nicely done and way more elegant :). $\endgroup$ Commented Sep 13, 2020 at 10:29
  • 2
    $\begingroup$ @JachymMichal, thanks... have UV yours as the OP said "no UVs"... ; ) $\endgroup$
    – lemon
    Commented Sep 13, 2020 at 10:34
  • 1
    $\begingroup$ Yeah, I must've missed that part :). $\endgroup$ Commented Sep 13, 2020 at 10:35
  • 1
    $\begingroup$ This works and meets the question requirements in a very elegant and simple way, I'm voting this as the solution to the question, thank you for helping! :) $\endgroup$
    – ermac
    Commented Sep 13, 2020 at 17:19
5
$\begingroup$

I couldn't help noticing an unsightly wipe in @lemon's answer, so here's a variation on it that switches.

enter image description here

..I'm sure this is what he meant ..

$\endgroup$
5
  • $\begingroup$ Certainly, but he said "No animation/keyframe use", so considered this does not matter... $\endgroup$
    – lemon
    Commented Sep 13, 2020 at 11:25
  • $\begingroup$ @lemon .. Just kidding, I would not have thought of your way in a hurry :) $\endgroup$
    – Robin Betts
    Commented Sep 13, 2020 at 11:32
  • $\begingroup$ unsightly... I didn't even know that word 5 minutes ago : ) $\endgroup$
    – lemon
    Commented Sep 13, 2020 at 11:34
  • $\begingroup$ This works and meets the question requirements very well. It's a little bit weird those value increments, but thank you for helping with this variation and reaching the objective! :) $\endgroup$
    – ermac
    Commented Sep 13, 2020 at 17:20
  • $\begingroup$ @ermac .. a couple more nodes would set the values to whatever you like :) I'm releived you accepted lemon's. this is basically his answer. $\endgroup$
    – Robin Betts
    Commented Sep 13, 2020 at 17:40
3
$\begingroup$

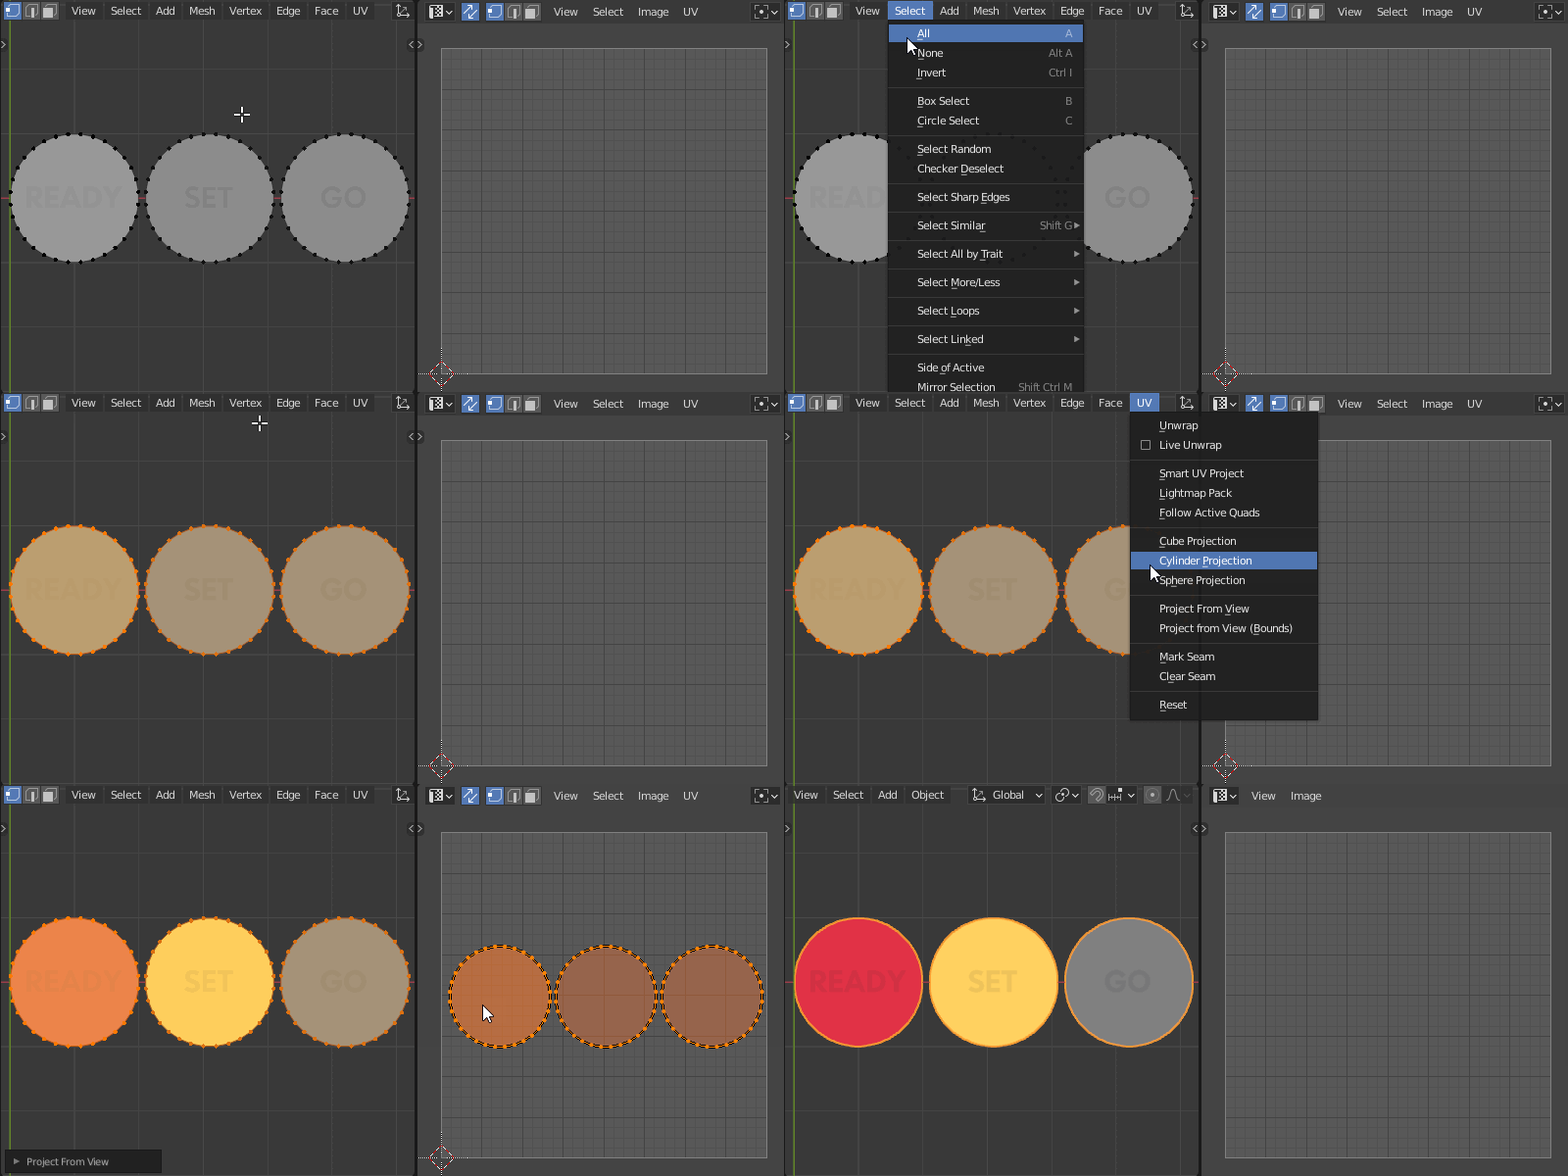
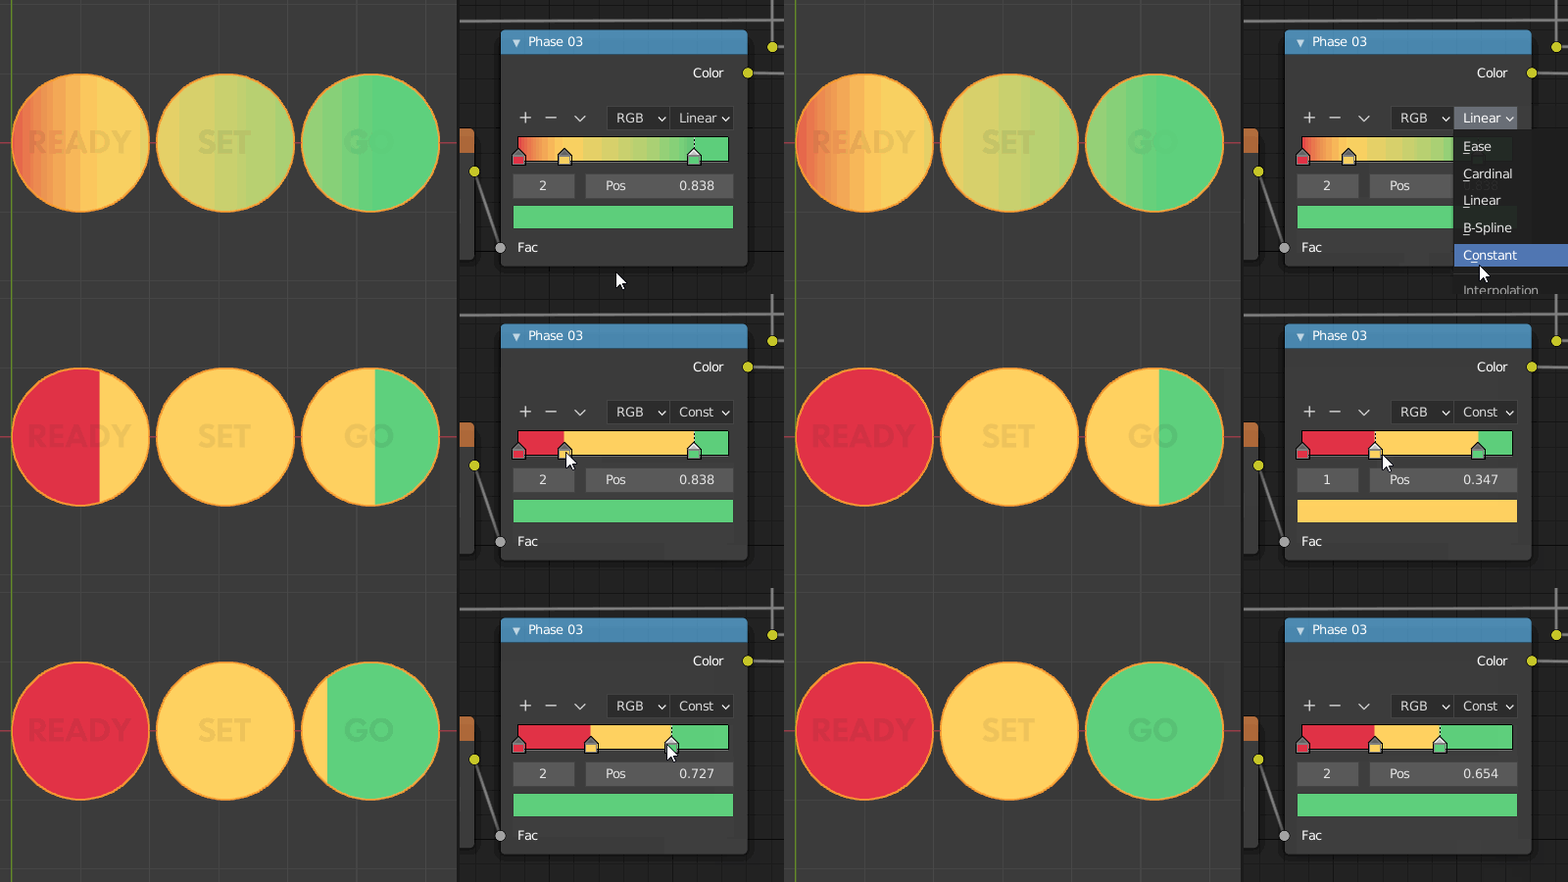
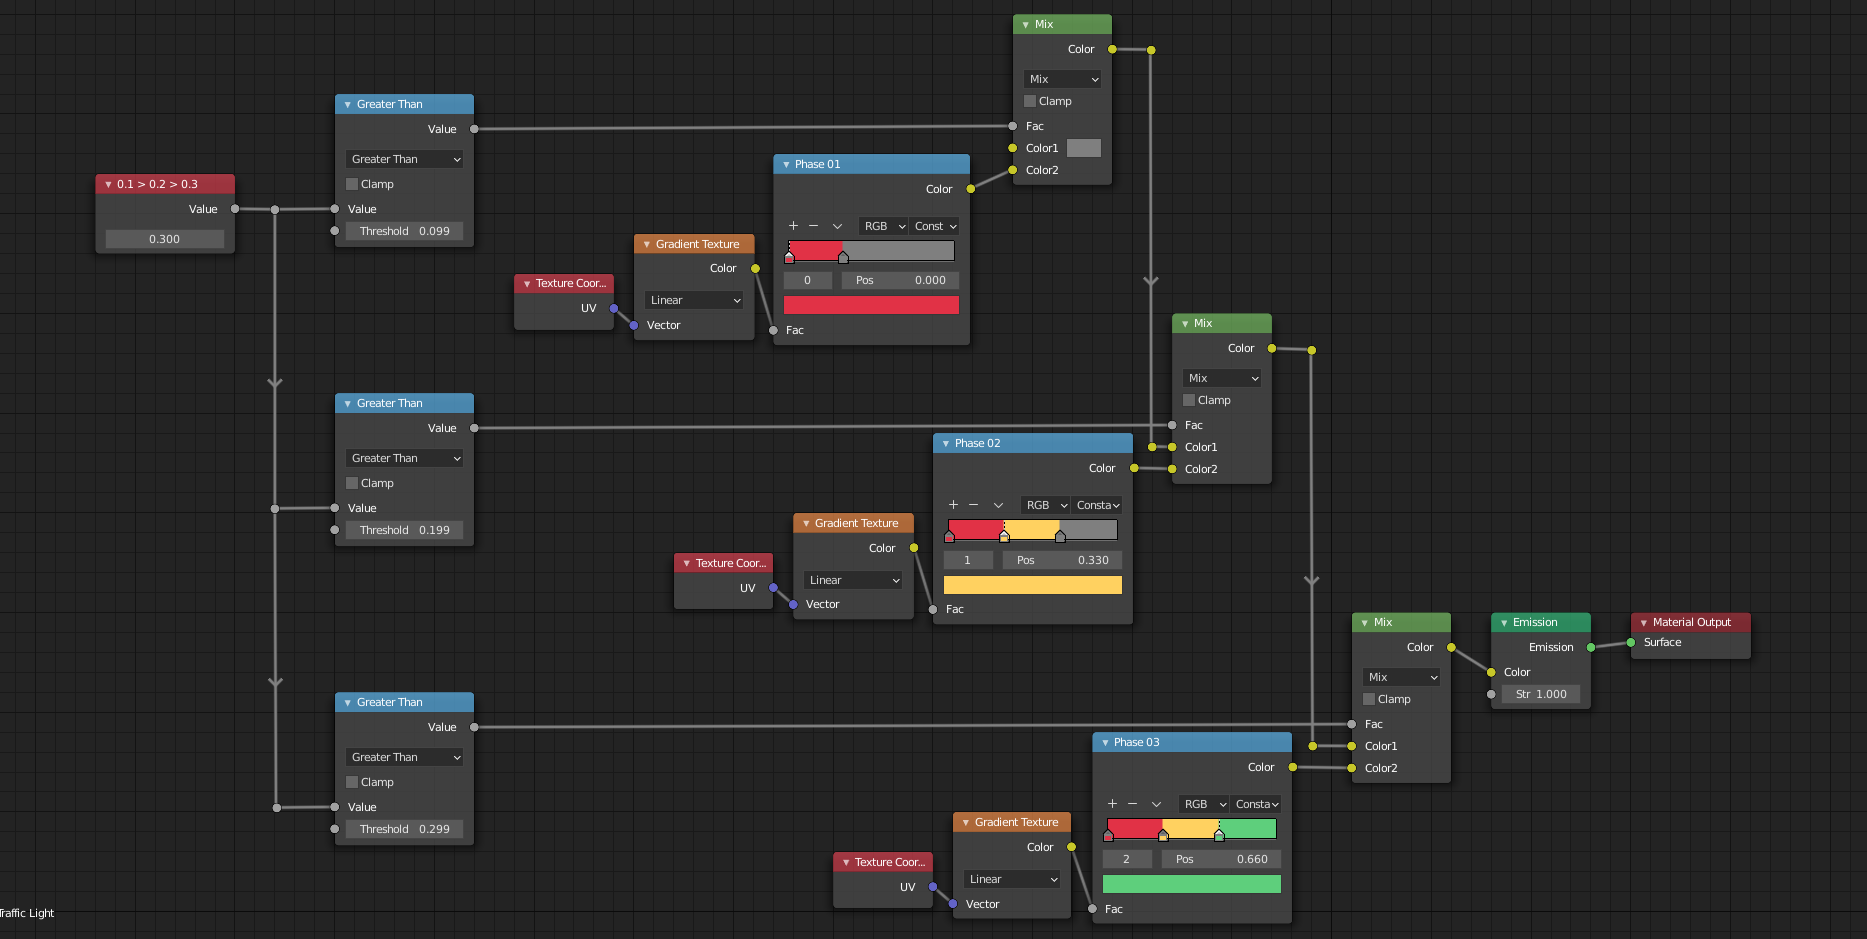
Simply add a Gradient texture with a UV map to your setup.

enter image description here

  1. Create a UV map for the traffic lights. (UV > Project from view)
  2. Add a Texture Coordinate > Gradient texture > Color Ramp for each phase
  3. The ColorRamp (set to Constant) controls which lights are on/off during the phase

Connect it to your current setup.

enter image description here

enter image description here

enter image description here

$\endgroup$
3
  • 1
    $\begingroup$ This works although it doesn't meet the question requirements, thank you for the alternative approach :) $\endgroup$
    – ermac
    Commented Sep 13, 2020 at 17:15
  • 1
    $\begingroup$ You're right, I should learn to read more carefully :). Good luck with your project. $\endgroup$ Commented Sep 13, 2020 at 17:18
  • $\begingroup$ No problem, thank you for your wishes and good luck as well! $\endgroup$
    – ermac
    Commented Sep 13, 2020 at 17:22
3
$\begingroup$

After the good answers and suggestions, I've made my own answer with some additions to whoever wants more features with this workflow idea.

Here's an optimized output (inspired by all the proposals received):

optimized output

And the optimized node setup:

optimized node setup


Explanation:

Four math nodes in total function as the masking factor and it's suitable for extending the object count and its values. To achieve this, the light lamps are now individual geometries (they are not into the same mesh group) and they were assigned with a different Object Index (Object Properties > Relations > Pass Index) to each one. Having now a unique index identification, it's now easier to control which element (or elements) changes sequentially when the value input increases.

Usage: You can now add more mesh elements and features to change sequentially

  • Separate the mesh or add a new geometry
  • Delegate an Object Index number to each geometry
  • Add an extra color in the ColorRamp or any feature you like
  • Change the Modulo value to match all the Index numbers
  • Subtract 1 Index number from the total in the Divide node

By following these steps you can now control the sequential output using only just 1 click with no UVs or external masking media :)

Extra idea:

  • You can delegate the same Object Index to different geometries if you want them to have the same output when it's needed (for example: making the 3-2-1 countdown all in red and the GO! light in green). It's not necessary to have 4 colors to achieve this, you can just put Red and Green color in the ColorRamp and delegate the same Object Index value to each 3-2-1 sequence. Don't forget to update the Modulo and Divide values according to the total Index values.

Hope you find this useful and I hope you learned new things as I did today. New suggestions and alternatives are always welcome.

$\endgroup$

You must log in to answer this question.

Not the answer you're looking for? Browse other questions tagged .