Question:
How to match an EXR (linear scene-referred information) to a PNG (in display referred values with sRGB "gamma" curves) of the same image in resolve?
The issue:
Even though both images are generated from the same render layer in blender, they are going through different pipelines and the values don't match: The PNG is encoded with a gamma curve (sRGB, 2.2) and the information has been scaled to fit within the 0-1 values of display referred, while the EXR is still in Scene-Referred values that exceed what the display is capable of representing on the screen. All values past 1 are displayed as "clipped" or "pure white".
A graphic to illustrate. Both images loaded in blender:
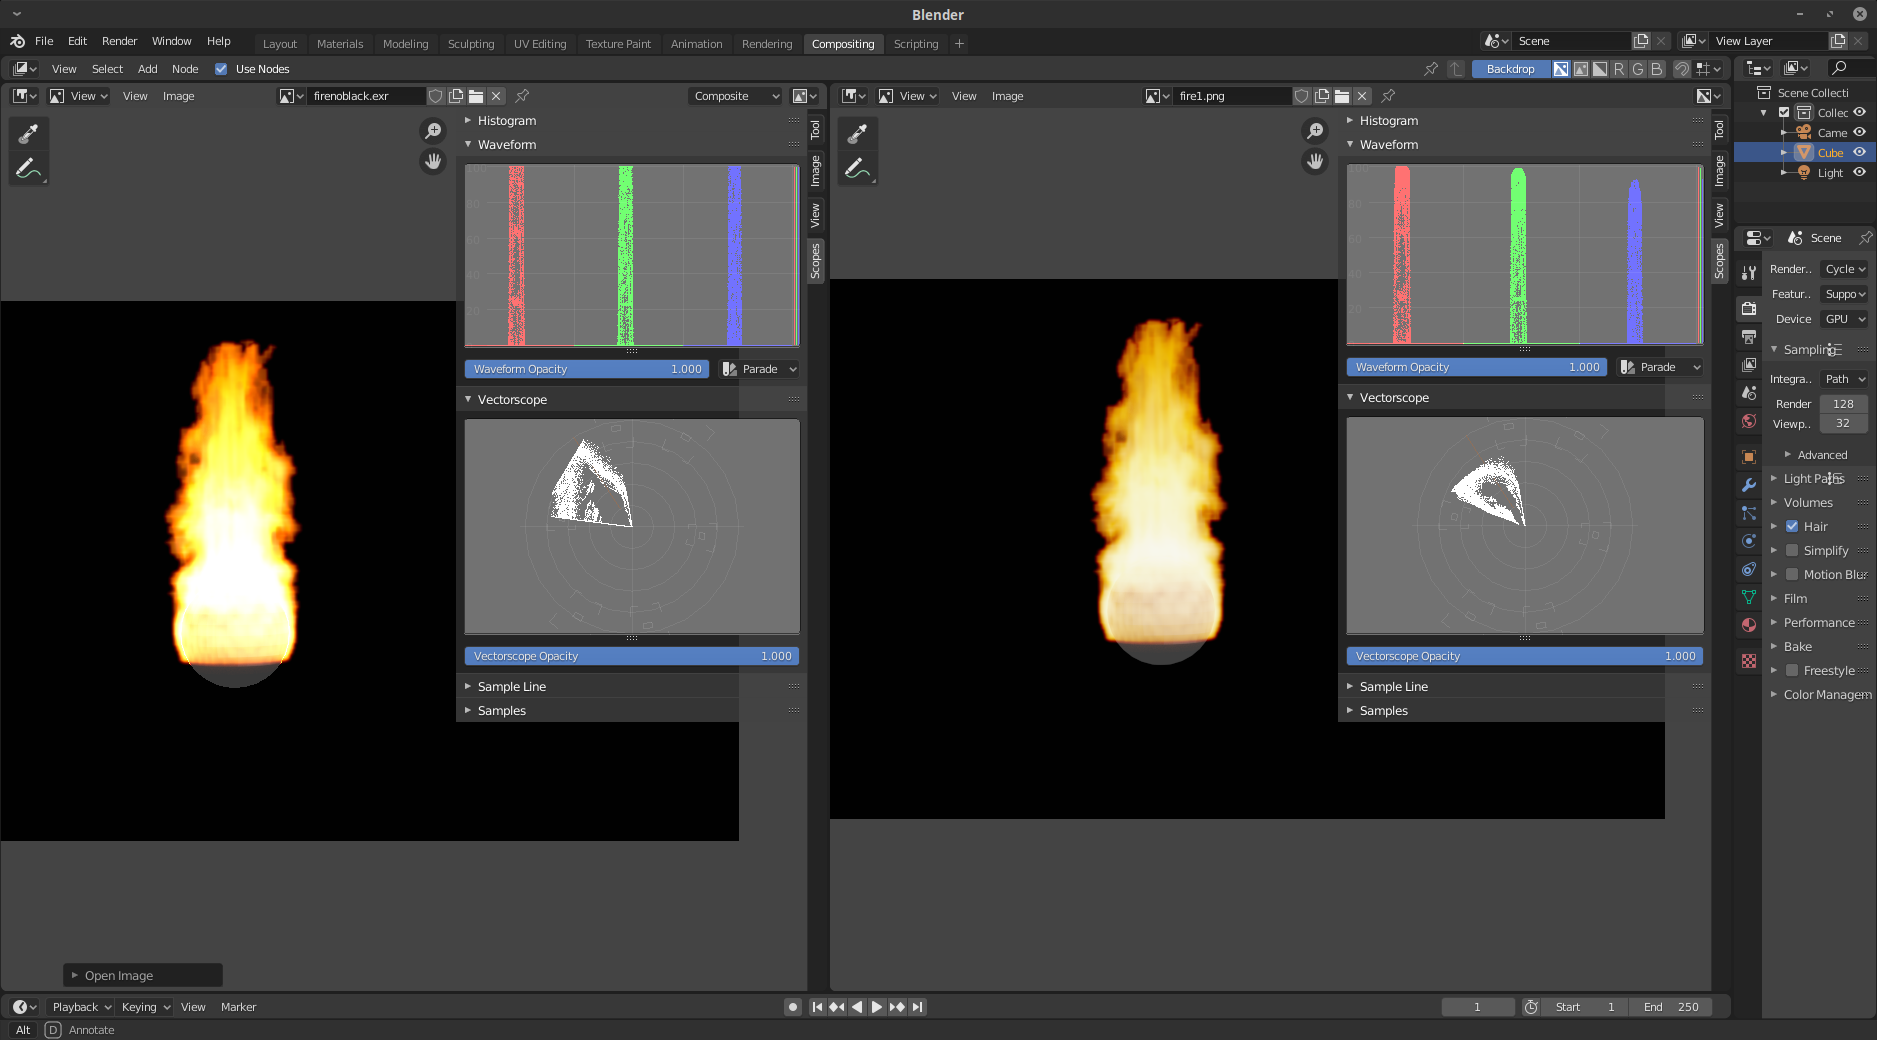
On the vectorscope you can see how the image brightess values for each channel are represented. The bottom of the scale is 0 (black) and the top 1 (or 100%, meaning white).
The image on the left is the EXR. Notice how values over 1 are ignored and "hard clipped". There is a flat line at the very top. All values higher than one or 100% are ignored.
If sampled, some of the values in this EXR exceed a value of 24 on the red channel, way over what the display can deal with.
On the right of the image is the PNG, the vectorscope shows how the highlights are scaled down to a displayable values (thanks to the color transforms called "filmic"). Note how they curve at the top, and some (in the green and blue channel) don't reach 100 percent, giving the flame a "yellowish" tone.
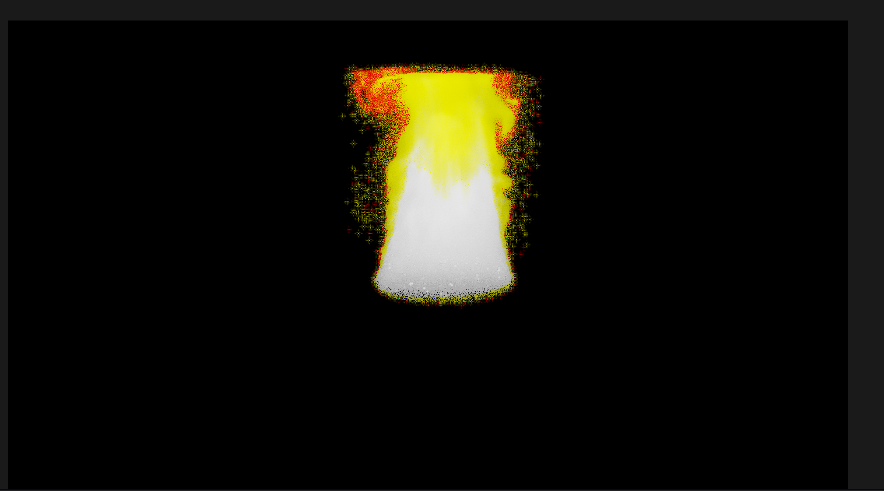
Bringing the files to resolve shows the same difference.
The EXR file:

The PNG one:
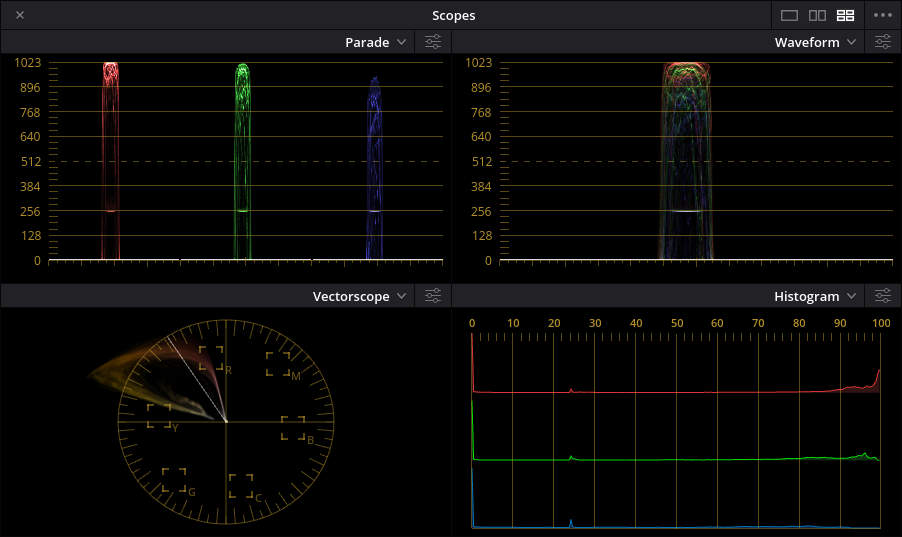
One solution:
To match the images, as cleverly pointed out by @Gez, both images would need to undergo the same color transforms.
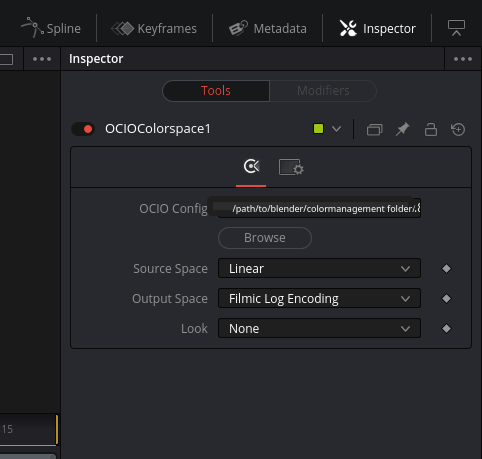
Open fusion tab, load the EXR file and add a Ocio Color Space node, load the OCIO config file (config.ocio) from your blender folder and set the Source Space to Linear and output to Filmic Log Encoding. Since the Looks don't work in Resolve you have to add them manually using another node.
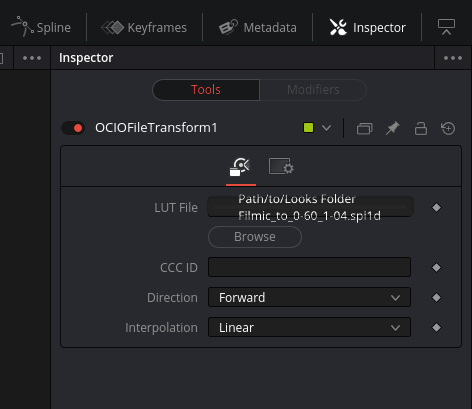
Add an OCIO File Transform node and look for the necessary LUT in the Looks sub-folder of the color management folder in Blender (in this example the lut is Filmic_to_0-60_1-04.spi1d for Medium Low Contrast). Set the direction to forward and the interpolation to linear.
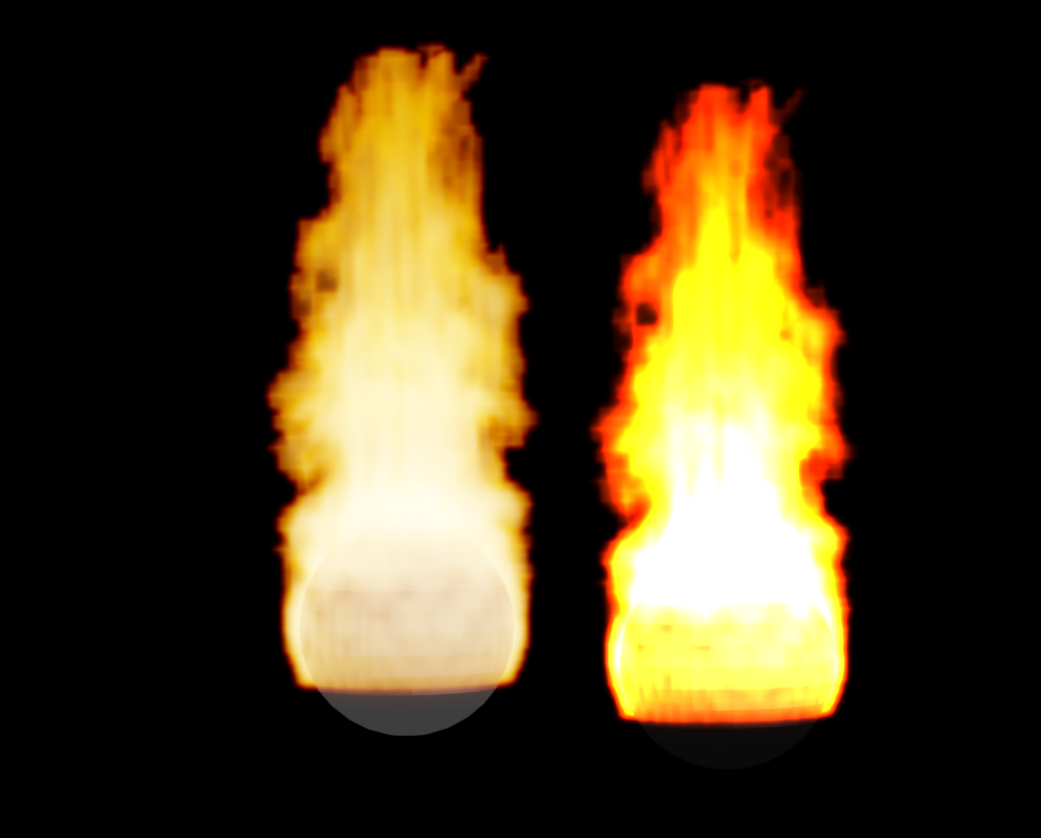
The resulting image should be what you are looking for (on the left the PNG, on the Right, the EXR processed through OCIO nodes).
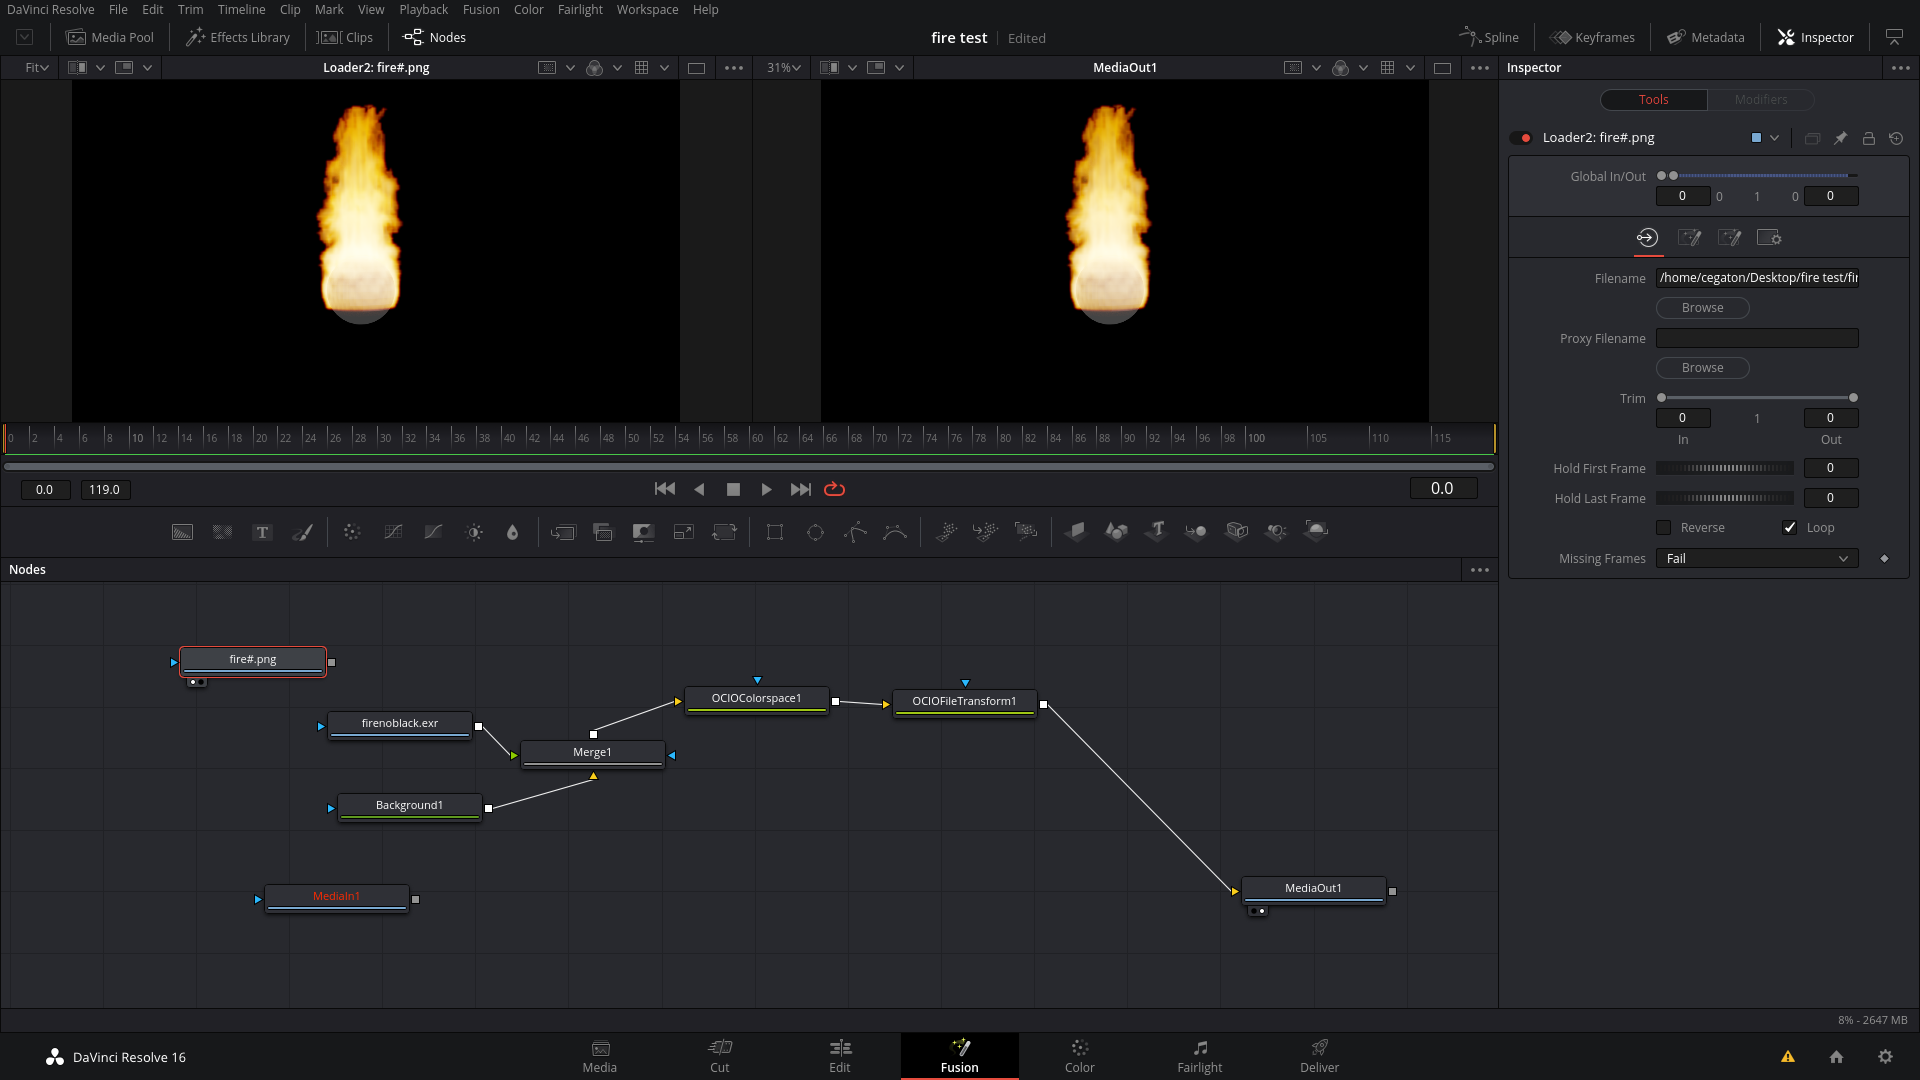
Note that Resolve is particularly tricky, using confusing (and sometimes wrong) terms, and has many settings that need to be correct for solution to work:
The EXR file should use the correct color space (in this case sRGB) and it has to be interpreted as LINEAR ("Gamma space":None), "Remove Curve" should be checked.
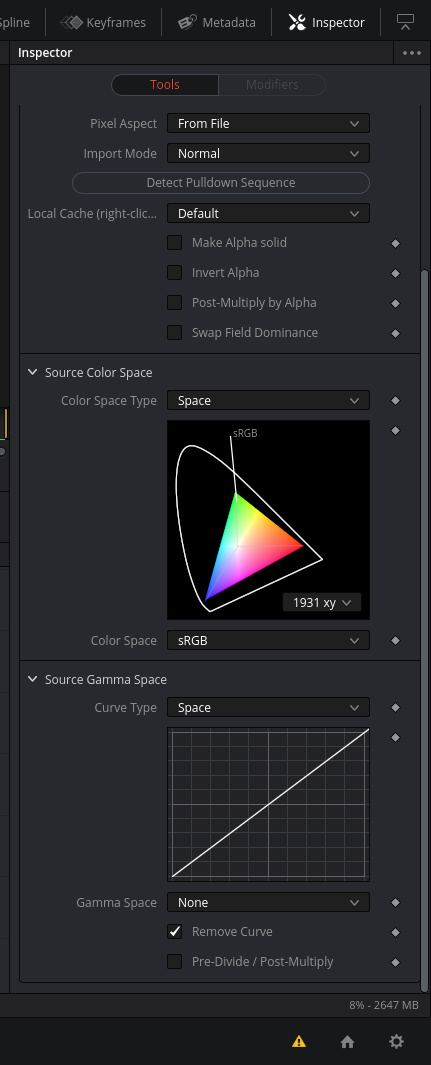
On the media tab, the Alpha channel on the EXR has to be set to "premultipy".
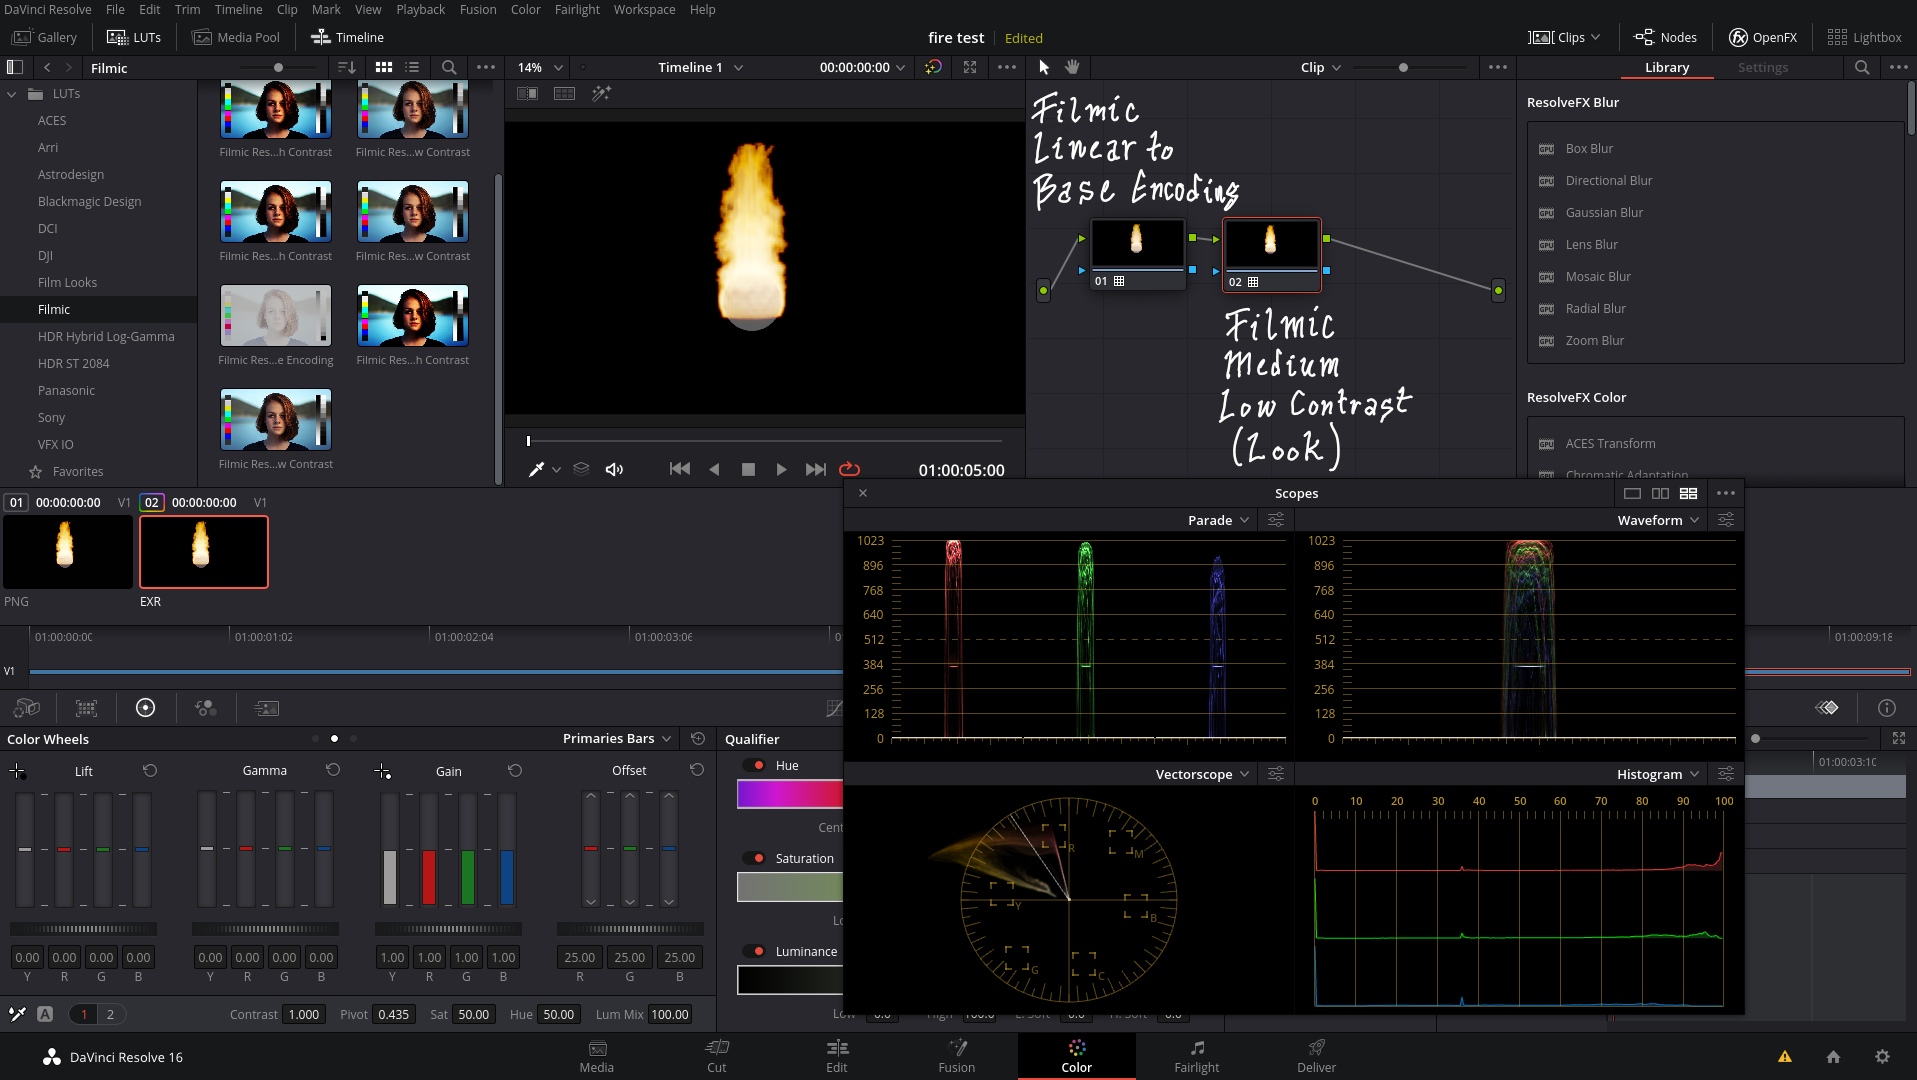
Here's the final image and scope readings:
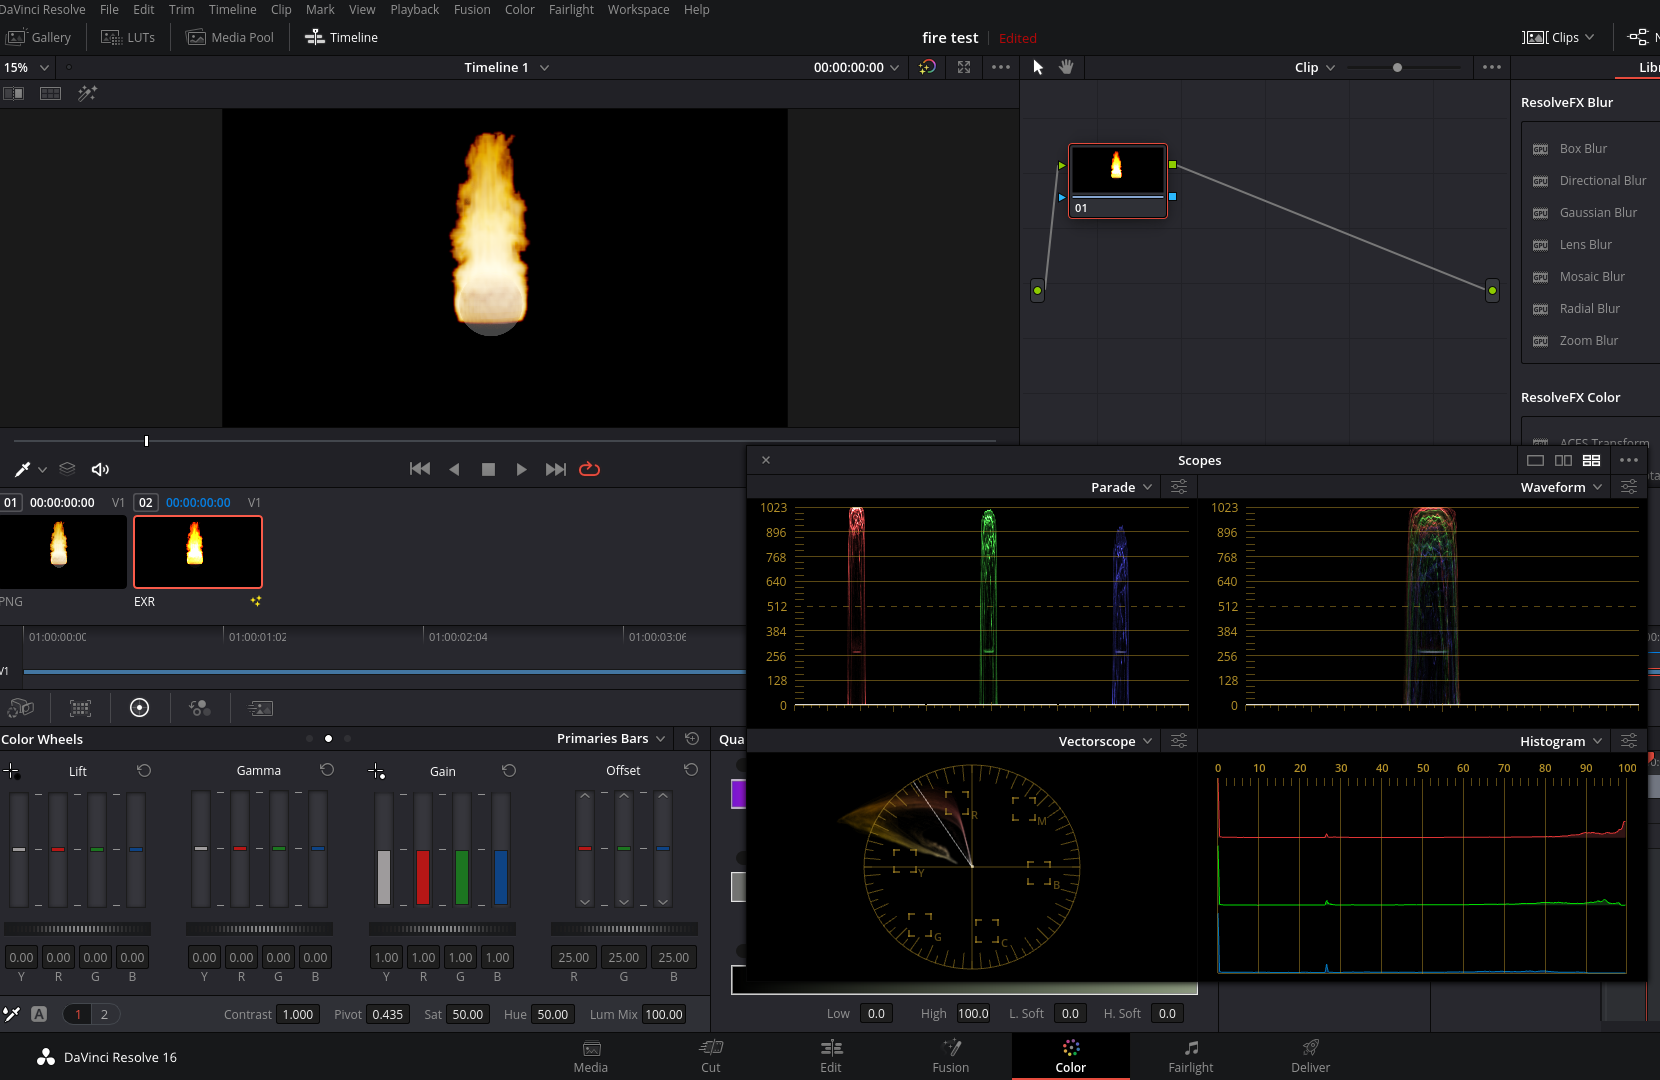
Other Solution.
Install the filmic LUTs from "Filmic Resolve ( https://github.com/sobotka/filmic-resolve) on your system.
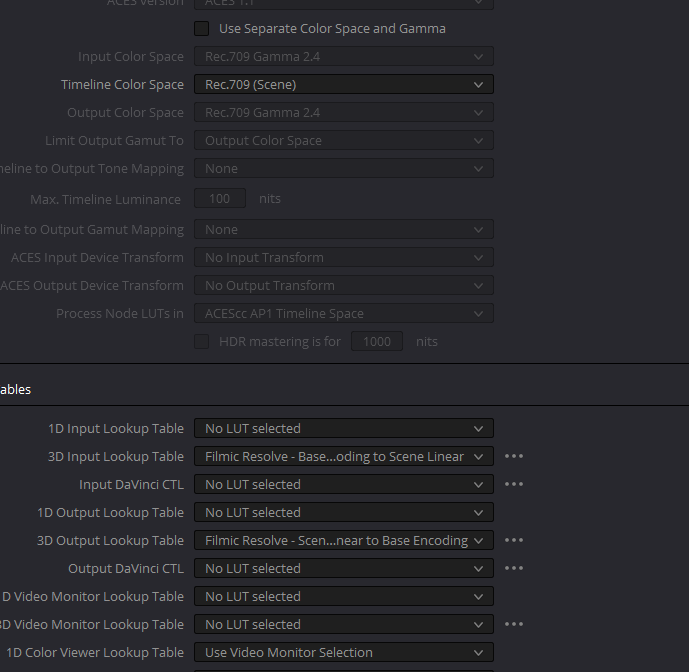
Set the Input and Timeline color spaces for the project to Rec709(Scene) but do not set any lookup tables.
Import the EXR normally and do not assign any LUTs or other pre-processing to it in the media section.
On the color section use two nodes to get the filmic look:
The first node uses a LUT-3D LUT-Filmic-Filmic Resolve-Scene Linear to Base Encoding.
The second node uses a LUT-3D LUT-Filmif-Filmic Resolve-Medium Low Contrast.
