3
$\begingroup$

Right, so:

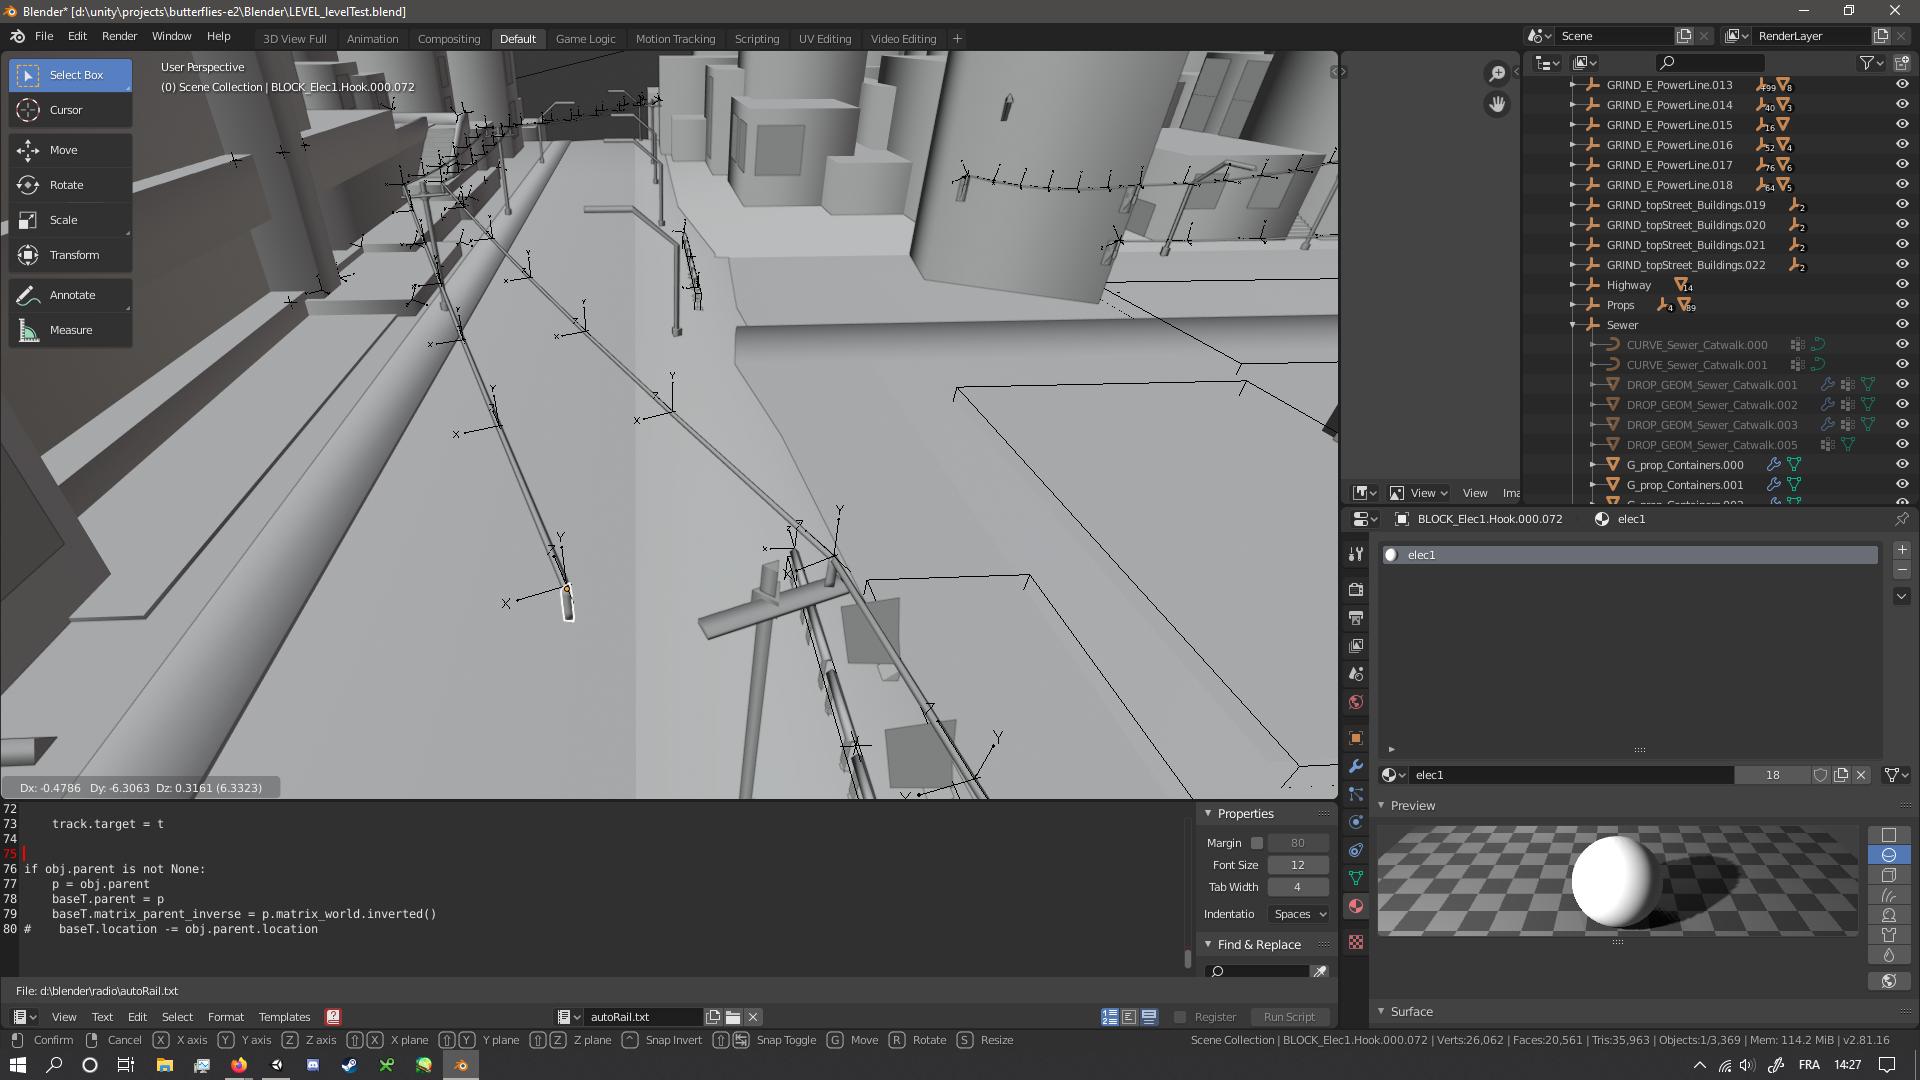
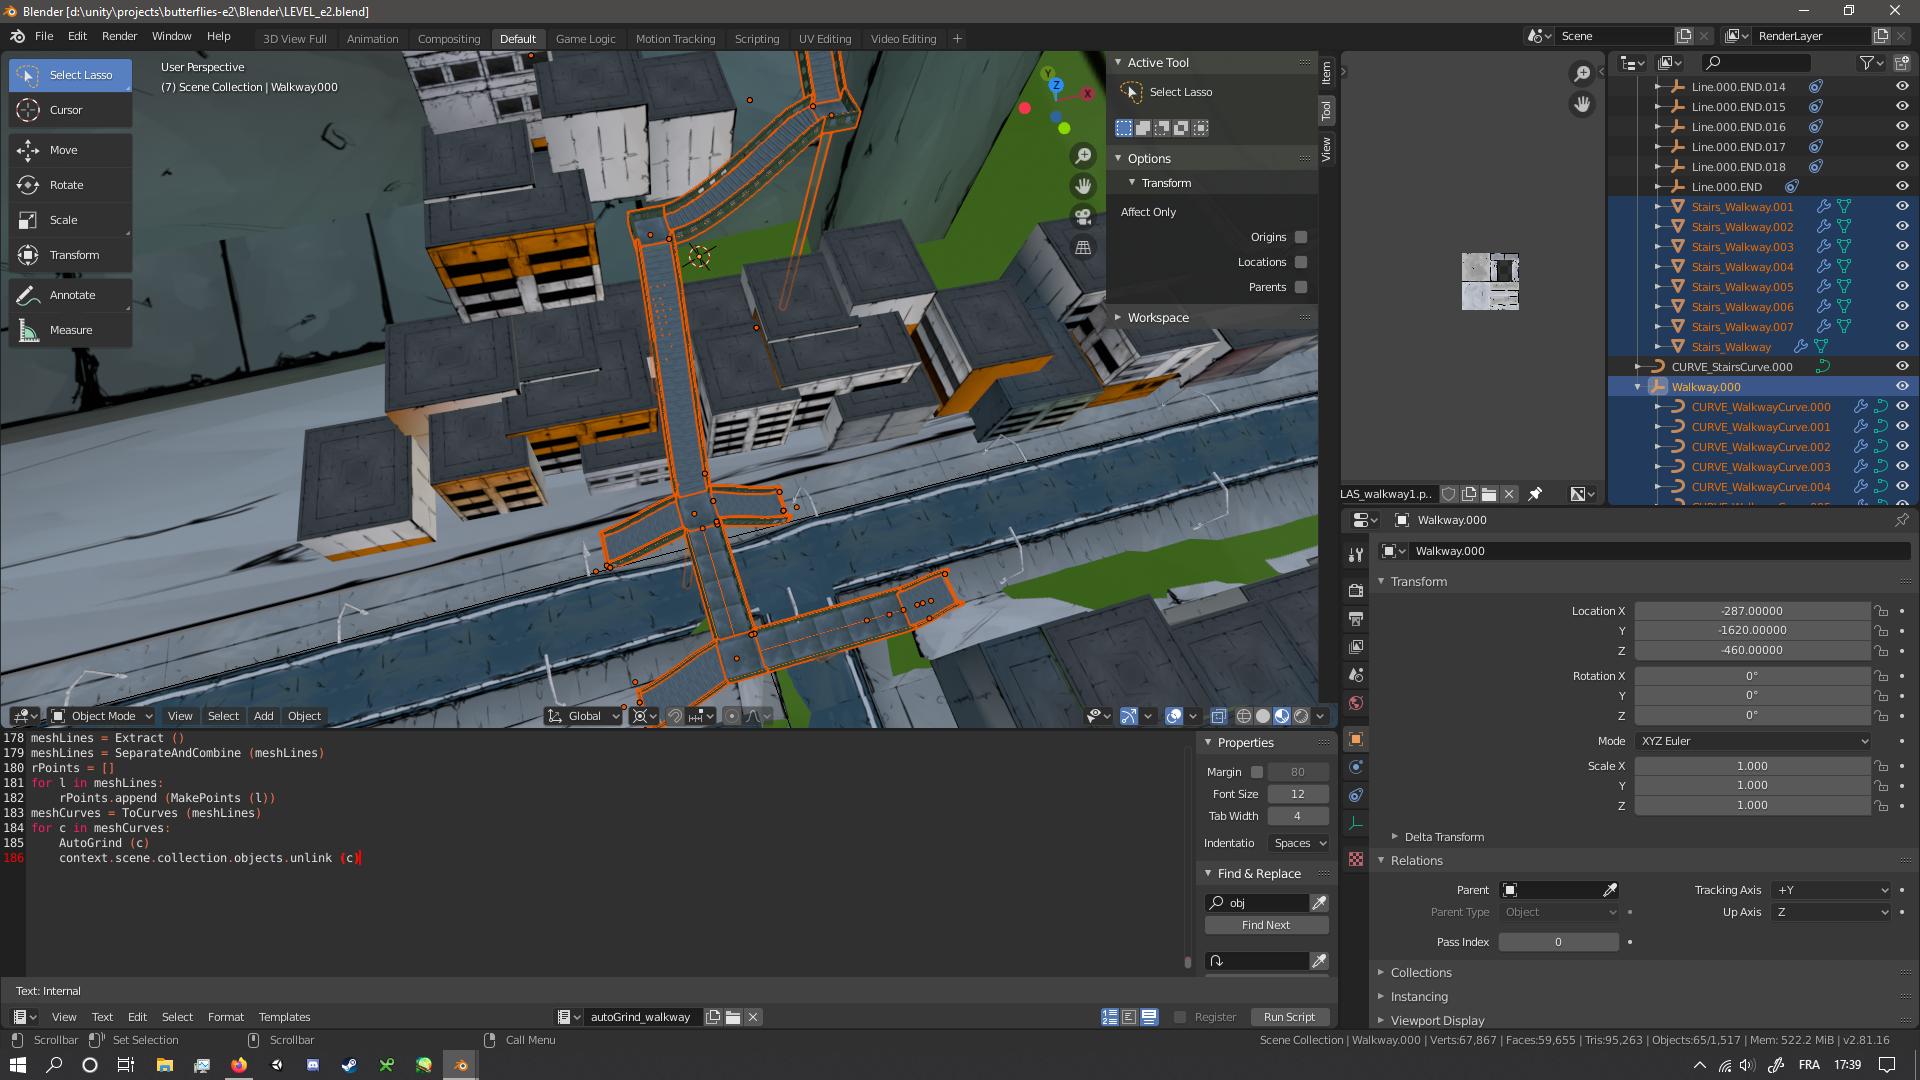
An arrayed and curved series of walkways

This is for a game where you can grind rails, and the rails function with waypoints which I generate from Blender empties. So far so good, I've already got a handful of scripts to automatically place them on curves and certain meshes.

Next though is those curved walkways, made up of multiple meshes and multiple curves. I've already figured out a way to combine each connected curve into one and then place my waypoints from there, but it's kind of inefficient and while technically non-destructive to the meshes and curves, it'll require me to delete and re-generate my grinds every time I move the walkways. What's more, the trick relies on superimposing edge-only meshes onto my walkway meshes, which makes tilt unpredictable.

What I'm looking for is a way to automatically place empties in such a way that they'll follow the curves. I don't necessarily mean an arbitrary number, so long as I can get it to roughly correspond to my rails.

Requirements include:

  • It must be non-destructive.
  • The waypoints must be real, or at the very least real once exported to FBX.
  • They must follow along the curve as it's moved.
  • They must all be children of one empty separate from the curve.

Possible avenues include:

  • Secondary empties, if real, can be parented to the curve, and then I can get their location into my waypoints via a Copy Location constraint.
  • The fake curve meshes can be actual curves. Currently looking into that.
  • Following that, the curves being followed by the waypoints don't necessarily have to be the same as the walkway. I'll be trying secondary curves following the primary ones.

Thanks in advance.

edit: A visual example from another model:

The grind waypoints move along with the model

The grind waypoints move with the model, copying the location of empties parented to the model's vertices. This allows them to be parented to a separate object and each to automatically face the next via Damped Track. What I'm looking to do with curves is either this or, even more ideally, directly influencing their positions via curve.

$\endgroup$
2

1 Answer 1

3
$\begingroup$

There is a workaround to emulate dupliframe.

Add a curve.

Add a plane. In edit mode scale it way down.

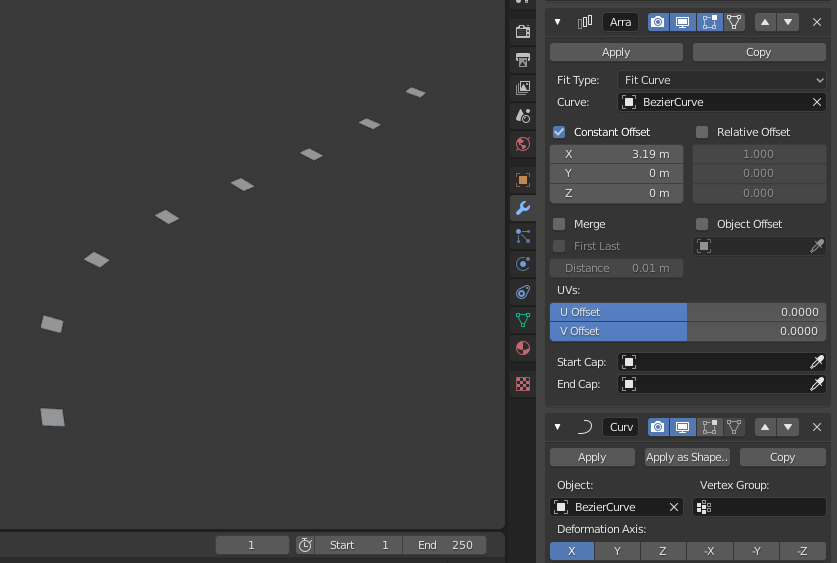
Add an "Array" modifier to the plane, set the length to 'fit curve' and select the curve. Deselect "Relative offset" and select "Constant offset", set the value to the spacing you want between each empty.

Add a curve modifier and set it to the curve.

enter image description here

Create an empty object. In object mode, select it then select the arrayed plane (not the curve). Go to Object > Parent (or press CTRL + P) and select "Object".

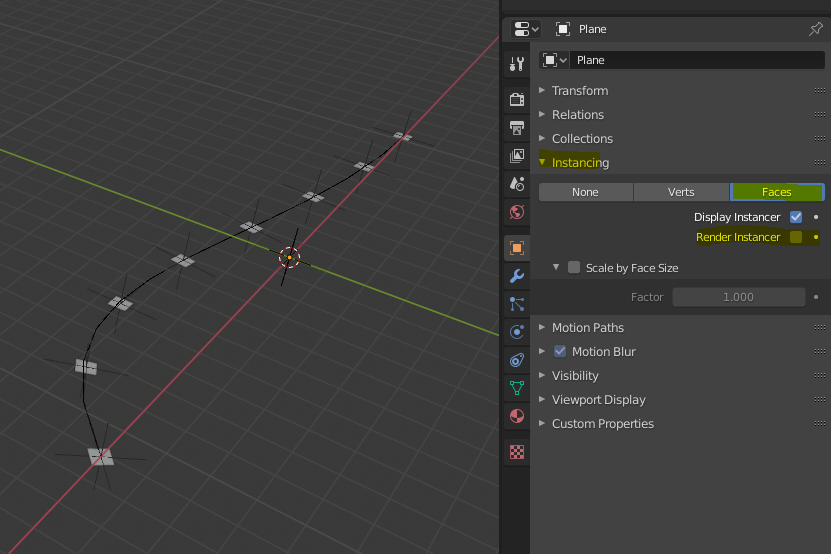
Select the arrayed plane and go to object info > Instancing and select "Faces". Uncheck "Render instancer" so that the plane doesn't get rendered. (Useless in your case since you are only interested in exporting it)

enter image description here

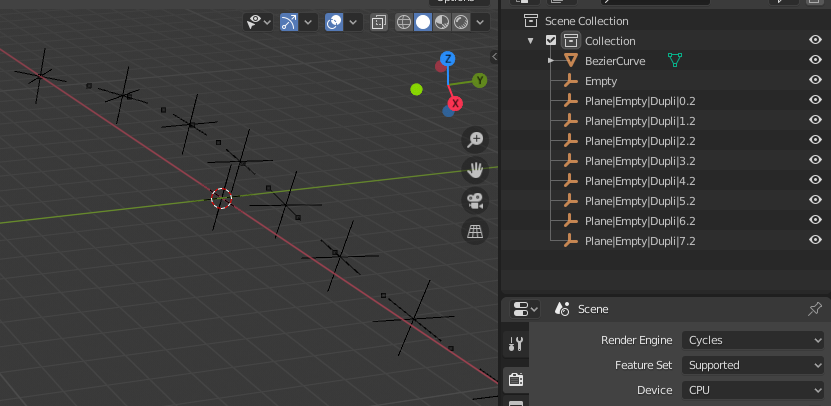
Now when you export your file, for example in fbx, it will contain the individual empties. Just delete the "plane" object to get rid of it. No need to apply the modifiers.

enter image description here

If you want for example your empties to be 2 meters above the curve, just move the original empty 2 meters along the z axis in object mode.

$\endgroup$
3
  • $\begingroup$ I figured this out around the same time and it's nearly there, but: - it only works for one curve out of several - I can't use the points as targets until they're real, at which point they don't follow the curve anymore To XY this a bit, a semi-ideal solution would be to apply the original curves to my combined curves, but transform/dimension shenanigans make this hard. I'll try applying transforms and get back. $\endgroup$ Commented Jan 28, 2020 at 12:50
  • $\begingroup$ Alright, I didn't get that information from your description. Could you add a little more "visual" informations in your question because I don't fully understand what your end-product should look like ? $\endgroup$
    – Gorgious
    Commented Jan 28, 2020 at 13:05
  • $\begingroup$ Done, hopefully that explains that better. $\endgroup$ Commented Jan 28, 2020 at 13:32

You must log in to answer this question.

Not the answer you're looking for? Browse other questions tagged .