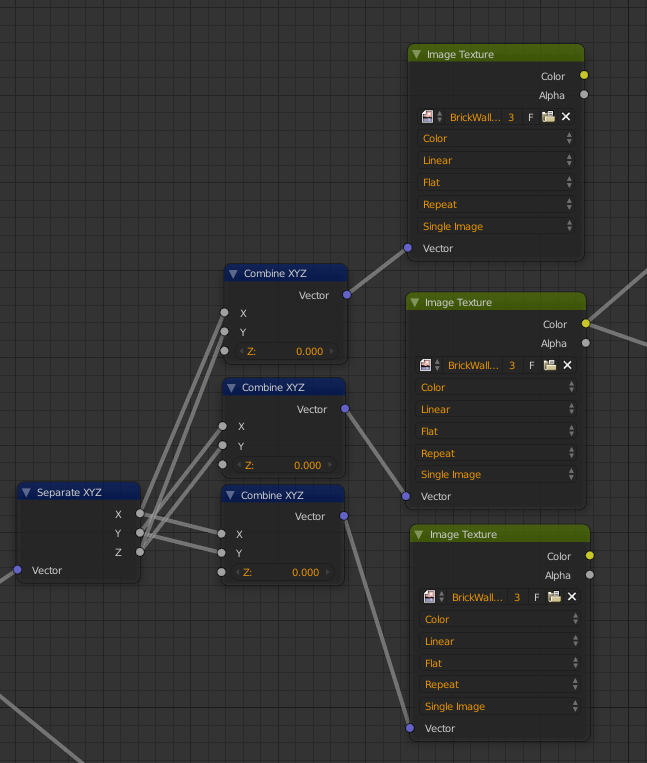
This can be achieved with OSL - but this is not compatible with GPU rendering - so CPU rendering only.
To start with we need a node where we can specify the filename. For this we can use the following OSL code - paste it into a new Text Editor datablock named 'simpleFilename.osl' :
shader simpleFilename(
    string FileName = "",
    output string oFileName = "<undefined>"
    ) {
    oFileName = FileName;
}
In the Node Editor, add a Script node and set point it at your new 'simpleFilename.osl' text block. Assuming you have OSL enabled (if it's available in your Blender then you'll have an Open Shading Language checkbox on your Render properties) you should see the node transform into the following :
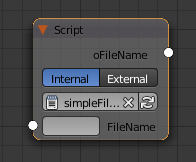
This new node provides an input (which can either be connected to another 'string' socket or the filename can be typed into the input field - enter the full path to the image or use a '//' prefix to indicate a 'local' file relative to the location of the saved .blend file) and an output - both of which should be colored white to indicate type 'string'. The output from this node will be used to drive our Image Texture node (so you can drive multiple Image Texture nodes from the same input).
However, while we're at it we might want to add some flexibility - we can use OSL to combine multiple inputs to generate the filename. For example, create another Text block , this time named 'dynamicFilename.osl' and paste the following :
shader dynamicFilename(
    string Base = "//",
    int Index = 0,
    int Digits = 4,
    int Subframe = 0,
    int SubframeDigits = 4,
    string Suffix = ".png",
    output string oFileName = "<undefined>"
    ) {
    string filenameFormat;
    if (Subframe > 0) {
        //Build format string as "%s%0<Digits>i_%0<SubframeDigits>i%s"
        filenameFormat = concat("%s%0",format("%i",Digits),"i_%0",format("%i",SubframeDigits),"i%s");
        oFileName = format(filenameFormat, Base, Index, Subframe, Suffix);
    }
    else {
        //Build format string as "%s%0<Digits>i%s"
        filenameFormat = concat("%s%0",format("%i",Digits),"i%s");
        oFileName = format(filenameFormat,Base, Index, Suffix);
    }
}
Assigning this to a Script node will produce a node with additional inputs :
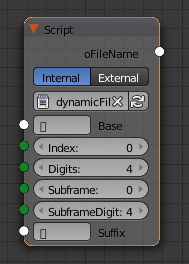
This node will behave similarly to the 'simple' version except that the filename will be built from the various elements in the formal PPPPNNNN_MMMMSSSS where PPPP is the prefix (eg, //images/), NNNN is a numeric representation of the Index input value (formatted to Digits number of digits - eg, '0001'), MMMM is similar but based on Subframe (and if Subframe is zero then the _MMMM element is omitted entirely), and SSSS is the filename suffix (eg, .png). In this way you can construct a filename that is automatically generated based on the input values similar to that used in How to show different images based on Object ID.
Now all that is required is the actual Image Texture and this is achieved by using the OSL 'texture' function which can extract pixel data from an image. Create another Text datablock (named 'imageTexture.osl') and paste the following :
shader imageTexture(
    vector Vector = P,
    string FileName = "",
    int Wrap = 0,
    output color Color = color(1,1,0)
    ) {

    string wrap;
    if (Wrap > 0)   { wrap = "periodic"; }
    else            { wrap = "black"; }

    Color = texture(FileName, Vector[0], Vector[1], "wrap", wrap);
}
Assigning this script to a Script node will produce the following :
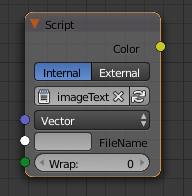
Note the FileName input to accept the filename (as generated by either the 'simpleFilename' or 'dynamicFilename' node) along with a Wrap input (the equivalent to Repeat/Clip of the standard Image Texture node - set to '0' for Clip, 1 for Repeat).
Now simply connect the nodes as required, linking the output oFilename to each of the ImageTexture's FileName input :
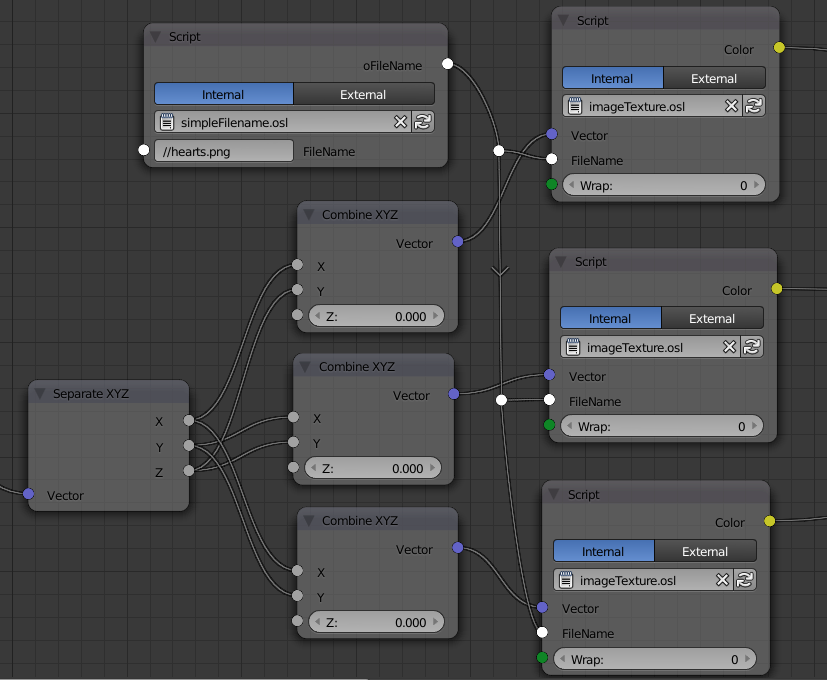
Varying the inputs to the 'Filename' node will vary the image for each of the Image Textures. Each Image Texture will be using the same image and this can be amended by simply changing the Filename node. The filename can also be passed into and out of node groups.

