10
$\begingroup$

Note to the readers, August 2019: Grease Pencil has gone through a major redesign for version 2.80, so you should probably check more recent resources than the (current) answers to this question


I would like to use the grease pencil for

  1. sketching the composition of illustrations
  2. sketching the storyboard for animations

where the illustration/animation will be done in 3D.

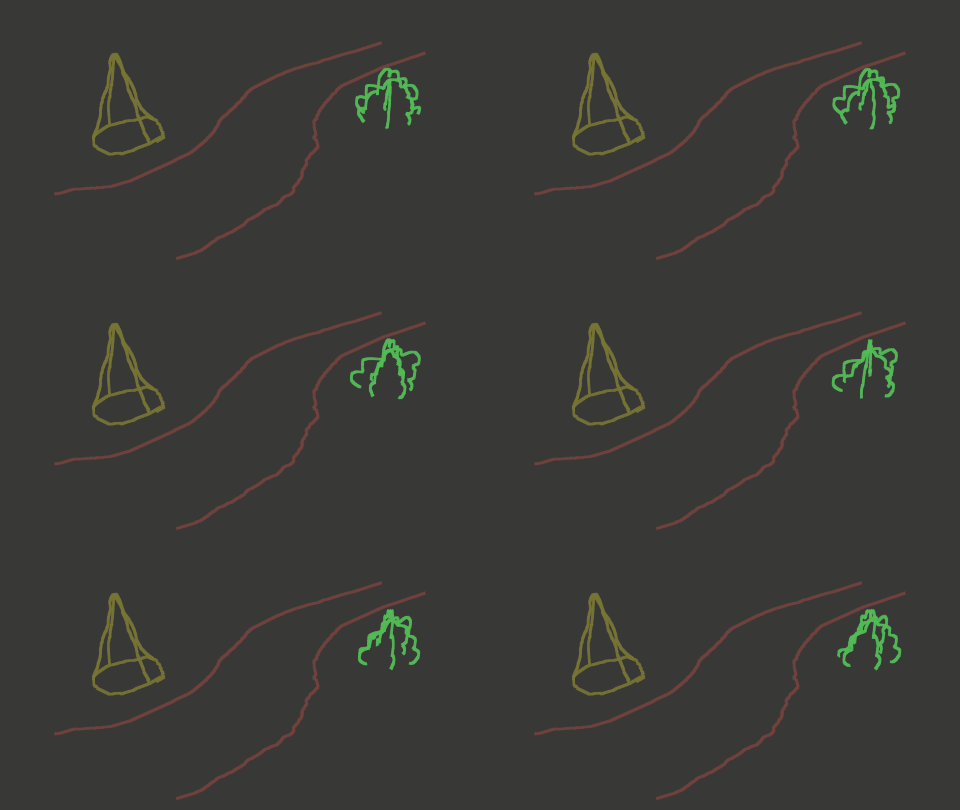
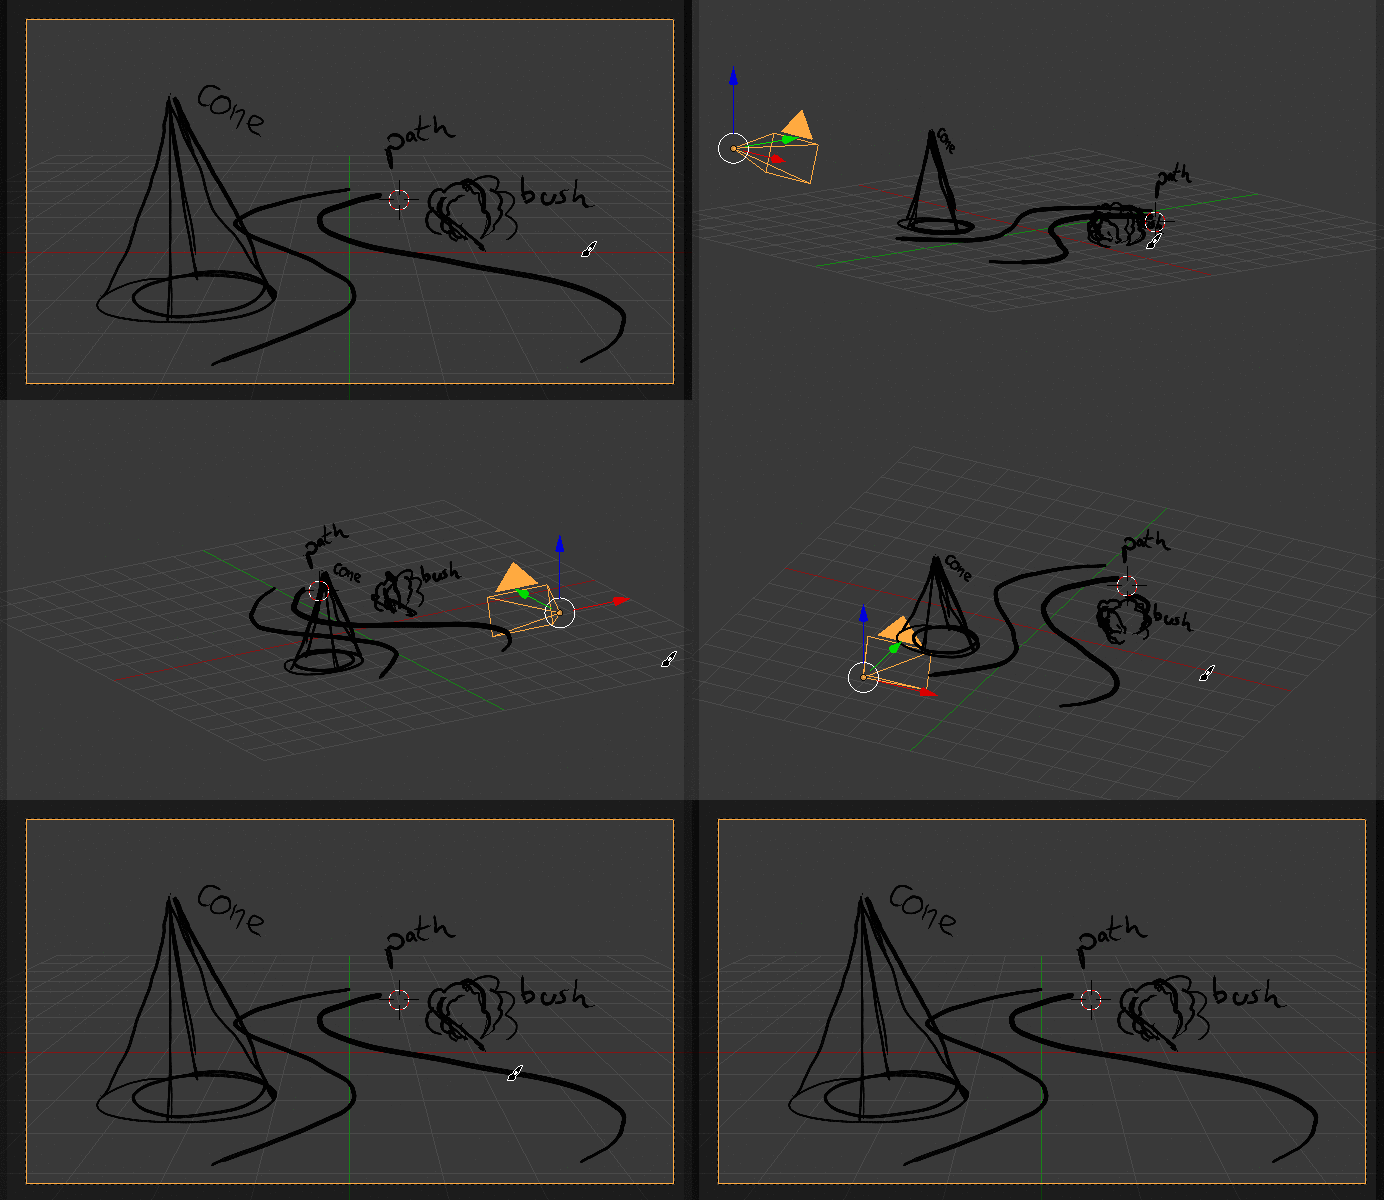
For the illustrations, I'd basically like to "place" the different objects of my scene in the 3D world, and I would like to know the best way of doing this. For instance, for making the setup below, I had to go back and forth from mouse to keyboard to graphic tablet in order to move the 3D cursor (to choose the depth at which the line would be drawn), go back in "draw" mode, and do the actual drawing; to replace a wrong stroke I had to hit "Undo" because I'm not sure how to reposition a stroke.

enter image description here

Is there a window layout and a set of hotkeys that would help me?

For the animations I'd like to do just the same, but also to be able to make elements appear/disappear, and possibly to keyframe their Rot, Loc, Scale.

Maybe this is all very simple, but I don't quite get the mindset behind all this: Are strokes objects? Where are they in the outliner? Do they have F-curves? Is their visibility keyframable? Does it change anything if I draw a stroke while being at frame #n rather than at frame #m (unlike regular objects)?


Wrapping it all up: I can't seem to find many tutorials, and the few I've found seem to focus on making 2D animations with the grease pencil itself. I'd really appreciate if you could introduce me to the right mindset that I need to work with G.P. as a "sketching" tool, and possibly some good resources about it.

$\endgroup$
2
  • 2
    $\begingroup$ That's interesting; it'd be cool to get some input. Some minor suggestions: try toggling quad view (N toolbar, under "Display") and also locking the view to the 3D cursor (N toolbar, under "View"). The ortho views will help you position the 3d cursor (controlling the origin of the plane in which the drawing occurs) and in the "User" part of the view you will be rotating around the 3D cursor, not the origin, allowing you to adjust the angle of your drawing plane). To reduce mouse usage, try "Emulate 3 Button Mouse" in Prefs-Input, you can hold down alt and rotate w/the stylus. $\endgroup$
    – risingfall
    Commented Jan 20, 2018 at 19:26
  • 2
    $\begingroup$ This might become much easier for you in the next year: in Blender 2.8, Grease Pencil drawings will be able to be treated as normal objects, and moved and positioned in the scene like normal objects, which seems perfect for what you want to do. The Blender developers posted a video on YouTube a few months ago demonstrating what will be possible. $\endgroup$ Commented Jan 23, 2018 at 0:05

2 Answers 2

6
$\begingroup$

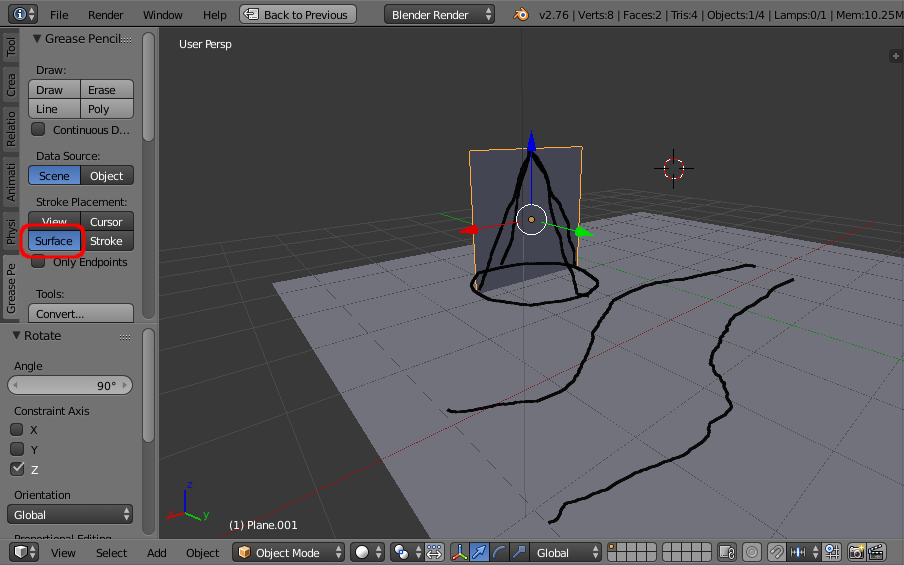
To draw with the grease pencil at a specific depth and angle it's often easiest to simply place an mesh in the scene and orient it so the surface is positioned where you require the GP lines and use the Surface stroke placement to effectively draw on that surface. You can then either hide the mesh (to use it later to re-draw something in the same place) or move it to another location to draw the next stroke.

grease pencil to surface

For animation of grease pencil strokes there are a couple of options.

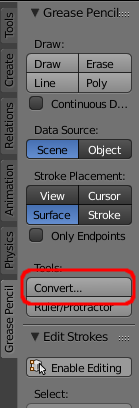
The first is to convert the grease pencil strokes into 'real' geometry using the Convert... tool in the tool shelf.

tool shelf Convert

This will create a curve from your grease pencil strokes and this can be manipulated as for any geometry.

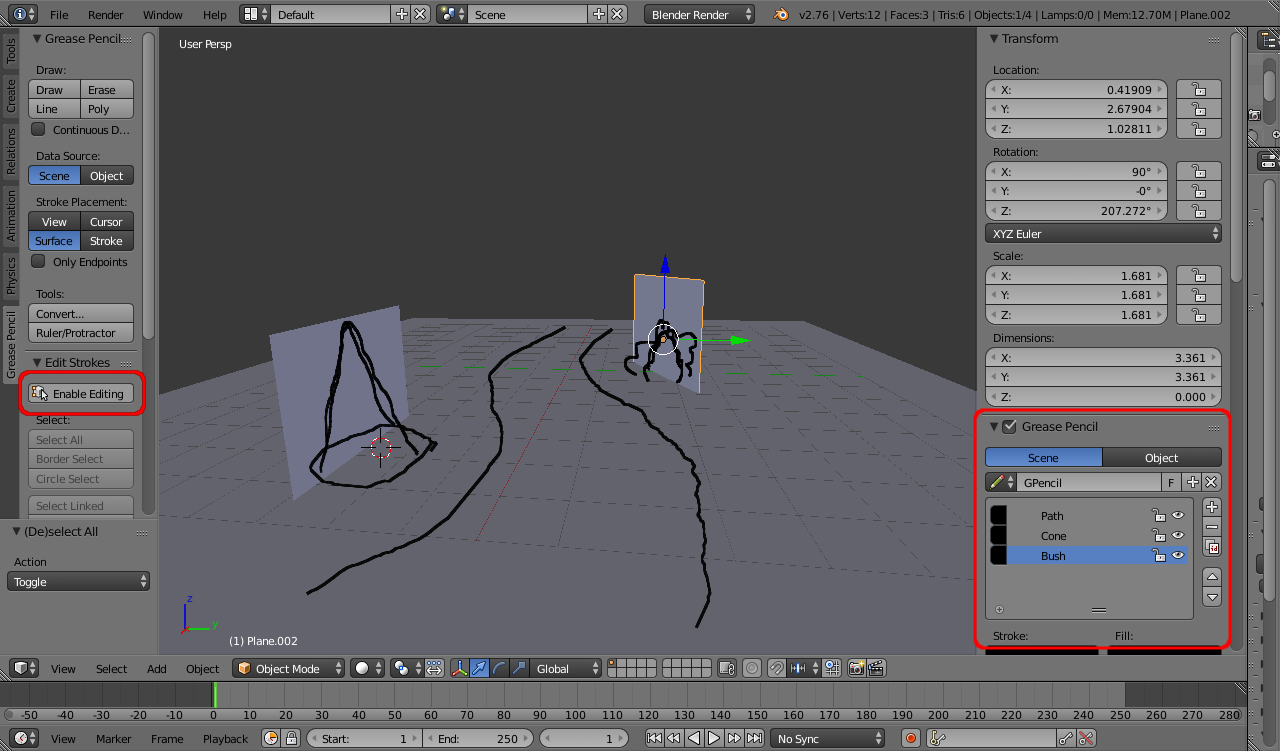
The other (pure grease pencil) option is to use the grease pencil Enable Editing mode and the Grease Pencil tools in the properties side panel of the 3D view.

GP enable editing, GP properties

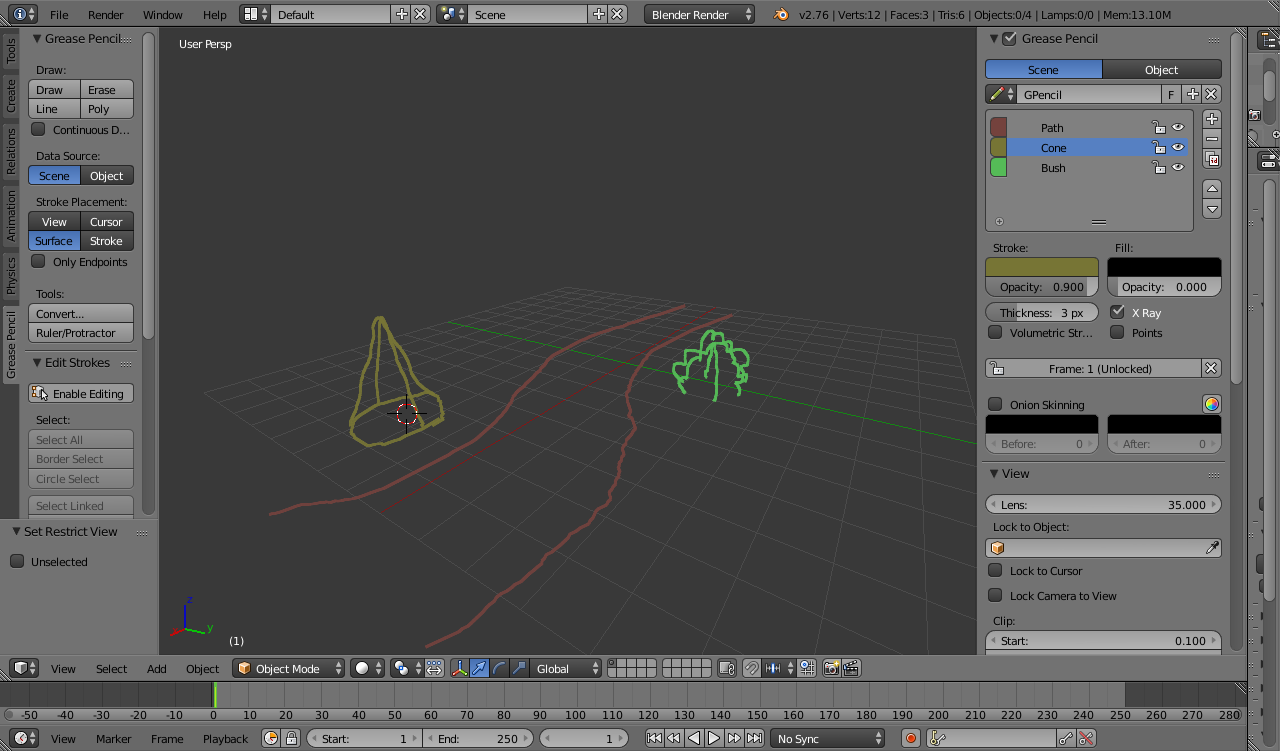
Firstly, use the Grease Pencil layers to keep your different elements separate. This allows easy manipulation of the different layers. For example, to select all of one particular layer (when in Edit mode) you can simply hide all other (by clicking the eye icon in the Grease Pencil layers list) and the press A in the 3D View to select 'All'. The layers can be assigned individual colours in the Grease Pencil properties panel if desired.

set colours

To manipulate particular GP strokes, enable editing by clicking the Enable Editing button in the Tool Shelf (T). You can now use the usual selection tools (A for 'all', Box Select (B), Circle Select (C), etc.). Once you have selected the relevant points on the strokes you can use the usual Grab G, Rotate R, Scale S tools as well as Proportional Editing, etc. to manipulate the strokes.

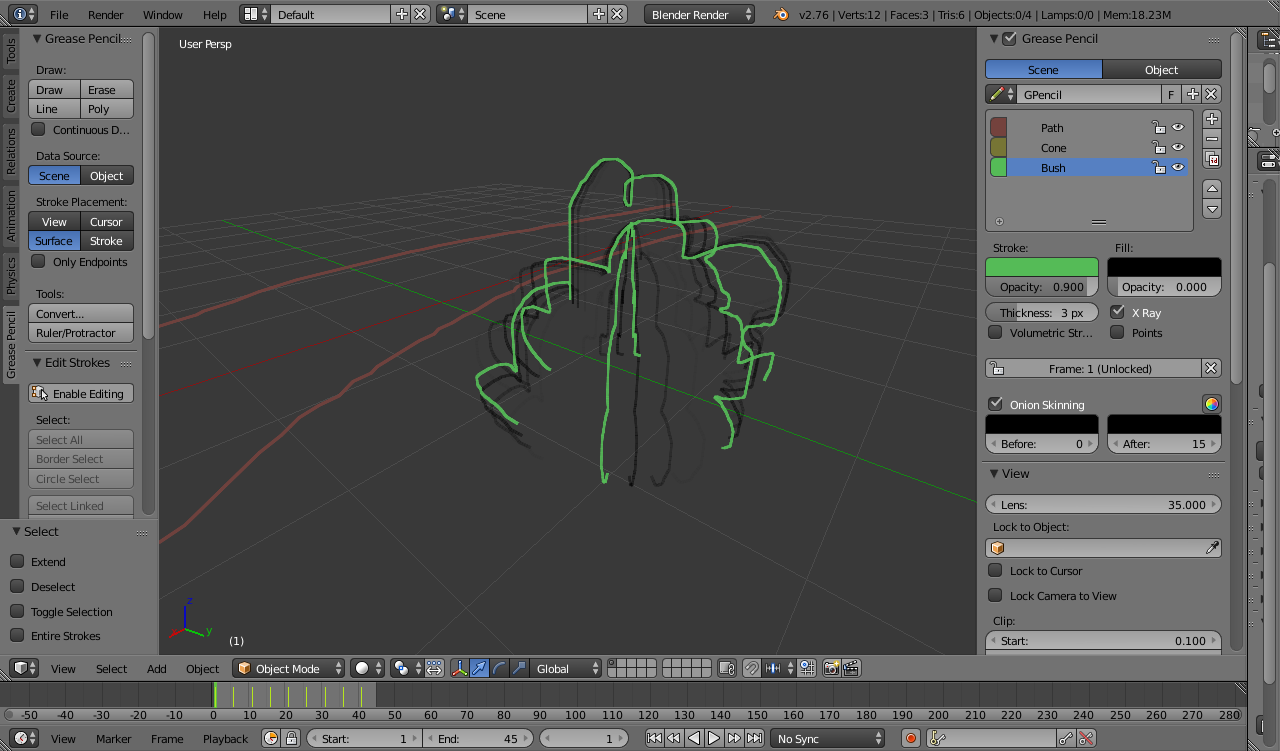
To keyframe the changes simply swap to a different keyframe before manipulating the GP strokes. This will automatically create a new keyframe for the new strokes' position.

animated bush

Additionally, enable Onion Skinning to allow you to see how the grease pencil strokes vary between adjacent frames.

onion skin

$\endgroup$
3
  • 1
    $\begingroup$ Thank you for your answer! I still find that using grease pencil requires a lot of interface usage, but your tips make it easier to work smoothly, and I'm looking forward to trying version 2.8 that will make it even easier. Your answer is the accepted one as it addresses both my points (illustration and animation); I've also embraced @risingfall quad-view tip and awarded the bounty to the least senior user of you two. $\endgroup$
    – Nicola Sap
    Commented Jan 29, 2018 at 9:20
  • $\begingroup$ Glad to help - I’m sure @risingfall will appreciate the rep for an answer for a good technique that was well illustrated. I was surprised their answer didn’t get more upvotes tbh (certainly got mine). $\endgroup$ Commented Jan 29, 2018 at 9:39
  • $\begingroup$ Do you also happen to know shortcut to decrease/increase size of grease pencil? ( blender.stackexchange.com/questions/110458/… ) $\endgroup$ Commented Mar 15, 2021 at 4:02
3
+200
$\begingroup$

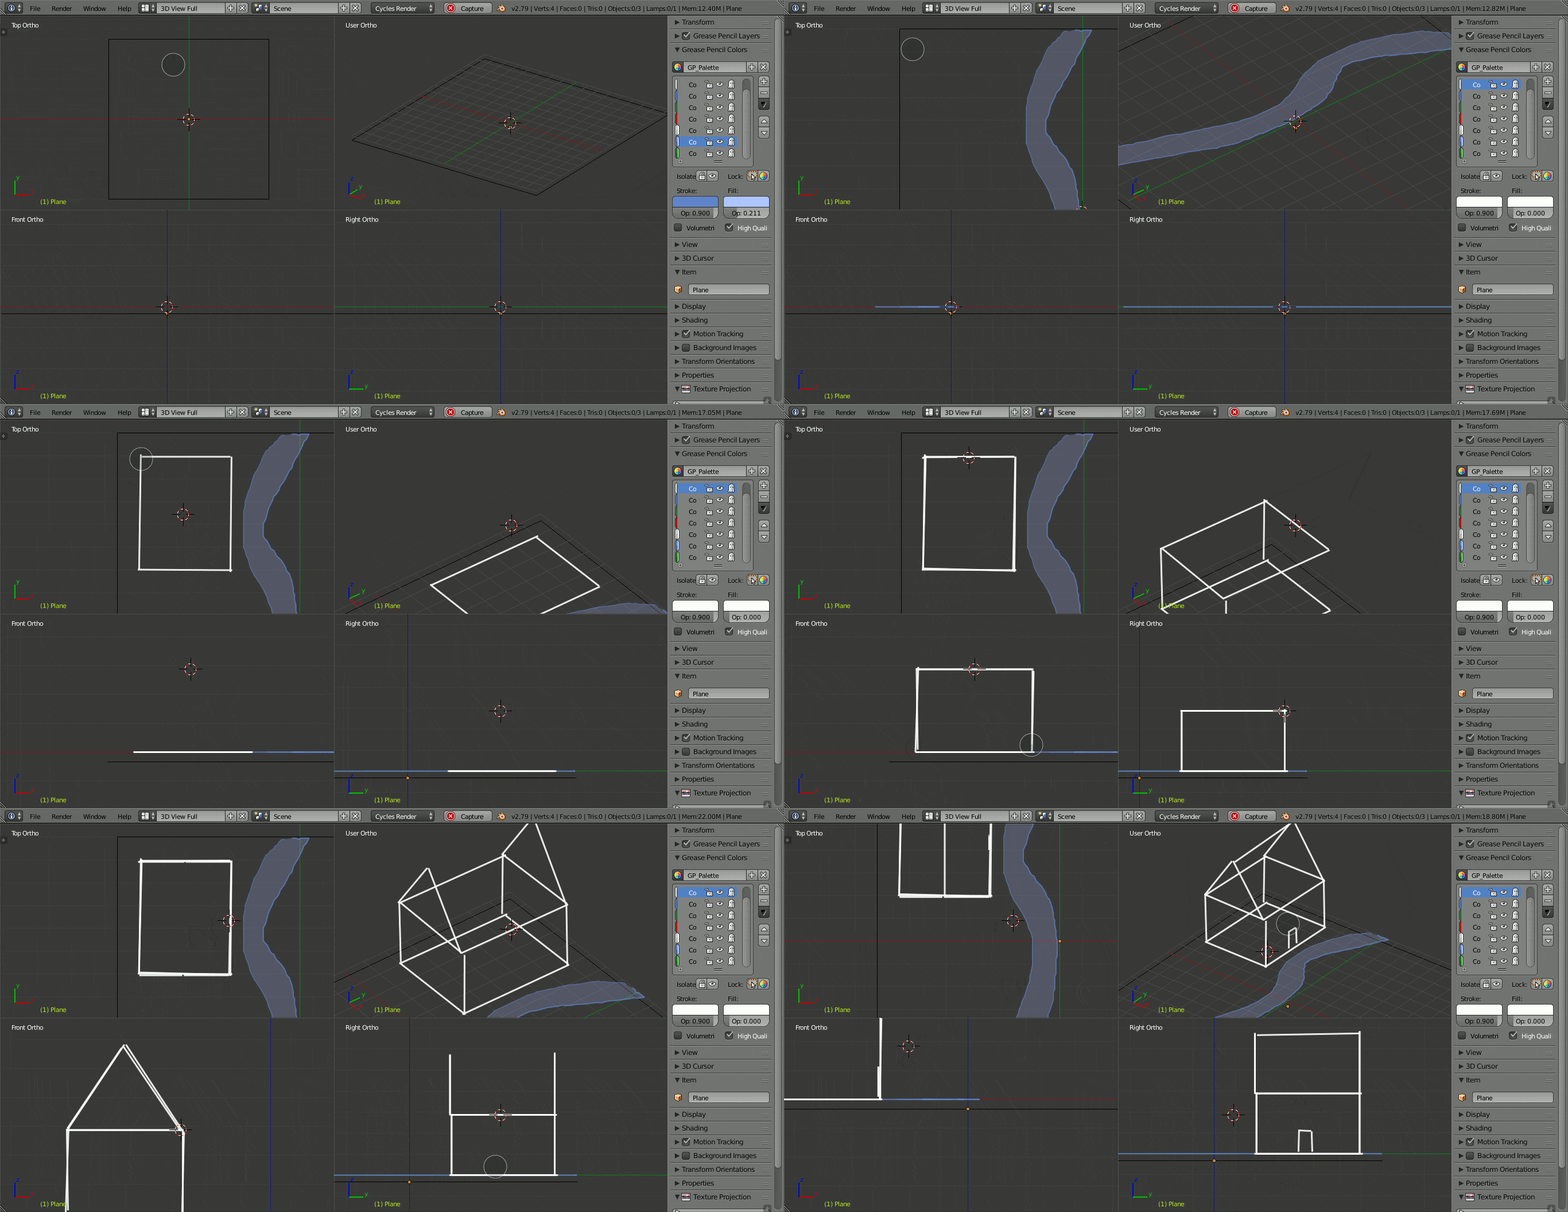
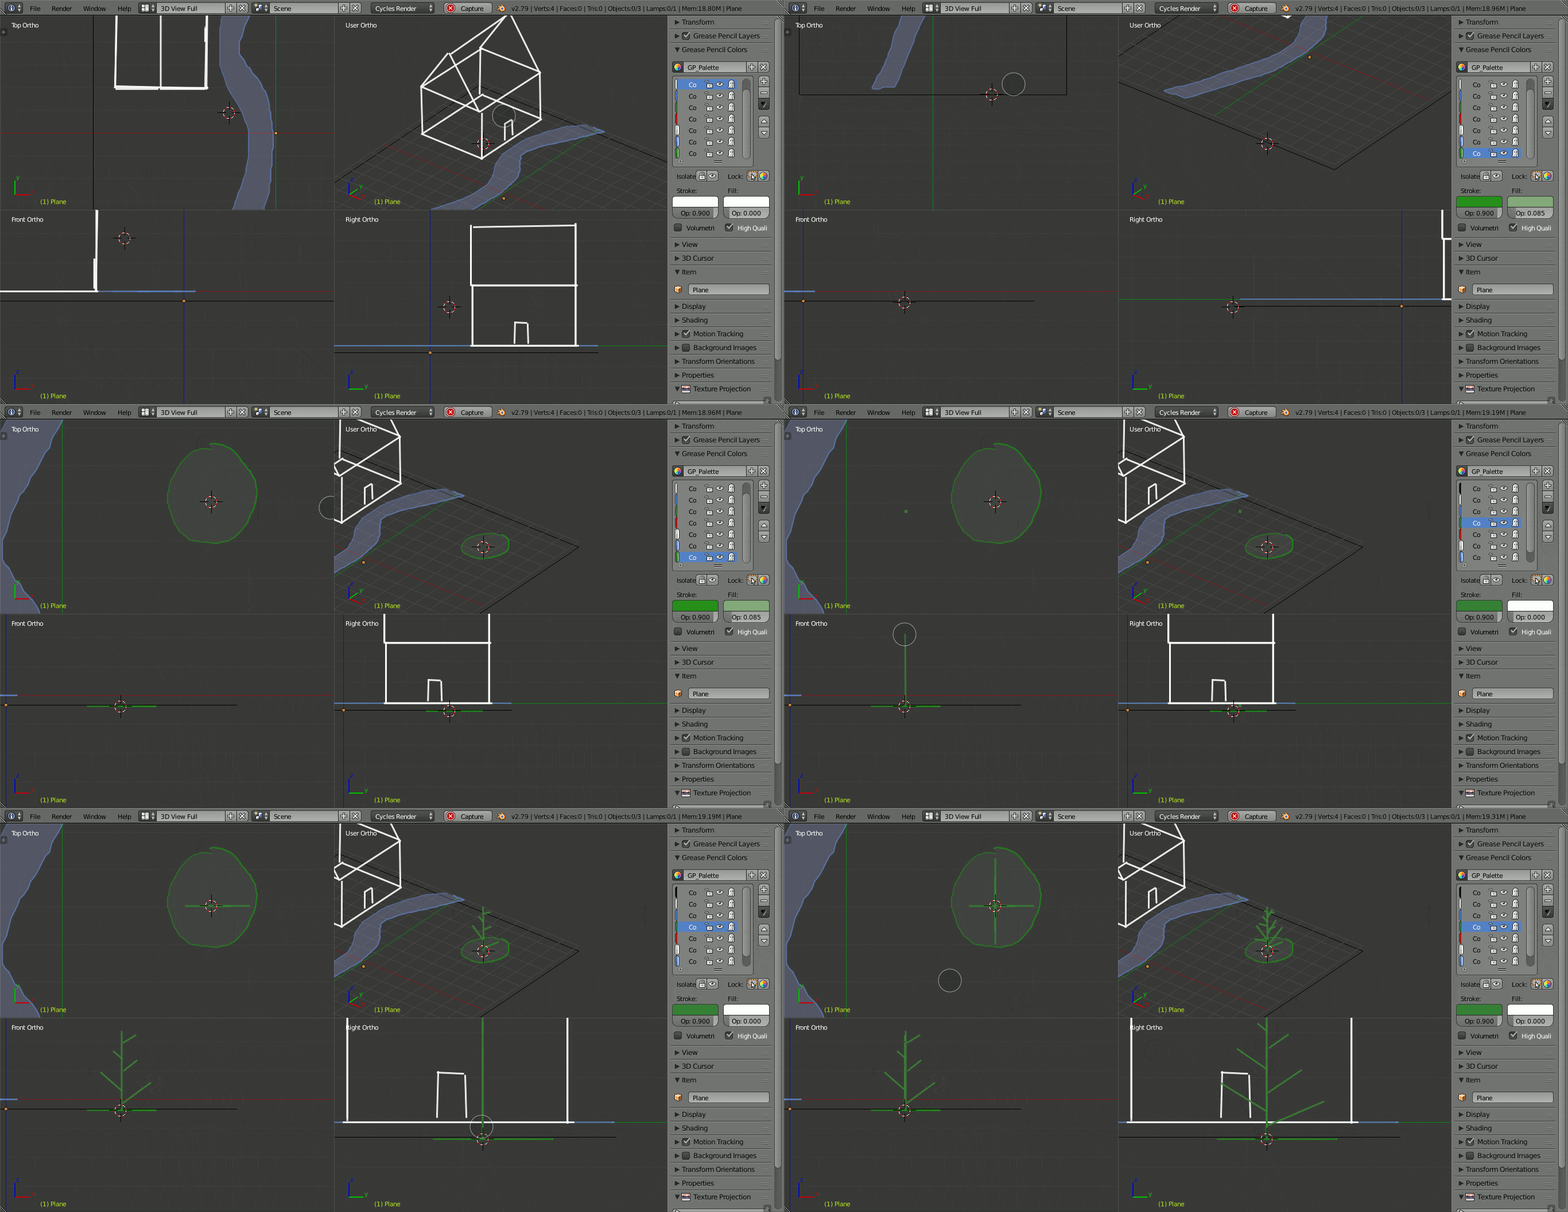
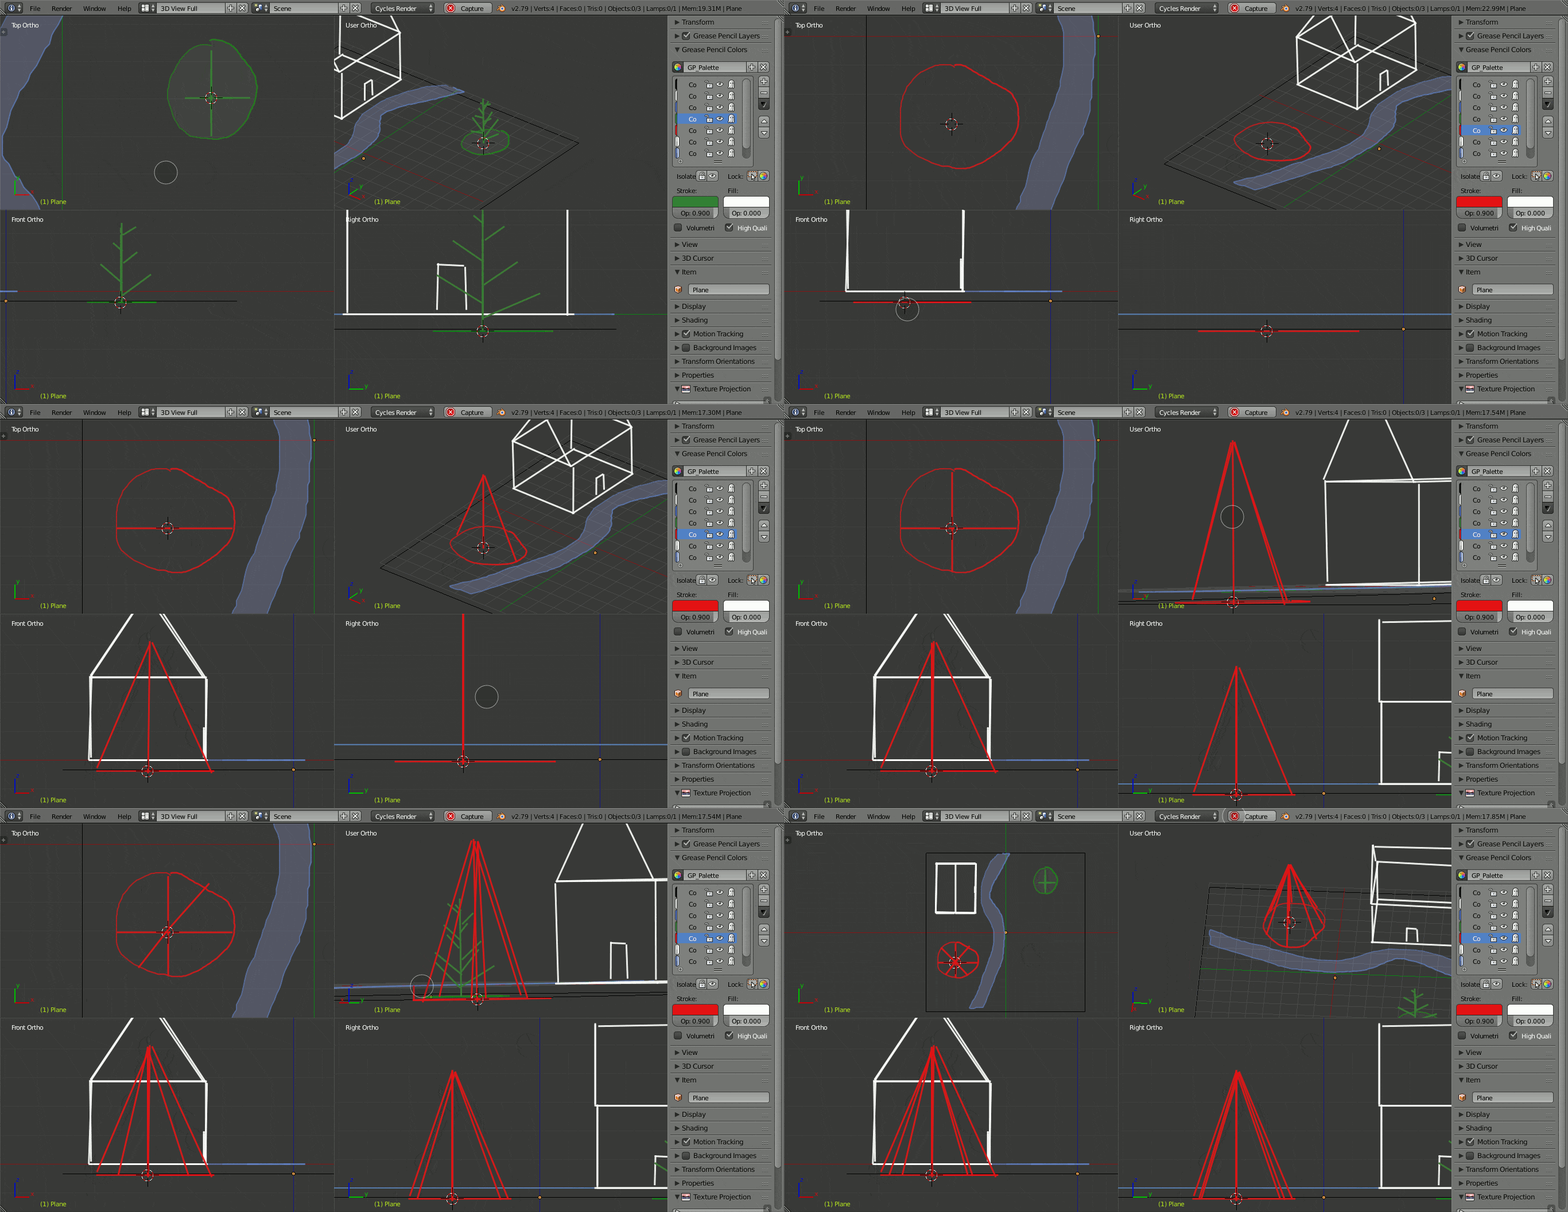
Okay, I've been playing around with the quad view settings indicated in my comment, and I think this actually provides a pretty decent setup for grease pencil drawing in 3d.

The scenes below were done with just the tablet and keyboard - no mouse. With "Emulate 3 Button Mouse," the stylus can be used for rotate, pan, and zoom while holding down the Alt key (Alt, Alt-Shift, and Alt-Ctrl respectively). Being able to position the 3d cursor by tapping in the various parts of the quad view allows for fairly efficient positioning of the drawing plane.

The user part of the quad view should be set to orthagonal mode, that allows using the num pad to jump to any of the standard views and incrementally rotate as needed.

grease pencil quad view part 1

grease pencil quad view part 2

grease pencil quad view part 3

$\endgroup$

You must log in to answer this question.

Not the answer you're looking for? Browse other questions tagged .