added 2060 characters in body
Source Link
Rich Sedman
  • 45.2k
  • 2
  • 109
  • 233

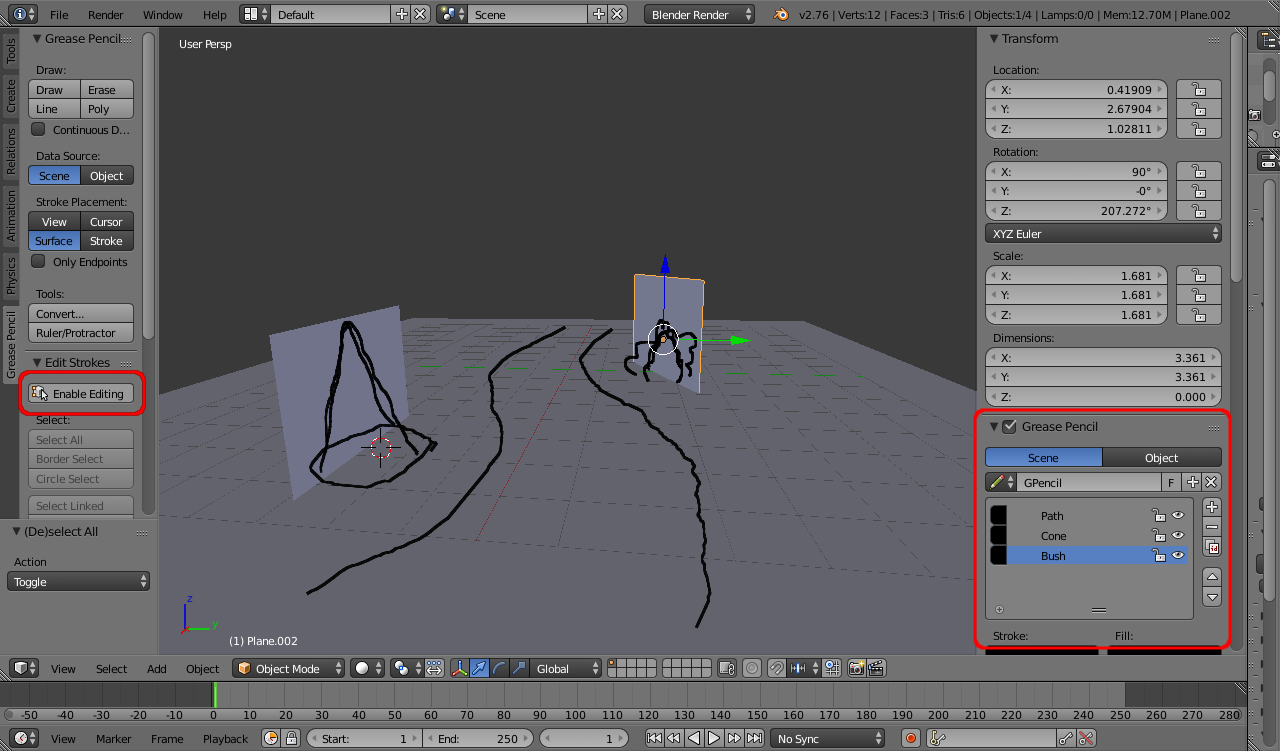
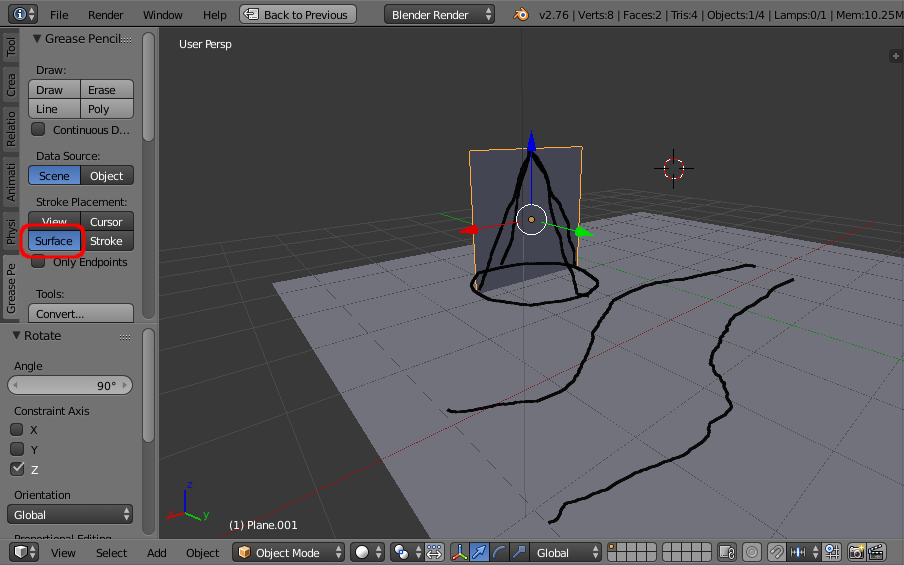
To draw with the grease pencil at a specific depth and angle it's often easiest to simply place an mesh in the scene and orient it so the surface is positioned where you require the GP lines and use the Surface stroke placement to effectively draw on that surface. You can then either hide the mesh (to use it later to re-draw something in the same place) or move it to another location to draw the next stroke.

grease pencil to surface

For animation of grease pencil strokes there are a couple of options.

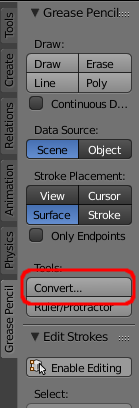
The first is to convert the grease pencil strokes into 'real' geometry using the Convert... tool in the tool shelf.

tool shelf Convert

This will create a curve from your grease pencil strokes and this can be manipulated as for any geometry.

The other (pure grease pencil) option is to use the grease pencil Enable Editing mode and the Grease Pencil tools in the properties side panel of the 3D view.

GP enable editing, GP properties

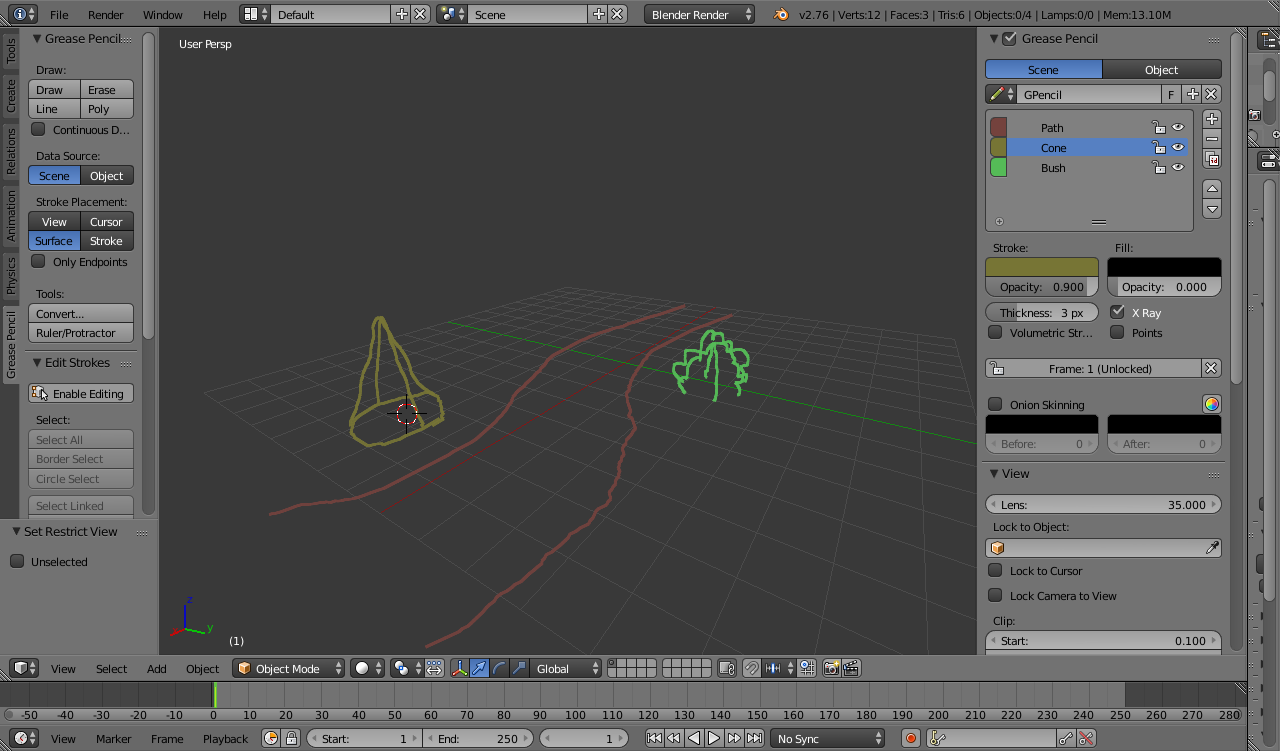
Firstly, use the Grease Pencil layers to keep your different elements separate. This allows easy manipulation of the different layers. For example, to select all of one particular layer (when in Edit mode) you can simply hide all other (by clicking the eye icon in the Grease Pencil layers list) and the press A in the 3D View to select 'All'. The layers can be assigned individual colours in the Grease Pencil properties panel if desired.

set colours

To manipulate particular GP strokes, enable editing by clicking the Enable Editing button in the Tool Shelf (T). You can now use the usual selection tools (A for 'all', Box Select (B), Circle Select (C), etc.). Once you have selected the relevant points on the strokes you can use the usual Grab G, Rotate R, Scale S tools as well as Proportional Editing, etc. to manipulate the strokes.

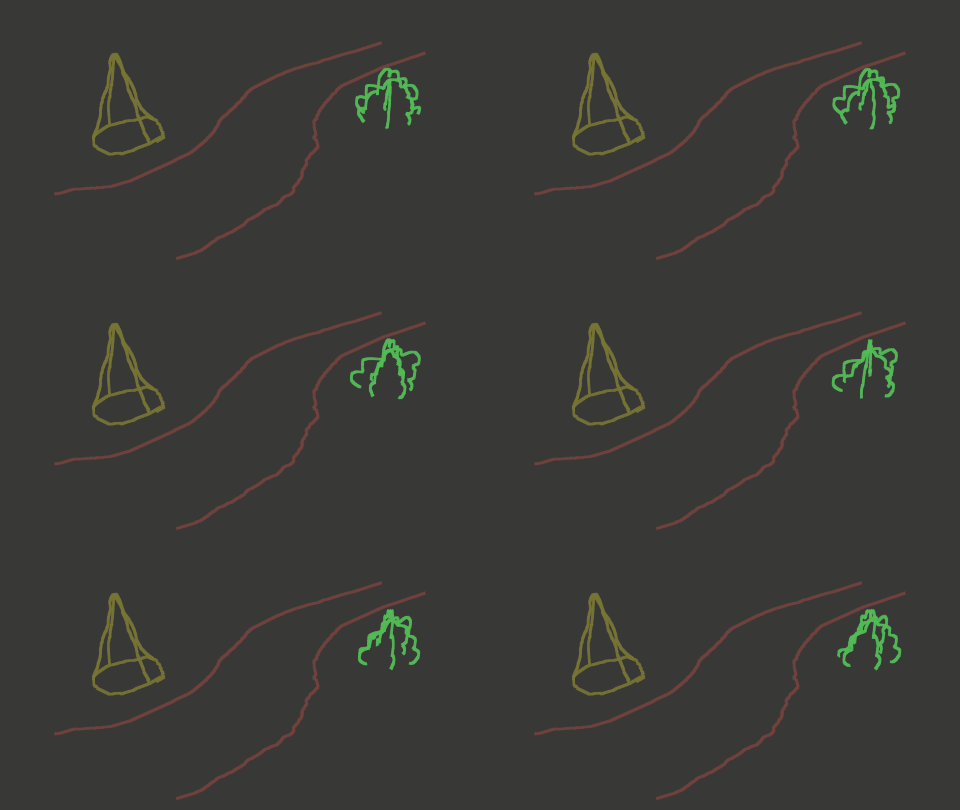
To keyframe the changes simply swap to a different keyframe before manipulating the GP strokes. This will automatically create a new keyframe for the new strokes' position.

animated bush

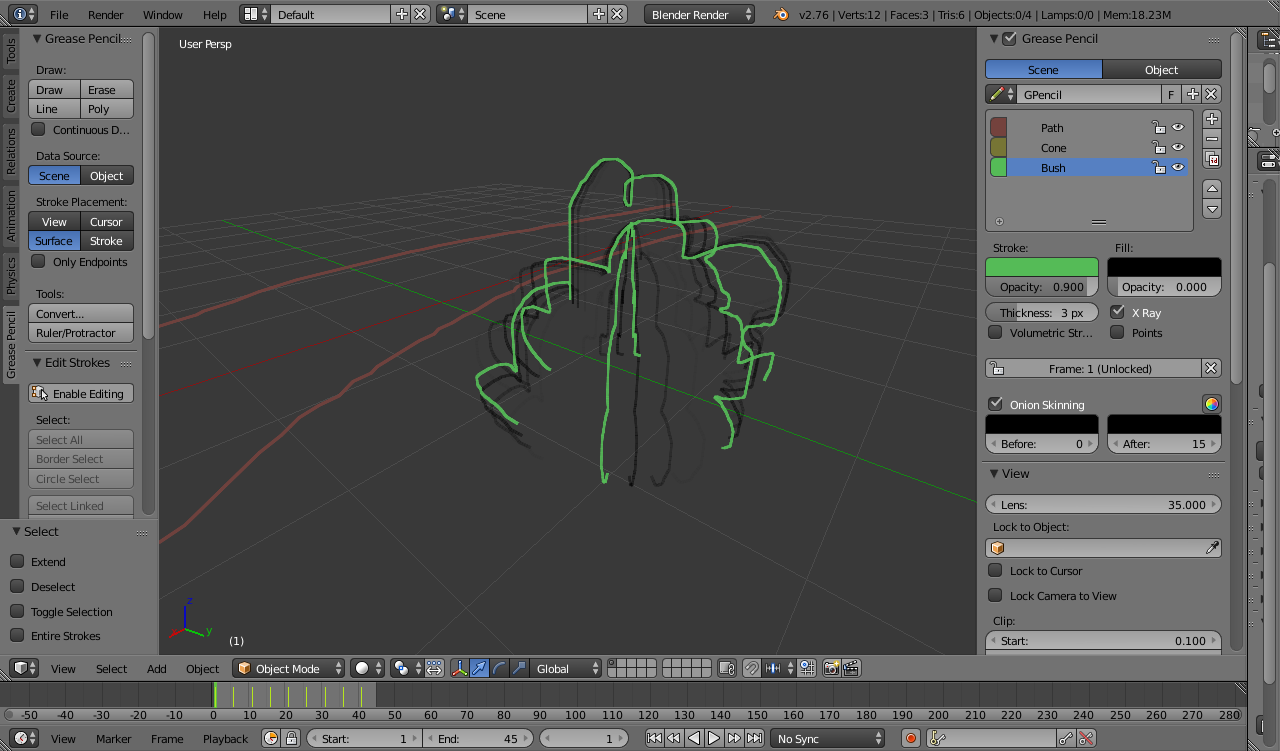
Additionally, enable Onion Skinning to allow you to see how the grease pencil strokes vary between adjacent frames.

onion skin

To draw with the grease pencil at a specific depth and angle it's often easiest to simply place an mesh in the scene and orient it so the surface is positioned where you require the GP lines and use the Surface stroke placement to effectively draw on that surface. You can then either hide the mesh (to use it later to re-draw something in the same place) or move it to another location to draw the next stroke.

grease pencil to surface

For animation of grease pencil strokes there are a couple of options.

The first is to convert the grease pencil strokes into 'real' geometry using the Convert... tool in the tool shelf.

tool shelf Convert

This will create a curve from your grease pencil strokes and this can be manipulated as for any geometry.

The other (pure grease pencil) option is to use the grease pencil Enable Editing mode and the Grease Pencil tools in the properties side panel of the 3D view.

GP enable editing, GP properties

Firstly, use the Grease Pencil layers to keep your different elements separate. This allows easy manipulation of the different layers. For example, to select all of one particular layer (when in Edit mode) you can simply hide all other (by clicking the eye icon in the Grease Pencil layers list) and the press A in the 3D View to select 'All'. The layers can be assigned individual colours in the Grease Pencil properties panel if desired.

set colours

To manipulate particular GP strokes, enable editing by clicking the Enable Editing button in the Tool Shelf (T). You can now use the usual selection tools (A for 'all', Box Select (B), Circle Select (C), etc.). Once you have selected the relevant points on the strokes you can use the usual Grab G, Rotate R, Scale S tools as well as Proportional Editing, etc. to manipulate the strokes.

To keyframe the changes simply swap to a different keyframe before manipulating the GP strokes. This will automatically create a new keyframe for the new strokes' position.

animated bush

Additionally, enable Onion Skinning to allow you to see how the grease pencil strokes vary between adjacent frames.
onion skin

Source Link
Rich Sedman
  • 45.2k
  • 2
  • 109
  • 233

To draw with the grease pencil at a specific depth and angle it's often easiest to simply place an mesh in the scene and orient it so the surface is positioned where you require the GP lines and use the Surface stroke placement to effectively draw on that surface. You can then either hide the mesh (to use it later to re-draw something in the same place) or move it to another location to draw the next stroke.

grease pencil to surface