0
$\begingroup$

I'm looking for some help in Blender to create a shader that incorporates a crosshatched pattern.

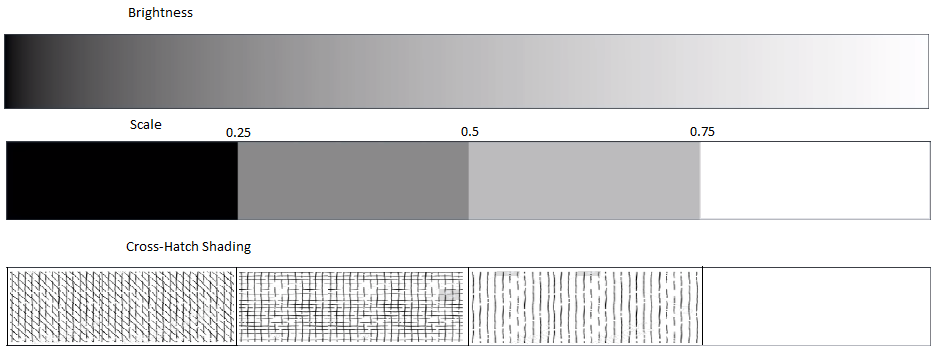
Some tutorials teach how to do it, but they use the same pattern, only changing its size or intensity based on brightness. What I would like is for the crosshatched pattern to change depending on the pixel brightness, according to "classes".

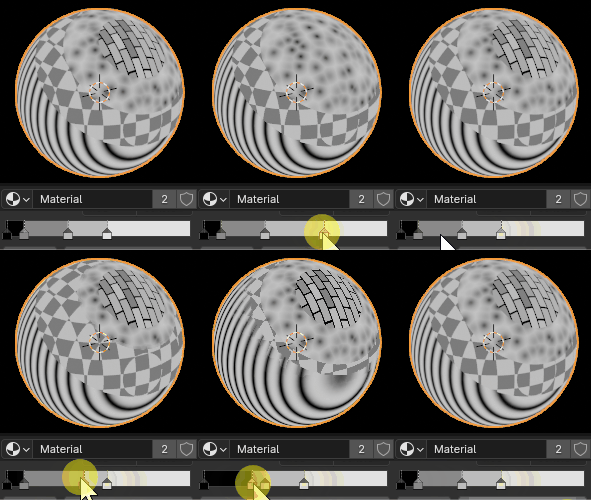
The image below shows a bit:

enter image description here

While I've managed to separate the classes based on brightness (using diffuse shader - shader to color - color ramp... second bar in the picture). I'm struggling with using this classification to determine which pattern, generated through wave noise, to apply (third bar in the picture).

Any guidance or assistance would be greatly appreciated!

$\endgroup$
2
  • $\begingroup$ What is your issue exactly, if you managed to separate your colors into classes ? $\endgroup$
    – Lutzi
    Commented Apr 18 at 16:46
  • $\begingroup$ Yes. On a gray scale, for example, a brighter pixel, between the value of 1 (white) and 0.75, it would use no pattern. The pixel between 0.5 and 0.75, for example, a vertical pattern, between 0.25 and 0.5, a crossed pattern, and black (0.0) up to 0.25, a denser pattern. It would be something more or less like this. In color ramp, I can separate this intensity from the brightness, but I don't know how to use this (or any other way) to create a form of control for pattern $\endgroup$
    – Thomas
    Commented Apr 18 at 16:55

3 Answers 3

2
$\begingroup$

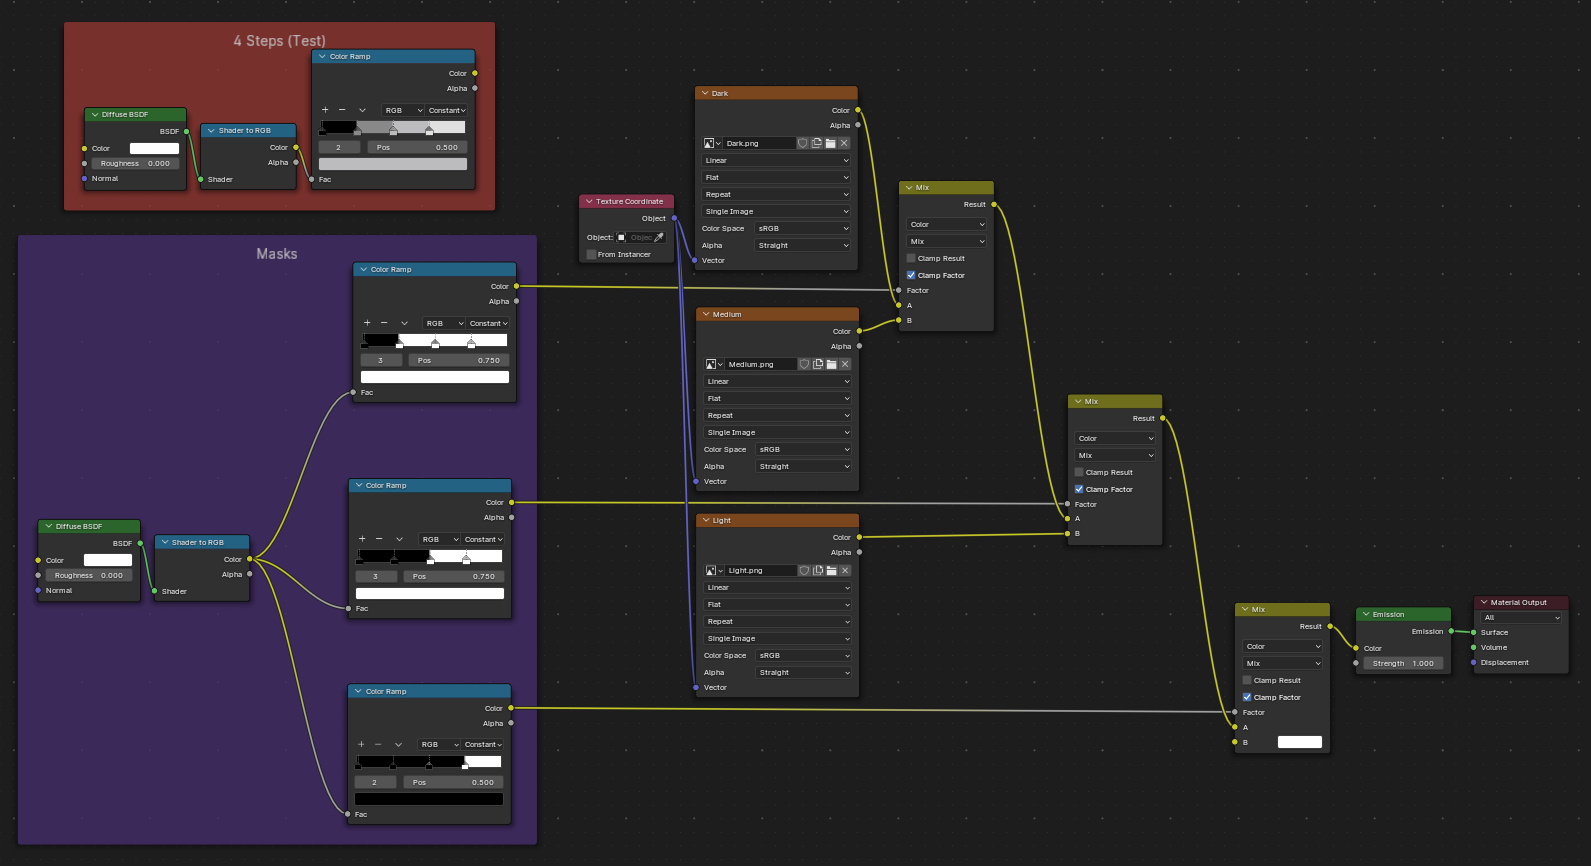
If I understand correctly, the easiest way is to make masks out of the steps you want and use mix nodes to combine the patterns: enter image description here

As you can see in the purple "Masks"-frame, I separate the steps into multiple parts, so I can use it in the Mix-Node ("Mix Color").

The darker parts of a mask make the "A"-input show more, lighter parts make the "B"-input show more. As inputs I used different image textures, but you could plug procedural hatching into these.

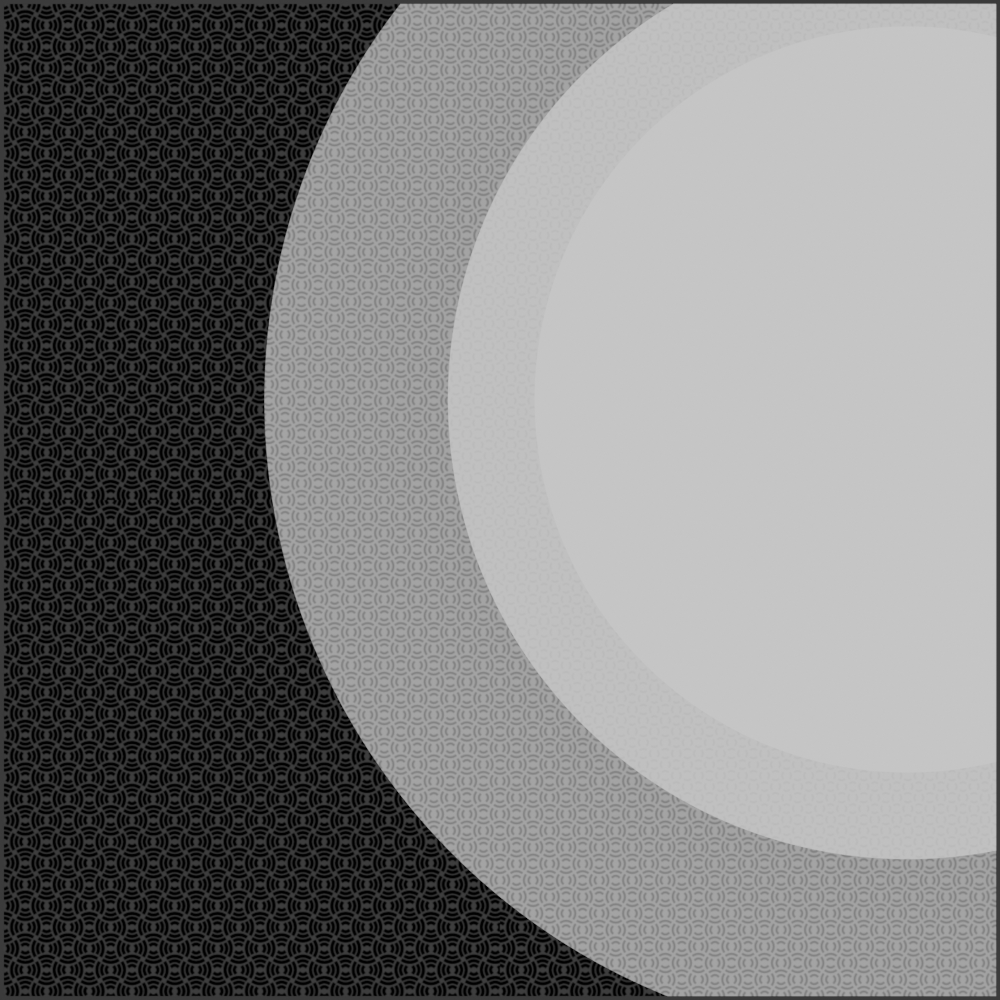
My result with this shader on a plane and lighting:

enter image description here

My Blender file:

$\endgroup$
1
  • $\begingroup$ That's it! Thank you very much. Seriously. I had actually created a node structure very, very similar, but I hadn't thought about the masks like you did. It all makes sense now, looking at it haha thank you! Abraços. $\endgroup$
    – Thomas
    Commented Apr 19 at 10:39
1
$\begingroup$

Mixing between patterns based on brightness

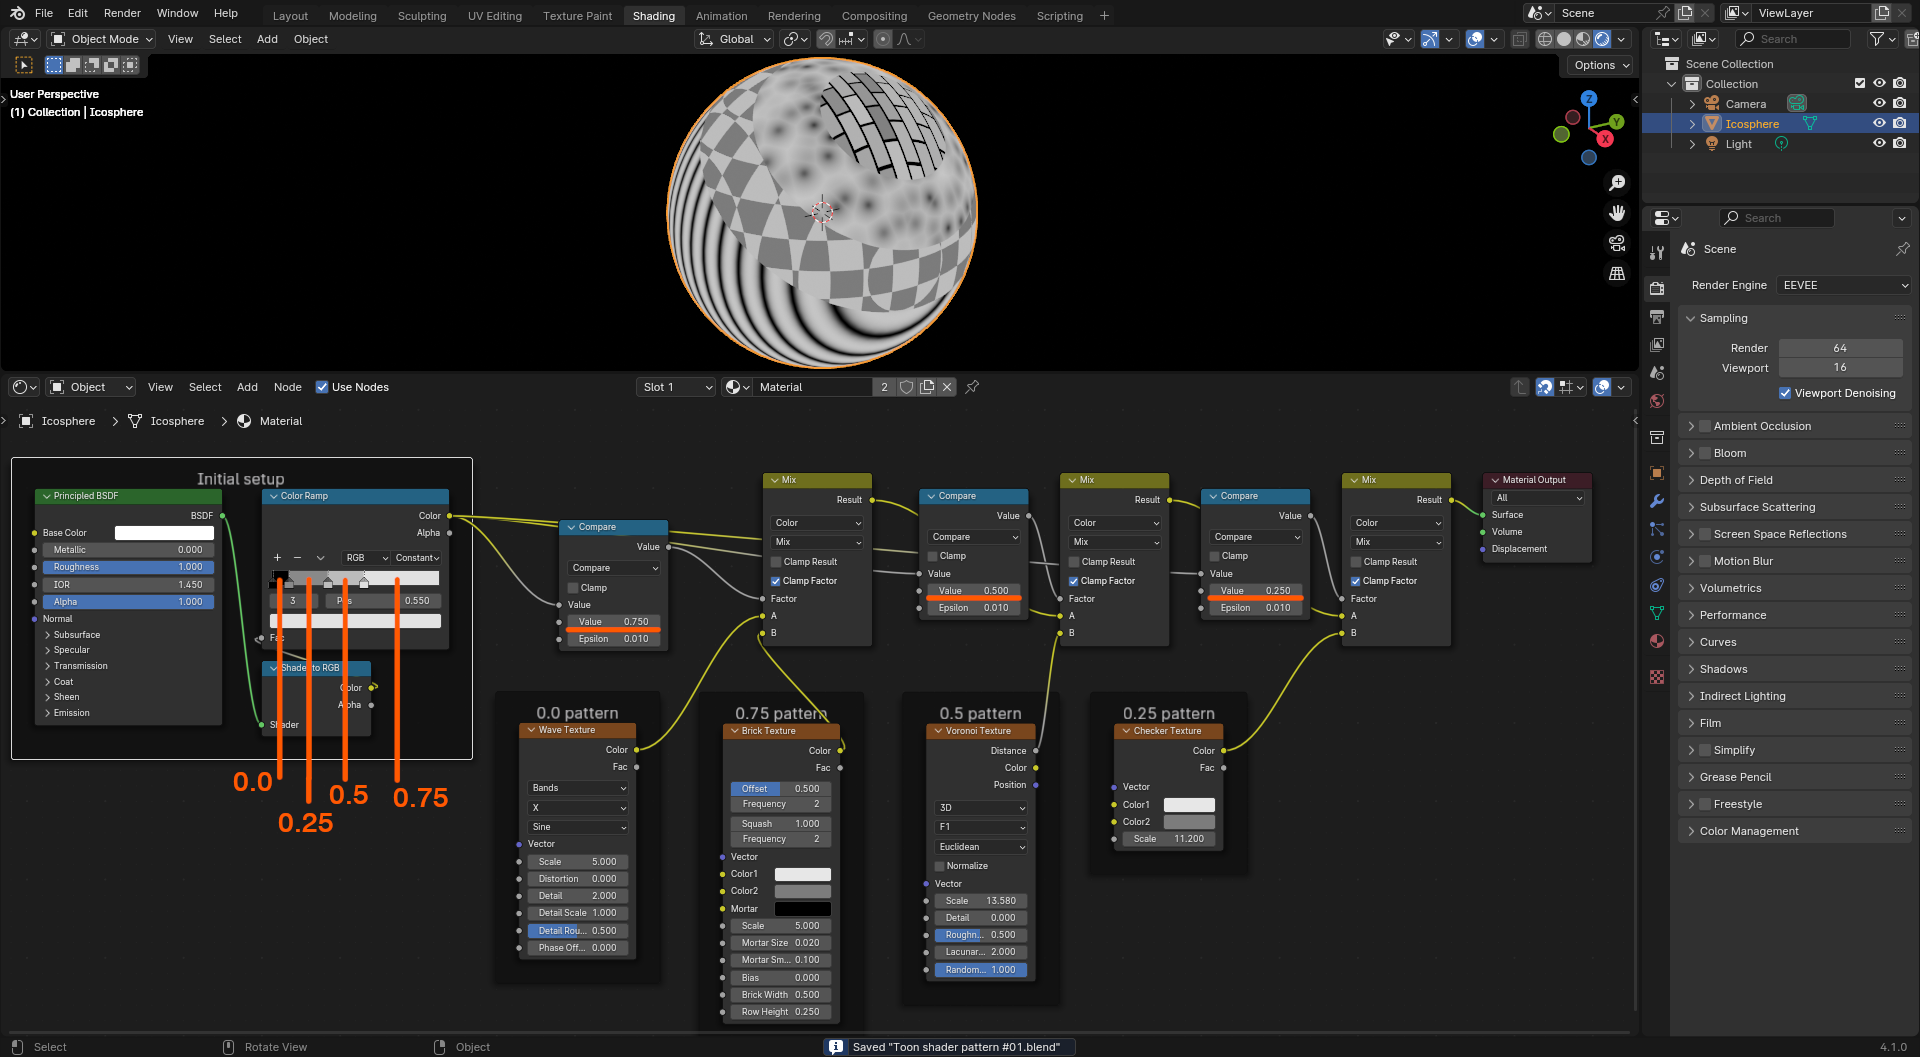
You could use a Compare node to mix between multiple patterns as follows :

enter image description here

Basically, for each Mix node, if the Color Ramp output is equal to some value (0, 0.25, 0.5, 0.75) then use B output. Otherwise, use A output.

Alternatively, you could use Greater Than or Less Than nodes as input factor of your Mix nodes.

Of course you still have control over the distribution by adjusting the color ramp :

enter image description here

$\endgroup$
1
  • $\begingroup$ Thank you, it worked as well. With your idea, I learned a bit more about the math nodes. Thank you very, very much. Abraços! $\endgroup$
    – Thomas
    Commented Apr 19 at 10:41
0
$\begingroup$

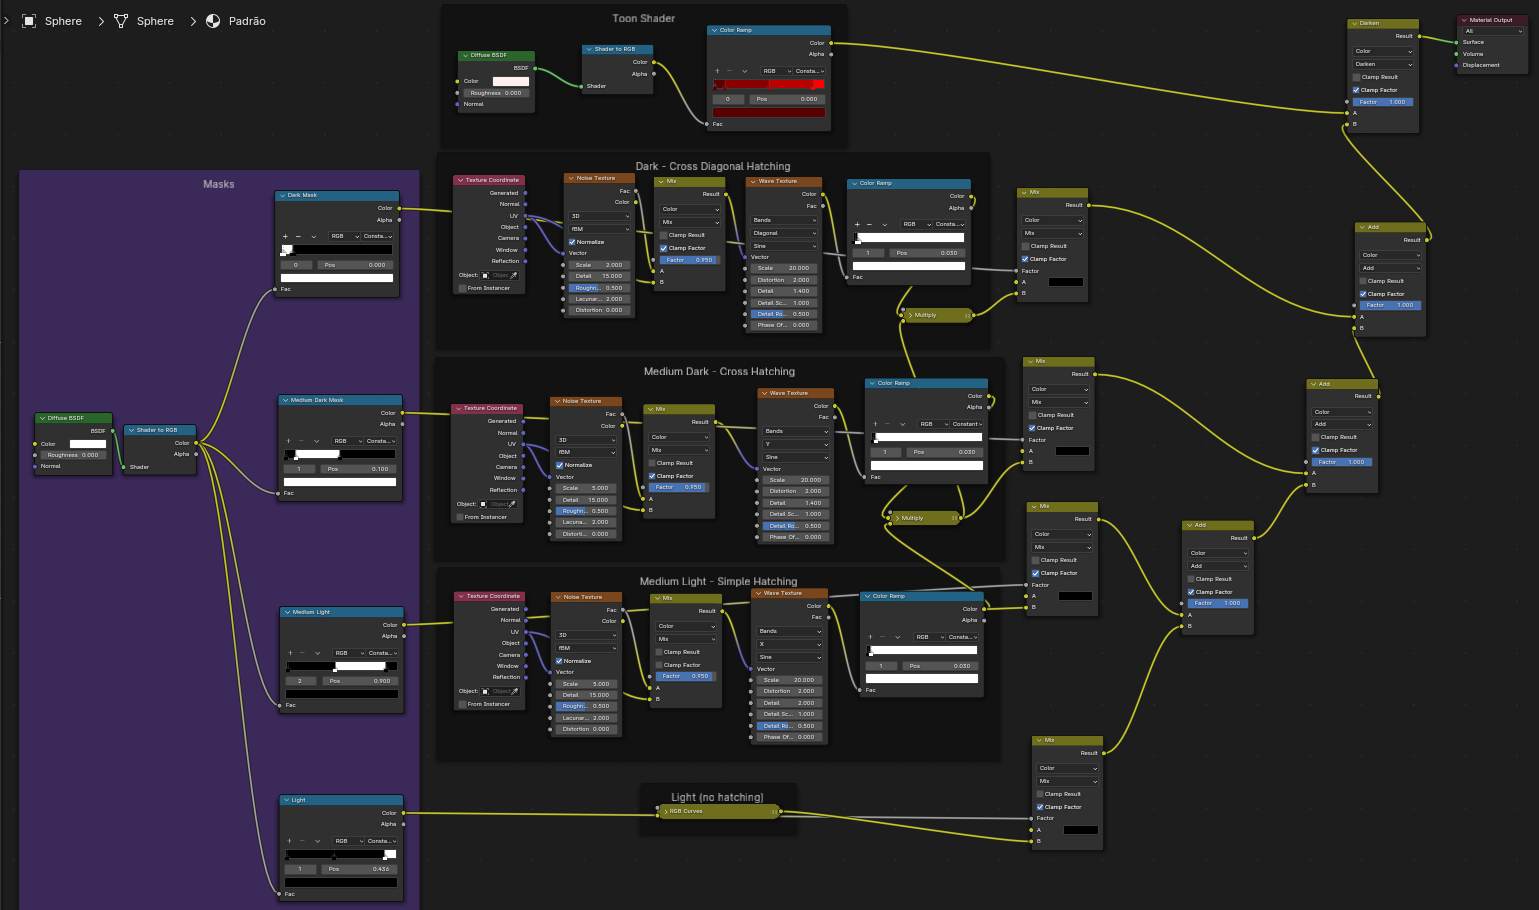
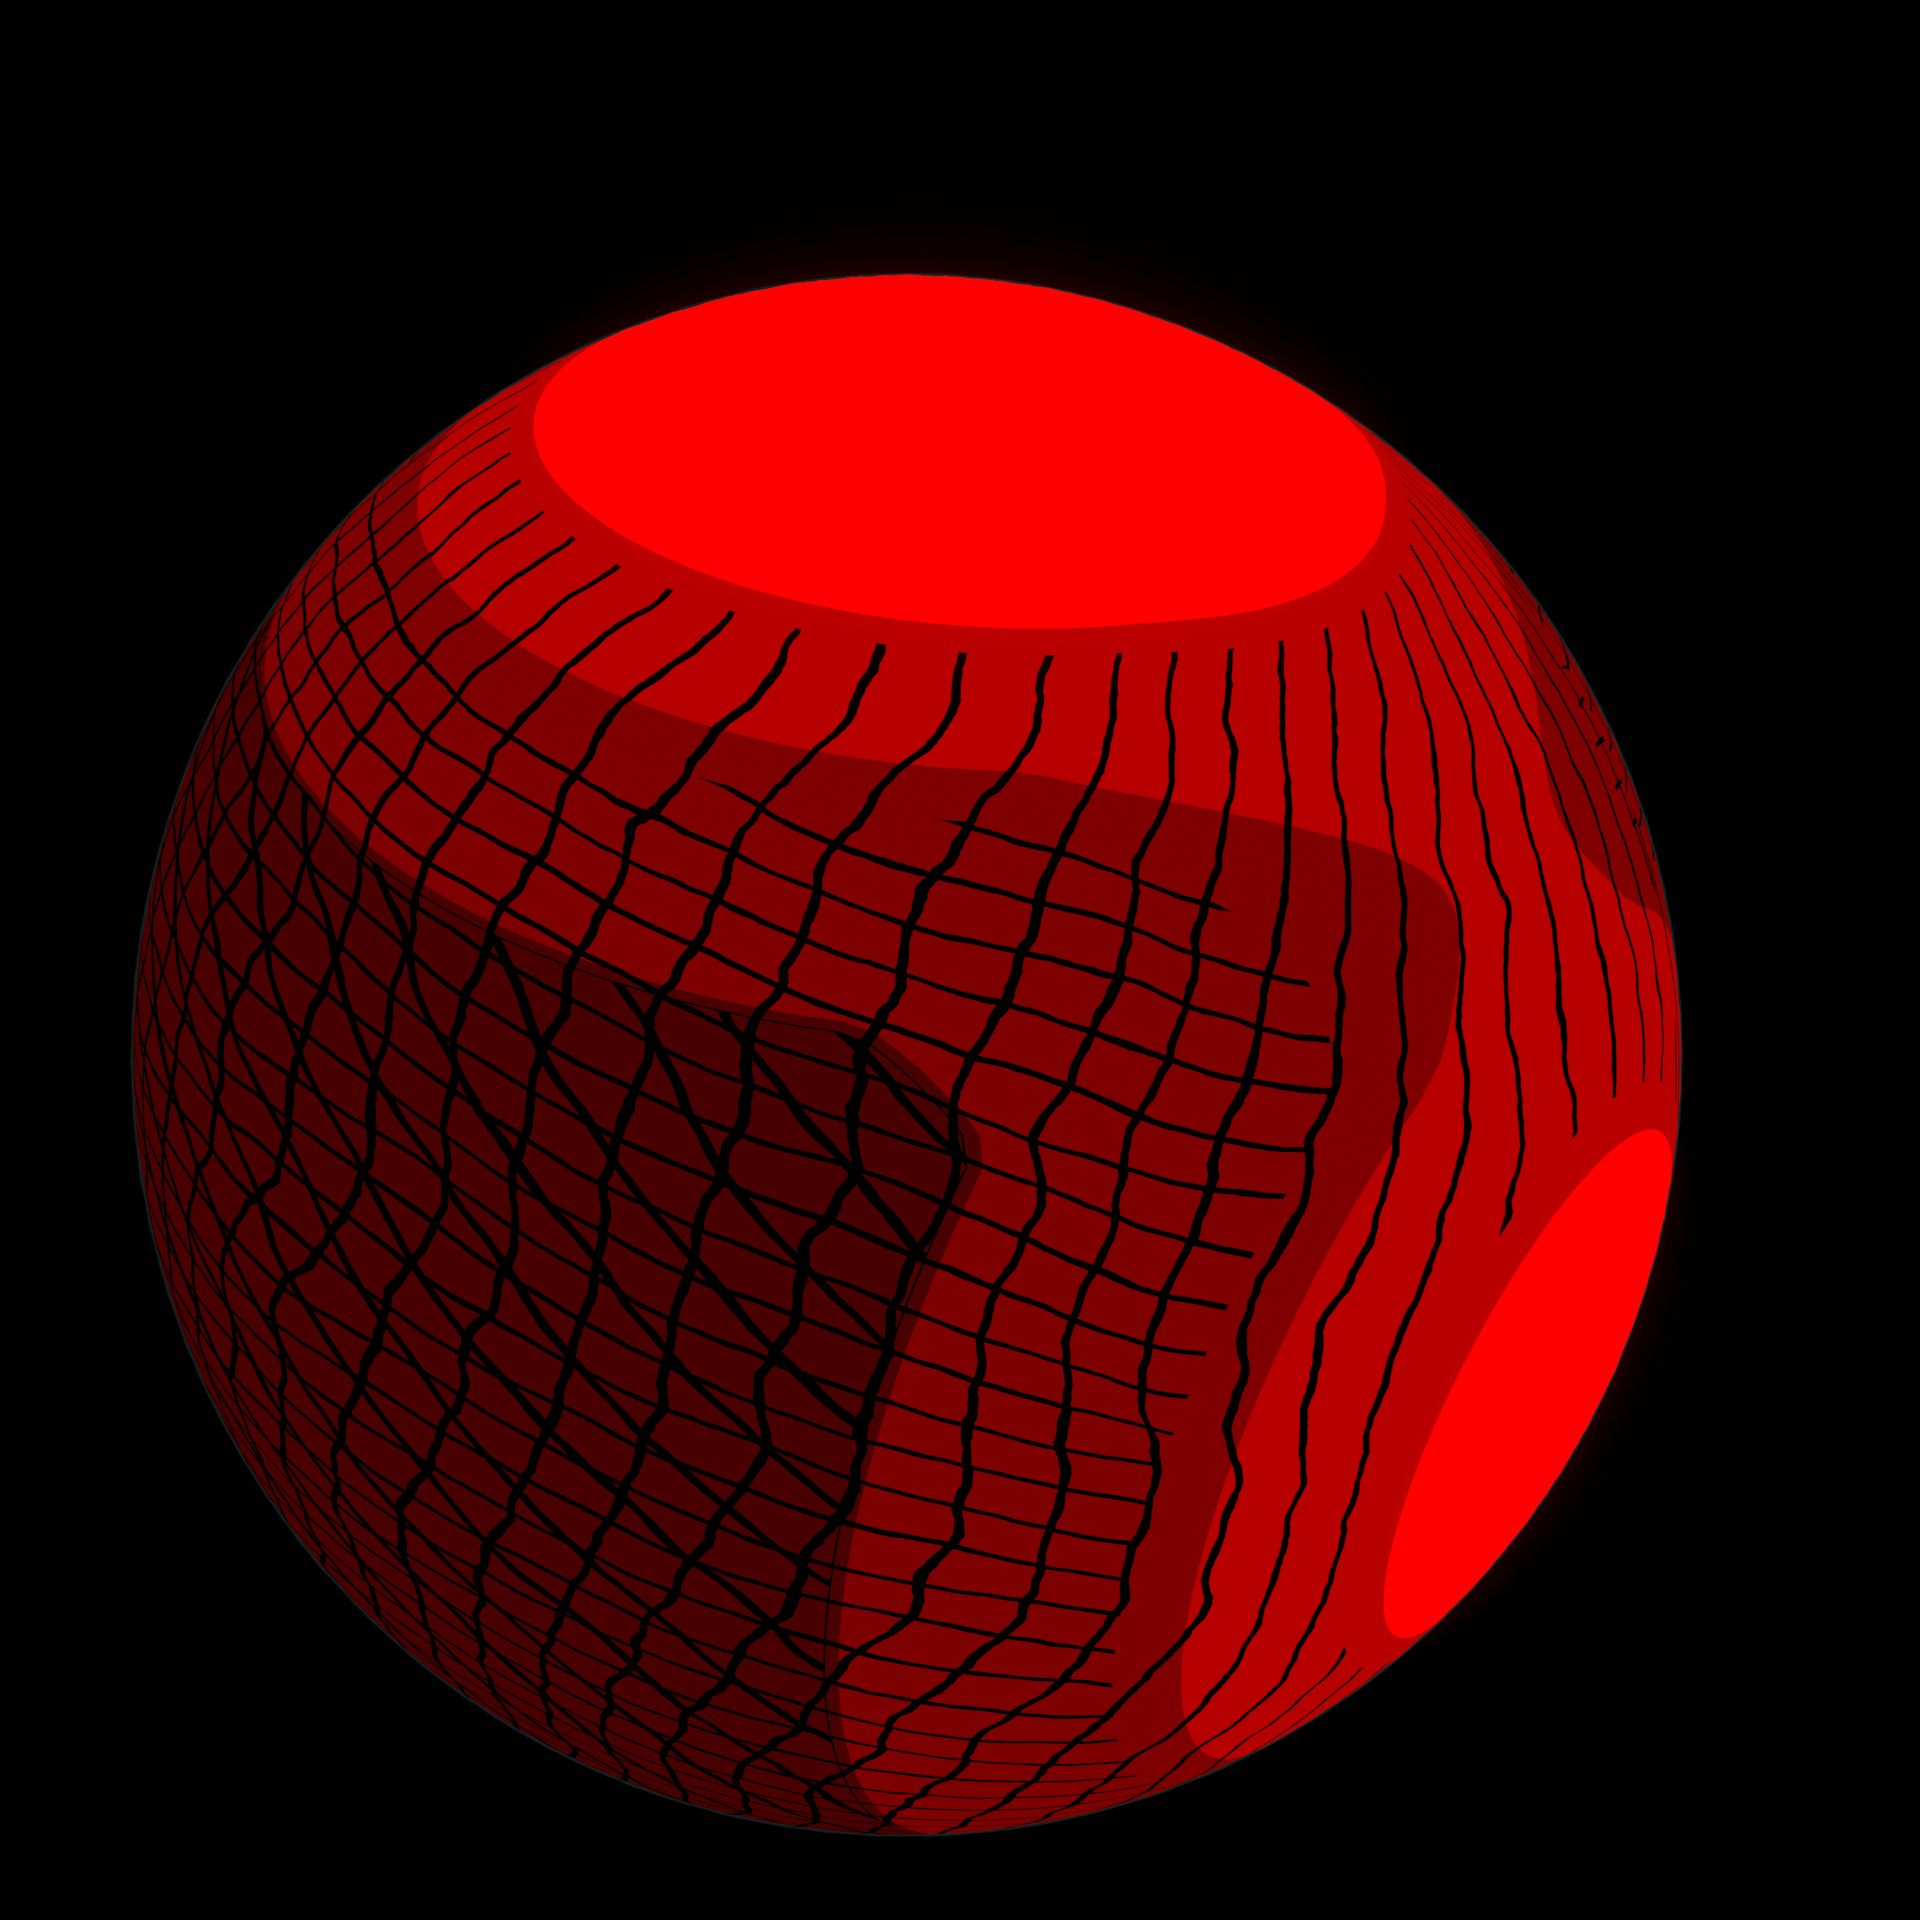
Taking the awesome tips from Lutzi and Empress (thank you again), I modified the nodes a bit to achieve the exact result I wanted.

I'll leave here recorded the complex nodes (surely, it could be more functional) for anyone who wants it in the future!

enter image description here

enter image description here

$\endgroup$

You must log in to answer this question.

Not the answer you're looking for? Browse other questions tagged .