0
$\begingroup$

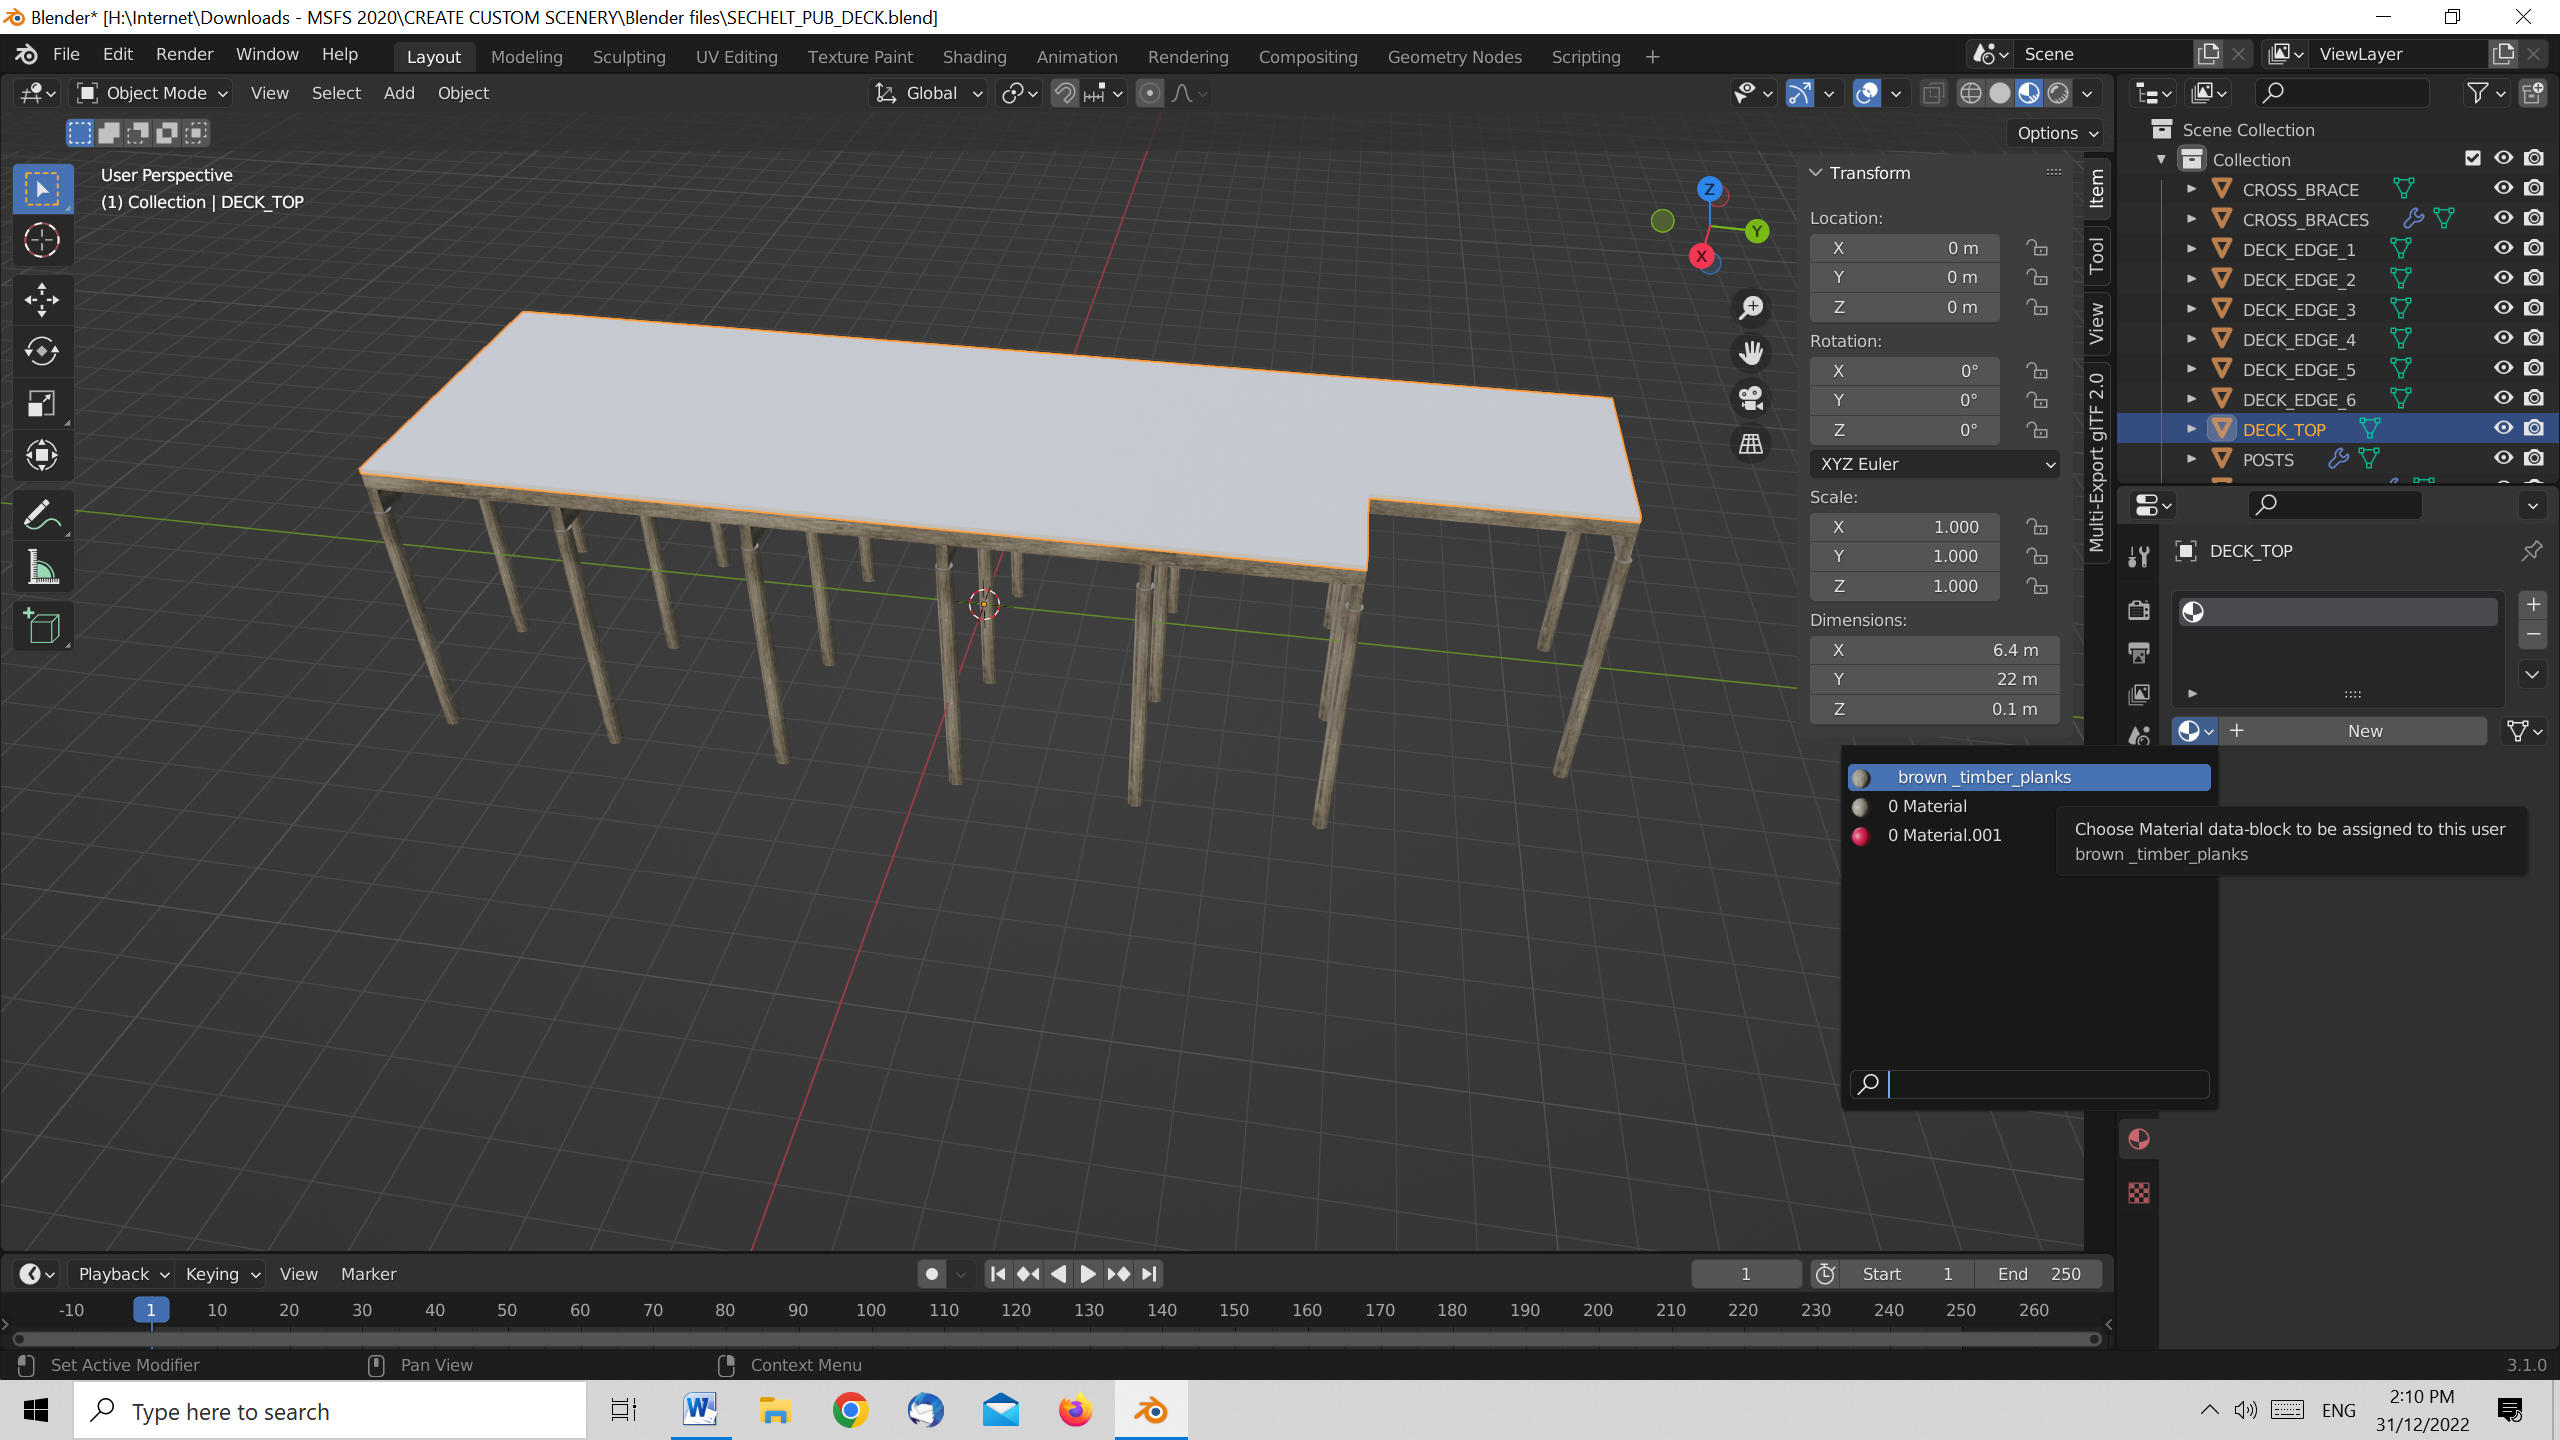
I am creating a model of a pier with an irregular shaped deck (not a simple rectangle) - see image below. I am using the same texture image for every mesh in the model. I created the top using a collapsed (in center to create a single vertex) mesh cube and then extruding along the edges required and then I Filled before extruding on the Z axis to give it thickness. I can apply a simple color to the deck without any problem but when I apply my texture image the deck mesh goes all black. It seems that the mesh has a material already applied but I cannot see it. What do I need to do to enable me to apply the texture image?

Also I recently cleared all cookies etc and so could not post my question without logging in when I attempted to post this question. I clicked on the LOG IN 'link' top right of screen but instead of being prompted for login details I was shown a list of previously posted questions. Seems to be a problem there. I will attempt to post as a guest until next time. enter image description here
enter image description here

enter image description here

$\endgroup$
5
  • $\begingroup$ That seems to be a very roundabout method of creating your object! Have you UV unwrapped your mesh and have you applied the scale to the mesh and checked the normals are correct? Those are all things that could affect materials. $\endgroup$
    – John Eason
    Commented Dec 31, 2022 at 10:05
  • $\begingroup$ All meshes have had scale of applied. I have UV unwrapped all other meshes successfully. Please note that the same problem happens if I start with "a blank canvas' ie remove default cube,add mesh cube, go to edit mode, press M and select 'at center', then E (extrude) Y 10 press Enter, E X 10 press Enter, X Y -10 press Enter, E X -10 press enter to form a square, select all edges then press F to fill, then E Z 0.1 press Enter to create thickness. Note this is a regular rectangle just for the example. Then apply all transforms. What else should I be doing. How do I check that normals? $\endgroup$ Commented Dec 31, 2022 at 10:55
  • 1
    $\begingroup$ To check the normals you can enable 'Face Orientation' on the Viewport Overlays menu. Any faces with inverted normals will be shown in red. Going into Edit mode, selecting All and then Shift-N will usually correct them. If you still have problems we'll need to see your blend file with the materials packed into it via File > External Data > Pack Resources. Share it by following the instructions at blend-exchange.com. $\endgroup$
    – John Eason
    Commented Dec 31, 2022 at 11:23
  • $\begingroup$ Thanks. I have selected all then 'applied' normals which did not fix the problem although I did see some meshes in the model outlines in red although I thing they were they were those with arrays.. Here is by blender file <img src="https://blend-exchange.com/embedImage.png?bid=d64bKLEa" /> $\endgroup$ Commented Dec 31, 2022 at 21:49
  • $\begingroup$ [added later] I should point out that the reason I chose to create the mesh (decking) using the method described above (starting with one vertex and then using Extrude) was so that I can apply my image texture material of wooden planks the way they would appear in real life. I tried creating the decking with two mesh cubes and then joining them into one mesh (ctrl J) but uv wrapping still treated both original cubes separately instead of one mesh. Maybe there is a better method to do it? $\endgroup$ Commented Dec 31, 2022 at 22:01

1 Answer 1

0
$\begingroup$

Ok. I've now had a chance to look at your file. You hadn't marked any seams on the main deck before UV unwrapping it. Consequently you get a brief warning in the bottom toolbar when you select Unwrap which I've shown below.

enter image description here

I also added a cut across the deck to create two rectangular areas, found there were still two duplicate vertices on the mesh, and have re-unwrapped the object, scaled and rotated some of the UV islands so that the planks all run in the same direction and set a material for the deck! I've uploaded the corrected file here:

$\endgroup$
6
  • $\begingroup$ Thanks but I did mark the seams. As soon as I 'apply' the image texture material the decking goes black. When I mark the seams, press letter u twice and select UV editing the uv 'unwrapping' screen displays the correct image texture but with no 'outlines' of each face. Maybe it was caused by the duplicate vertices which I didn't notice. Anyway thanks for your help which is very appreciated. $\endgroup$ Commented Dec 31, 2022 at 23:36
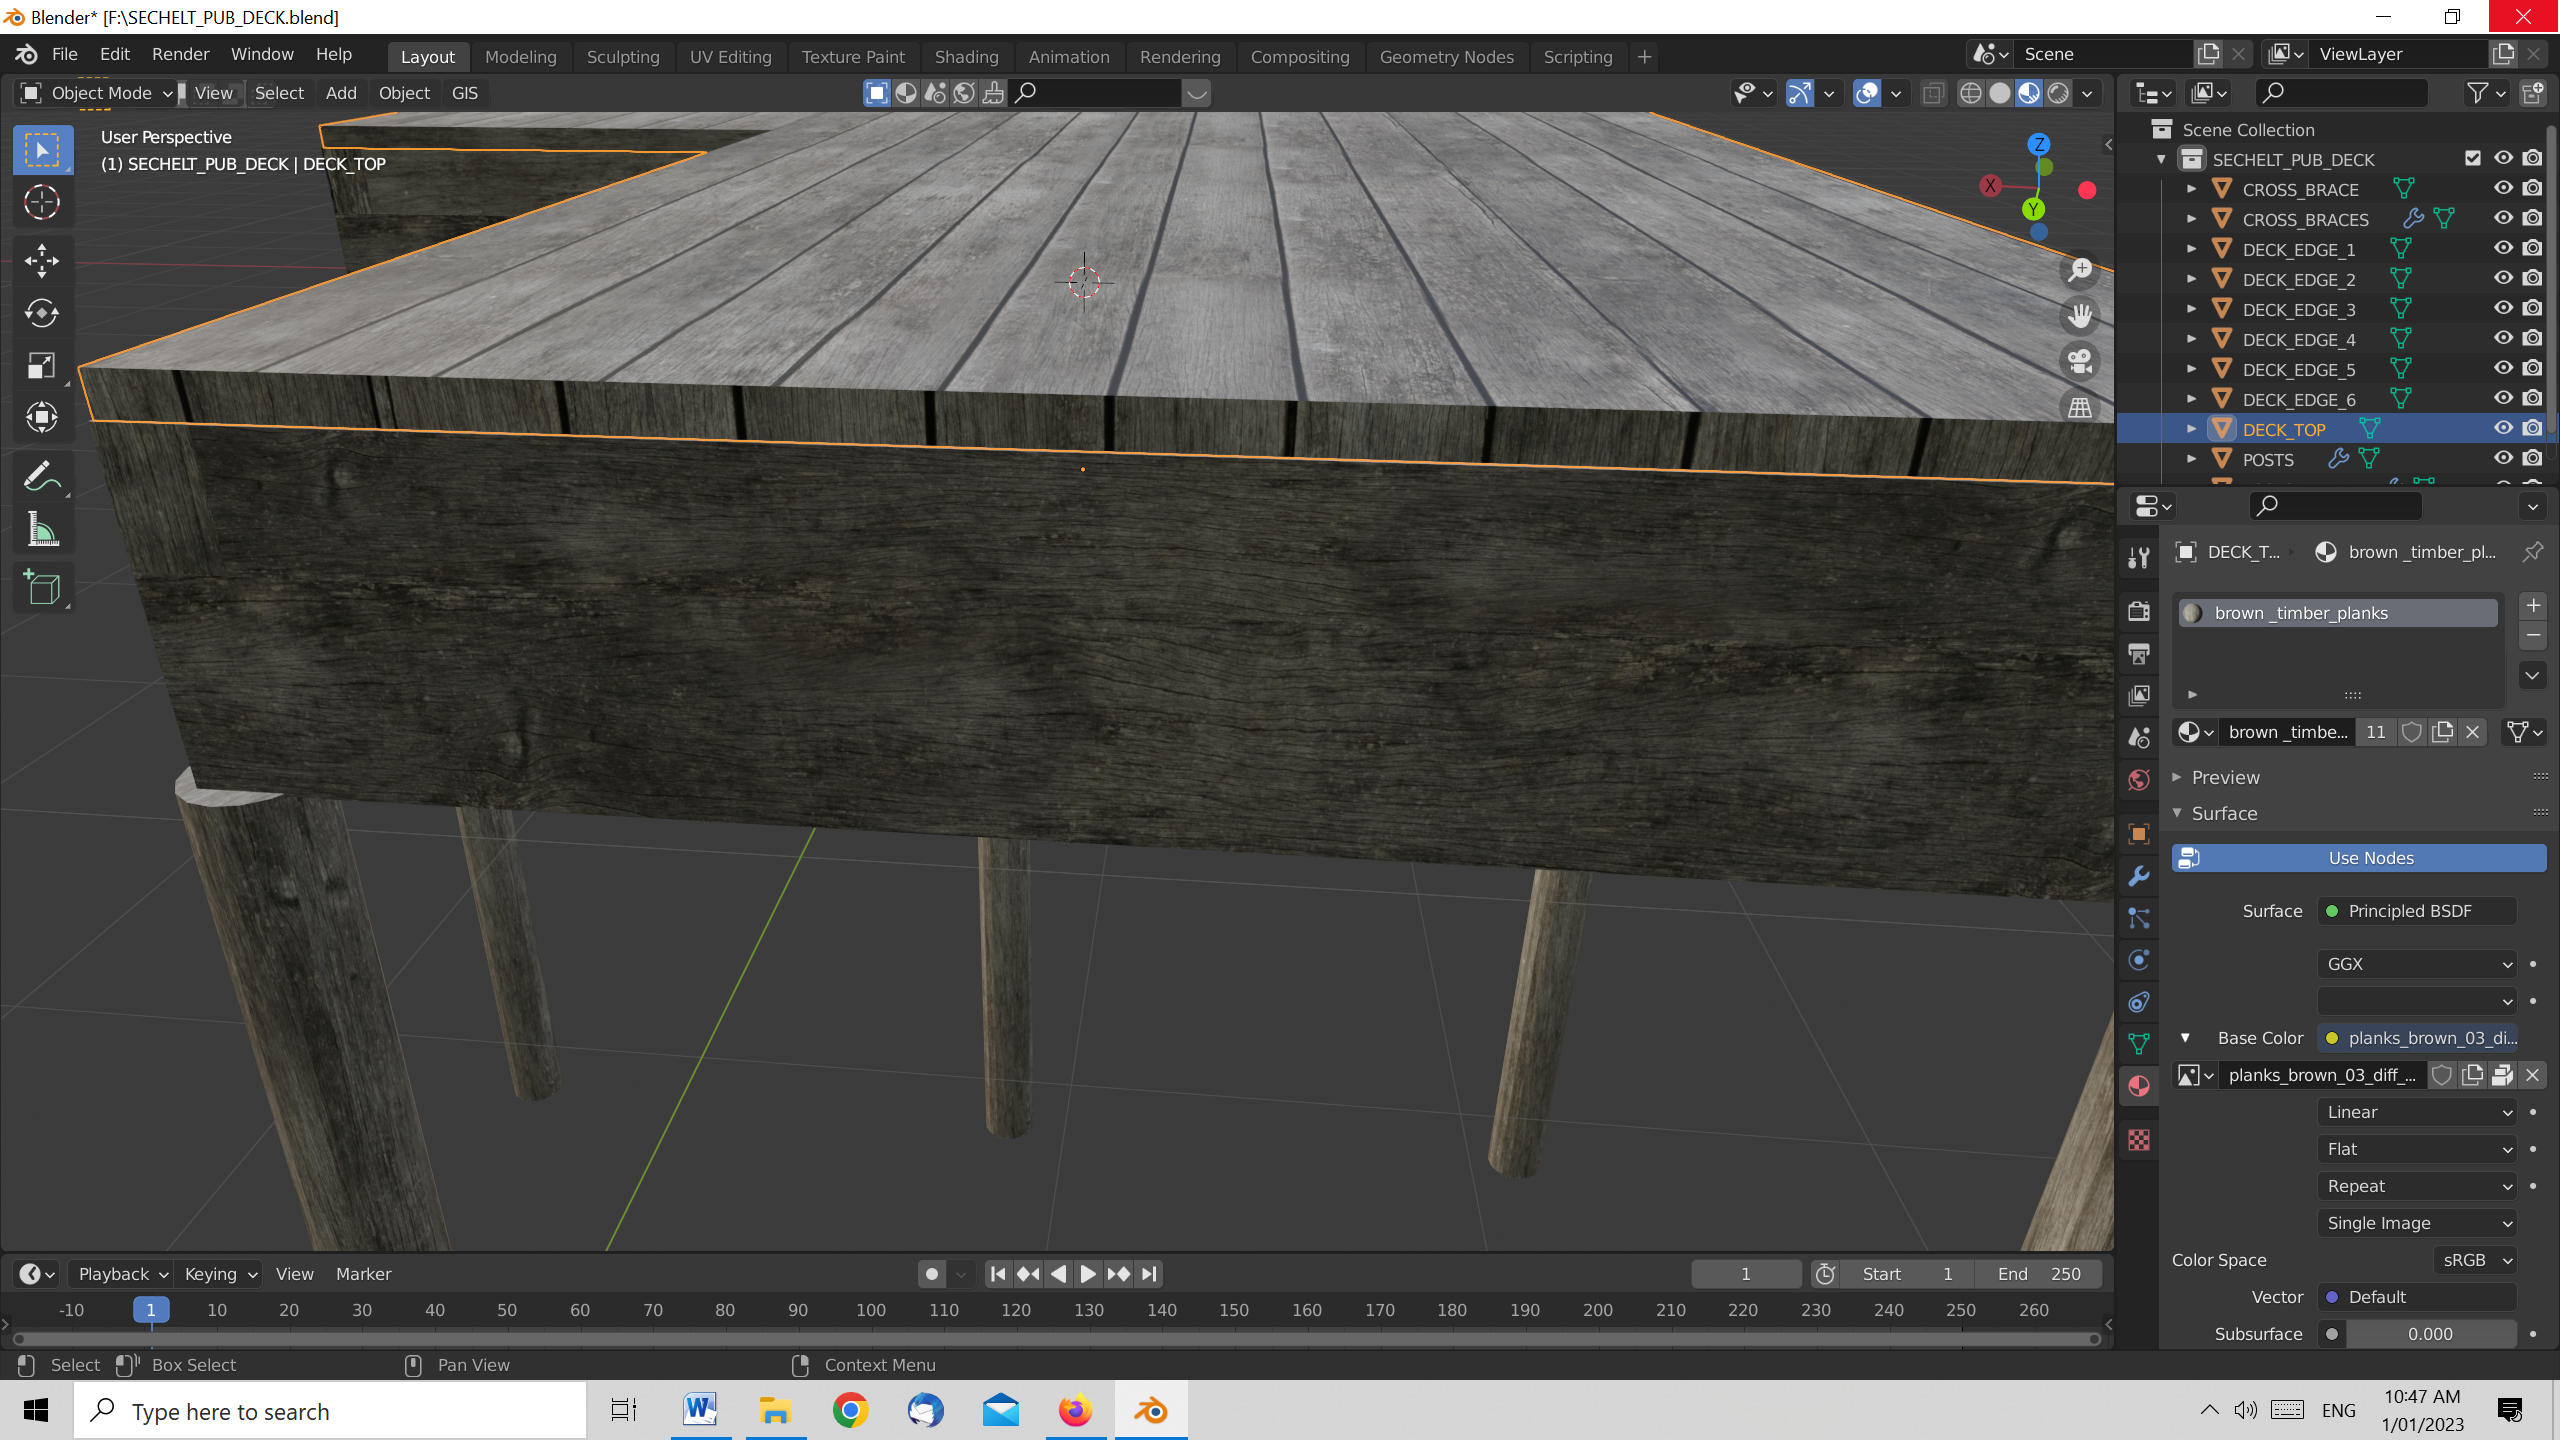
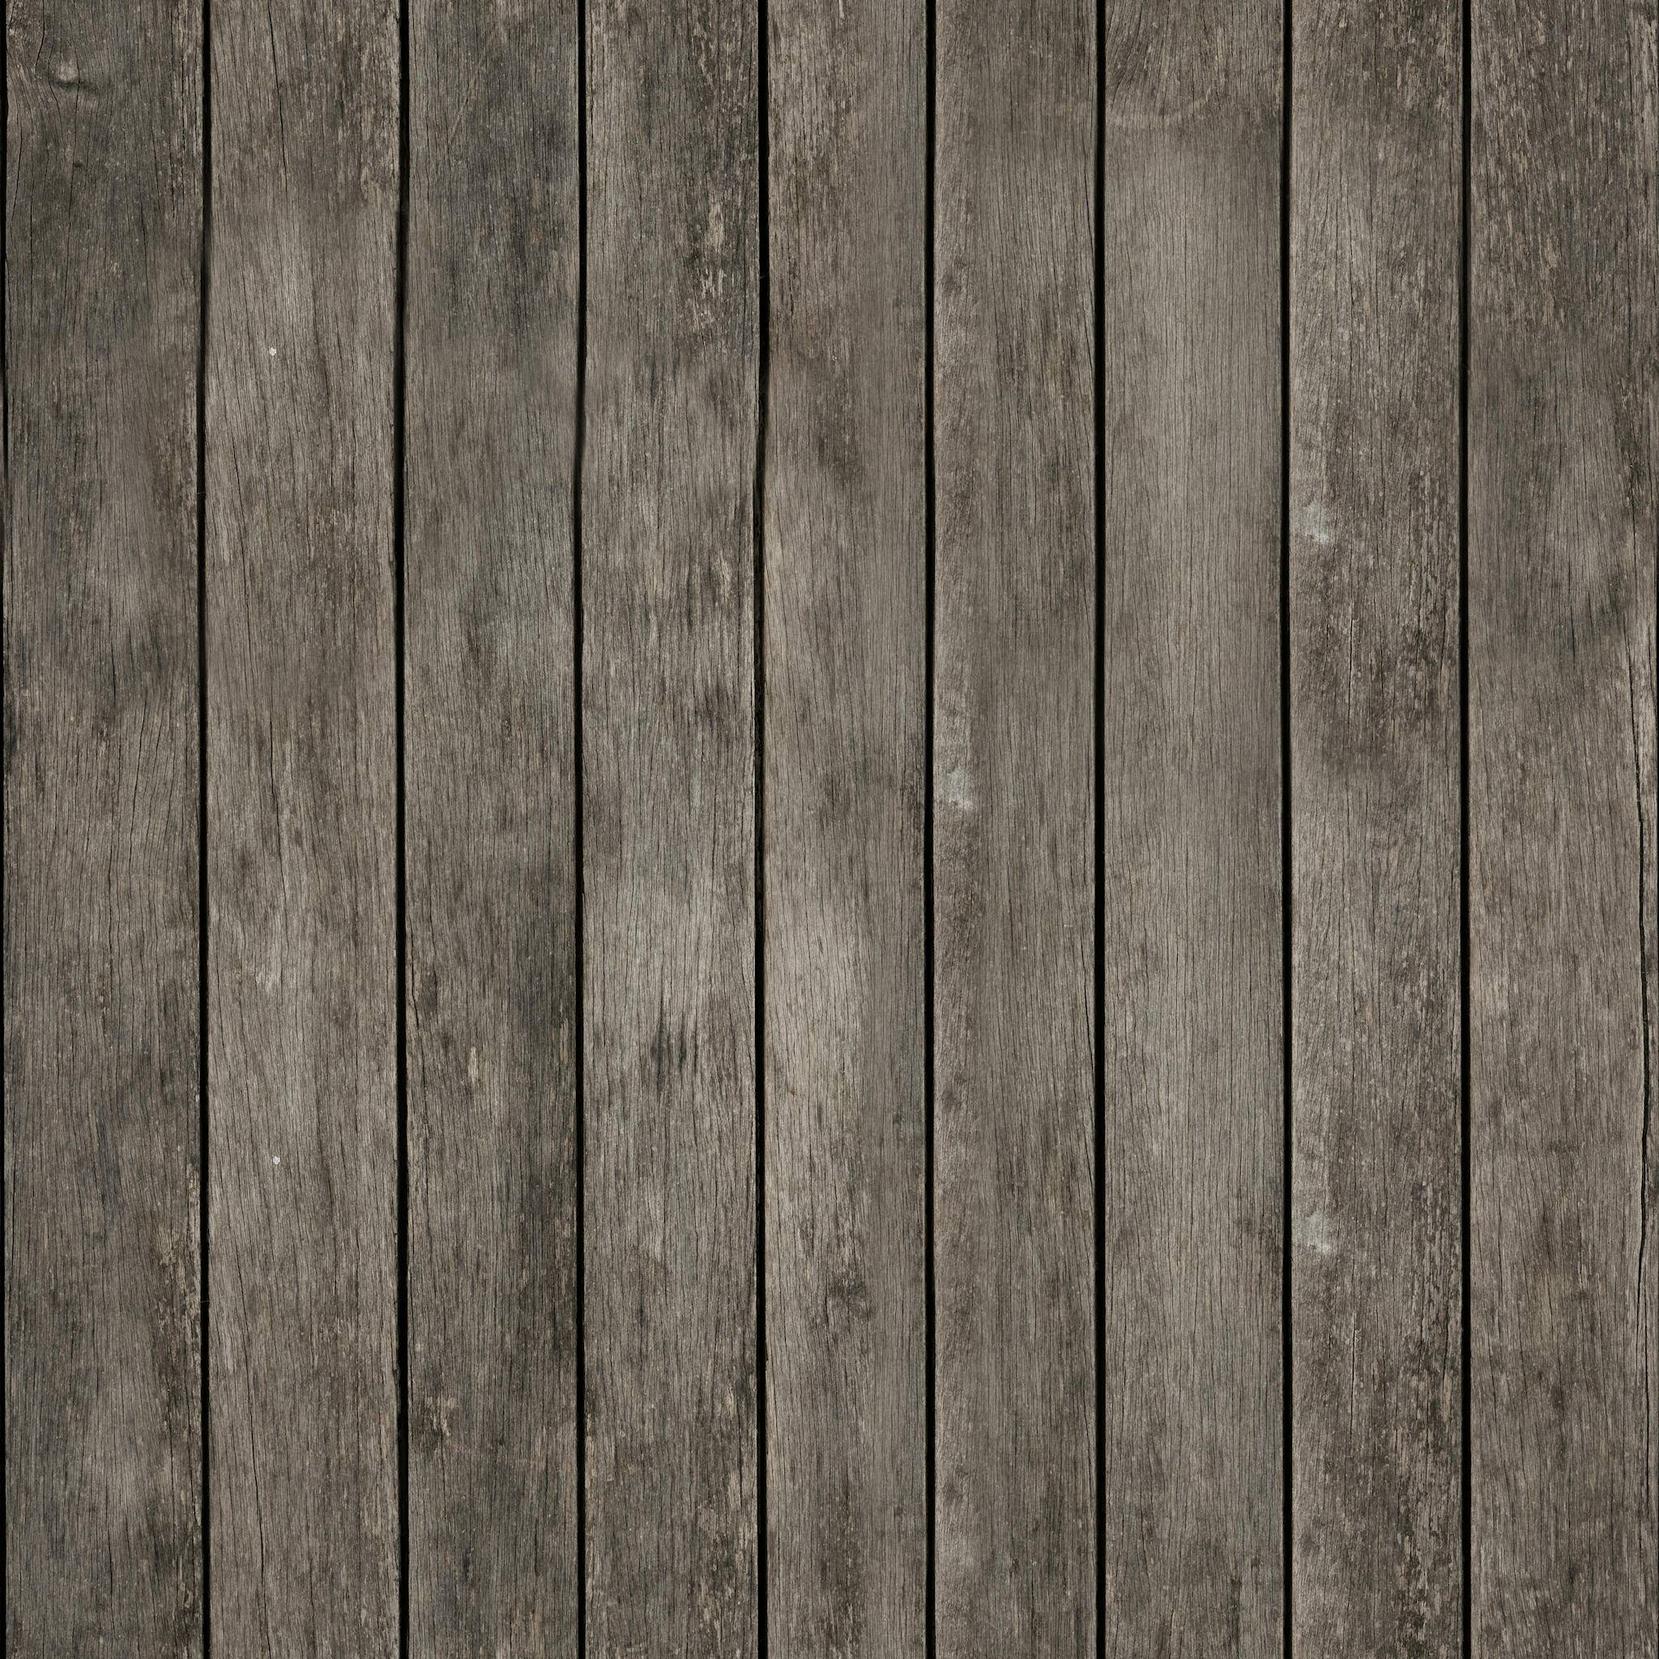
  • $\begingroup$ [added later] I modified the uv unwrapping so that the end of the planks looks more correct but noticed (it seems) the texture image has each plank a slightly different width and so matching the 'gaps' for the end of the deck is impossible (see image I added to the initial post). I know that I could use Photo shop to increase or decrease each 'plank' so that they all are the same width and reapply the new image but is there a method in Blender which will allow it to be adjusted (hope I have described enough). $\endgroup$ Commented Dec 31, 2022 at 23:53
  • $\begingroup$ There were no seams marked on the deck when I downloaded your file. You have to select All in the 3D view before the unwrapping appears in the UV editor. You can select just the end face which is wrong then use the usual 'S' for scale in the UV editor to scale the planks to the correct size. $\endgroup$
    – John Eason
    Commented Jan 1, 2023 at 0:24
  • $\begingroup$ Thanks John. Is there a method to display what scaling has already been applied? The planks are NOT separate though. They are pseudo planks. The image contains 9 planks and a dark area for the gap between each plank so applying scale scales every one of the 9 planks in the image as well as the 'gaps'. I will add the image used in the initial post (above). $\endgroup$ Commented Jan 1, 2023 at 0:31
  • $\begingroup$ Afraid not. I should have added that you can also move those edges with 'G' in the UV editor as well as scaling them to get them lined up exactly but do you really need such precision just in a rendered image? It's a quarter to one in the morning here so I'm going to bed! $\endgroup$
    – John Eason
    Commented Jan 1, 2023 at 0:45

You must log in to answer this question.

Not the answer you're looking for? Browse other questions tagged .