2
$\begingroup$

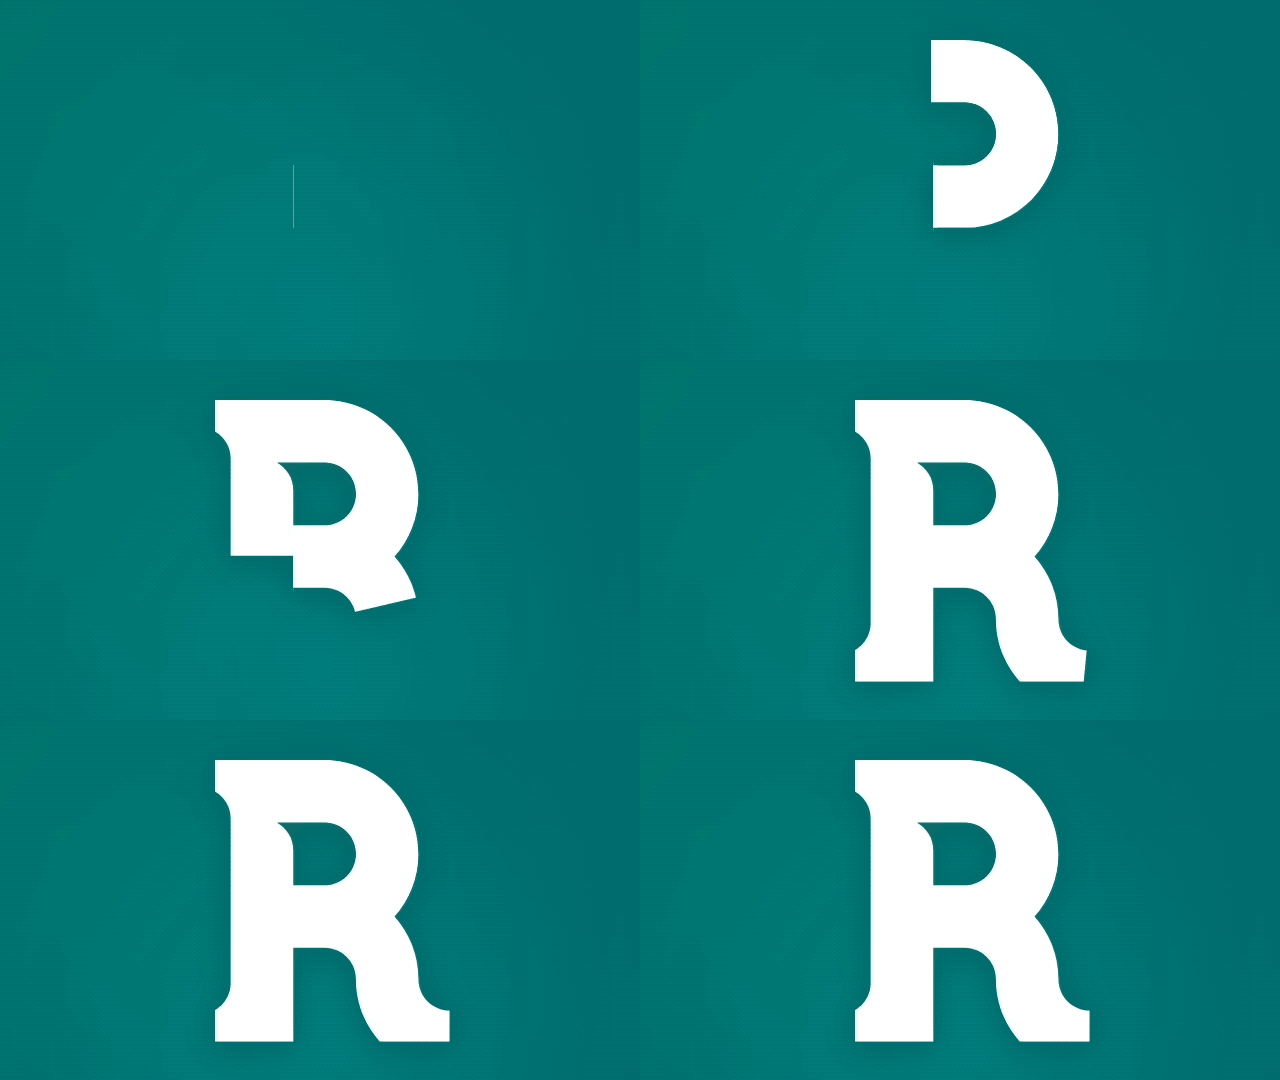
How would I animate a precise geometric shape "growing out" in Blender, like in the attached gif, but extruded in 3D?

An R shape growing out

The animation was created in Keyshape using a combination of animated strokes and mask shapes.

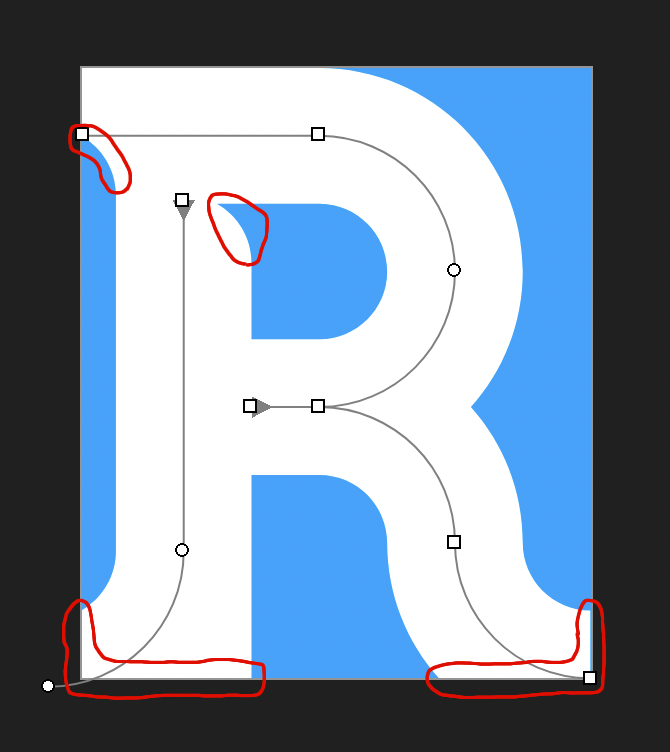
I've seen tips in Blender on how to animate hand-writing using curves with shape properties (YouTube), but that doesn't give precise control of the shape. In the image below you can see the red marked areas where the shape is not simply derived from the animated curves - that's why I had to mask the animated brush strokes with a shape that restricts the brush strokes to the desired shape.

enter image description here

Theoretically I suppose it could be created in Blender using paths with shape thickness combined with boolean union and intersection modifiers to intersect the path shapes with the desired final shape, similar to a what a mask does in 2D. However, based on my past experience with Blender's boolean modifiers, I wouldn't trust it to handle that without glitches or artifacts, given there would be multiple co-planar surfaces.

How would you go about it? Is there a reasonably simple way to achieve it that isn't overly complex or hacky?

$\endgroup$
2
  • $\begingroup$ blender.stackexchange.com/questions/63310/… $\endgroup$ Commented Oct 9, 2022 at 13:29
  • 1
    $\begingroup$ @DuarteFarrajotaRamos I'm not sure I see how the technique in that linked post could be used to achieve the specific shapes highlighted in red in my post? It seems it can be used only to scale the thickness and remove segments (and only when applying the curve deformation), but not alter the geometry in a way that would create new vertices etc.? That is, it doesn't give 100% control over the resulting shape? $\endgroup$
    – runevision
    Commented Oct 9, 2022 at 14:57

1 Answer 1

1
$\begingroup$

If the Boolean modifier doesn't satisfy you, you could try it with the Mask modifier. It's a bit tedious but it works:

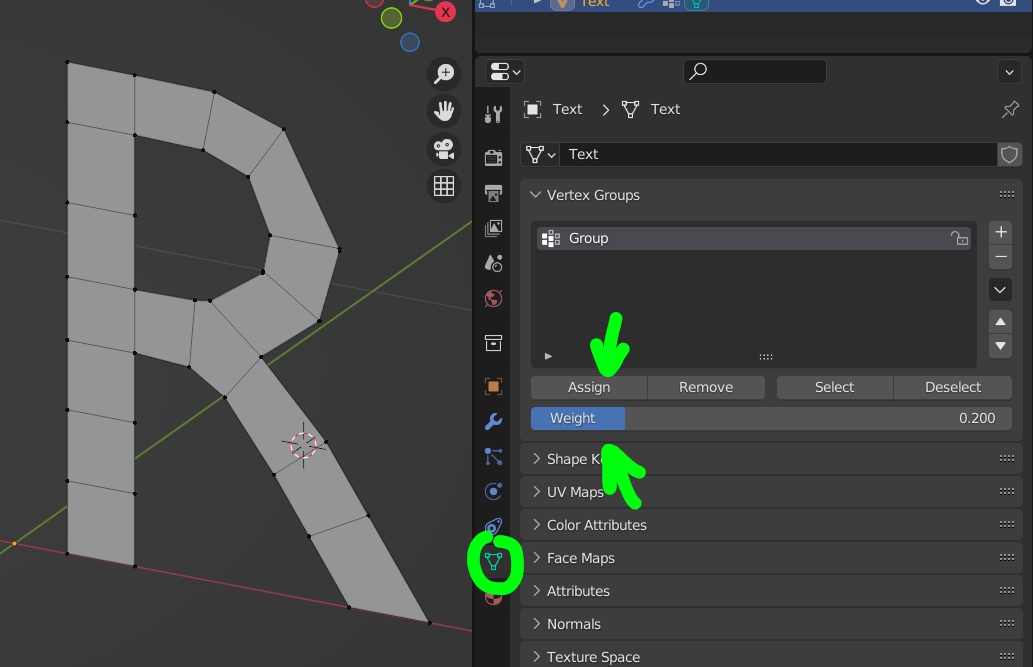
Give a vertex group to your object, assign a decreasing weight to the vertices all along the path of the letter:

enter image description here

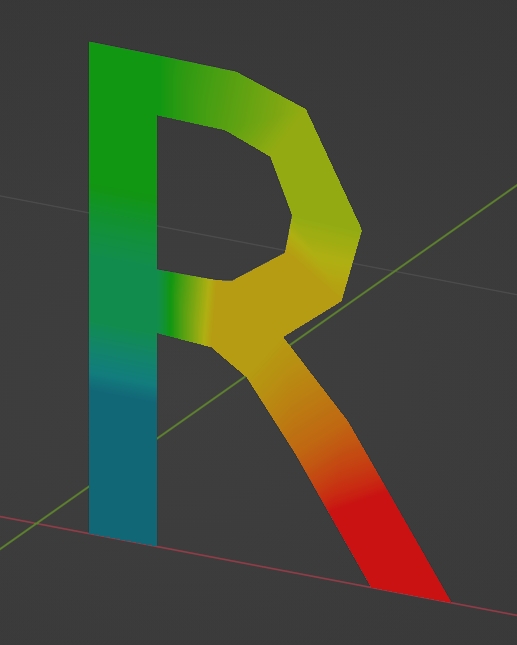
At the end it should look like something like this:

enter image description here

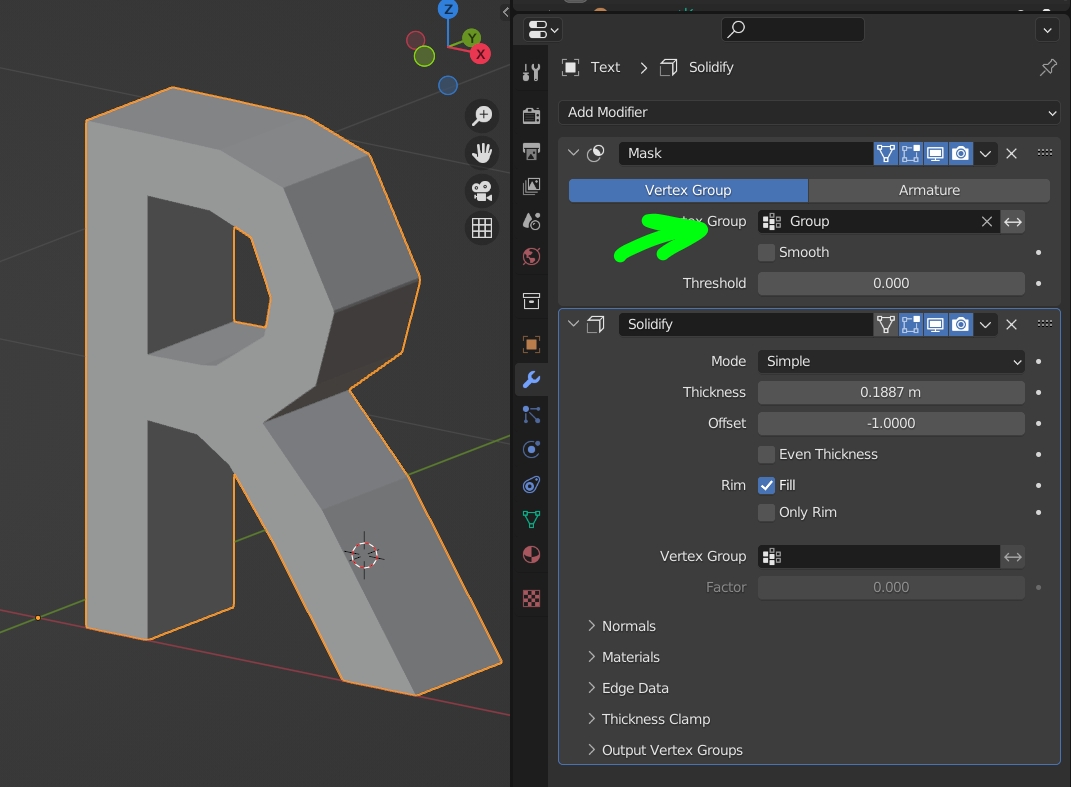
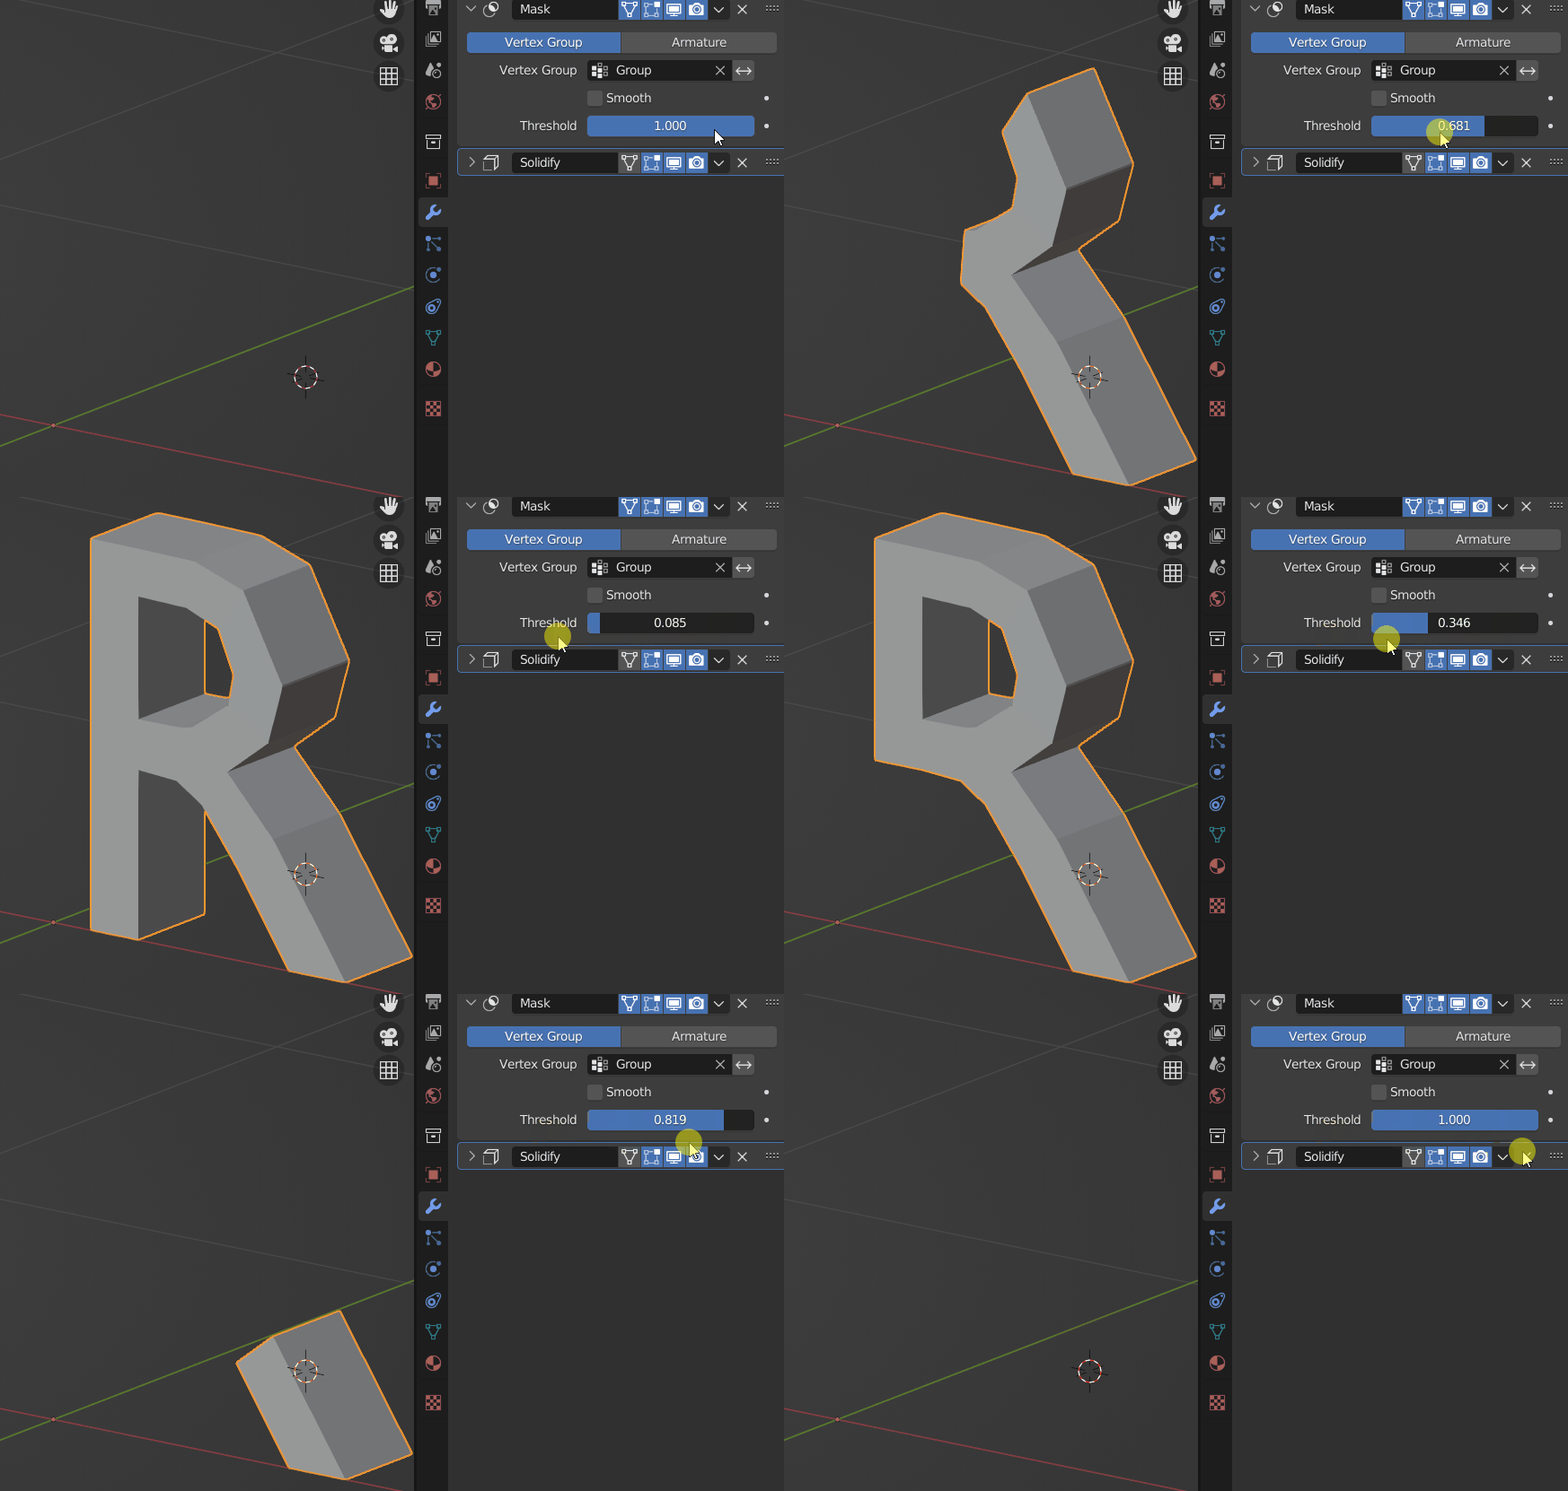
Give your object a Mask modifier, choose the vertex you've created. Give it a Solidify modifier in order to give it thickness:

enter image description here

Now animate the Threshold value of the Mask in order to make the letter appear:

enter image description here

$\endgroup$

You must log in to answer this question.

Not the answer you're looking for? Browse other questions tagged .