2
$\begingroup$

How to render an image in which pixel stores the index on the corresponding face?

We can render barycentric coordinates image in Parametric (Shader Editor >> Geometry node), but how to access the corresponding face index?

Is it related to ptex_face_id in Attribute?

And there's Object Index, Material Index, but no Face Index in Indexes.

$\endgroup$
7
  • $\begingroup$ Perhaps all you need is menu View > Viewport Render Image? $\endgroup$ Commented Nov 20, 2021 at 10:27
  • $\begingroup$ I tested it and couldn't get the desired result. While rendering the depth map, it's convenient to record the index of the surface, but I don't know how to do that. $\endgroup$
    – LogWell
    Commented Nov 20, 2021 at 13:28
  • $\begingroup$ What is the desired result? Can you describe the difference between the desired result and Viewport Render Image outcome? $\endgroup$ Commented Nov 20, 2021 at 15:06
  • $\begingroup$ I upload an image here. For example, when rendering a depth map, each pixel records the distance in the z-direction to the nearest surface to form a depth map. Can the index of the nearest surface be recorded to form a new image for other purposes? $\endgroup$
    – LogWell
    Commented Nov 20, 2021 at 15:30
  • $\begingroup$ You can probably do it with geometry nodes but I don't know how. You could easily do it by using Python to bake the index to eg. a UVMap you can read in the shader, but you'd have to rebake it whenever you change the mesh... $\endgroup$
    – scurest
    Commented Nov 20, 2021 at 16:21

2 Answers 2

3
$\begingroup$

I'll expand on my comment. Here's a partial answer that will give you the polygon index in a shader. Maybe you can use that to do what you want.

First run this script to bake the polygon index into the U coordinate of a UVMap named PolyIndex. The active object should be the mesh you want to bake. You'll have to re-run the script whenever you edit the mesh to get the UVMap up to date though.

import bpy

ob = bpy.context.object
assert ob and ob.type == 'MESH'

if bpy.context.mode != 'OBJECT':
    bpy.ops.object.mode_set(mode='OBJECT')

mesh = ob.data
uvs = [0.0] * (2 * len(mesh.loops))

for poly in mesh.polygons:
    for loopi in poly.loop_indices:
        uvs[2*loopi] = poly.index

if 'PolyIndex' not in mesh.uv_layers:
    mesh.uv_layers.new(name='PolyIndex')

mesh.uv_layers['PolyIndex'].data.foreach_set('uv', uvs)

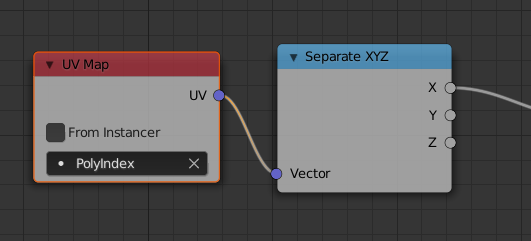
Then in the shader, you can get the polygon index with this

UVMap node -> Separate XYZ -> X

$\endgroup$
5
  • $\begingroup$ According to your code, I can connect Emission and Material Output after the X in Separate XYZ. 1. From the result, there is interpolation at the edge boundary. How to avoid this kind of interpolation? 2. And there are some outlier values at the position corresponding to edge_index=9, 10(without triangulate) in the rendered image, why is there such a singular value and how to avoid it? $\endgroup$
    – LogWell
    Commented Nov 21, 2021 at 10:24
  • 1
    $\begingroup$ See this Q about rendering solid colors. $\endgroup$
    – scurest
    Commented Nov 21, 2021 at 15:55
  • $\begingroup$ 1. "When using Eevee set the Filter Size in the Film panel to zero, for Cycles select Box Filter." can solve the problem of interpolation. $\endgroup$
    – LogWell
    Commented Nov 22, 2021 at 3:32
  • $\begingroup$ 2. I upload a video here. The rendering of some views will produce incorrect pixel values at the edge boundary(it is actually the index of the backface instead of the visible front face). I don't know if the outlier pixel values are caused by the small offset like this. I will study this problem again later. $\endgroup$
    – LogWell
    Commented Nov 22, 2021 at 3:32
  • $\begingroup$ 2.1. The position of incorrect pixels is affected by: Render Properitied >> File >> Overscan(I don't know why), but the position still changes on the edge boundary. $\endgroup$
    – LogWell
    Commented Nov 22, 2021 at 7:01
1
$\begingroup$

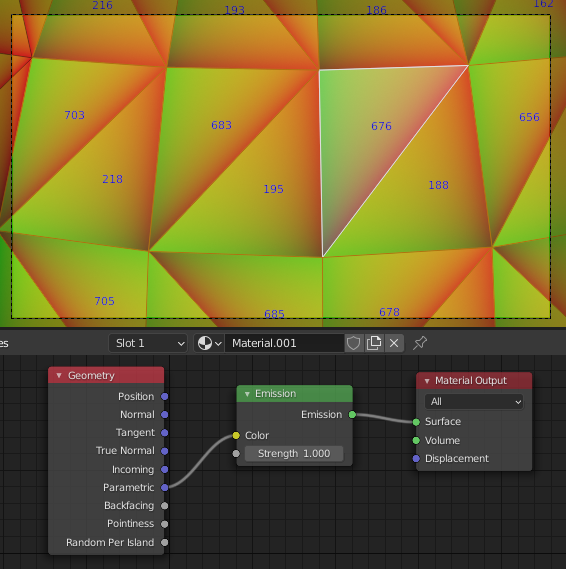
Base on the answer of scurest, I can get the following result(top: Geometry Parametric, bottom: triangle face index), you can check pixel-level correspondence in tev:
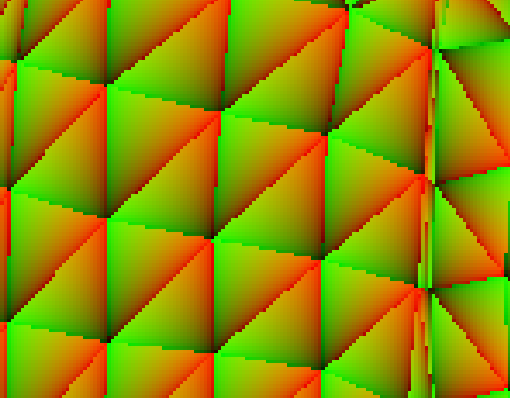
enter image description here

enter image description here

To distinguish from the background, I add an offset to face index: uvs[2 * loopi] = poly.index + 1, and I shuffled the face index to make it easier to visualize(the colors of adjacent faces may be almost the same under 256 different colors):

import cv2
import numpy as np

path_img_idx = "UVMap_TriFaceIndex_01.exr"
img_idx = cv2.imread(path_img_idx, -1)
img_idx = img_idx[:, :, 0].astype(np.int32)
max_idx = np.max(img_idx)

lut = np.arange(1, max_idx + 1)
np.random.shuffle(lut)
lut = np.array([0, *lut]).astype(np.int32) # 0 for background

img_idx = lut[img_idx]  # https://stackoverflow.com/a/67765996/10636347

img_idx = (img_idx / max_idx * 255).astype(np.uint8)
img_idx_vis = cv2.applyColorMap(img_idx, cv2.COLORMAP_JET)
cv2.imwrite(path_img_idx[:-4] + "_vis.png", img_idx_vis)
$\endgroup$

You must log in to answer this question.

Not the answer you're looking for? Browse other questions tagged .