0
$\begingroup$

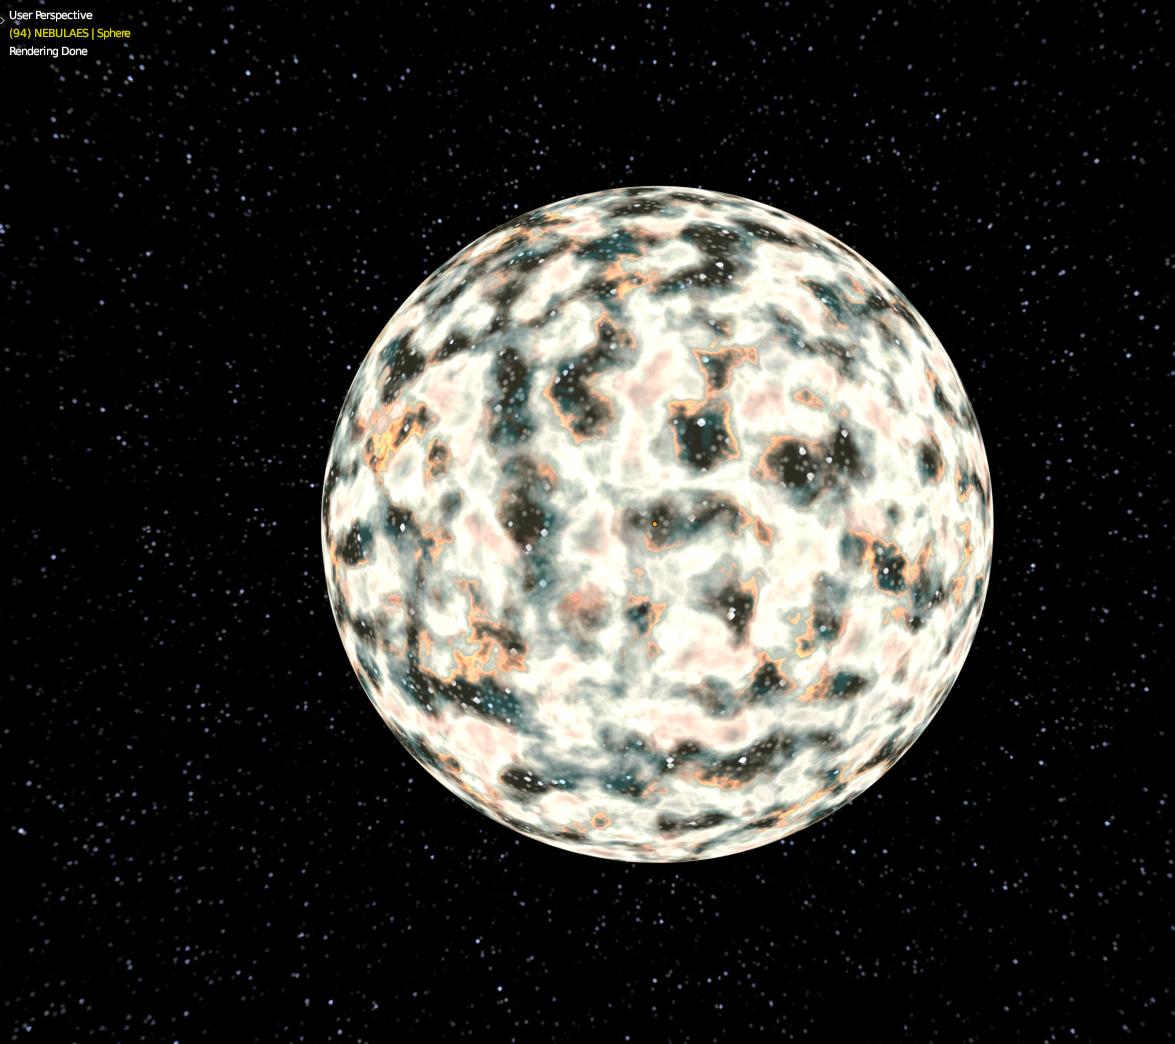
I have a quick texture applied on a UV Sphere. It is meant to be a spherical nebulae that I animate by keyframing the nodes settings (mostly color ramp, noise textures and color dodge mix shaders).

Here is a screen : enter image description here

From here, I need 3 things :

  • Making my camera fly through this sphere to discover what is inside
  • Make the black areas completely transparent
  • Blur the limits of the sphere (it is too round now)

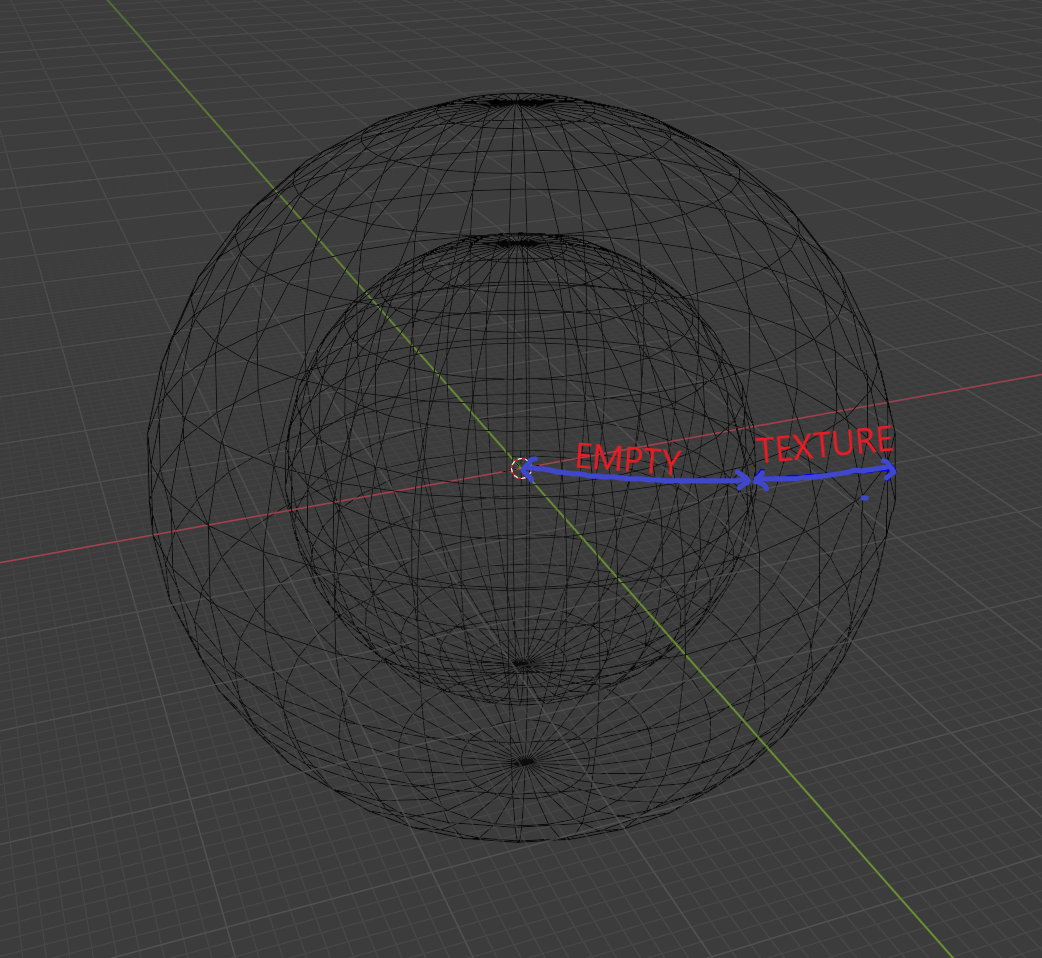
To do this, my though was to make this texture a volumed texture, keeping the sphere empty inside. Is it possible ? Like if I had a spherical smoke domain with this exact texture, but Blender cannot handle it as far as I know. Plus, I'm a nood with volumetric textures.

Here is a quick reprensation: enter image description here

Is there any way to achieve this ? Or, do you have any idea on how I can meet the results I need ?

$\endgroup$

2 Answers 2

1
$\begingroup$

You could try something like this.

Volume1

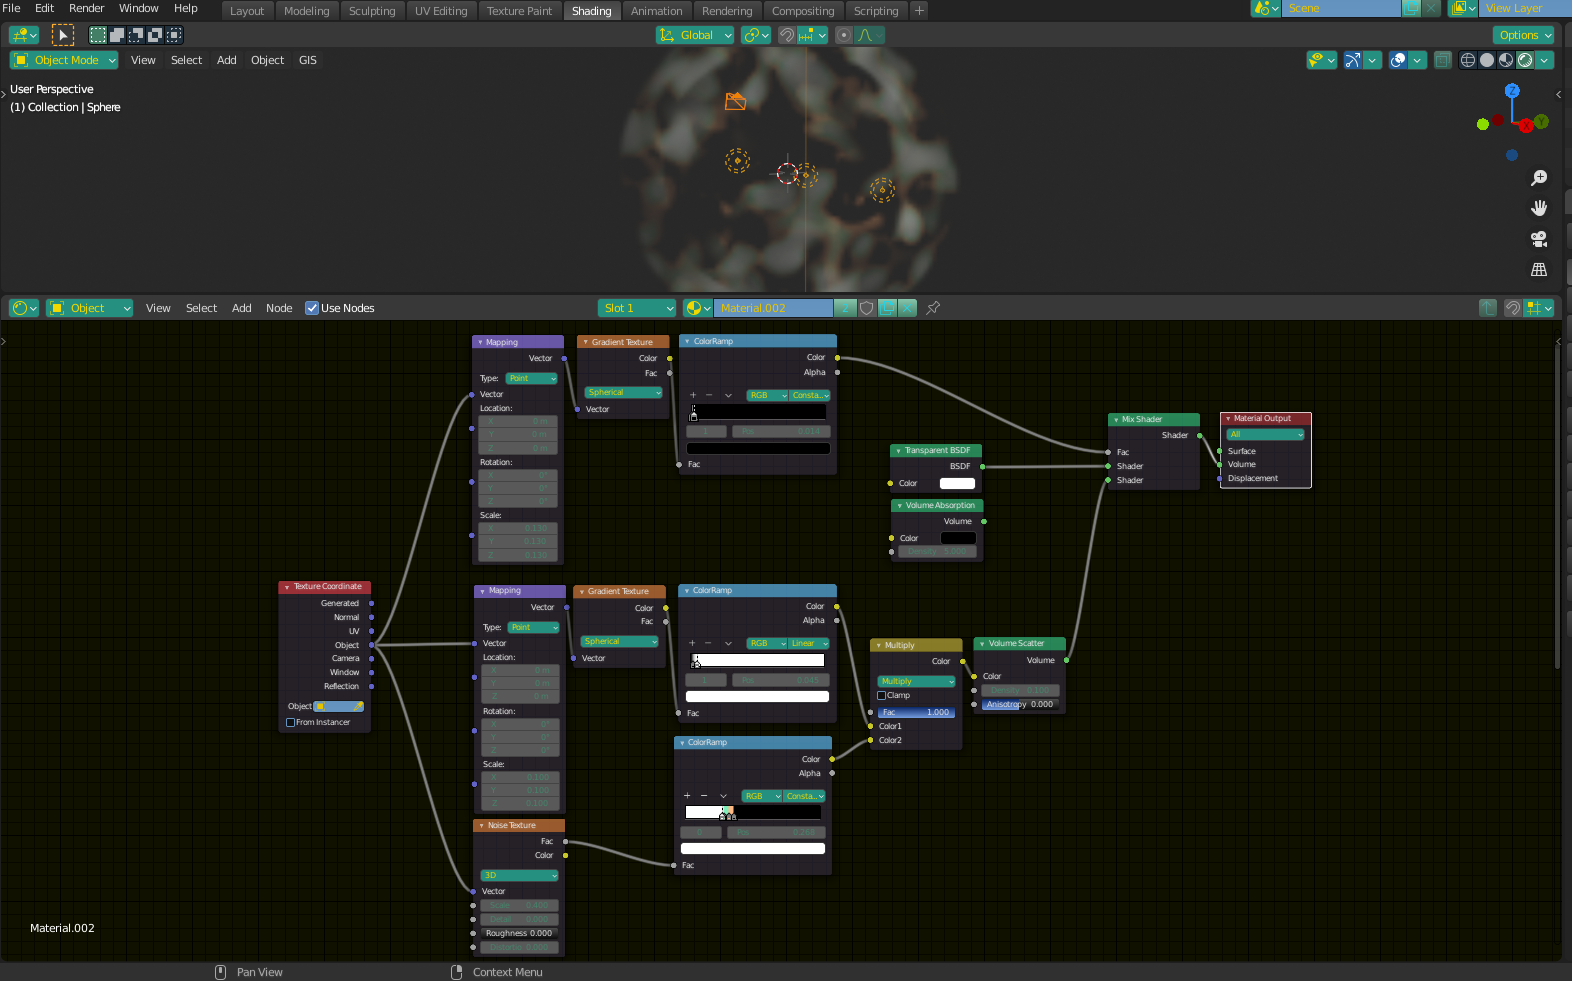
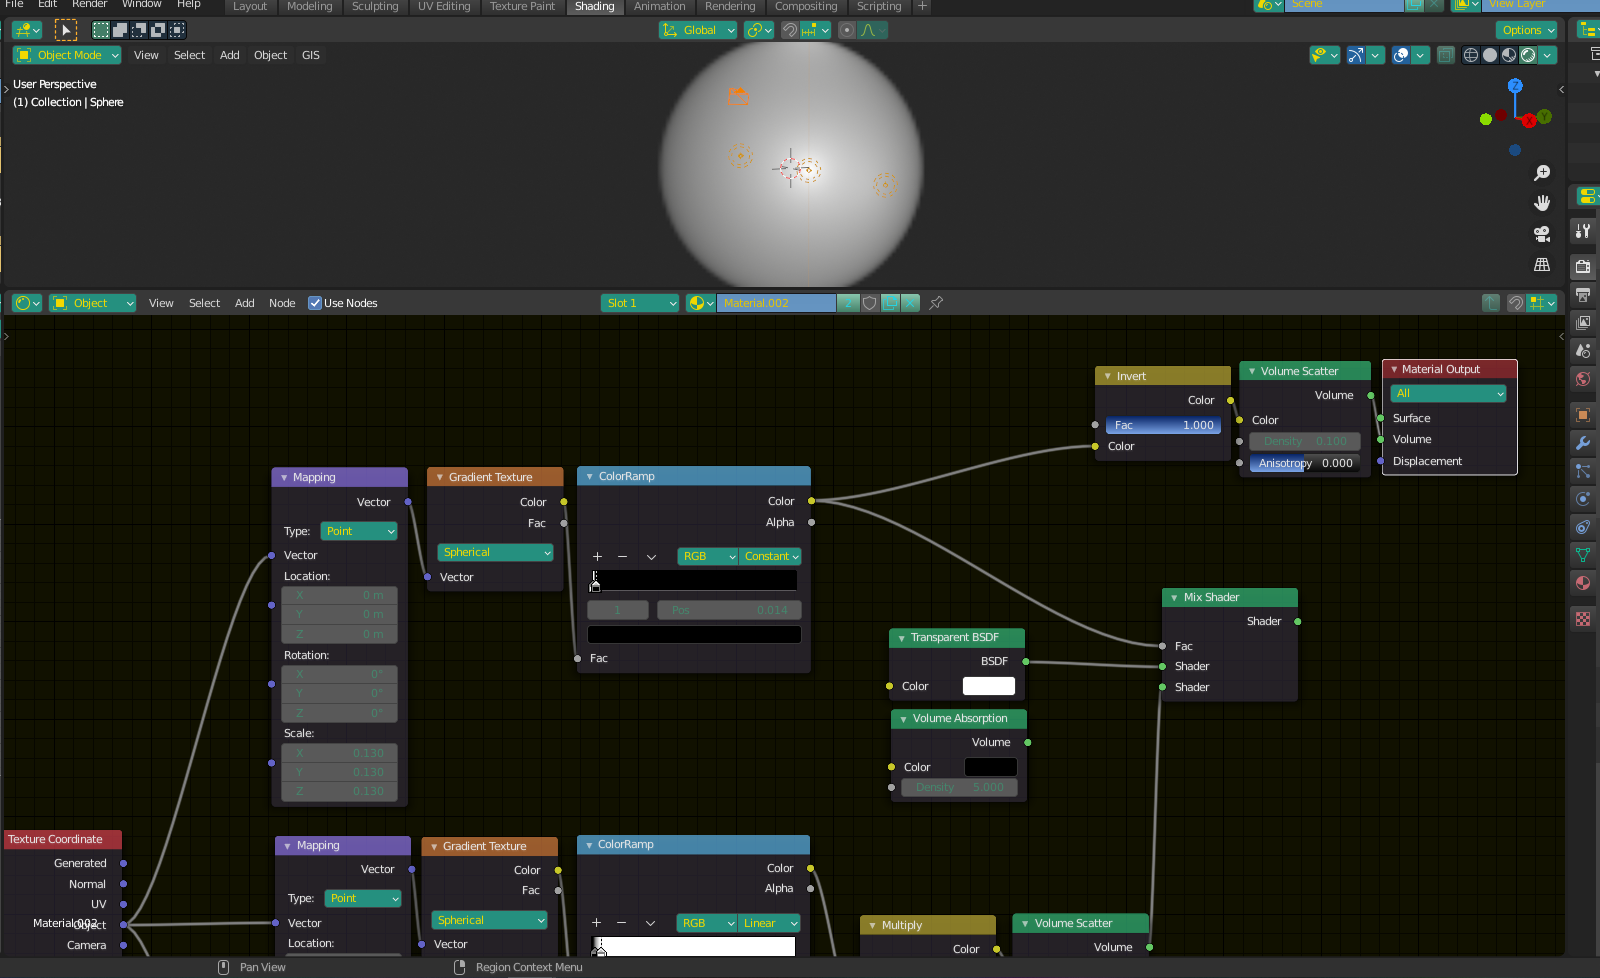
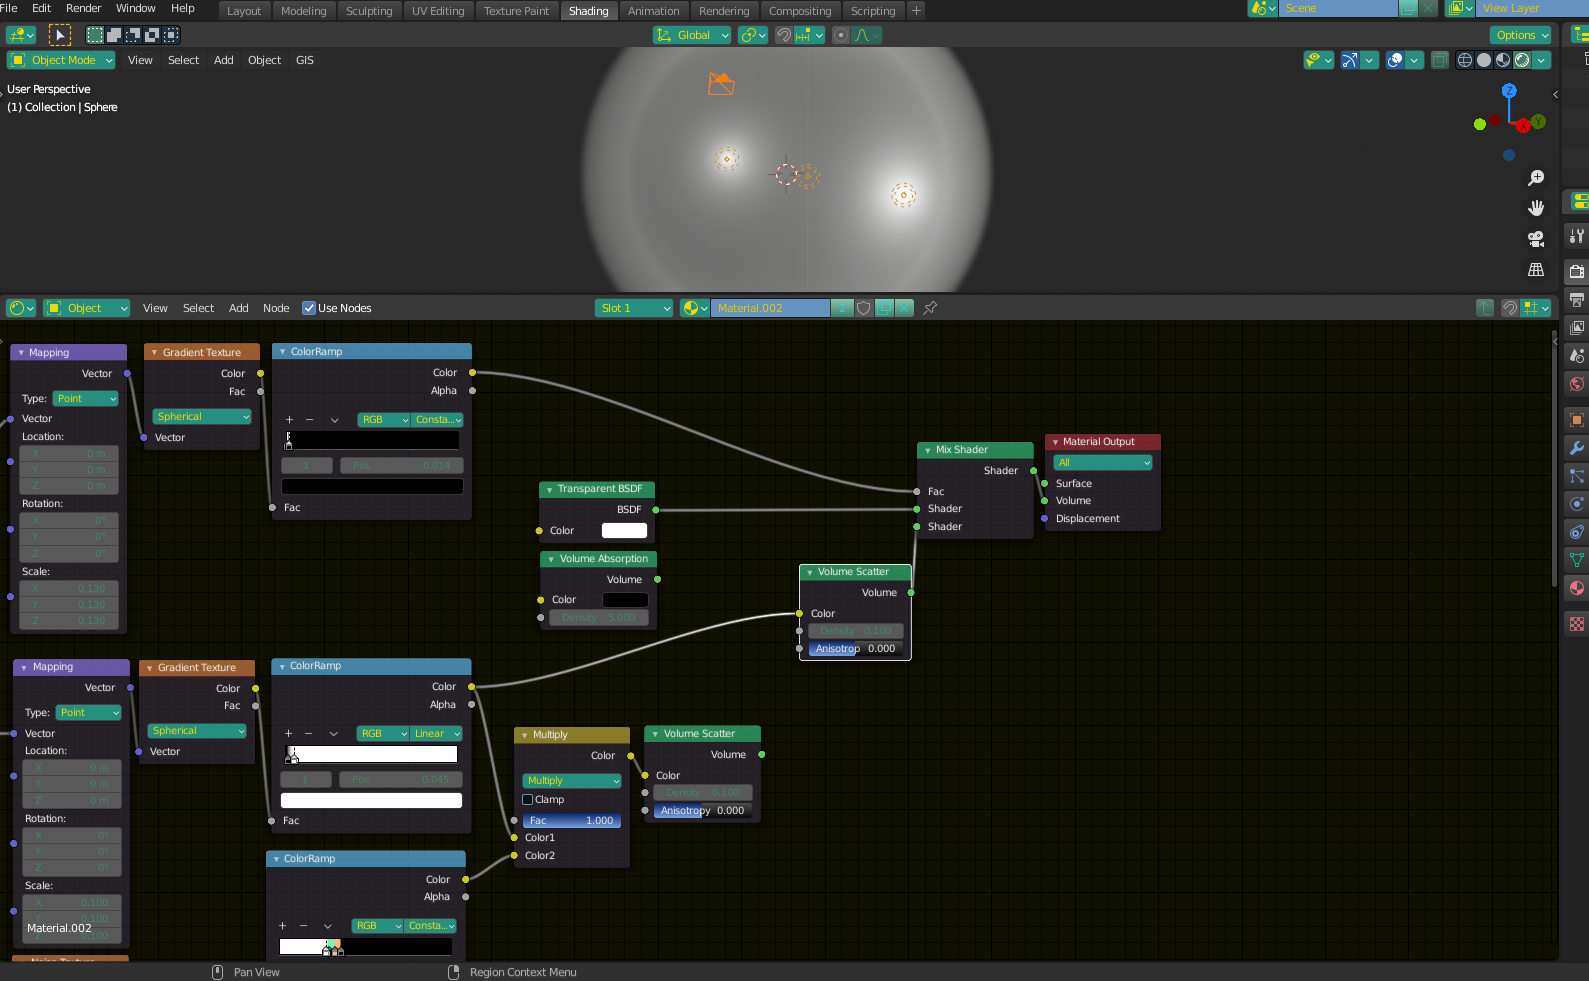
The object I used for this is a simple UV sphere (I scaled mine up in edit mode to make it bigger - this might affect mapping values, I'm not sure - just be warned you may need to adjust those). Anyway, for the material, the main objective is to make 2 "spheres" using Gradient textures. You need to make a large one and a smaller one - The large sphere will be your Volume, and the smaller one will be used as a Mix Factor to "subtract" from the larger one. In the image below where I show the smaller sphere, I inverted it just for the image example - The regular (non-inverted) output is what makes the mix factor, it just doesn't display well in a 2D image because it's a volume.

Volume2

Volume3

You can see from the mix with a Transparent BSDF (or Volume absorption if you want a "void" in the center), that the center sphere is "missing". It's a bit faint in the photo, but this is due to the nature of volumetrics.

Volume4

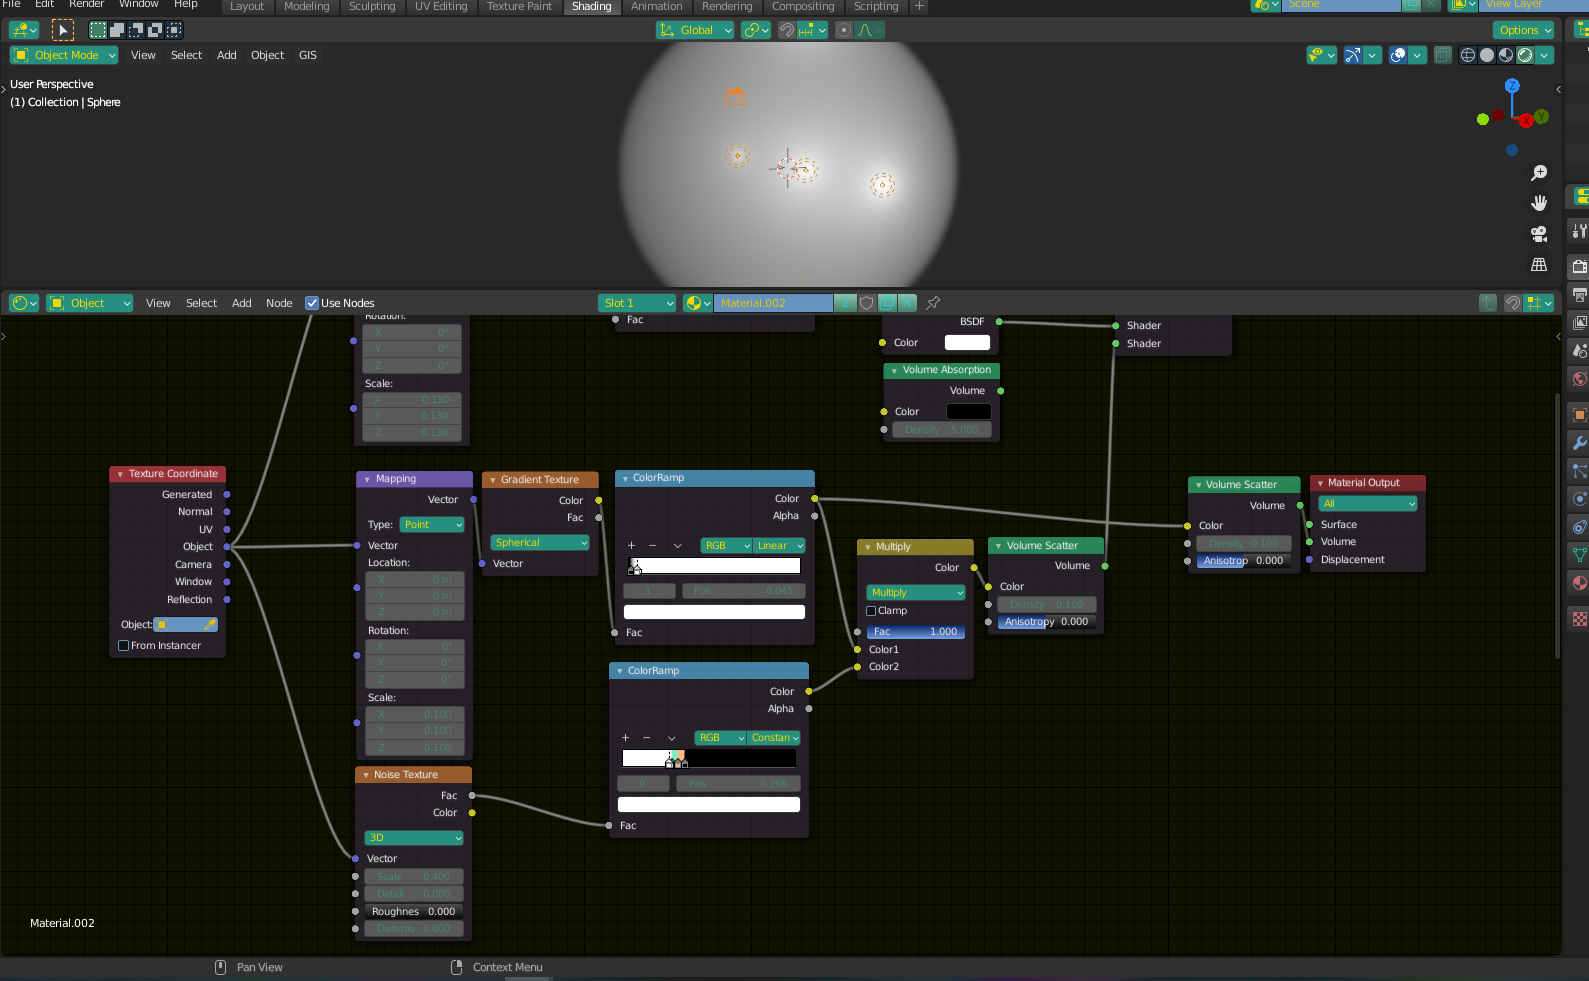
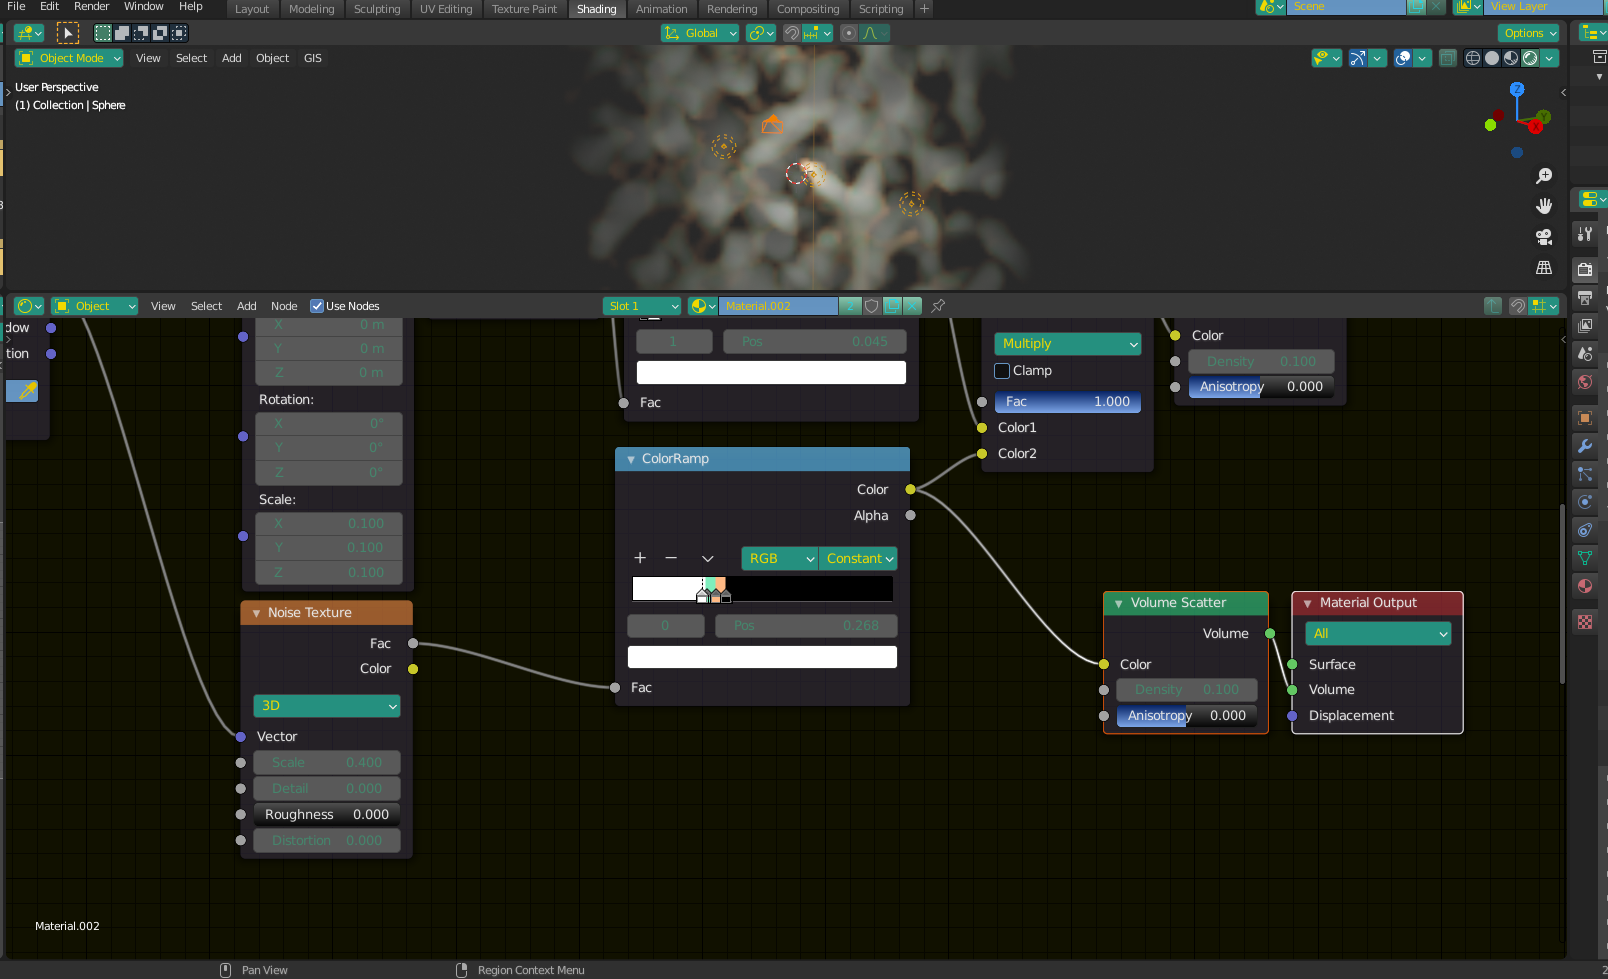
The last thing I did was make a "noise volume", colored similarly to the colors in your image. You can use whatever texture you already have (as a volume).

Volume5

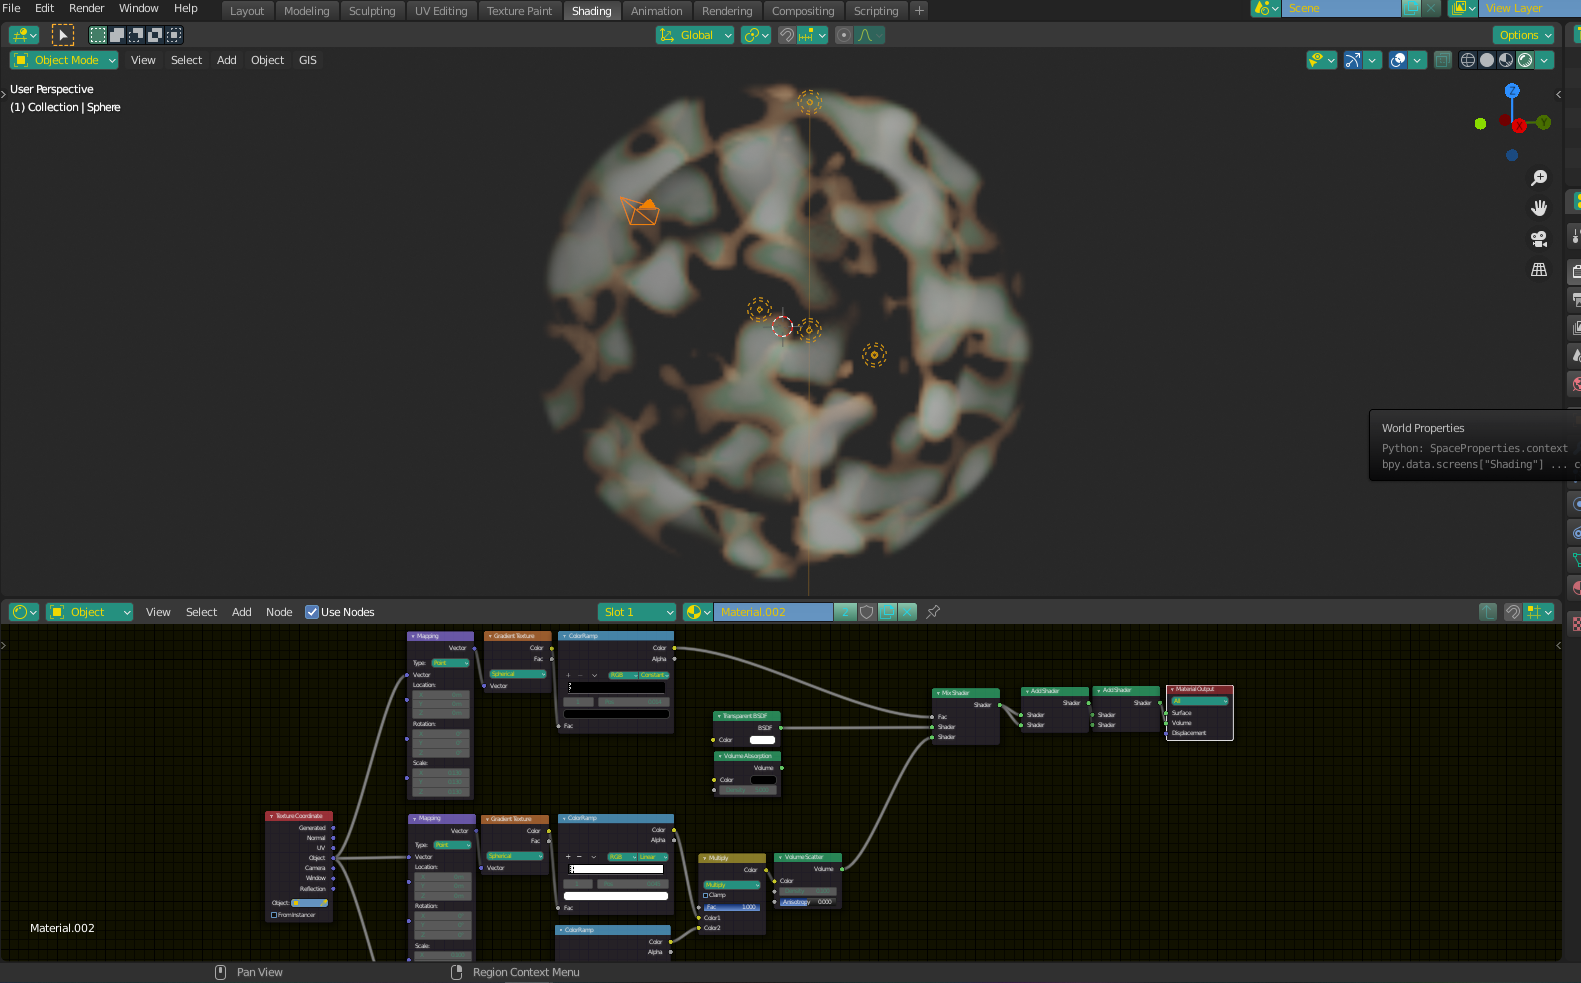
Lastly, I multiplied those values with the large sphere's "color" to transfer the dark (absent) areas and the colors. The final result looks like this (In my image, I added the values to themselves a couple of times with an add shader to make them brighter - you may or may not want to do this).

Volume6

$\endgroup$
4
  • $\begingroup$ That is a huge help you're giving me here !! I'll try this right now and keep you updated ! Thank you VERY much :) (and sorry if my english is bad) $\endgroup$
    – Pdhm
    Commented Sep 9, 2020 at 14:07
  • $\begingroup$ Hey, no problem. Let me know if it works, or if you have any troubles. The hardest part for me was getting the right scale to make the "spheres" the proper sizes. I ended up having to use .1 and .13 - strange numbers, I know, but anything else was either way too big or way too small. And BTW, your English is pretty much perfect. $\endgroup$ Commented Sep 9, 2020 at 14:27
  • $\begingroup$ Hey ! It seems that I can do something nice with your proposal ! Yet, when I add the multiple Add shaders at the end of the node tree, Blender gives me some purple colors artefact among the colors I choosed with the color ramp. It does not seems to appear on your screenshots, do you know why ? It seems that scaling down the sphere can fix this, but I really need a large scale scene. In any case, I'll update you on the final results soon ! $\endgroup$
    – Pdhm
    Commented Sep 9, 2020 at 17:07
  • $\begingroup$ As I mentioned, I only used the Add Shaders to make the image brighter for the screenshot, you can get by without them. There are other ways to make your texture brighter if necessary, such as using a Bright/Contrast Node or an HSV Node (value component) between the MixRGB and the Volume Scatter. $\endgroup$ Commented Sep 9, 2020 at 17:11
0
$\begingroup$

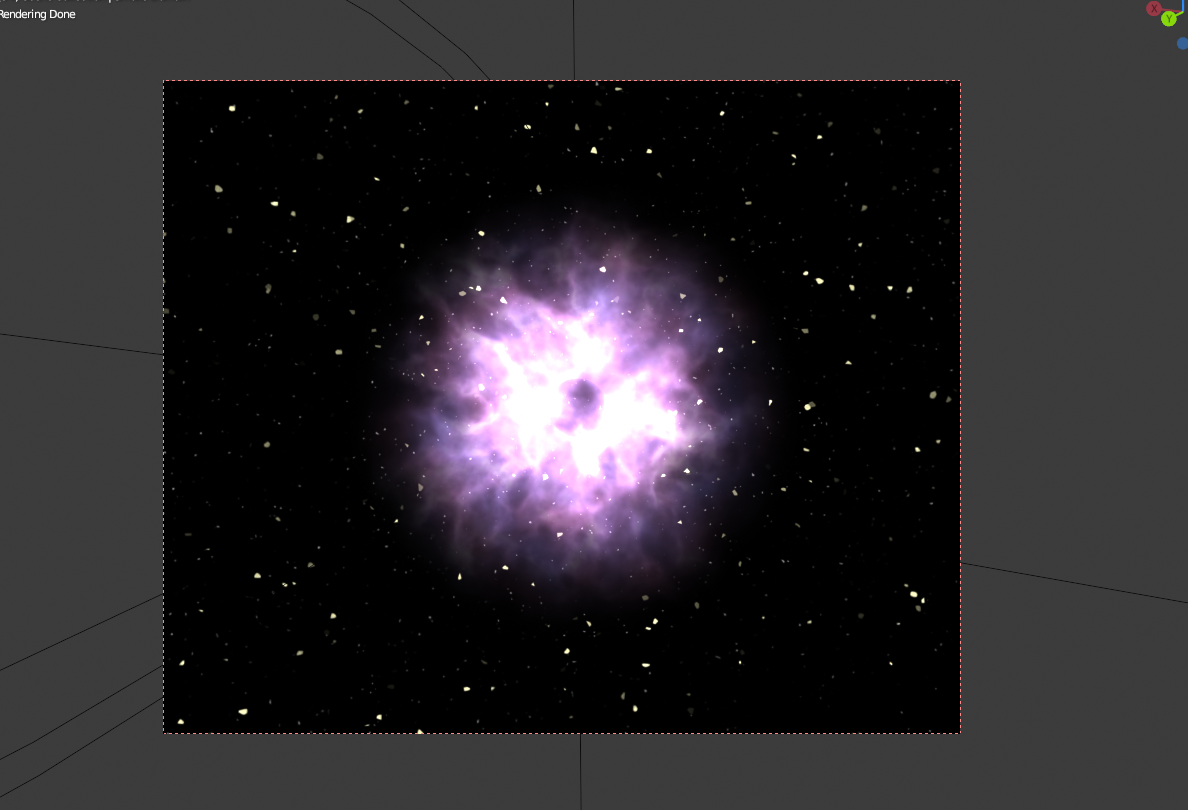
Ok so, thanks to Christopher Bennett, I managed to create some kind of "volumed & voided nebulae" (by voided I mean with a hole inside). Using two gradient texture to artificially split the sphere in two was the good call ! Thanks Christophe, and to anyone : please check his comment where he explains everything :)

enter image description here

A little note here : I used an Emission node instead of the Volume Scatter node.

As I understand it, the Volume Scatter node is able to provide a high quality render, but alters a lot the colors you choose with the color ramp (especially if you scale up your sphere !), adds a lot of noise in the texture, and ask for a high level of CPU/GPU ressources.

So I used an Emission node, which provides a simpler texture I guess (but it is enough for me), and is processed wayyyy faster in Cycles.

Anyway it looks pretty cool for what I need to do (fly through it, and discover what's inside the "voided area" of the nebulae).

$\endgroup$

You must log in to answer this question.

Not the answer you're looking for? Browse other questions tagged .