0
$\begingroup$

I'm fairly new to Blender, in fact, I've been '3d modelling' in Blender for no longer than 10 days.

While my 3d modelling skills are slowly getting sharpened I'm completely clueless on how I would unwrap this model I'm currently working on.

This is an asset for a game, by the way is far from be finished, but I wanted to test the components scales, so I though, let me chuck some materials and see how it look in the game with proper lighting and stuff... I couldn't be more disappointed with the results.

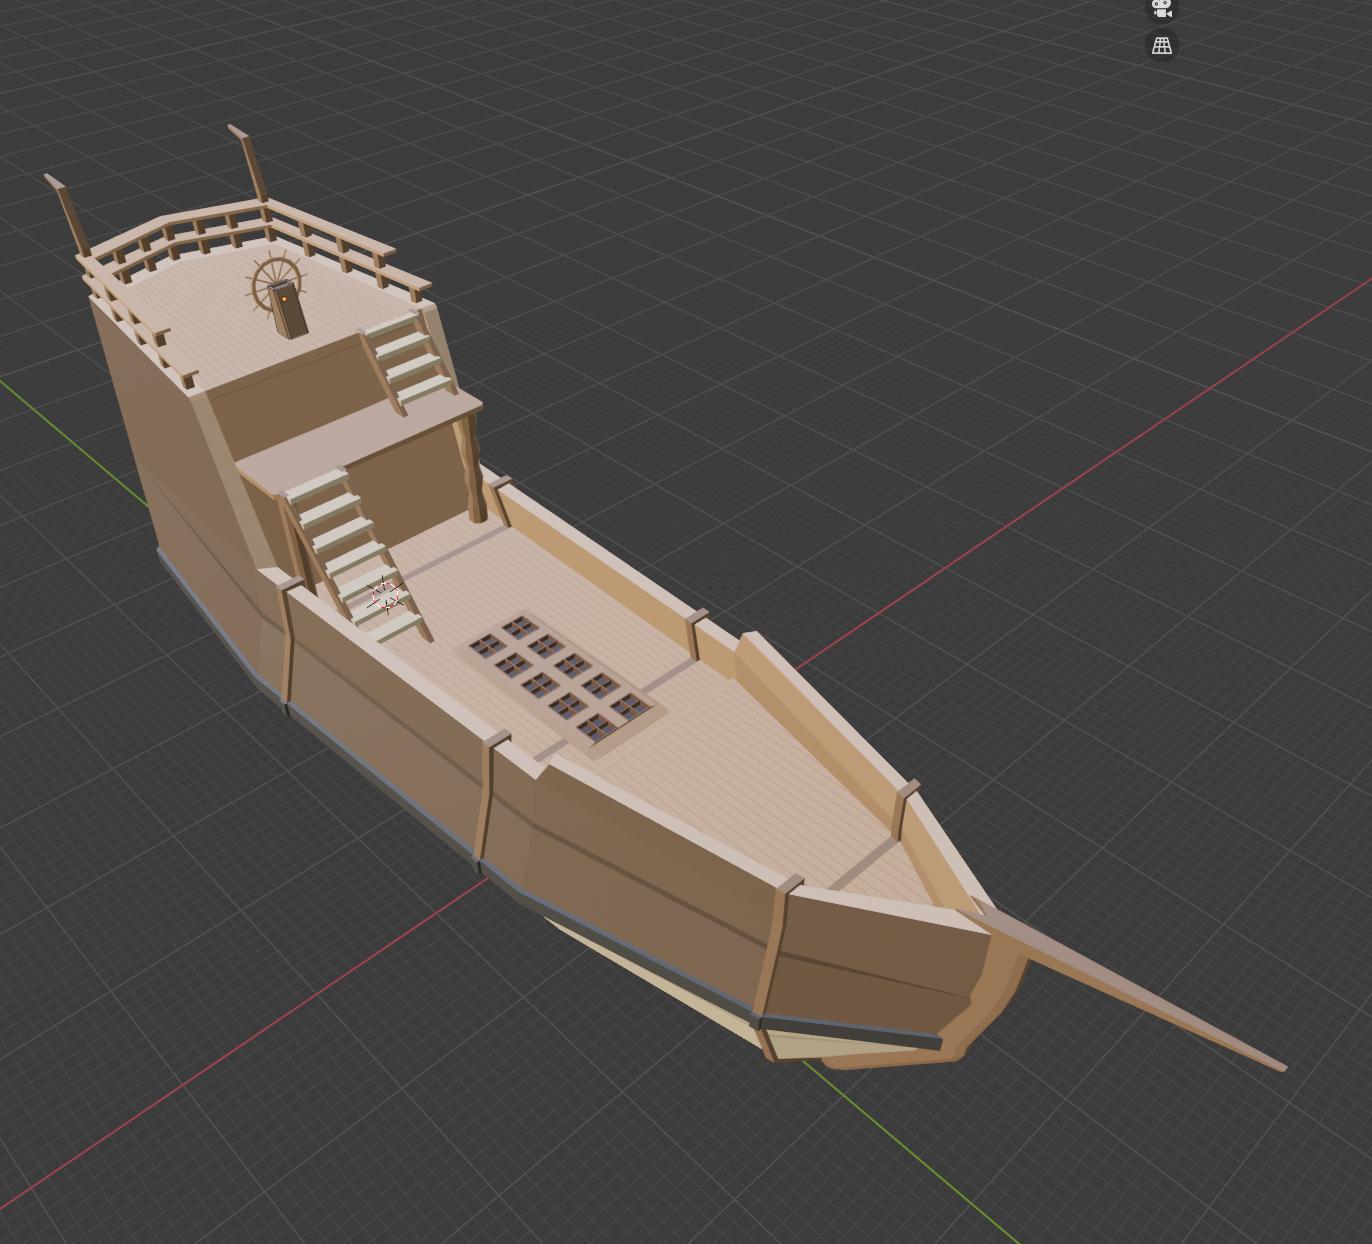
Here's my model in Blender: enter image description here

And here's how it looks when I import it to my game using smart UV project or lightmap pack to generate the texture. enter image description here
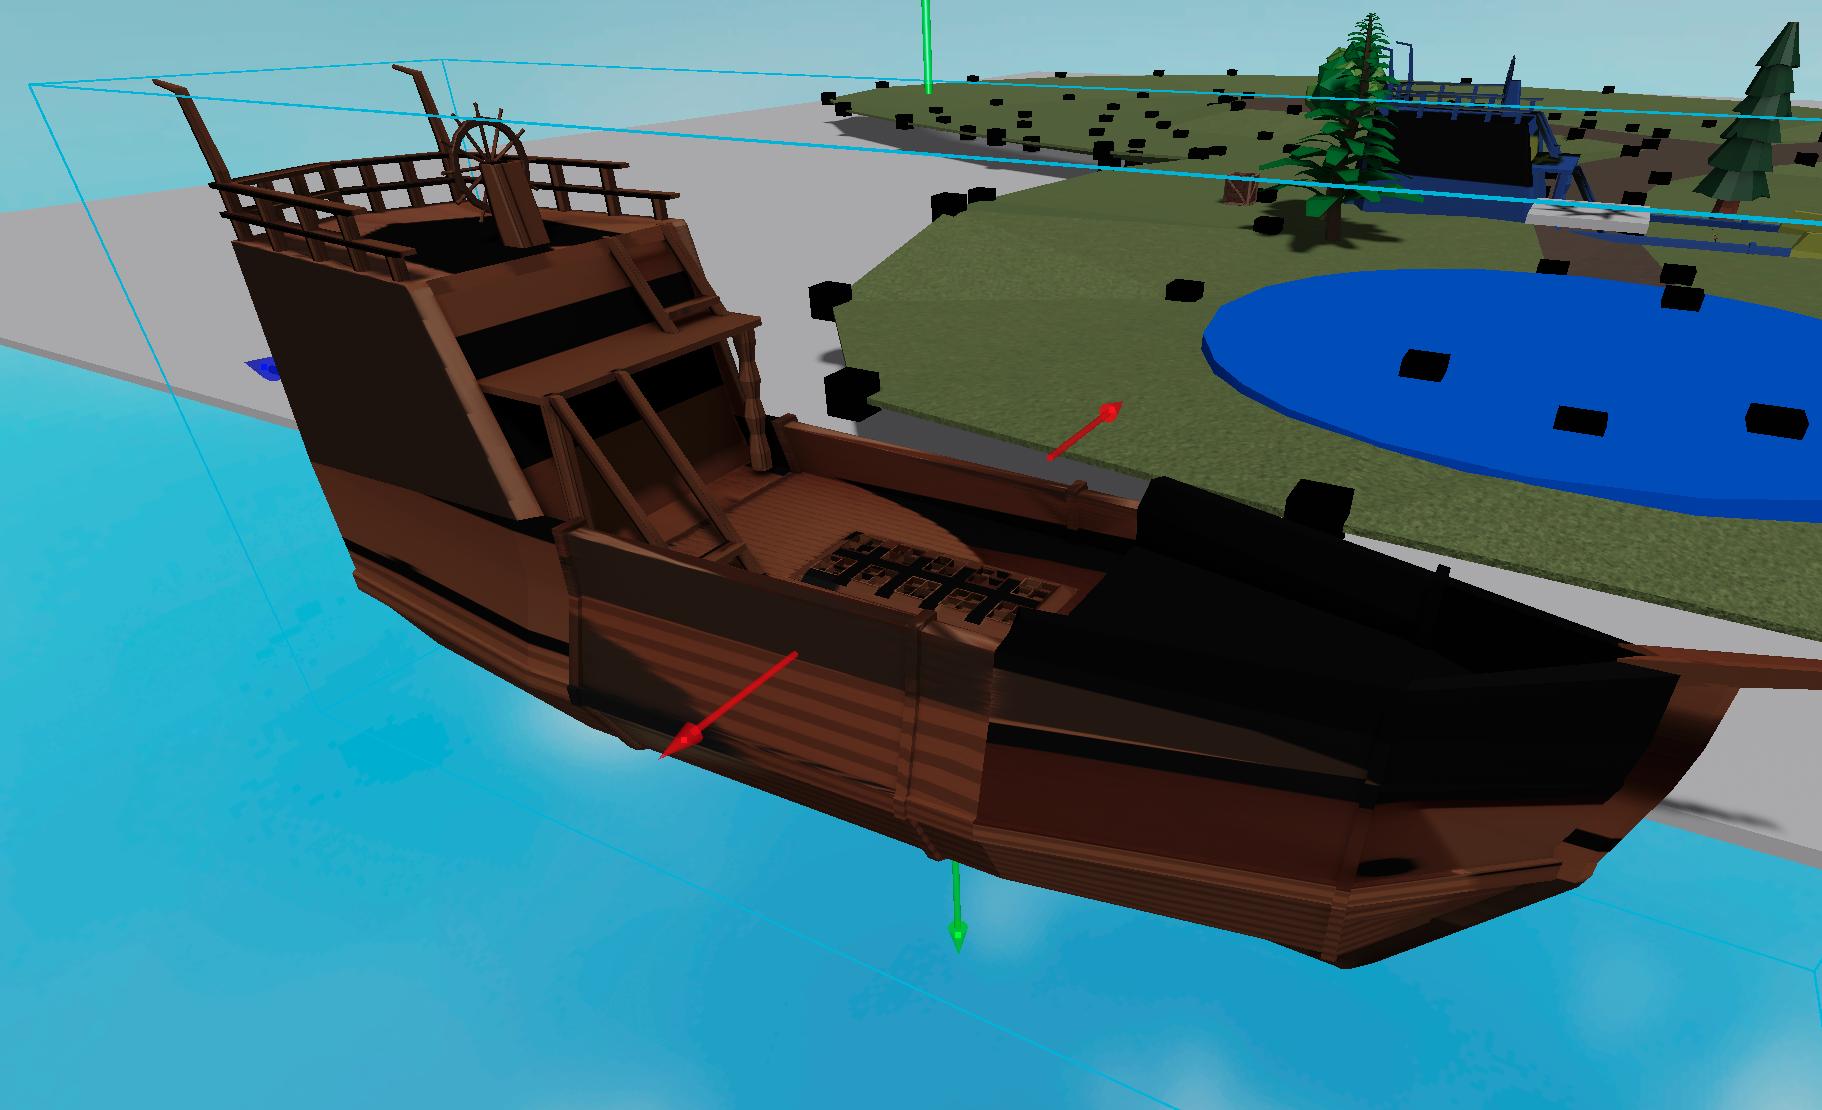
Like I said, I'm fairly new to Blender and based on the researches I did, it seems that I should be using seams although I also noticed that there are several different strategies, and I have no idea where to start from...

So if somebody could provide some sort of guidance, or point me into a tutorial, or something that would help me to solve this problem I would very much appreciate.

PS: I can link my 3d model if necessary.

Thanks!

$\endgroup$
2
  • $\begingroup$ yes I think using seams would be the best strategy for your object, as you could place your UVmap on a wood plank texture $\endgroup$
    – moonboots
    Commented Aug 10, 2020 at 19:50
  • $\begingroup$ Yes, but the question is how do I do that? Is there any tutorial or technique explained? $\endgroup$ Commented Aug 10, 2020 at 20:11

1 Answer 1

1
$\begingroup$

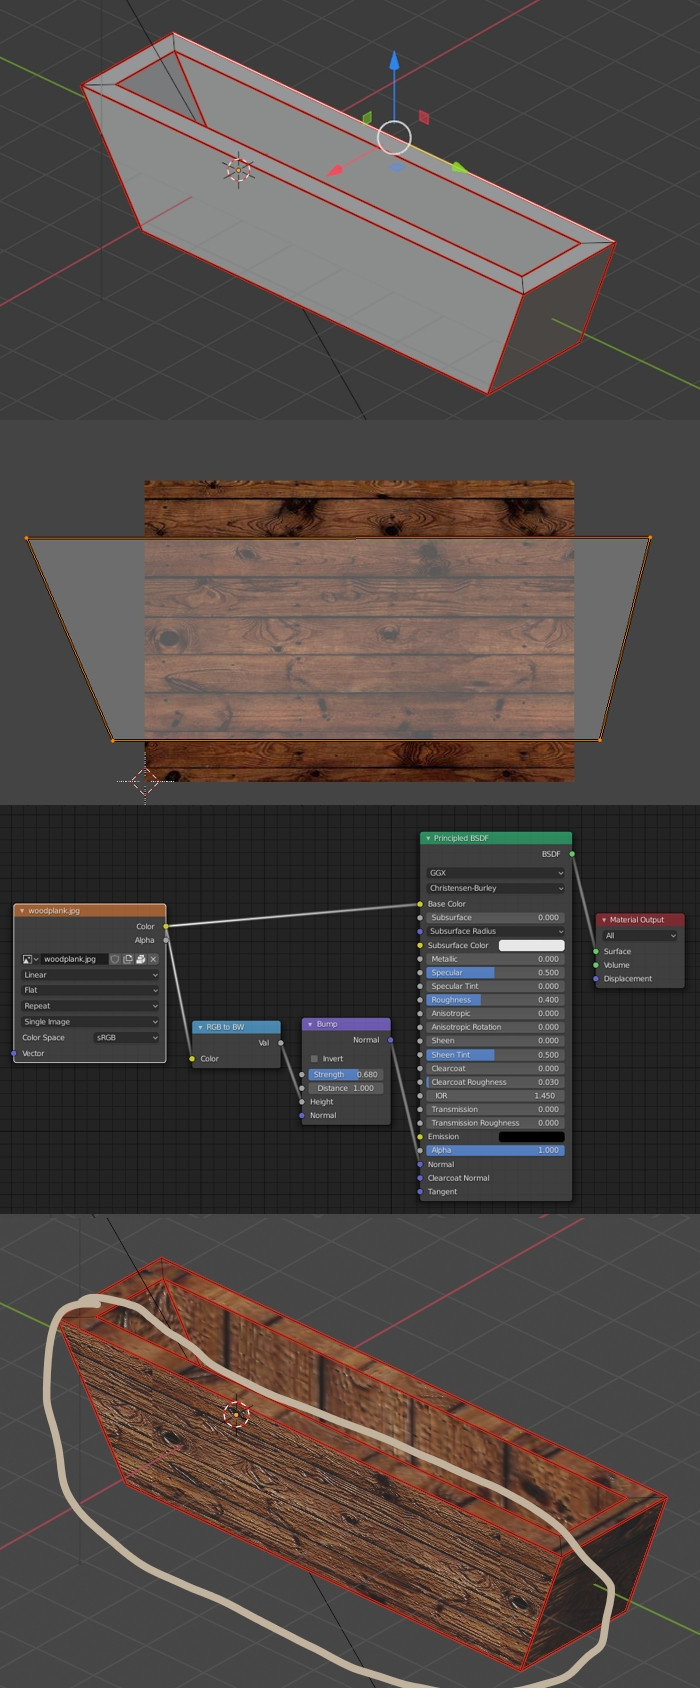
For this kind of project you need to create some seams before the unwrap, then load a wood image texture that is tileable so that it can repeat without visible seam, in the UV Editor place the UV islands correctly on this image, load the image into an Image Texture node, plug this node into the Principled BSDF node, and to give a bit 3D bumps to your texture, plug a black and white version of your texture into a Bump node that you plug into the Normal socket of the Principled (or ideally, create a b&w displacement map from your wood texture with a software like CrazyBump). Of course the texture is improvable with a bit of glossiness etc...

enter image description here

$\endgroup$

Not the answer you're looking for? Browse other questions tagged .