1
$\begingroup$

I need to add vertices / objects to an object with shape keys. I need to move the new vertices along with the shape-keyed pre-existing vertices. One idea I had is to somehow measure the distance or somehow take note of the start position and end position of a single vertex, then apply that measurement to the new vertices.

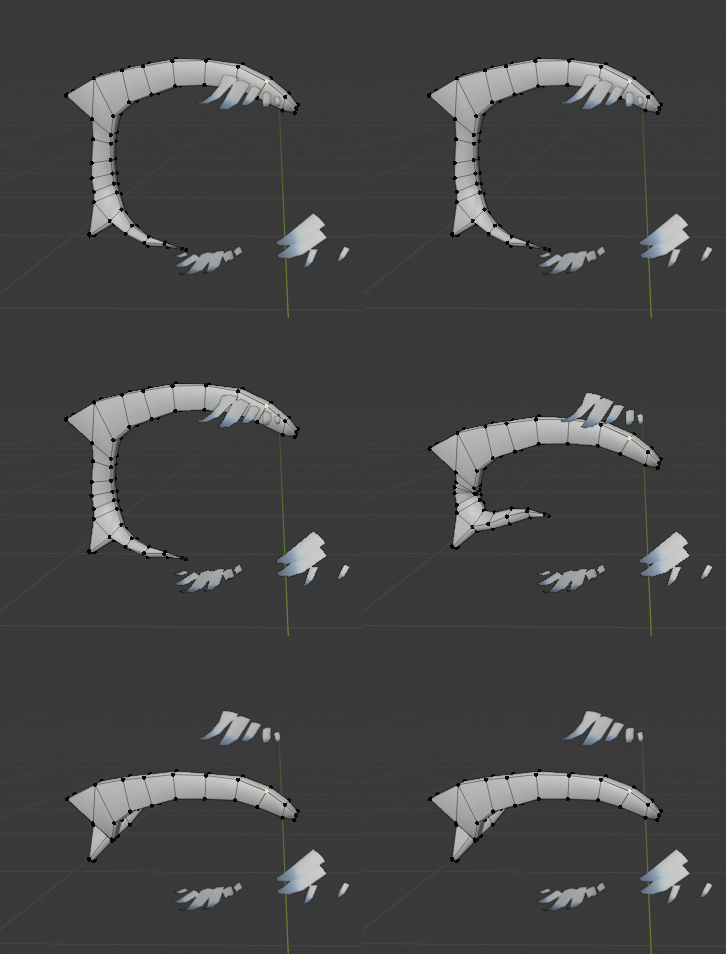
This image represents one of many examples where I need to have the new eye lashes move with the eye lids opening and closing.

Do you have any suggestions or techniques that you can give me to accomplish this?

Edit: Ok I found one way, but let me know if there's a better one because this is quite convoluted.

  • Go to edit mode for the meshes in question
  • Preferences -> Addons -> search "extra" and enable "Add Mesh: Extra ObjectS"
  • Click on the desired vertex to measure position change.
  • F3 to search action -> Snap cursor to selected
  • Add -> Single Vert -> Add Single Vert (adds a single vertex at 3d cursor)
  • Activate shape key so that the vertex you need to measure has moved.
  • Repeat the steps to add a single vertex at the new location
  • Activate snapping / vertex / active / move / (project onto self?)
  • Move the two new vertexes using snapping to one of the new mesh's vertices so now the two vertices represent the distance that the new mesh needs to move.
  • Move the new mesh using snapping to the new location (the 2nd of the two new vertices) while the desired shape key is fully active.

Edit: The above only works if your mesh just moves around rather than moves and morphs. So this won't work for me. Next idea is to texture-paint reference points and just eye it; get the mesh to be positioned in the same place before and after shape key movements with the image texture as a guide.

$\endgroup$
3
  • $\begingroup$ I think it would be better if you described all the context. Why are you doing this? What are you trying to achieve? Could you add some screenshots or share the .blend file? It seems like you are trying to solve a complicated problem that you might not need to have in the first place. $\endgroup$ Commented Mar 16, 2020 at 6:03
  • $\begingroup$ done . . . . . . . $\endgroup$
    – user90346
    Commented Mar 16, 2020 at 6:35
  • $\begingroup$ Sorry but I don't get the point. What is so complex and needs such a process? Is it because lids and lashes are separated objects? Or? $\endgroup$
    – lemon
    Commented Mar 16, 2020 at 7:04

2 Answers 2

1
$\begingroup$

I can make 3 examples of 3 different ways of doing this (and there can be many more).

1 - Vertex parent: select 3 vertices of the eyelid, then in object mode select the eyelash; shift select the eyelid and press Ctrl P (choose vertex triangle), so that eyelashes will follow any movement of the 3 choosen vertices.

2 - Drivers: set a shape key for the eyelash also and set a driver so that it will act together with the eyelid shapekey.

3 - Join the two objects: select the eyelash FISRT, then shift select the eyelid, press ctrl J, then select the shapekey and in edit mode put the eyelash in the correct position.

$\endgroup$
0
$\begingroup$

How about...

  • In the basis key position, bind the eyelash to the eyelid using a Surface Deform modifier
  • The eyelash should now follow the lid's deformations. Duplicate the pair off at various lid key positions.
  • Taking care to apply the modifier on the lash, and delete the keys on the lid in the right order, you now have independent, matched, static pairs of objects.
  • CtrlJJoin the pairs, lash-to-lid
  • Taking one joined-pair as a master, set a Basis shape key on it.
  • Select the other joined-pairs, and 'Join as Shape Keys' them to the master using the Shape Key Specials menu.

Now any edits you make to the Master Basis, (welding, etc.) which change its topology, should follow through in its keys.

$\endgroup$

You must log in to answer this question.

Not the answer you're looking for? Browse other questions tagged .