1
$\begingroup$

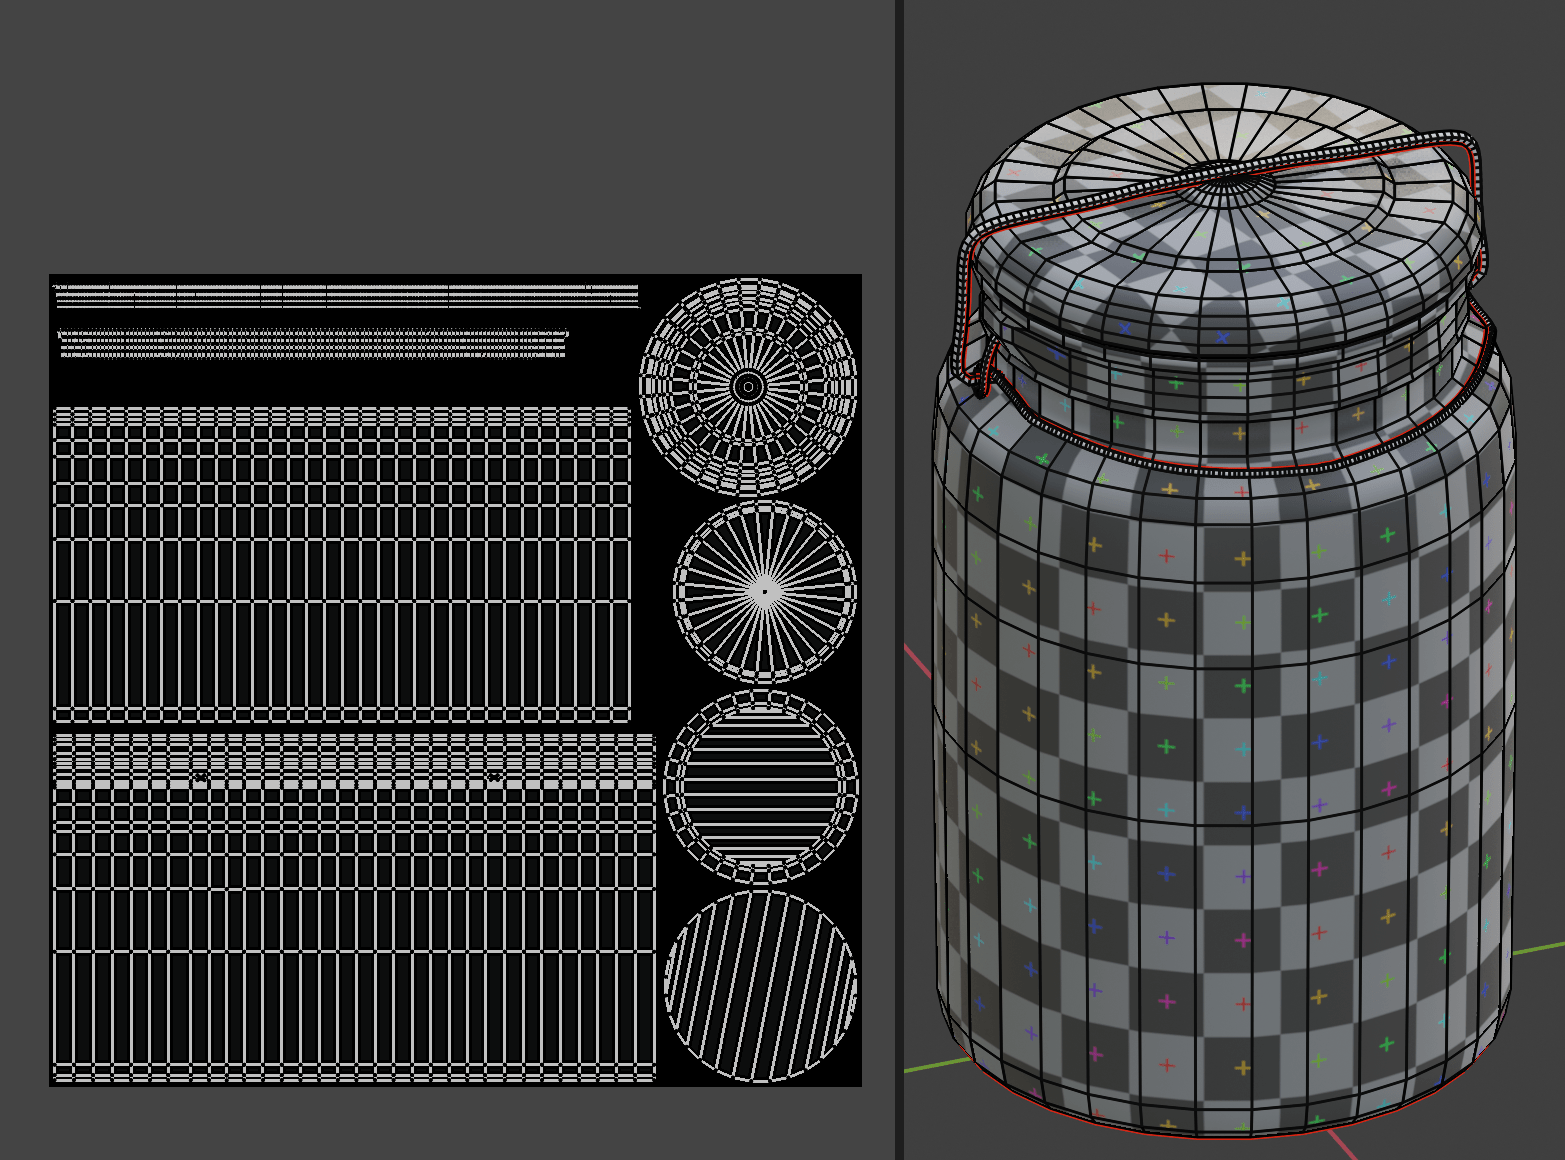
I have created a mason jar object, and I am primarily having issues unwrapping the lid part of the mesh: enter image description here
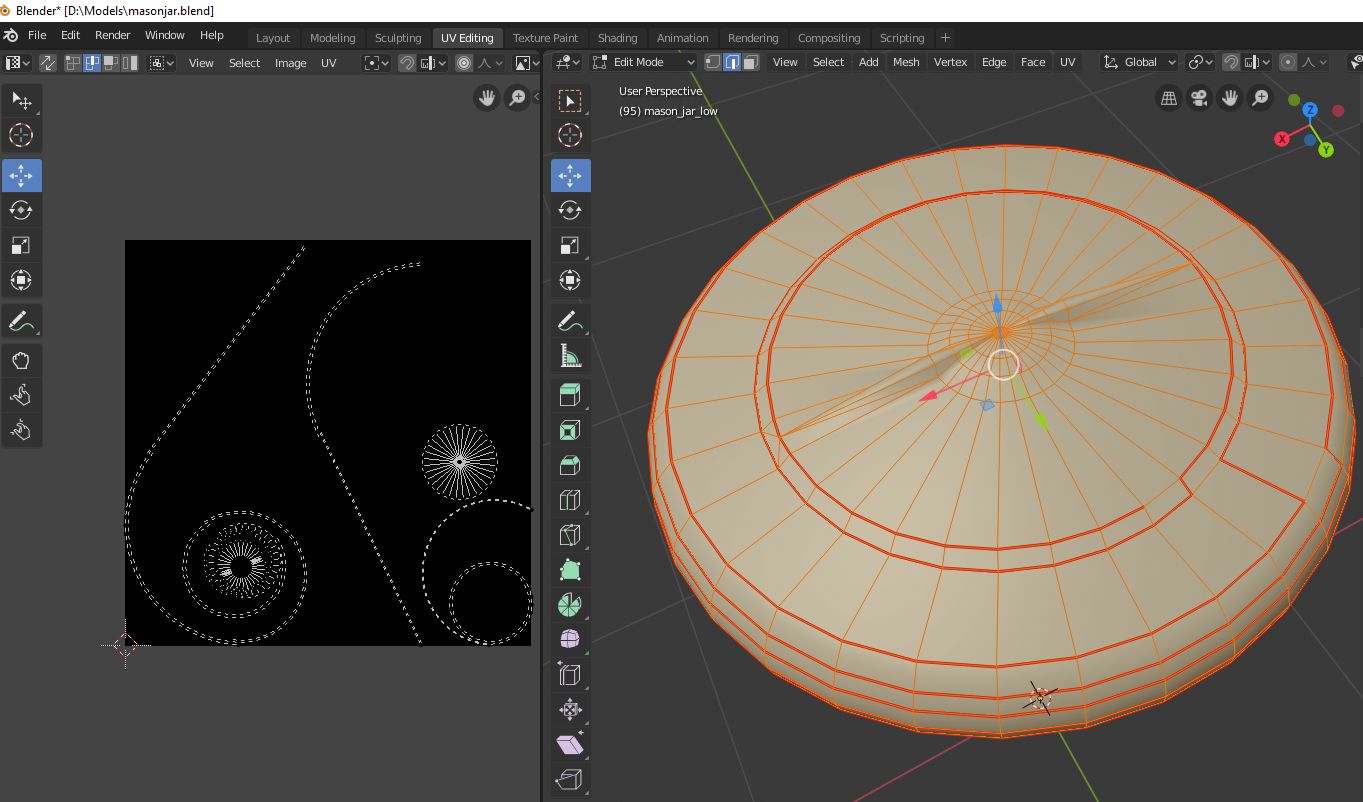
When attempting to unwrap properly and avoid an overhead projection type mythology that requires placing the rings in a separate location in the UV space, I am not sure how to reconcile the result of the unwrap.

I want to avoid a lengthy manual process of manually moving around vertices in the UV space to achieve a good result.
enter image description here Using the unwrap methodology above yields seams when brought into Substance Painter and having materials applied.

I am also trying to unwrap the entire object onto one UV image and even at 2k, the results seem fairly low resolution. I have made sure transformations were applied to the object prior to unwrap, so the relative size of different parts of the UV shouldn't be the issue. enter image description here
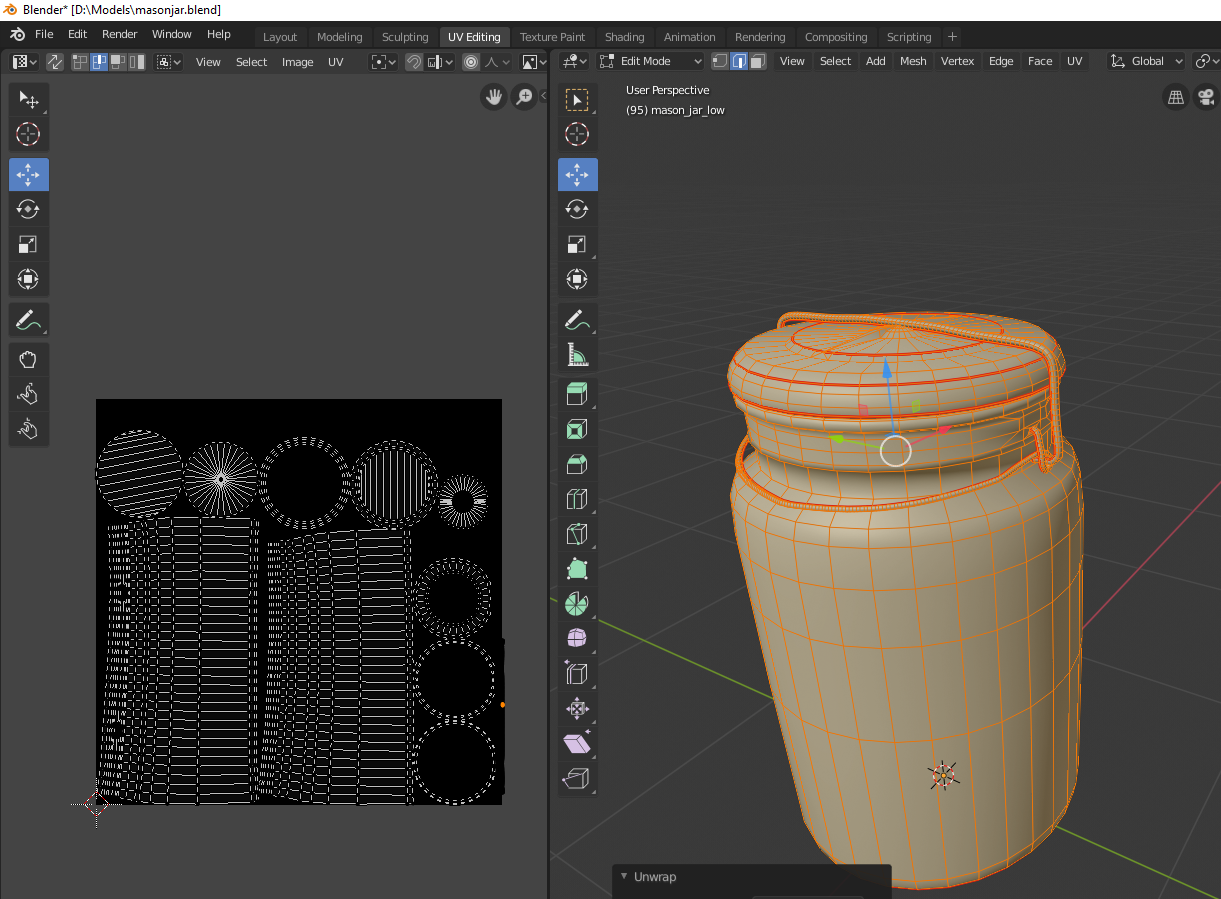
My goal is to have a fairly clean unwrap that allows for as few seams as possible and a maximize usage of the UV space in a 2k image.

Is there a better way to mark the seams?

Is my overall geometry unsound for efficient UV unwrapping and maximizing use of space?

Also, the interior faces may be important as I plan on applying alpha transparency to the materials applied to the lid and jar of the object.

I have attached the blend file if anybody was interested in taking a look and pointing me in the right direction.

I plan to use the model in the Unity environment.

Thanks!

$\endgroup$
1
  • $\begingroup$ When adding a .blend, don't provide just the url of the website, please provide the link given at the site. Thank you! $\endgroup$ Commented Jan 25, 2020 at 18:17

1 Answer 1

1
$\begingroup$

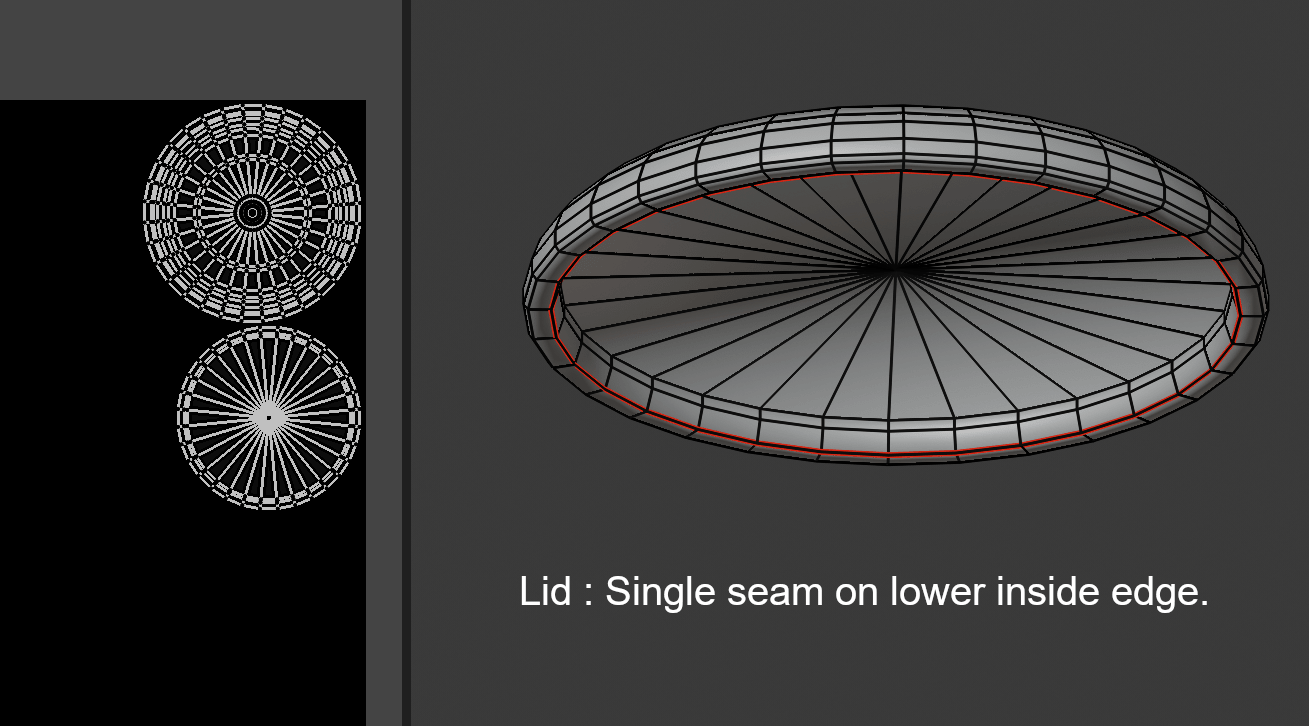
The lid probably only needs a single UV seam on its lower inside edge.

enter image description here

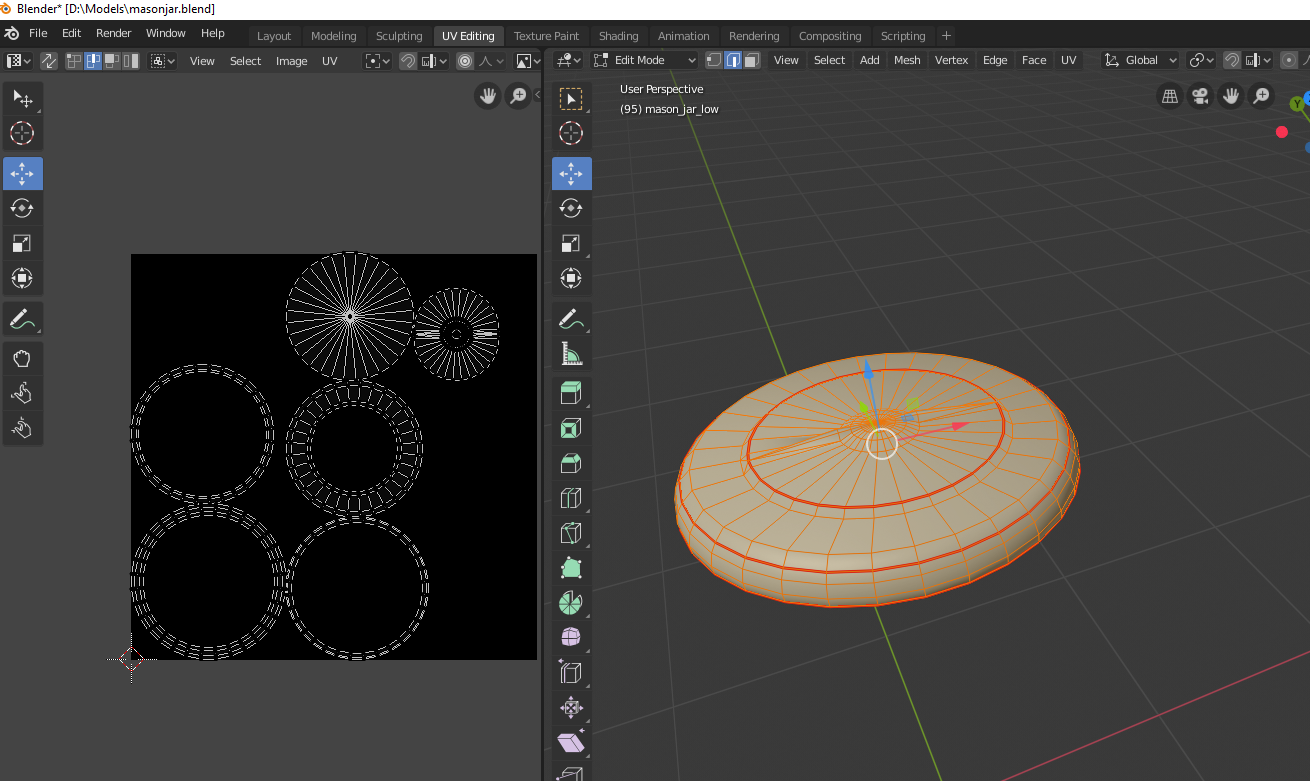
Then you can arrange the UV's something like in the screenshot below: enter image description here

Your jar was almost 2 meters tall. Unless you have a special reason not to I would suggest that you always model to real world dimensions. In this casxe scaling it down to size ( s 0.1 giving a more realistic jar hight of 180mm) means you get 10 times the texel density on the finished model when using the same size texture. (2K texture for such a model seems a bit excessive :) )

Also, you have way to many edge loops in the Wires. I would suggest removing as many as 4 out of 5 in the Low version.

$\endgroup$
4
  • $\begingroup$ Beautiful! Thanks for the response. $\endgroup$
    – Dan Dodd
    Commented Jan 25, 2020 at 21:36
  • $\begingroup$ What was your methodology for straightening the verticle edges of the jar in the UV? Did you select each edge and scale to 0 or is there a faster method? Thanks. $\endgroup$
    – Dan Dodd
    Commented Jan 25, 2020 at 21:41
  • $\begingroup$ To straighten edges; For the first edge : Alt LMB to select edge, RMB to open the context menu popup and choose either the Align X or Align Y option. For the next edge : Alt LMB the the key board short cut to Repeat Last operation which is Shft R but I have my repeat last operation mapped to a single key (tilde key ( ~ ) which I find quicker and easier to use. $\endgroup$ Commented Jan 25, 2020 at 21:55
  • $\begingroup$ Appreciate the help, thanks! $\endgroup$
    – Dan Dodd
    Commented Jan 25, 2020 at 22:44

You must log in to answer this question.

Not the answer you're looking for? Browse other questions tagged .