2
$\begingroup$

EDIT NOTE: The other thread had two question in it. One was answered, the the other was not. I split the question into to separate questions and the other one can be found here.


I want to animate cutting open a machine with a mesh with a boolean modifier (or something that does the same). I want to apply a texture to the cut face .

What I want to create is something like this, but the red colour would be a texture:

machine red cutface

What I mean with apply a texture to the cutface is something like this

machine texture cutface

So the cutface of the material of the machine wouldn't have a red, orange, whatever colour, but would show a dashed texture. And while one part of the machine would be dashed in one direction, another part would be dashed perpendicular to it. A third part would get dots or any other pattern.

Example videos:

The author wrote in a comment: "For this video I made a cube and added a thin solidify modifer to it to create a surface. Then I used a two boolean modifiers: one to intersect the surface with the monkey and one to get the difference between the monkey and the cube. I used an absolute offset for the striped texture."

Kindof what I want to get, but not really. It looks like a nice effect and easy solution for a single object, but if you have multiple objects they would all get the same texture overlay.

I maybe think about this in the wrong way, but what I would like to have it that so I can specify that obejct X has has the matrial Y and if cut, the new face should have texture Z.

I have tried the solution of the other post (using a second material but giving the material a texture and UV unwrap it) but it didn't work because the cutface is created dynamicly and I have no idea how to UV unwrap it without applying the modifier)

My Question:

If not clear, my questionis: How do I do this?

How can I add a texture to a cutface that is created with something like the boolean tool and can be used in an animation.

$\endgroup$
3
  • $\begingroup$ Do you want the drawing to show while changing the cutaway? It's one thing to map it to a cutout, it's another thing to map it to a moving surface that changes shape. $\endgroup$ Commented Feb 23, 2018 at 10:26
  • $\begingroup$ if possible yes, just like in the other thread you would see the colour from the point you cut into the mesh. Since the machine I want to rebuild is made of metal everything would get a silver coat on the outside. So I would like to show the different parts right as the mesh is cut away $\endgroup$
    – Delta
    Commented Feb 23, 2018 at 10:34
  • $\begingroup$ @Edgel3D The last one (~40 sec) is pretty much what I wanted to get! BTW:I would appreciate if you would also contribute here: Cut mesh with circle pie chart like mesh for animation $\endgroup$
    – Delta
    Commented Mar 1, 2018 at 17:21

1 Answer 1

1
$\begingroup$

As requested In your last comment -

The example you mentioned is much more straight forward as it is a simple dissection and rotation of mesh that's been split in the Z axis...
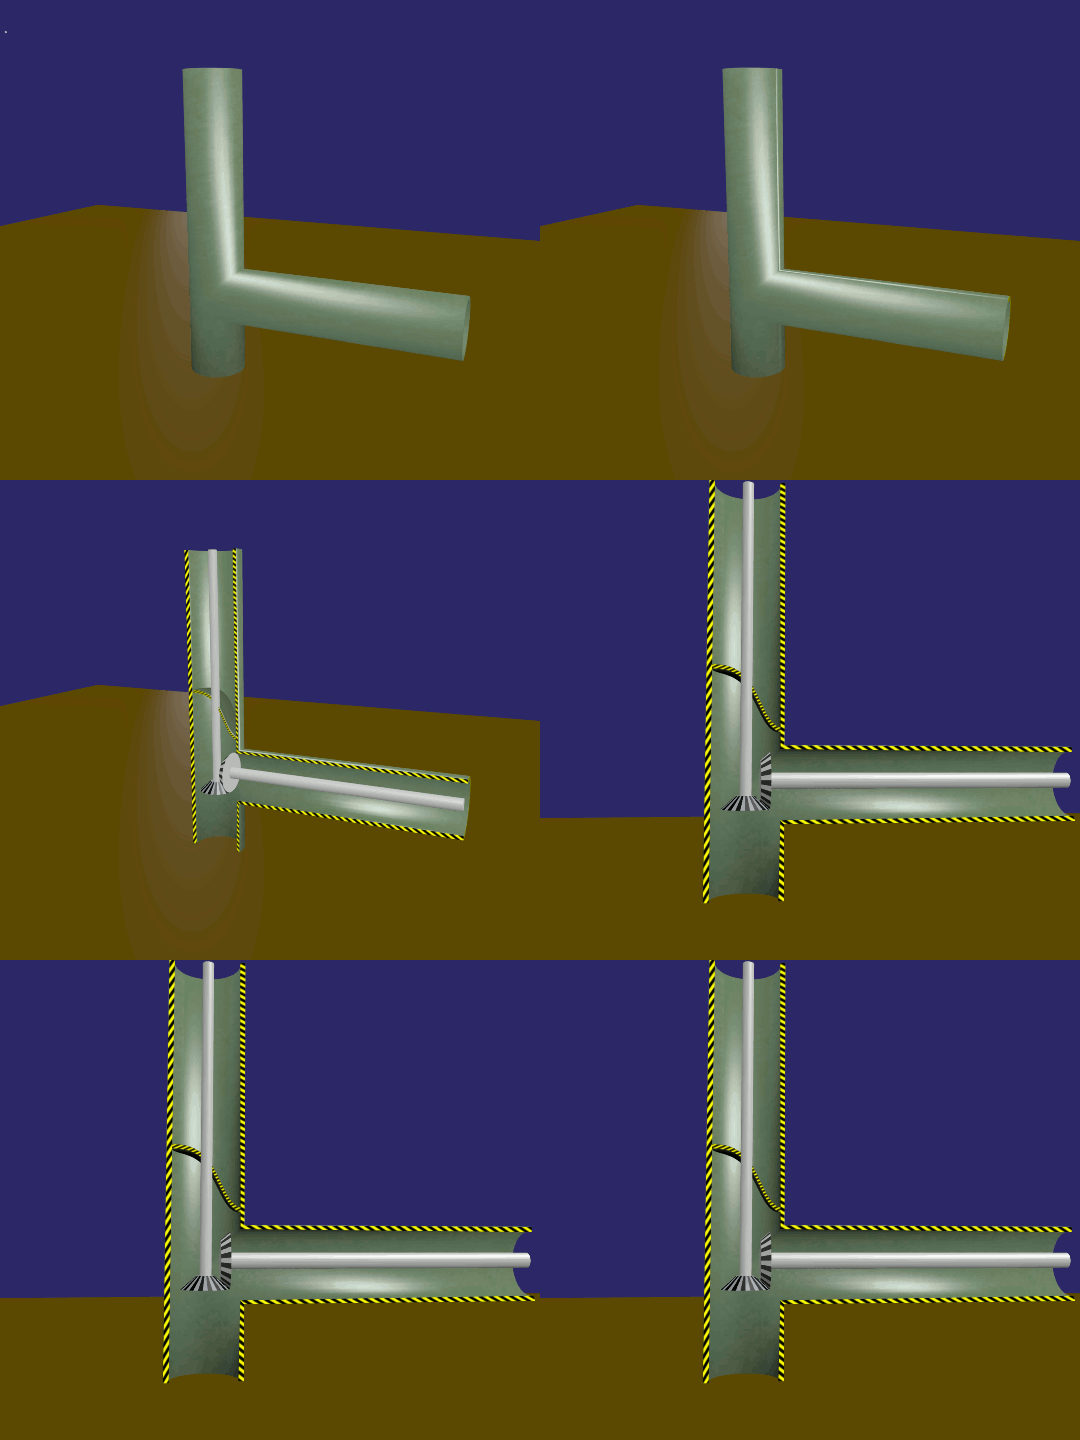
Create the casing and use the solidify modifier to give it's walls thickness all round, and "apply" the modifier so that thickness becomes permanent mesh.

Give it material and texture at this point.

Duplicate the casing and move the copy to a spare layer (layer 9?). It's often preferable to show the duplicate as a complete mesh rather than two stationary split sections. Shading can change at the edges when split and smoothing is also used, whereas the duplicate hasn't been affected.

Slice the original in half vertically, say at 180 degrees and perpendicular to the camera, so you'll have a clear view of any workings that are inside.

A Boolean modifier could do this but I elected to slice this one manually so the results will be predictable and possibly cleaner.
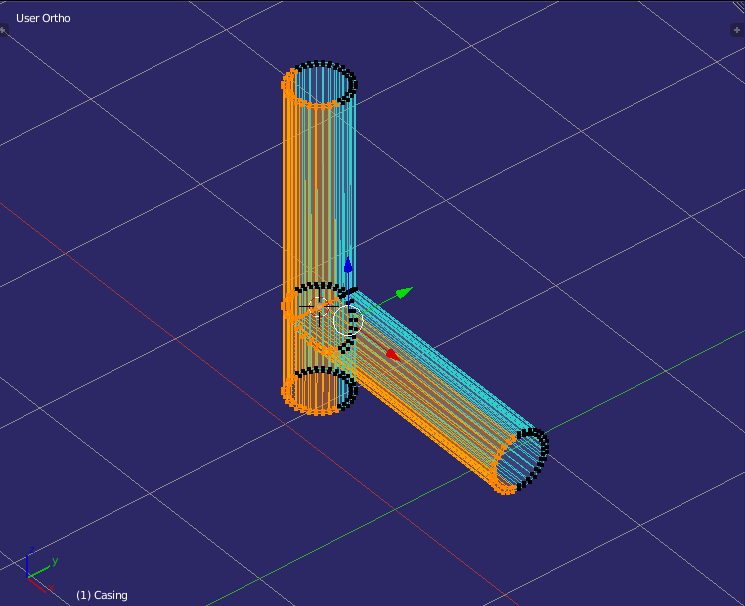
Doing it this way also means there won't be surfaces covering the cross-section gaps between the inner and outer casing walls. These are easily filled in from Edit mode with the F key.

Once filled they can be textured with your chosen cross-hatch pattern.
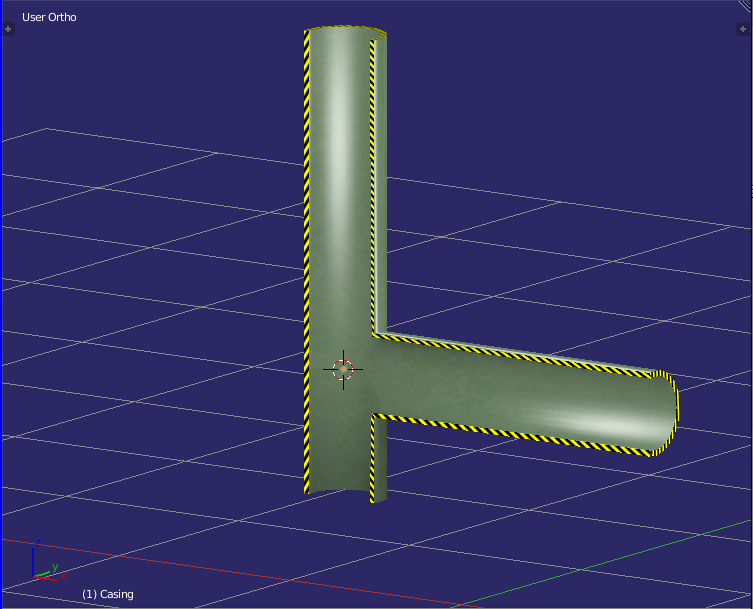
The front section's wall gaps probably won't need filling in because you'll only get a glimpse of them as the section is swept away. (a matter of choice)

Normally the mechanisms within would be left intact and working, probably in a separate layer for convenience.

Animate the front section as required.

-=====-

What I usually do is switch off (make invisible) the front and rear sections of the casing so they don't interfere with the duplicate in Layer 9 which will be visible while everything is stationary. Keyframe all three in the Outliner's Eye icon at frame 1.

At the frame where the animation starts, switch off the duplicate (eye icon in the outliner) and keyframe that.

At the same frame switch the front and rear sections on - keyframe those also.

The front section will be seen to swing out and be swept away, leaving us with the internal view and inner workings.

//////////////// ///////////////// ////////////

ANSWER for the 22 sec mark...
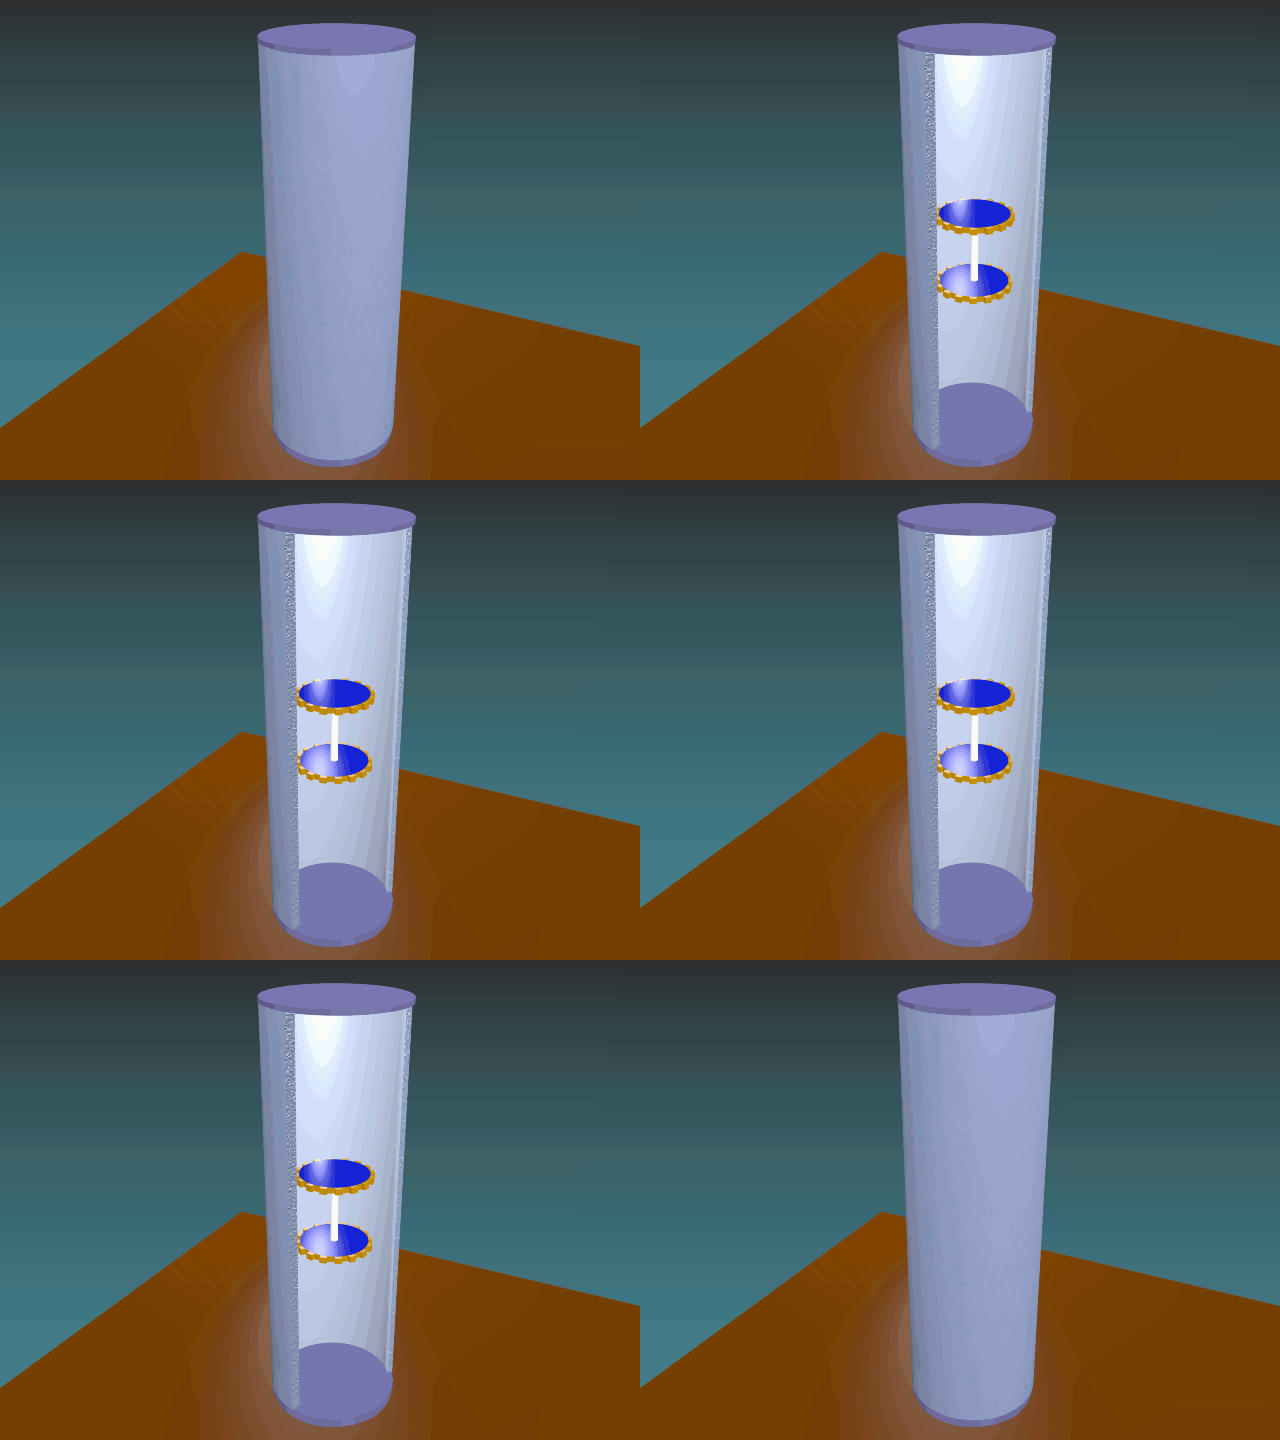
This method just uses a mask which slides right to left and hides only the front of the casing, not the rear.
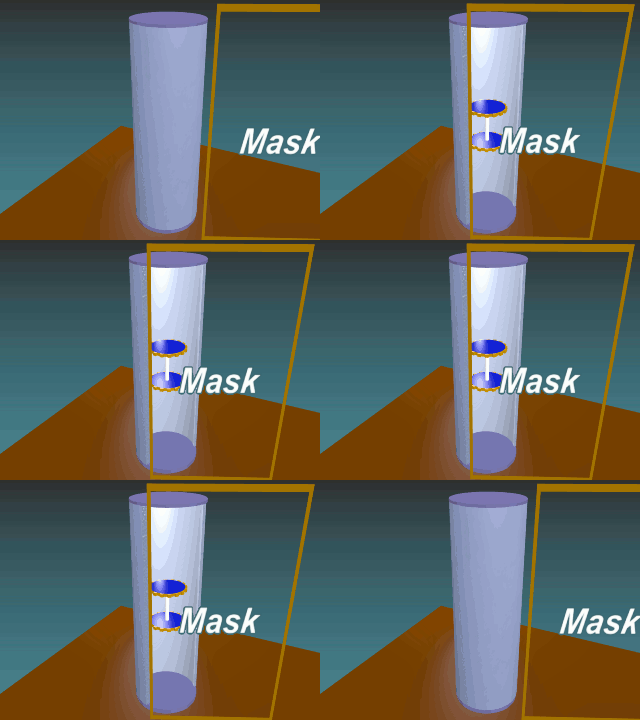
The casing has to be "parted" front from rear section so masking can differentiate between the two.

As you're requiring edge thickness for the cross hatch pattern, the edge has to be emulated as the front casing is progressively 'peeled back'. (Masking cuts targets away, edge thickness and all)

A textured plane shaped for the job is placed at the leading edge of the mask and animated to move identically with it. To this end the mask's keyframes were simply copied to the edge plane. (Parenting is unavailable because the mask would then render it invisible)

Shapekeys were used to tweak it's width so it appears to be rotating along with the edge of the front casing as it's peeled back, as well as trimming it's ends to the right angle and length over the course of it's travel.

If it's preferred, extra masks shaped accordingly can do most if not all of the trimming functions for you. Rotating the edge plane physically as the casing is rolled back would take care of perspective.

Example here
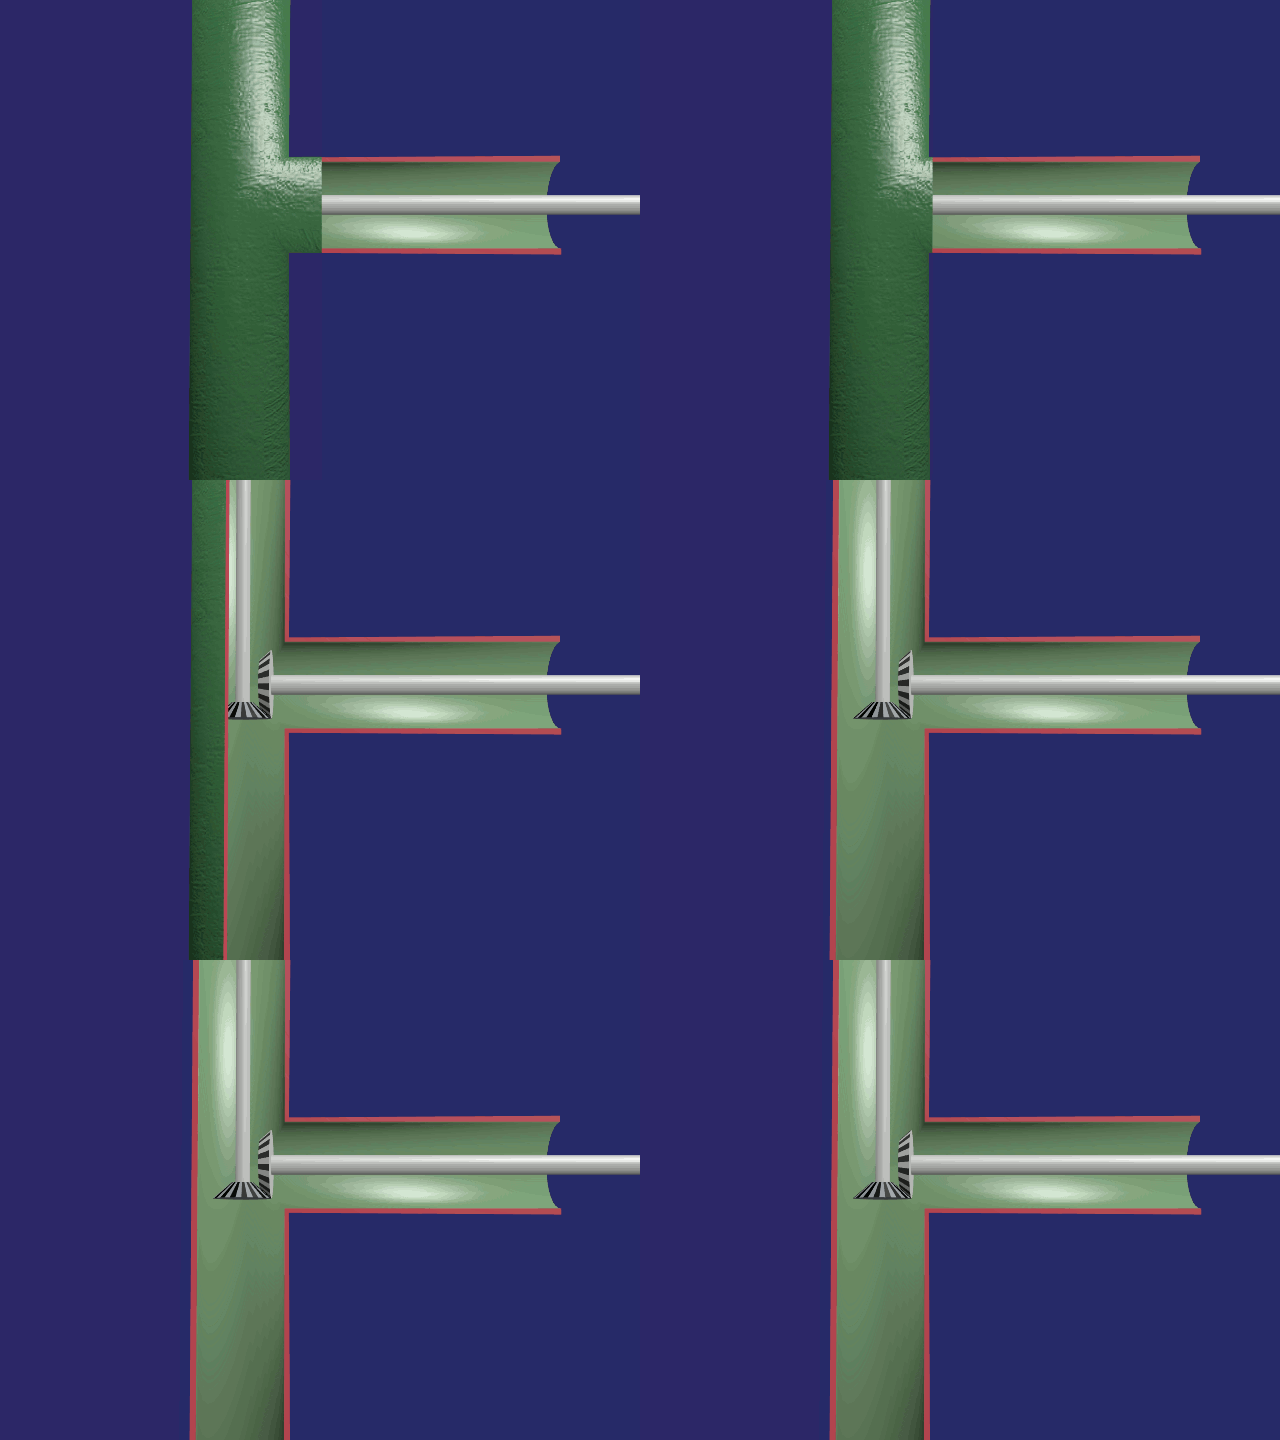
Inviso Masks" - (own term)

... only works with the viewport and rendering with OpenGL as far as I'm aware.

These are simply planes with absolutely no Specular, not much Diffuse, (dull grey) and their Material slot Opacity set to 0.008. (a tad above the default 0.004 Alpha threshold)

They are also selective and can discriminate between objects with little effort. Simply parent objects to them. (child = object to be hidden).

Remove the parenting immediately and use the "Keep Transformation" option in both instances.

To immunize objects from invisibility - simply parent in reverse. (child = the mask)
Again - remove the parentage immediately and "Keep Transformation"

IMPORTANT - Deselect all objects when checking them out. Be in Object Mode and Press A

Chroma-key and other forms of selective masking would need some extra imagination and multiple rendering.

$\endgroup$
6
  • $\begingroup$ I rewatched your video and I noticed that I made a mistake. The last of the examples is the texture style I want to have (so a different texture on every cut face). But animation style wise I want to cut it open like the example at 0:22. So a smooth animation that has a texture on the cut face. Imagine the red face [streamable.com/5s6dv](here) would be a texture and it would open like [streamable.com/tpdew](this). $\endgroup$
    – Delta
    Commented Mar 6, 2018 at 11:29
  • $\begingroup$ I tried to watch your links but no joy - it wanted me to sign in and apparently wasn't going to let me see anything without it. I checked at the 22 sec. mark as per your latest comment and will drop an answer for that method also. That example was done with masking. Mesh and texture are not affected. $\endgroup$
    – Edgel3D
    Commented Mar 7, 2018 at 15:42
  • $\begingroup$ 2nd answer appended to what's above... $\endgroup$
    – Edgel3D
    Commented Mar 7, 2018 at 16:02
  • $\begingroup$ The videos are streamable.com/5s6dv and streamable.com/tpdew . So the web adress was correct, I just placed it in the wrong order with the name which messed it up. The example on dropbox.com/s/g88f7nm04qctkh3/Pie3.mp4 is what I want to have. I just have never worked with OpenGL masks and therefore have no idea about them. Is there a tutorial you can recommend? $\endgroup$
    – Delta
    Commented Mar 12, 2018 at 16:22
  • 1
    $\begingroup$ @Delta will get back to you on that. Can't recall seeing any tutorials on the sort of masking I use, but a quick search should pick any up. If none I can take you through it. I use OpenGL almost exclusively now. It's a WYSIWYG thing and ideal for rapid rendering for instructional videos etc, You don't grow old waiting to check on results. Will leave another comment here - in the middle of tax returns at the moment... $\endgroup$
    – Edgel3D
    Commented Mar 14, 2018 at 5:24

You must log in to answer this question.

Not the answer you're looking for? Browse other questions tagged .