I'm looking for a way to make moving objects generate some sort of wind that affects particle systems and/or rigid body simulations. What I mean is that the moving object should not only interact with objects and particles it collides with, but also surrounding objects due to 'wind' being generated.
-
$\begingroup$ Could you point some real world example? $\endgroup$– cgslavCommented Aug 27, 2016 at 22:23
-
$\begingroup$ If you have a piece of paper thats a bit bent taped on only the top, and then swing your arm quickly in front of it, it should be affected by the 'wind'. $\endgroup$– FindusCommented Aug 27, 2016 at 22:29
-
$\begingroup$ And particles will be? $\endgroup$– cgslavCommented Aug 27, 2016 at 22:31
-
$\begingroup$ related blender.stackexchange.com/questions/58582/… $\endgroup$– lemonCommented Aug 28, 2016 at 5:17
2 Answers
You can use Drivers to automatically apply a Wind force around the object and to vary its intensity as the object moves. This can be achieved as follows.
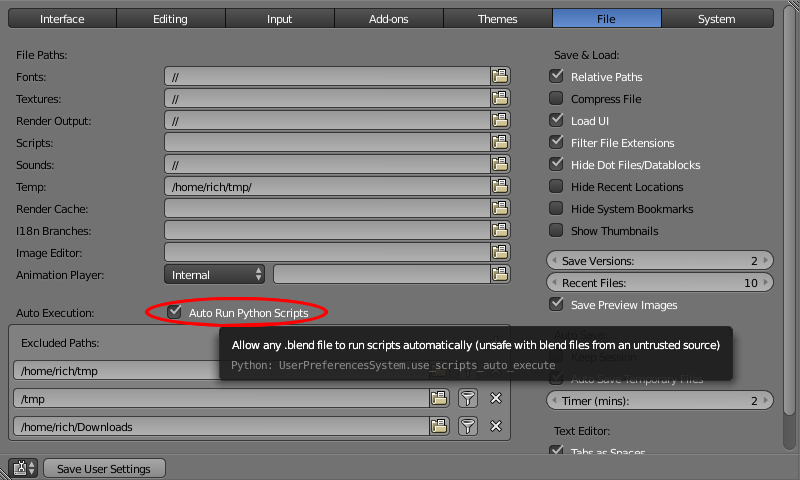
Firstly, enable 'Autorun Python Scripts' in the File preferences window. This will allow you to run scripts in Driver expressions.
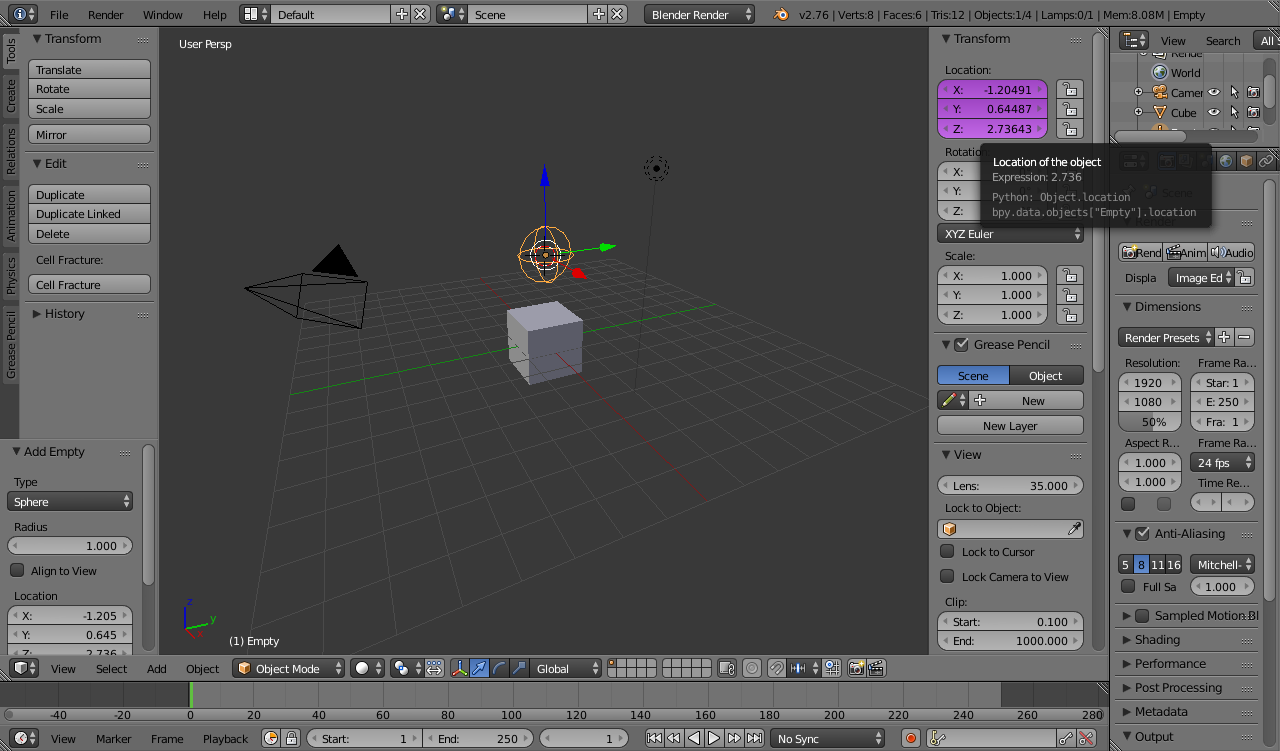
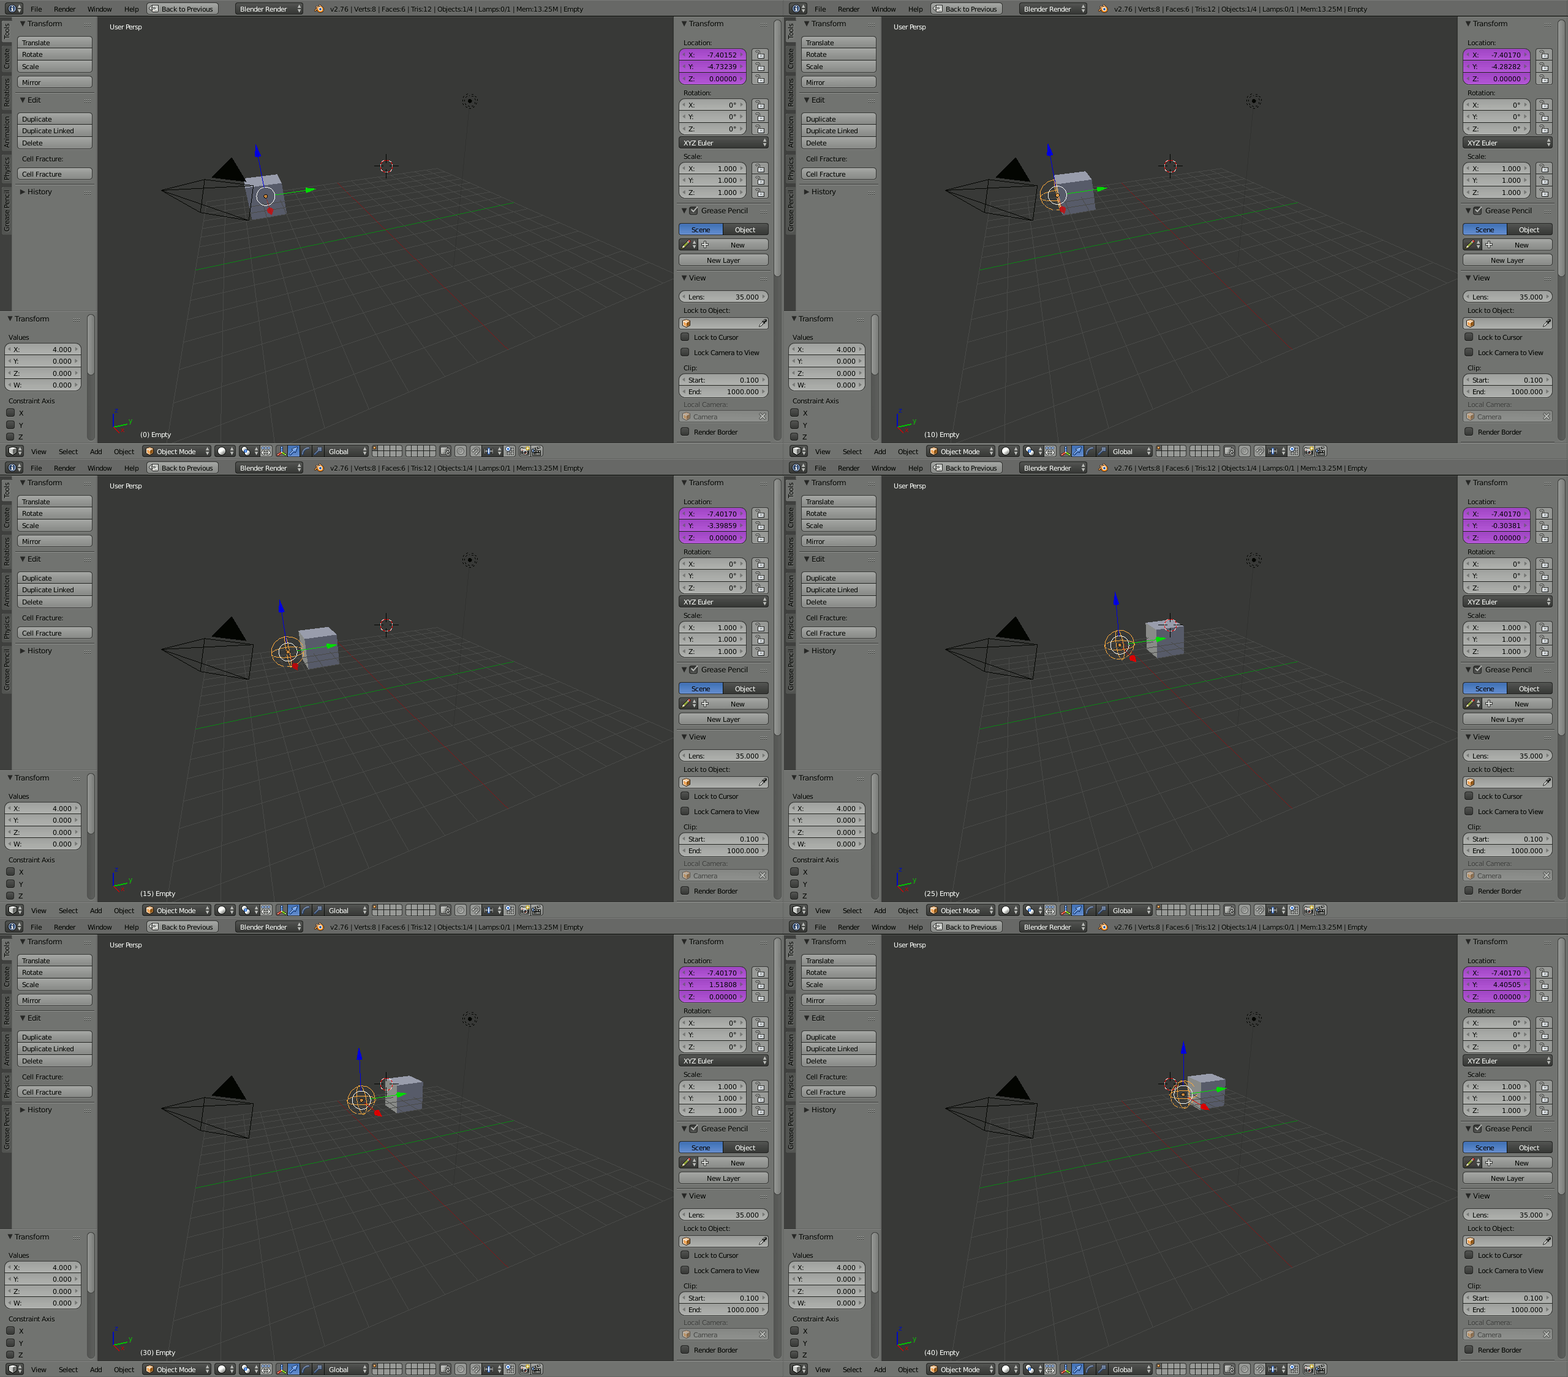
Create an empty to follow behind the moving object. This will be the 'source' of the wind and its distance from the moving object will dictate the magnitude of the forces. In the Empty's properties panel, right-click on one of its location properties and select 'Add drivers' - you should see the X, Y, Z properties turn purple to indicate a driver is present.
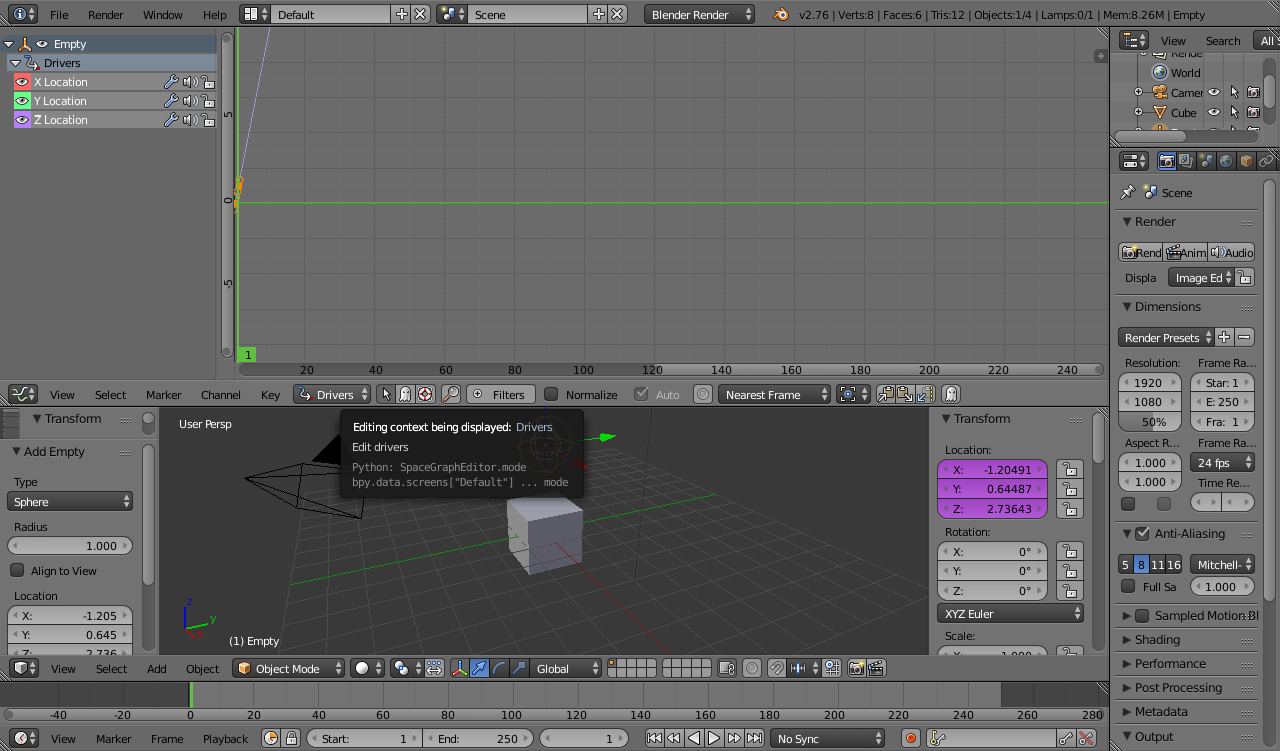
To get the Empty to follow the moving object you can set its location to a running average of itself and the target object's location. This will result in it closing in on the target on each successive frame. To do this, select the Empty in the 3D window, open a Graph Editor window and change the context from F-Curve to Drivers and you should see the newly created drivers.
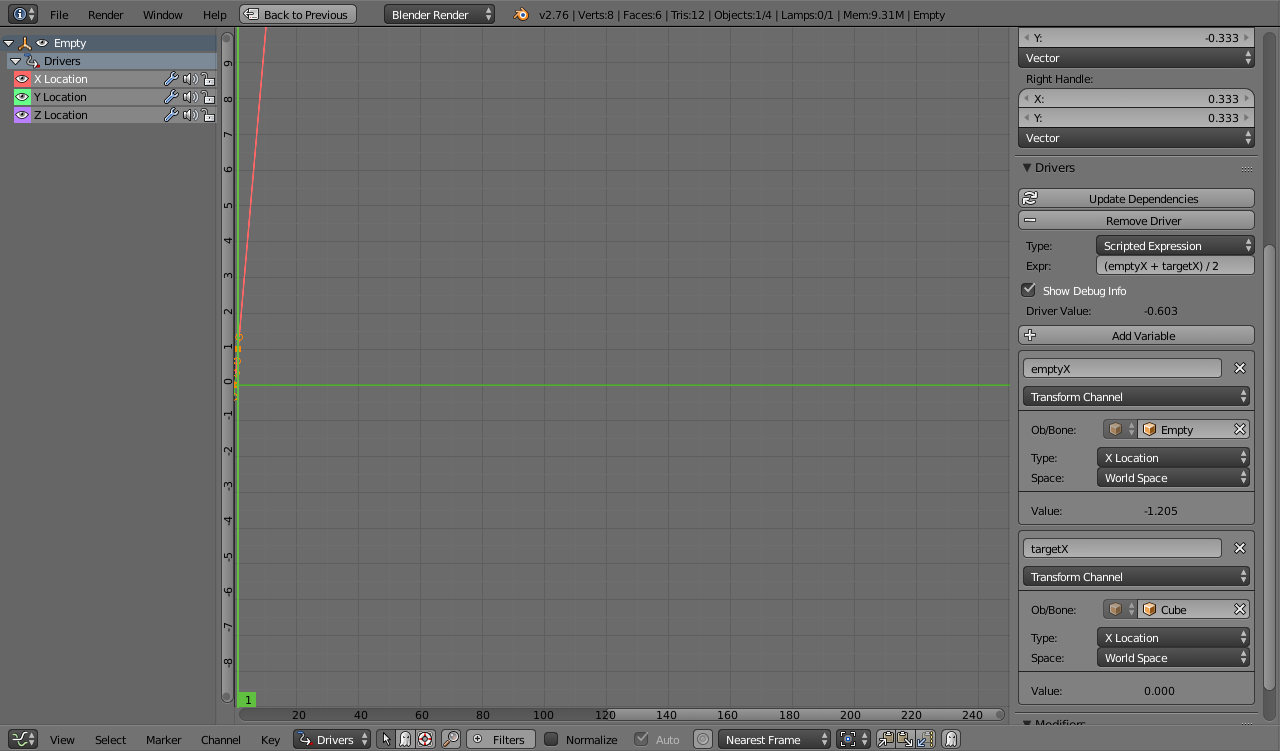
Select 'X Location' and set up 2 variables - both as 'Transform Channel' - one for the Empty's X Location and the other for the target object's X Location (named 'emptyX' and 'targetX'. Set the Driver value to be a Scripted Expression as '(emptyX + targetX) / 2'. This will result in the Empty moving halfway towards the target on each frame. Adjust this expression for a more gentle motion towards the target - eg, '(emptyX * 4 + targetX)/5' will cause the distance to close by 1/5th each frame.
Repeat the above for the Y and Z channels and you should have an Empty that follows behind the target object as it moves.
Create a Wind force at the same point as the Empty (select the Empty, Shift-S for 'Snap'menu , Cursor to Selected, Add/Force/Wind) and parent it to the Empty. Add a constraint to the Empty to 'Track To' the target object. Move the target away from the Empty and check that the direction of the Wind is correct - rotate it to point it towards the target object if it is incorrect.
Select the target object and go to its Object properties and create a Custom Property named 'WindMultiplier' and set its value to '35.0' (or similar). This will be used to control the strength of the wind.
Select the Wind force object and go to its Physics properties. Right-click the Strength property and Add Driver. Configure the rest of the force as required -- probably change the shape to 'Point', set the Falloff to Sphere and power to around 2 or slightly higher.
Go back to the Graph Editor window and select the new driver on the Wind force. Create a variable named 'distance' of type 'Distance' and set one object to the target object (in World space) and the other to the Empty. Create another variable named 'multiplier' as a Single Property, set the object to the target object and the path to '["WindMultiplier"]'. Set the Scripted Expression to 'distance * multiplier'.
You should now find that as the target object animates that the empty follows closely behind with the wind force varying based on its speed. You can repeat the above 'Wind' steps to create multiple forces - for example, a Turbulance force, vortex forces, etc., parenting each to the Empty and rotating it as required, affecting your particle system dynamically based on the motion. Tweak the force properties and multipliers as required.
You'll get strange results if you run the frame sequence in reverse or jump to points in the animation so it's best to play it forwards all the way through to make sure it's working as expected and then to Bake the animation and then disable the drivers until you need them again if you change the motion of the target object.
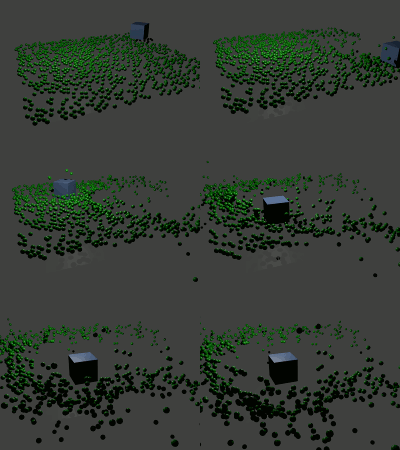
Here's an example using a Wind force and Turbulence force - there is no object collision involved. You could get more effective results by adding Vortex fields (as above) to simulate eddy currents in the air flow.
Note : You may find that Blender doesn't detect changes to your scene when adjusting the Driver properties (such as 'WindMultiplier' mentioned above) and will not refresh the particle system automatically. If this occurs you can simply go into the Particle System properties and re-bake the particle system. The other potential issue with the set up described above is that the initial state at frame zero will not be consistent - the Empty used to direct the forces may not necessarily be in the same place at the start of the animation. The driver Scripted Expressions could be adjusted to allow for this if required but I excluded this for clarity (eg, something like 'emptyX * 4 + targetX)/5 if frame = 0 else targetX' should give the desired effect.
What you could do is to parent a Wind force field to your objects that you intend to move. This way the animated movement will look like it's affecting the oject that is blow by the wind. Of course you will have to adjust the force field to your scene.

