4
$\begingroup$

I'm trying (and failing to) shade a racing helmet. My initial approach was to have multiple UVs for different parts of the design, but I'm finding it impossible to match perspectives properly.

Looking at models for sale on Turbosquid and CGTrader to see what the pros are doing isn't helping a lot either. For example:

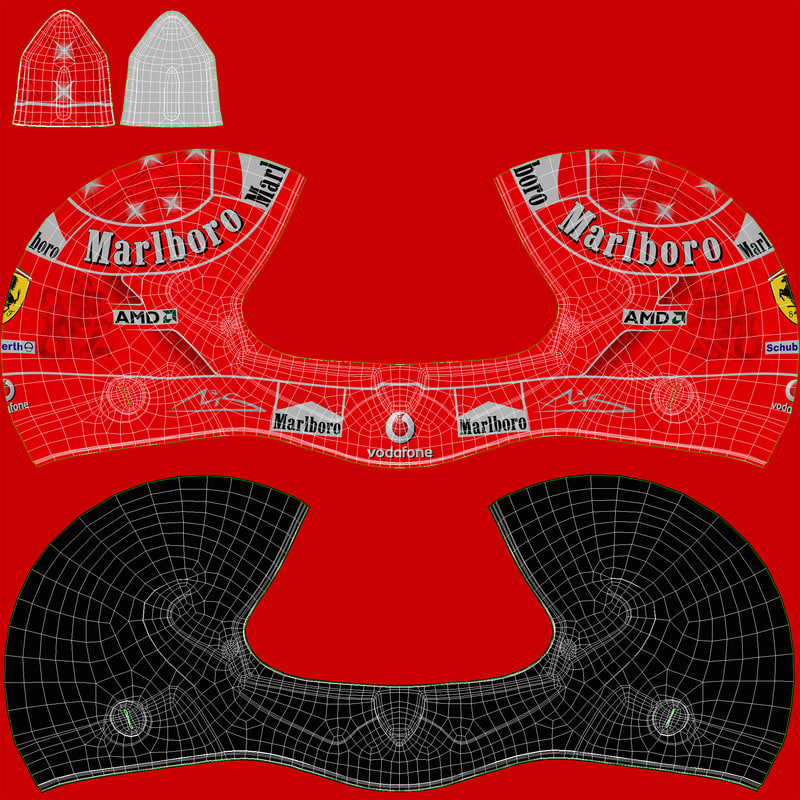
Helmet texture

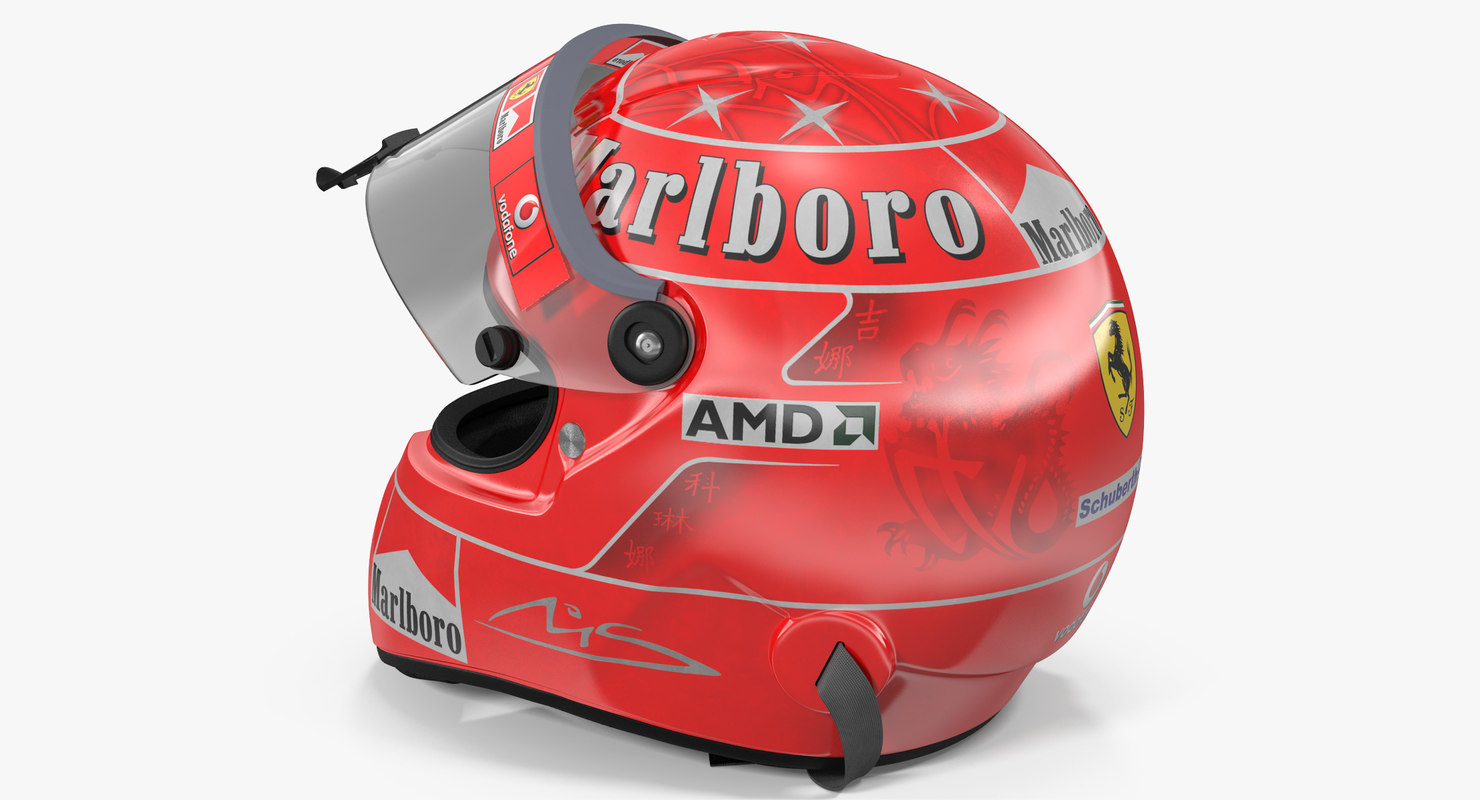
Helmet render

How did this person texture this? You can see in the render that the white lines are pretty straight on the 3D model, but all over the place in the texture. Did the artist use a different UV (say project from the left view) and then baked those lines onto a new UV?

How would you tackle this? It's driving me nuts, and I can't find the answer.

Thanks!

$\endgroup$
1
  • 1
    $\begingroup$ My guess is they used a vector style path tool to make the lines. Notice how they start and end in alignment with the topology of the helmet; with an exported image of the UV layout as a reference, those would be pretty easy to do in inkscape. Something like shrinkwrap + baking is another possibility, especially for the logos. $\endgroup$
    – gandalf3
    Commented Dec 14, 2017 at 21:33

1 Answer 1

3
$\begingroup$

We don't know how this specific artist created the unwrapped/distorted image texture.

Did the artist use a different UV (say project from the left view) and then baked those lines onto a new UV?

This is a common technique called Projection Painting which is widely used during texturing. Since I found no clear overviews in any answer, I will demonstrate the basic steps.

  1. Create a UV map, I named mine uvmapUnwrapped and unwrap it, maximizing used space and minizing distorsion. As you noticed, one cannot add any images onto the current 2d uv layout with them being distorted.

enter image description here

  1. Create a second UV map (the plus-icon) which places a logo (or other desired image) neatly onto the object. I loaded the Blender logo in the UV editor and found that unwrapping the subdivded cube from orthographic front view with Cylinder Projection worked best for this szenario. But there are plenty of other unwrapping methods. U

enter image description here

At this point, both images should be showing correctly on the object when their respective uv maps are active.

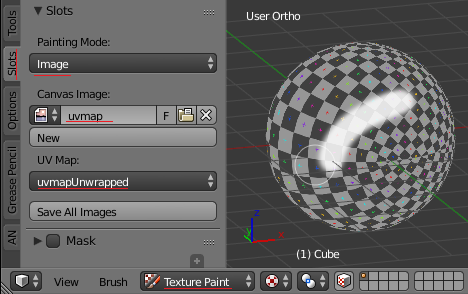
  1. Select the object and enter Texture Paint Mode. Go to the Slots tab, choose Image as mode, select the uv layout image as canvas layout, which we're going to paint on an choose its matching UV map layout.
    We could now paint on the object by drawing strokes on it in the 3D view.

enter image description here

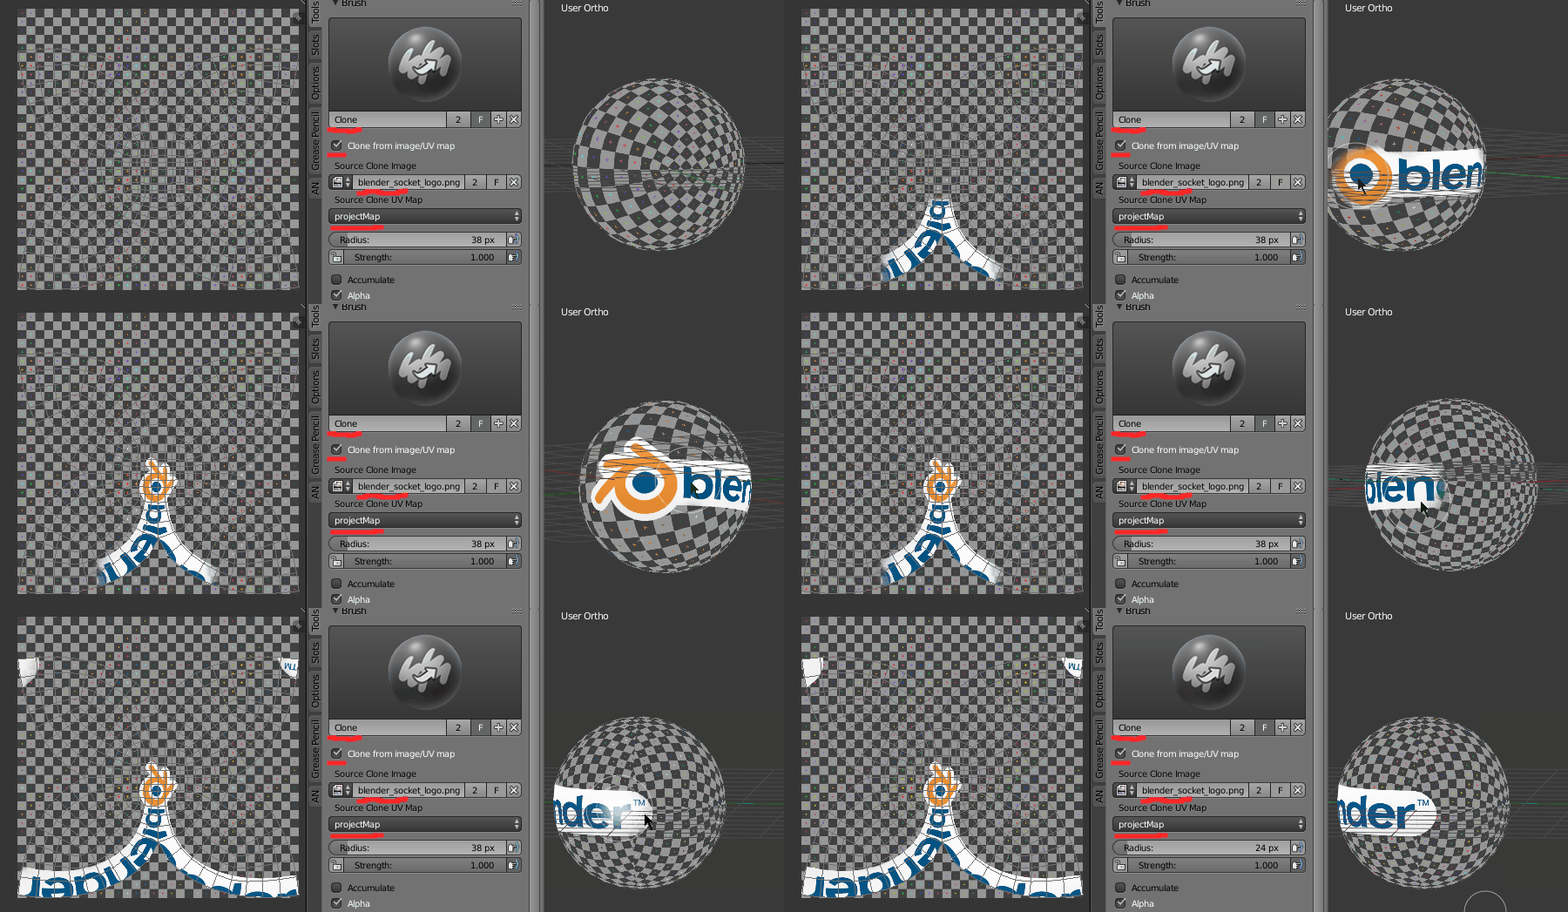
  1. Go to the Tools tab, select the clone brush. Check the box at clone from image/uv map. Select the logo image and its matching uvmap. You can now "draw" the logo onto the texture.

enter image description here

$\endgroup$
1
  • $\begingroup$ Thanks for the answer. This was really helpful, and it made me find the amazing stencil mode in texture painting. Which was exactly what I was looking for. $\endgroup$
    – awfulcode
    Commented Dec 20, 2017 at 12:30

You must log in to answer this question.

Not the answer you're looking for? Browse other questions tagged .