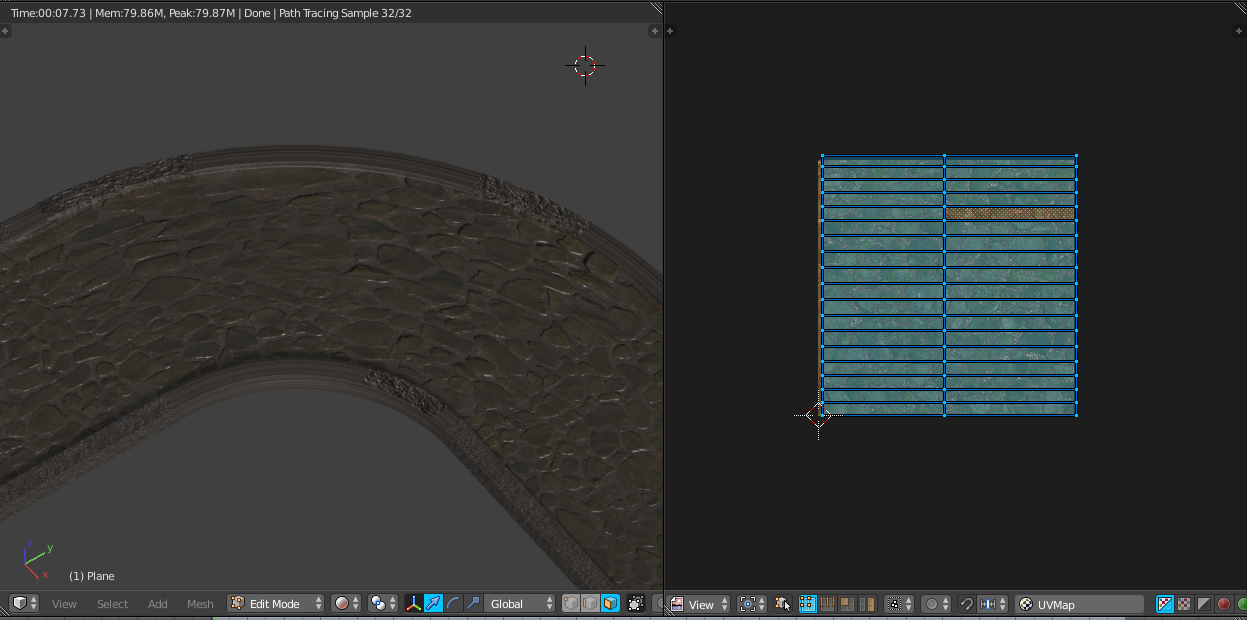
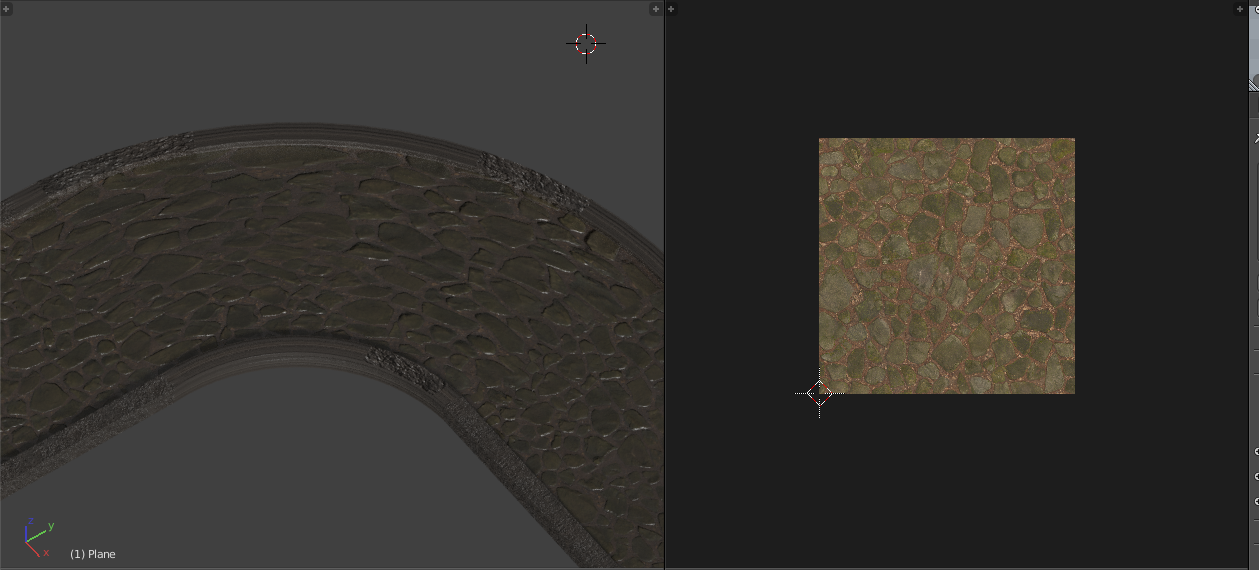
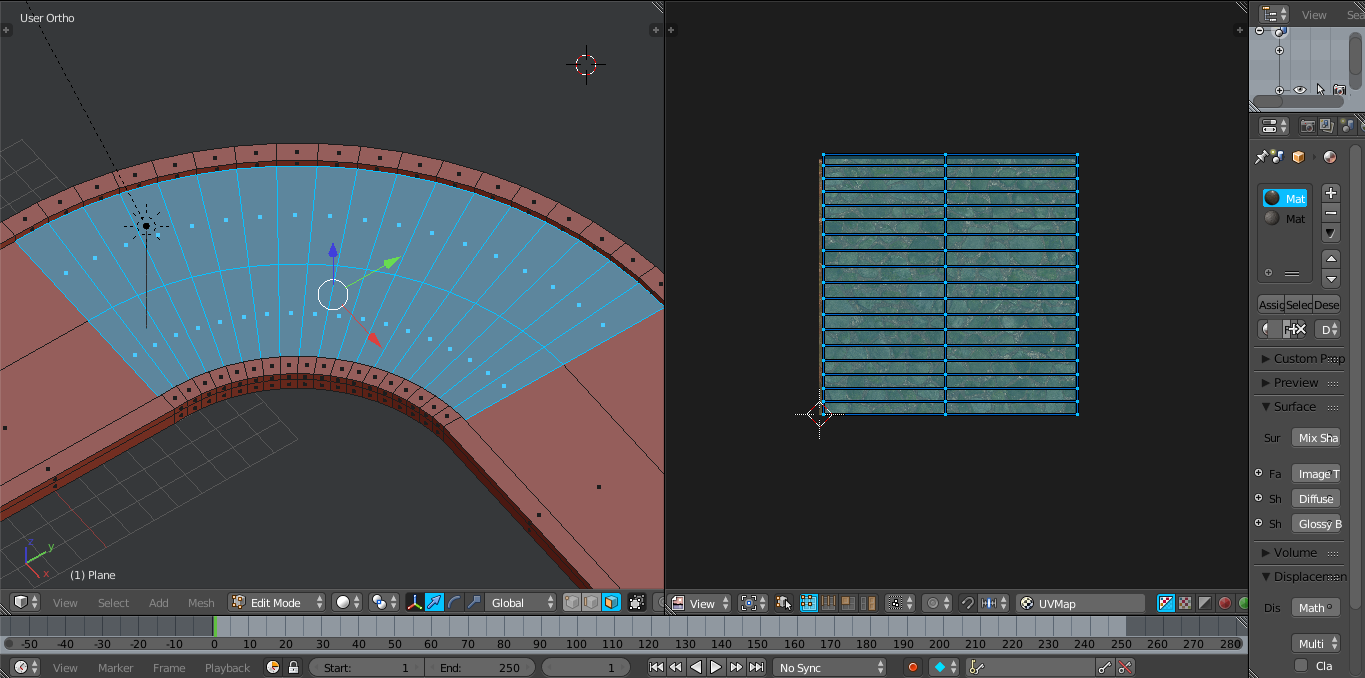
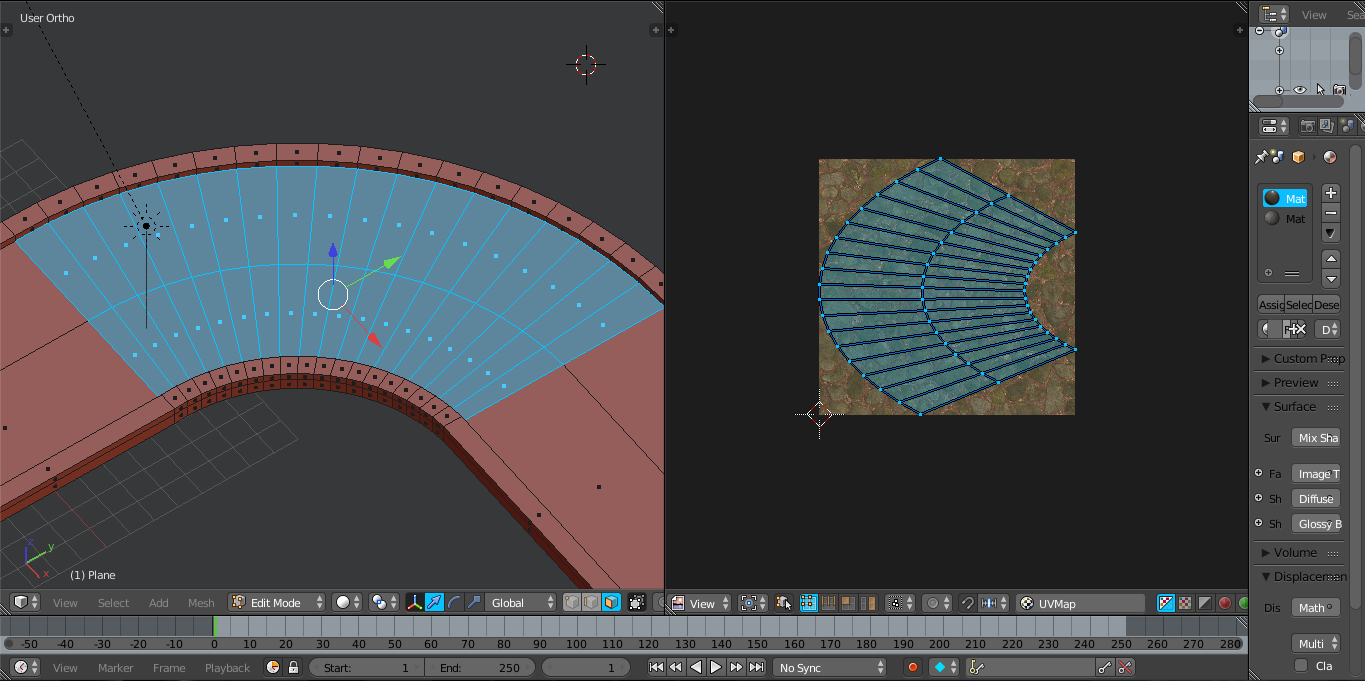
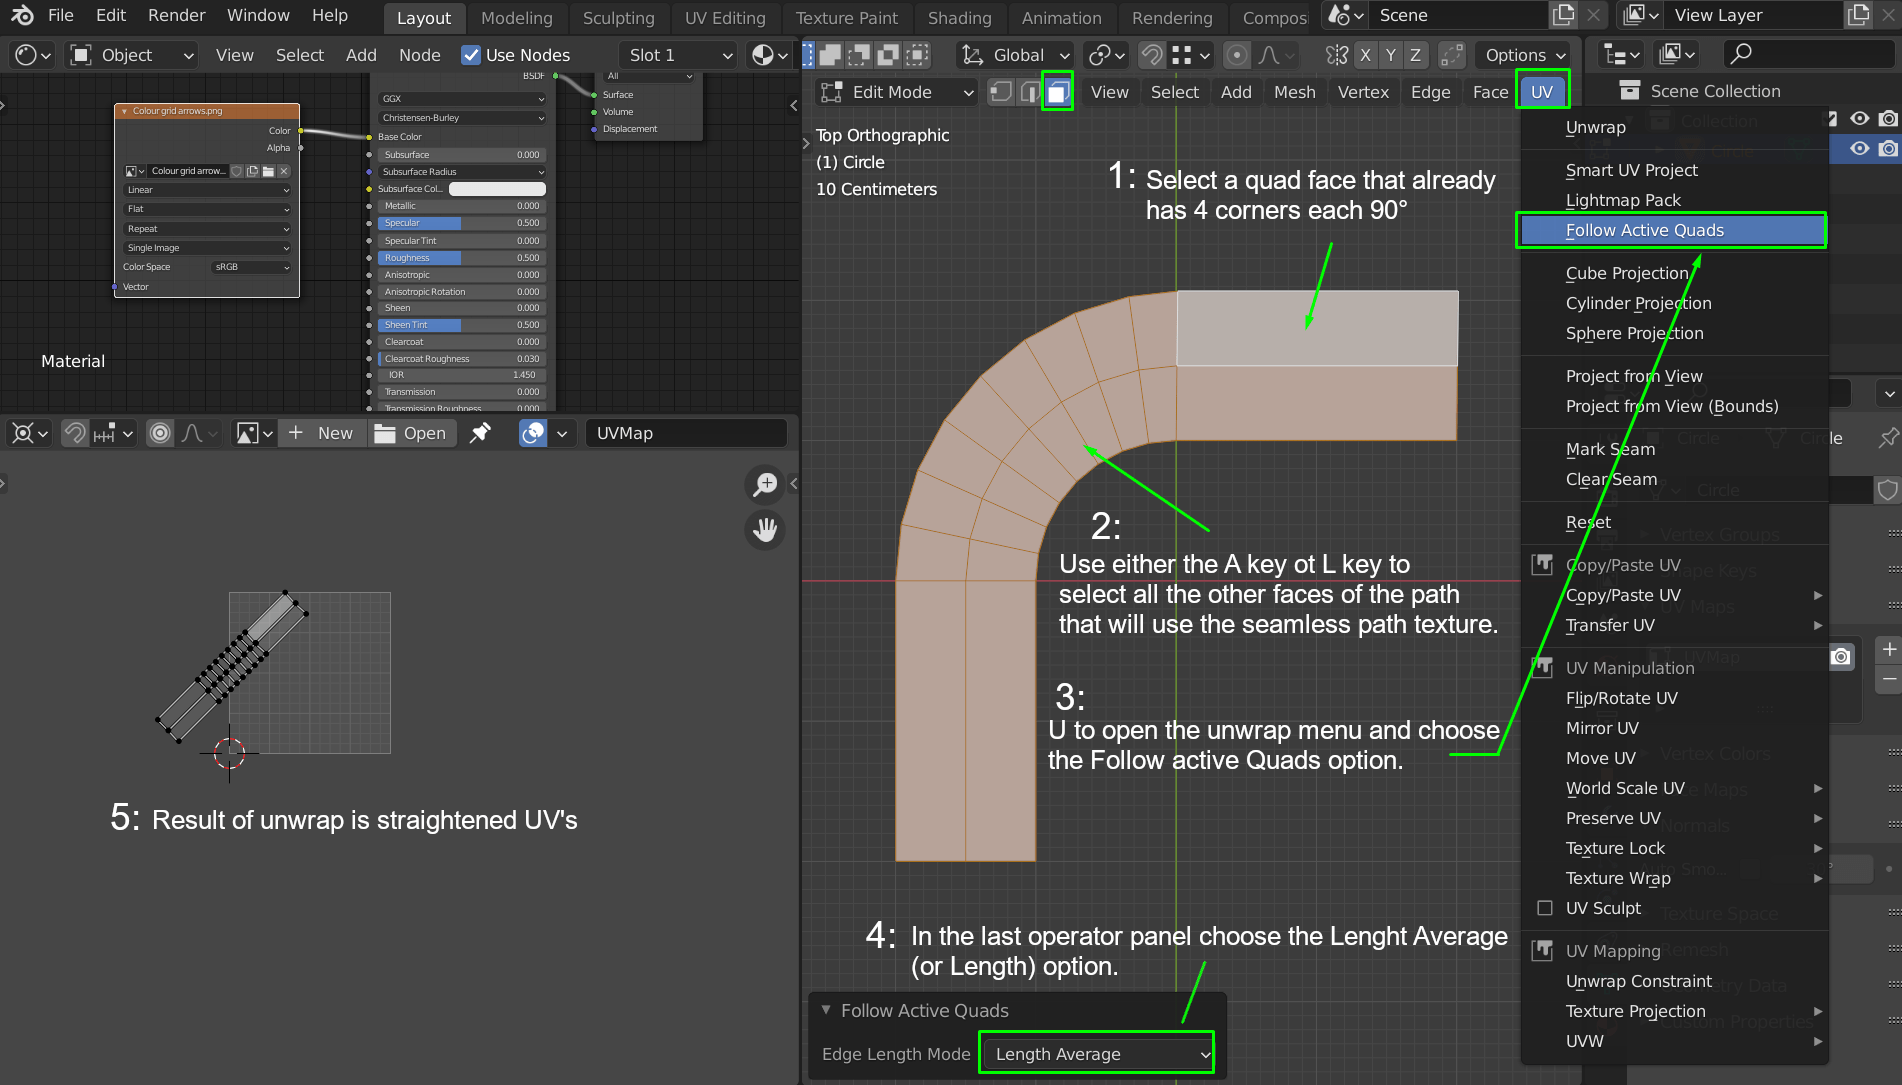
To avoid seams you need to unwrap your path as a single UV island. This UV island will be straightened out, be all quads and lie horizontally in the UV space. The bottom left hand corner of the UV island will be snapped to the UV space X = 0.00 and Y = 0.00. Then the UV island will be scaled along the X axis until the texture looks about correct on the object in the 3D viewport.
1: To Unwrap so that the path's UV's will be all quads in face select mode select a face of the path that is already a quad that has angles of 90° at each corner.
2: Then select the rest of the path that will be using the path texture.
3: Open the UV Unwrap menu and choose the option Follow Active Quads
4: In the last operator panel choose either the Length Average or Length option.
5: The Uv's should unwrap with all UV faces as quads.

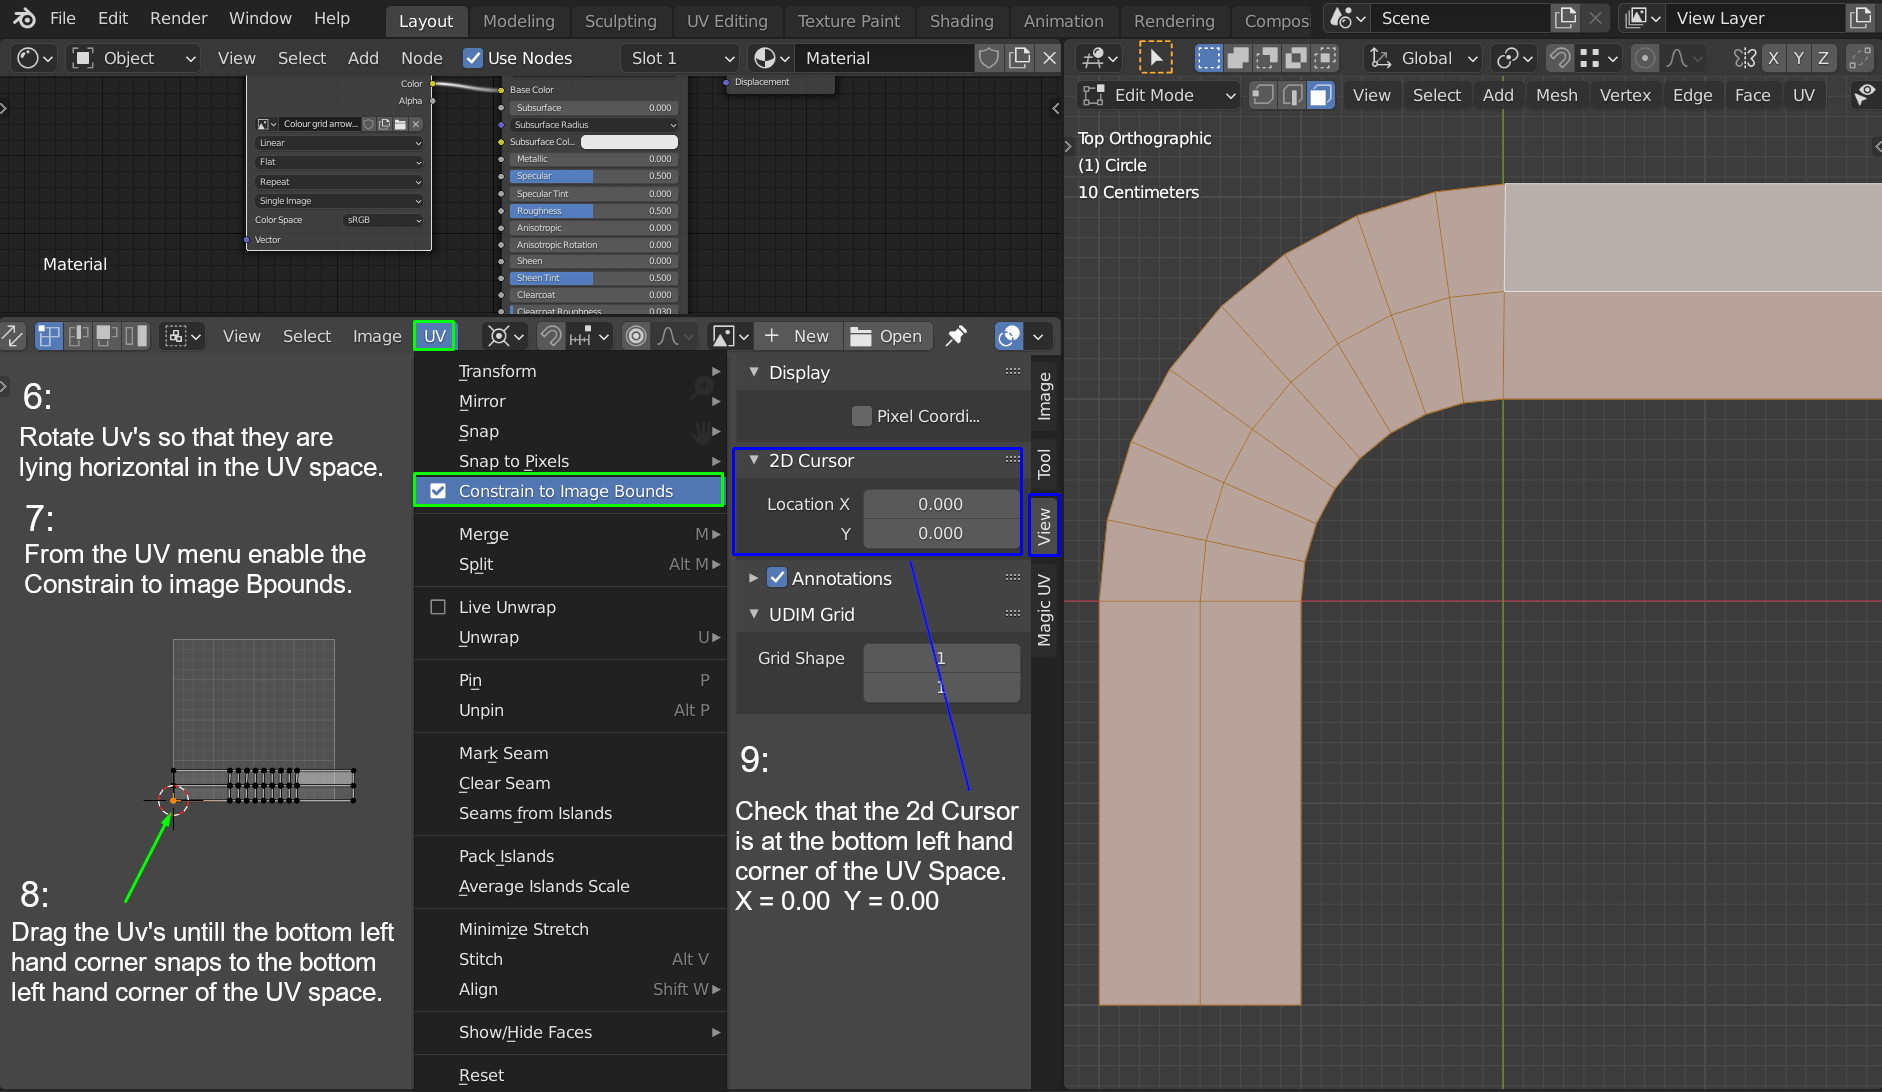
6: In the UV editor select the UV island and (if necessary)rotate it so that it is lying horizontally in the UV space.
7: From the UV menu enable the Constrain to Image Bounds option.
8: Drag the UV island down so that the lower left hand corner of the UV island is "snapped" at the lower left hand corner of the UV space.

9: Check that the 2d cursor is also positioned at X =0.00 and Y = 0.00 in the UV space.
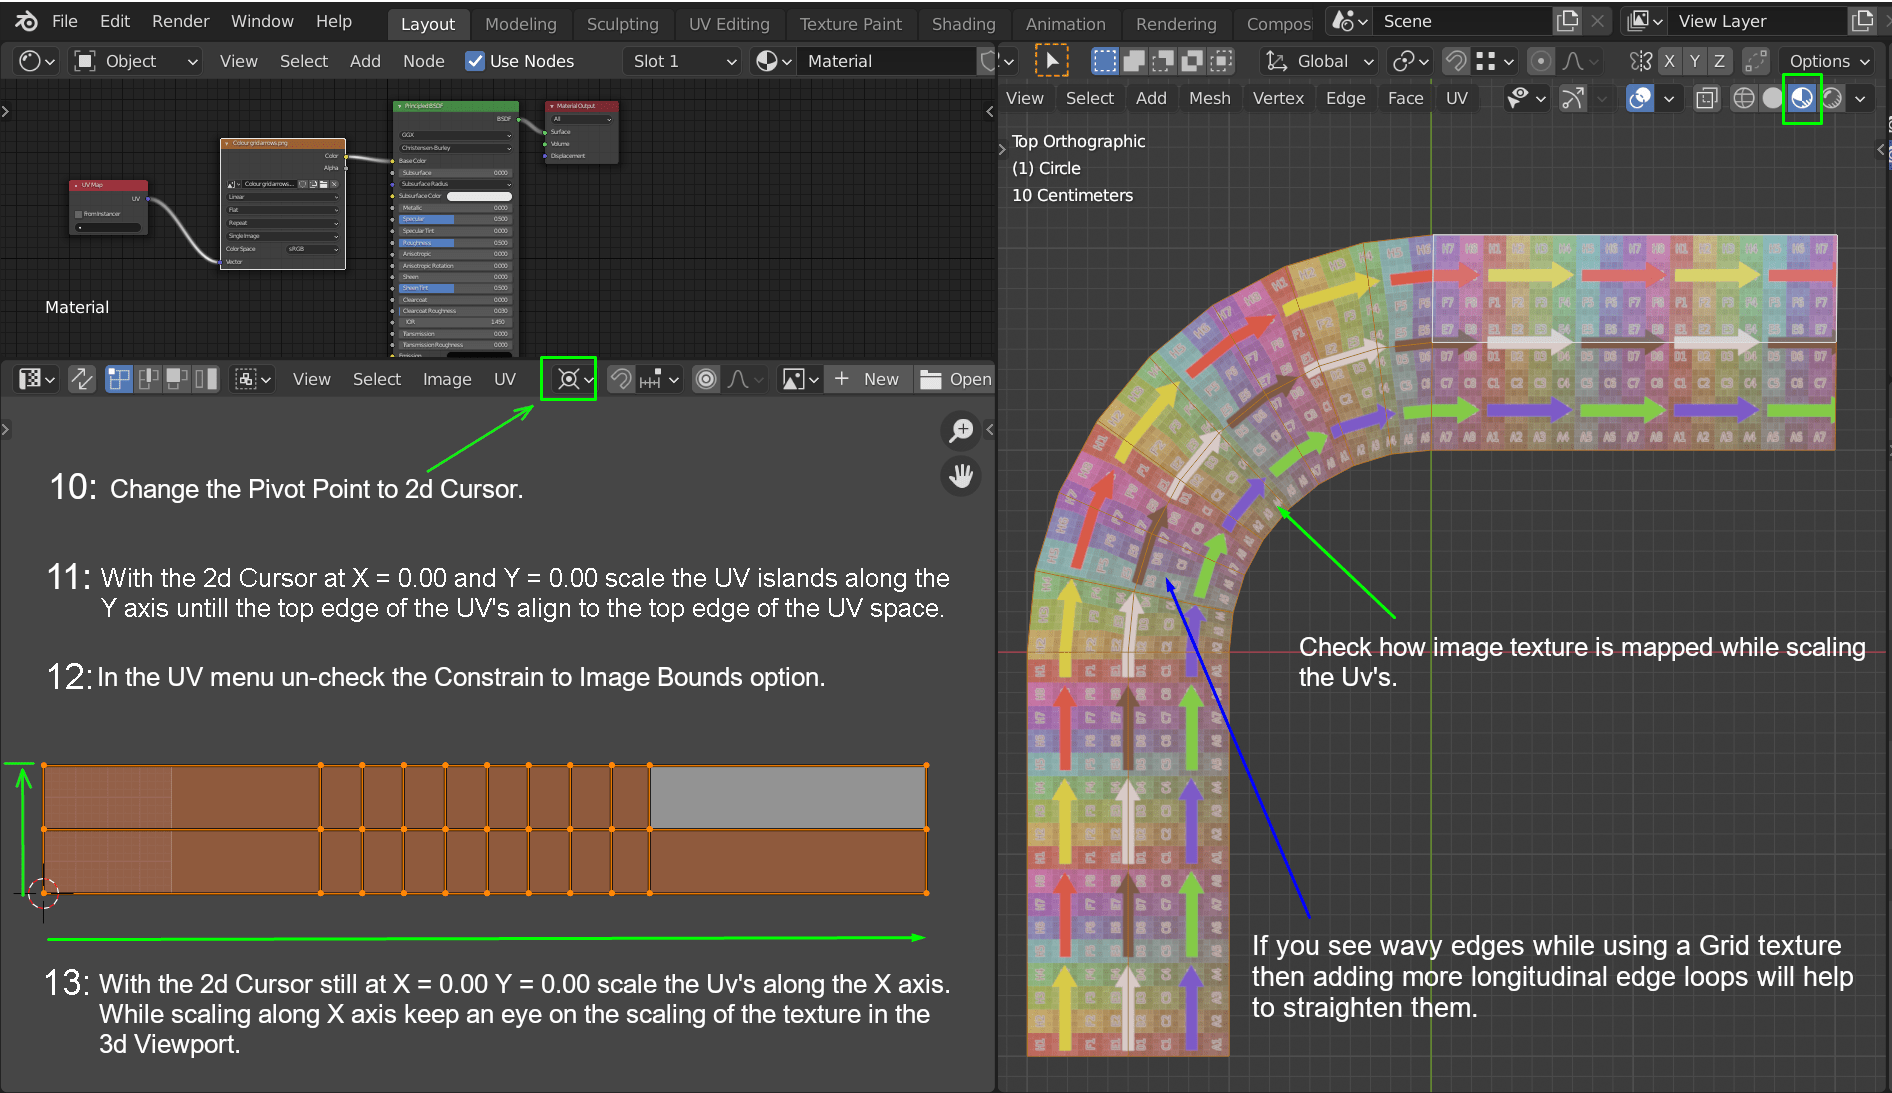
10: Change the Pivot Point to 2d Cursor. This will be used as the origin for the scaling in the next step.
11: Select the UV island and scale it up along the Y axis until the top edge of the UV's align with the top edge of the UV space.
12: Uncheck the Constrains to Image bounds option in the UV menu.
13: Scale the UV's along the X axis so that they extend beyond the UV space until the texture on the object in the 3d viewport looks OK.

If you notice that the texture looks a bit deformed (wavy) where the path bends then adding more longitudinal loop cuts along the length of the path will lixiviate a lot of this deforming.
