1
$\begingroup$

This is a specific issue with this model.

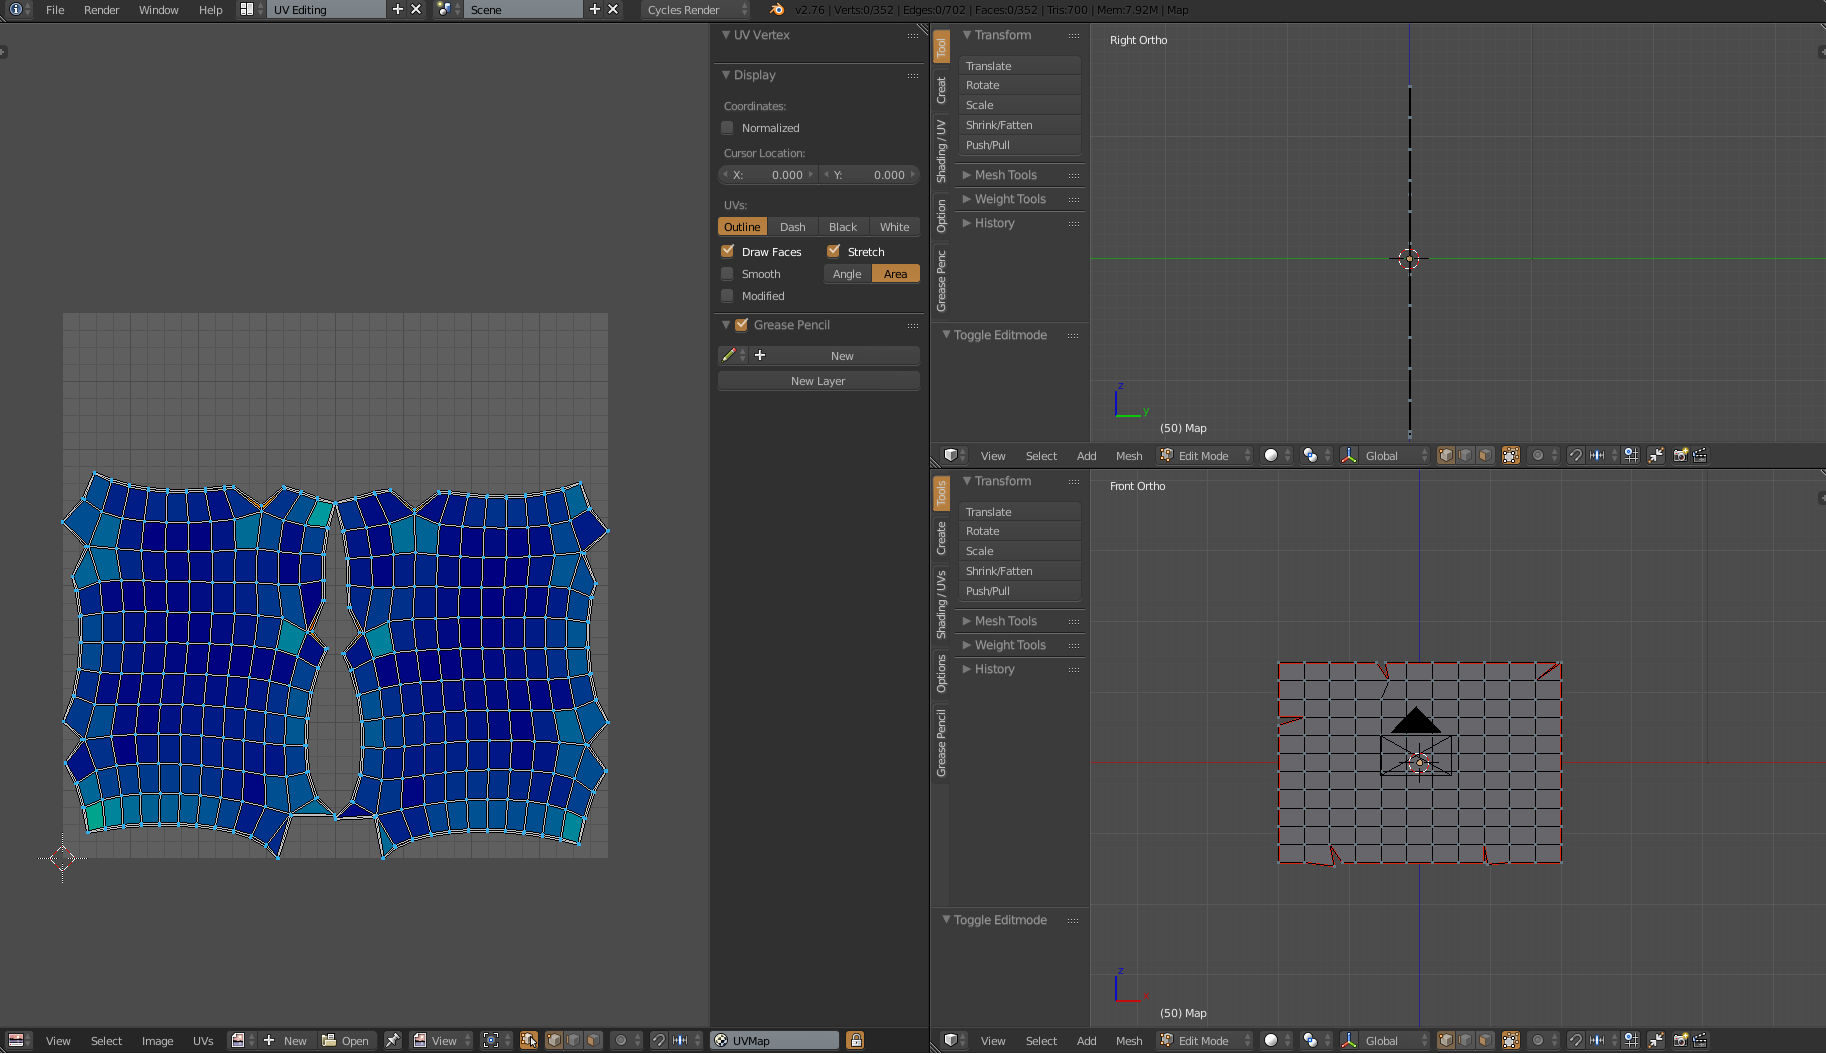
I have tried to UV unwrap it, yet it is not un-wraping neatly at all. The object is a flat map looking rectangle with a few tears in it. Obviously, I want it to unwrap in the straight and rectangular shape it is. I want it to unfold completely flat, not distorted, hinging at the top of the map.

Model Image

Things I have tried:

  • Using smart unwrap. This doesn't get the desired result.
  • Marking the interior loop on the edge except the top as a seam.
  • All the other unwrap options.
$\endgroup$
3
  • $\begingroup$ If the seams are marked on the border of the faces instead of the middle of the slice, it gives a good result. But, do you need to keep the slice UV close to the faces UV ? $\endgroup$
    – lemon
    Commented Aug 11, 2016 at 7:41
  • $\begingroup$ @lemon Hey thanks for commenting. Strange, that makes no sense. Yes, I want to. I want to unwrap the whole thing without distortion, so in this case how I did the seams was to attempt to have two halves, both with the edges unfolded and connected to the appropriate side. The main thing that I want to know in general is why there is so much distortion. I have had this kind of distortion before and had to use smart unwrap, which doesn't work right here. $\endgroup$
    – CAA14
    Commented Aug 11, 2016 at 19:14
  • $\begingroup$ what I proposed will not keep the edges connected automatically. What I wanted to say is to seam at the edges borders (not inside the edges like in your file) $\endgroup$
    – lemon
    Commented Aug 12, 2016 at 5:15

1 Answer 1

1
$\begingroup$

It might take a LITTLE extra work, but why don't you just:

  1. select only the front faces
  2. orient the view so you're looking directly at it -- i.e. View > front (Numpad 1)
  3. From the unwrap options choose "Project from view" (in ortho mode)

This will give you as "flat" an unwrap as possible for just the faces you selected. Then, you can repeat these steps for the remaining five different views (back, left, right, top, bottom). As you do each side, you'll notice that only the UVs for the selected faces will be set -- so after each round, you may have to scale/rotate/translate and put them roughly in the position of the desired final layout. (For example, since you want it to be hinged at the top, when you do the back faces, you'll have to rotate the UVs 180 degrees clockwise and position them above the front faces.)

Once you get the scale and position for each side as close to one another as possible, you can select pairs of UVs (I use "B" so that I can box-select) and "W" to weld them together.

There might be a faster/better way to do it, but that's all I got.

Hope this helps.

$\endgroup$
4
  • $\begingroup$ Thanks, I may have to resort to this. I really want to learn about UV unwrapping something like this completely. In other words, I want to have it connected on by the top vertices and then laid out flat, including the edges. What you suggest would probably work, but like you say I really want to know if there is a better way. $\endgroup$
    – CAA14
    Commented Aug 11, 2016 at 5:03
  • $\begingroup$ @CAA14, alternative as the model seems to be composed of two flat faces : rotate 180° the back face along a border then unwrap (project from view) $\endgroup$
    – lemon
    Commented Aug 11, 2016 at 5:32
  • $\begingroup$ @CAA14 gotcha; well, if you figure out a good way, do update this thread. I also find UV unwrapping to be one of the most painful and tedious aspects of modeling and would love to learn how to do it better. $\endgroup$
    – yoshi
    Commented Aug 11, 2016 at 6:43
  • $\begingroup$ @yoshi Will do. If I get no other better answers I will mark yours, since it technically does work. Thanks again. $\endgroup$
    – CAA14
    Commented Aug 11, 2016 at 19:03

You must log in to answer this question.

Not the answer you're looking for? Browse other questions tagged .