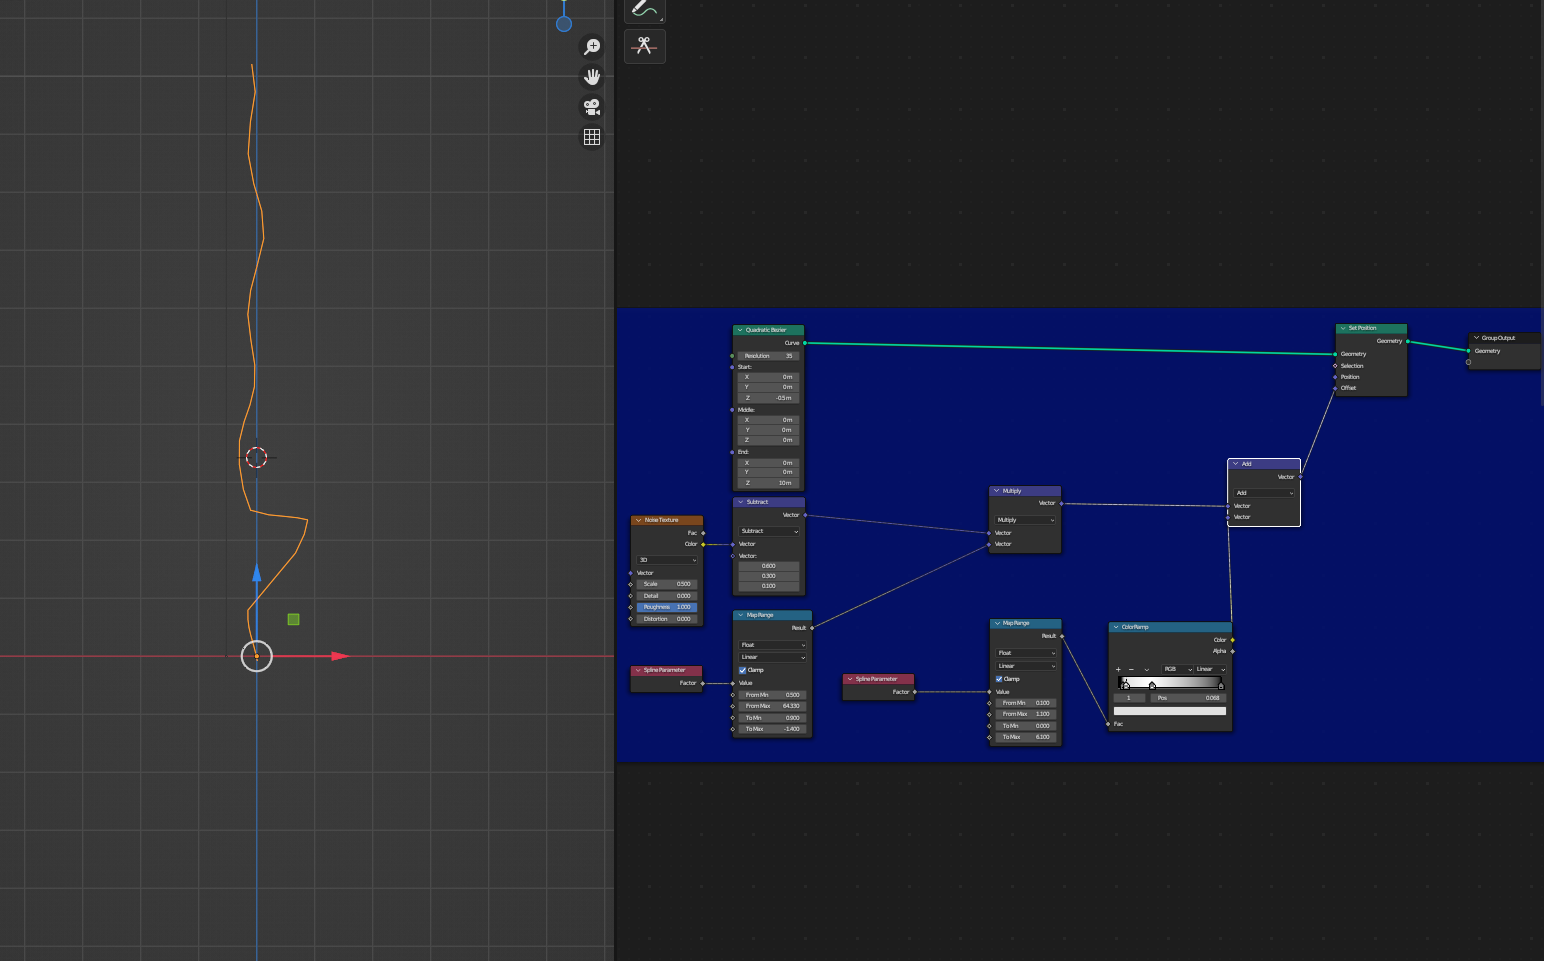
I'm working on creating tree trunks similar to the one in the image. The trunk is made using a Quadratic Bezier Curve and has a noise texture applied to introduce subtle randomness along its entire height. For the base of the trunk, I need an additional noise texture (or a different method) to create a semi-circular curved trunk part, but only in that specific area. I even made a sketch of how I would prefer the curve to look. You can check my nodes to see how I achieved that effect, but I'm looking for suggestions on how to achieve it with more control over the second noise texture. Thanks
-
$\begingroup$ Is there a specific reason why you set the From Max value to such a high value of 64.33? The Spline Parameter > Factor can only output values from 0 to 1, so instead of From Min/Max 0.5/64.33 and To Min/Max 0.9/-1.4 you could have left the From Max at the default 1 and set the To Max to 0.882 instead. For the question: which "second noise texture"? I see only one. Is the curved cyan part supposed to completely replace the first noise or should be additional (i.e. should the curved part be smooth like your sketch or noisy as well)? $\endgroup$– Gordon BrinkmannCommented Jul 31 at 10:32
-
$\begingroup$ Hi @GordonBrinkmann, thanks for helping out again! 1. The reason for such a high value is that I am still not familiar with Geo Nodes, and I applied the method of "what can this number do". Although I am aware that it goes from 0-1, I left it like this without double-checking. Thanks for the tip. 2. I didn't apply a second noise texture; that was something I thought could be a solution, but I am not sure if it would work. 3. The curved cyan part should be smooth like in my sketch, without noise. $\endgroup$– BoxonCommented Jul 31 at 10:42
1 Answer
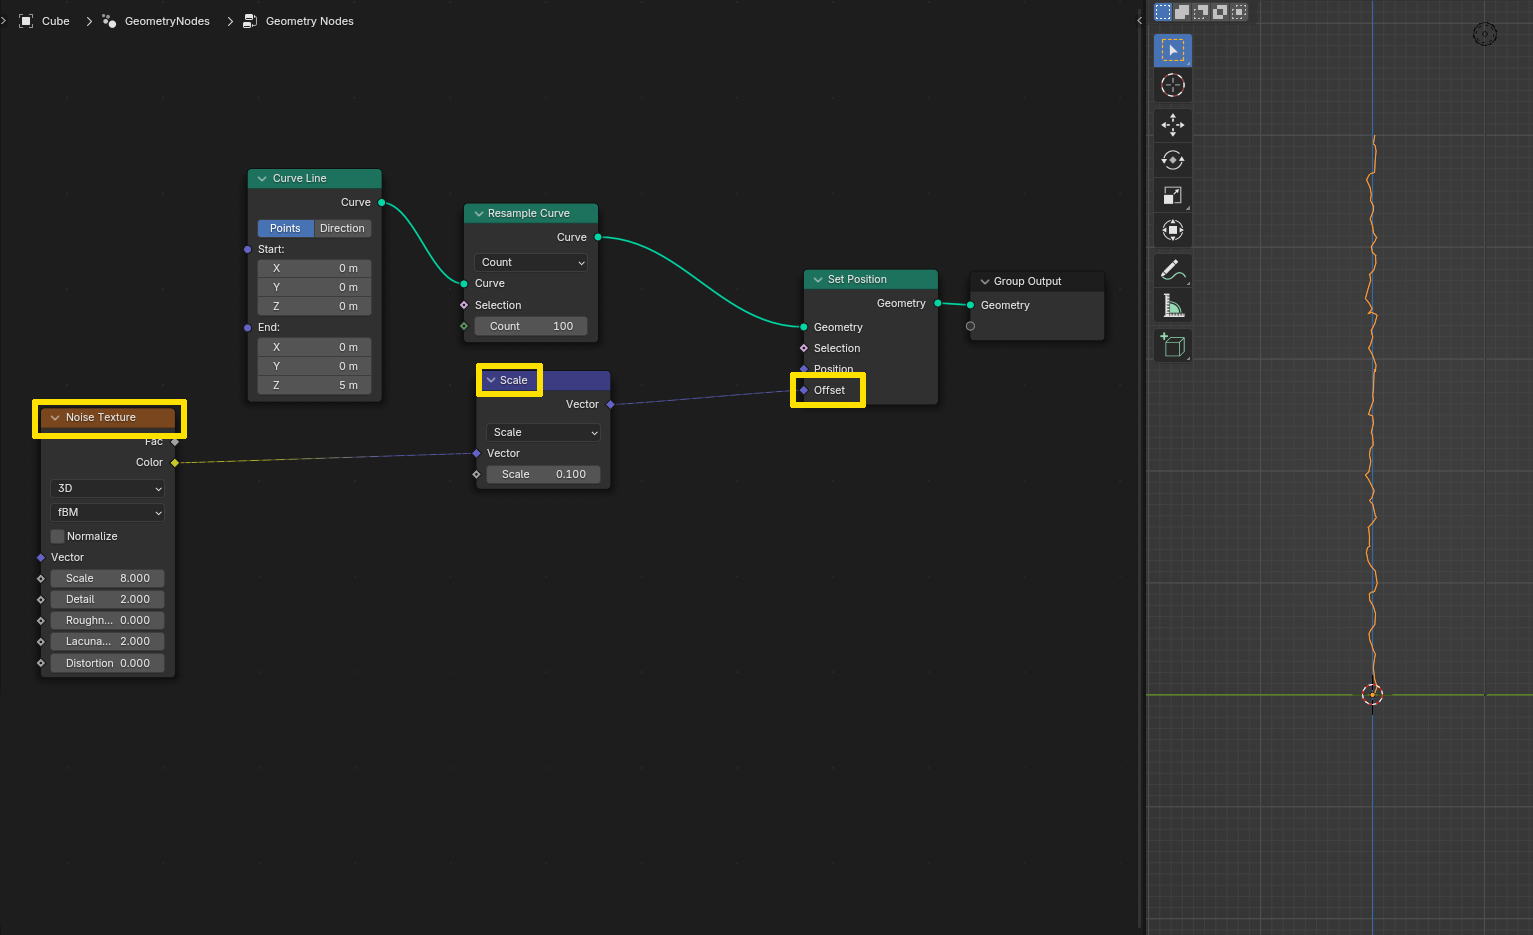
Here is an example how you can achieve the result. First I have a resampled Curve Line where I set the position of the points randomly with a Set Position node by plugging a Noise Texture into the Offset. To decrease the strength of the noise, I added a Vector Math > Scale node inbetween. I did not use a Subtract node to center the noise values by the way, because I disabled Normalize which your node does not have, so I guess you are using an older version of Blender. But for the following method that is not an issue.
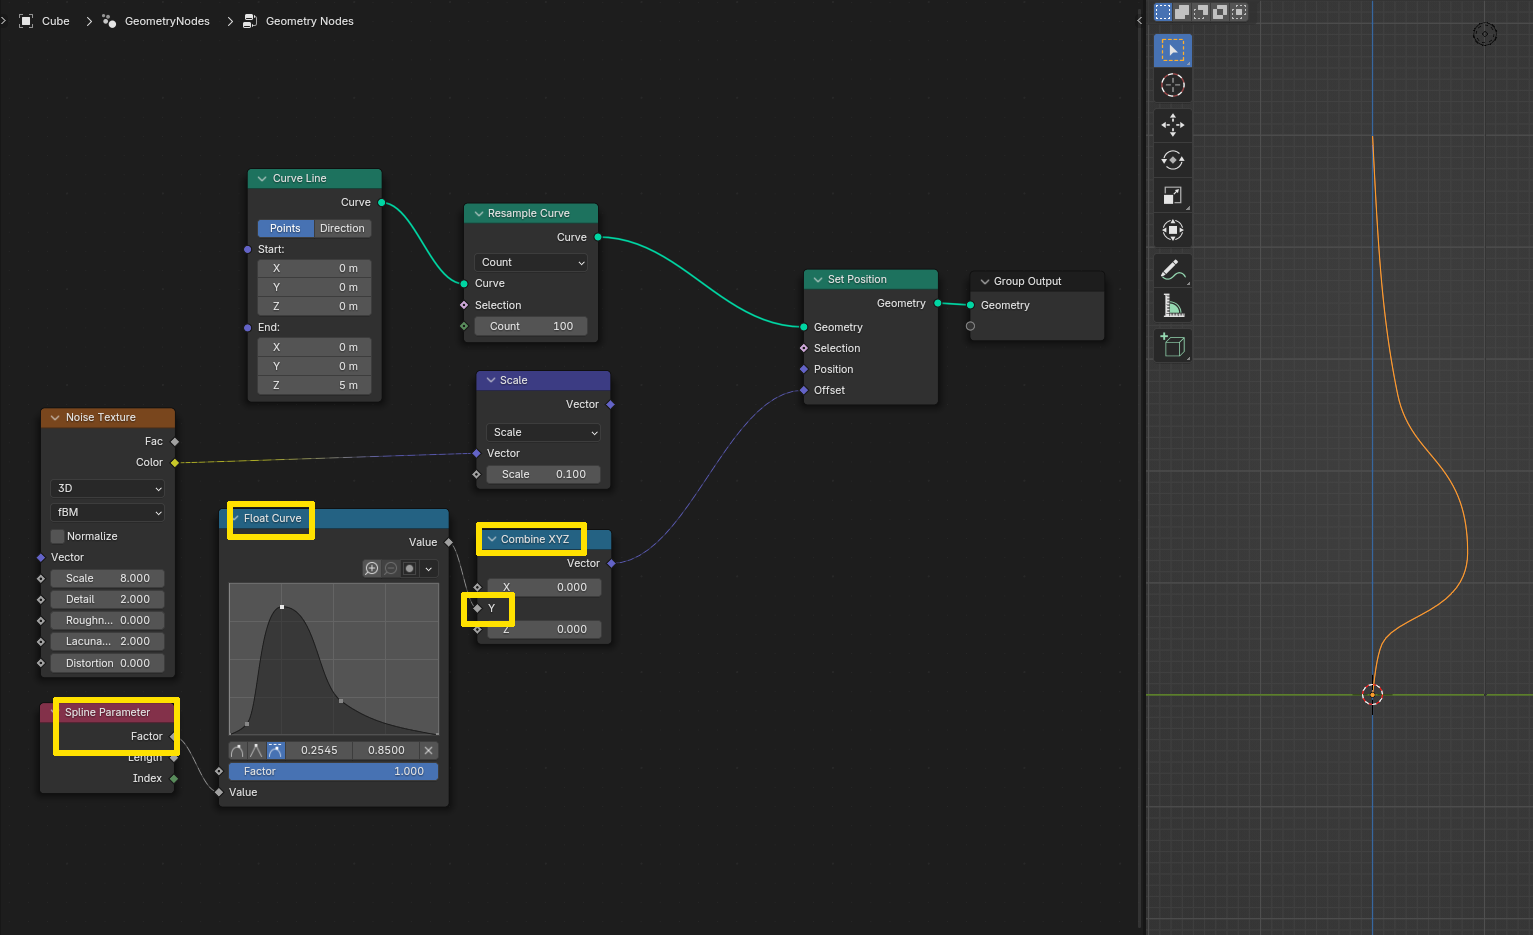
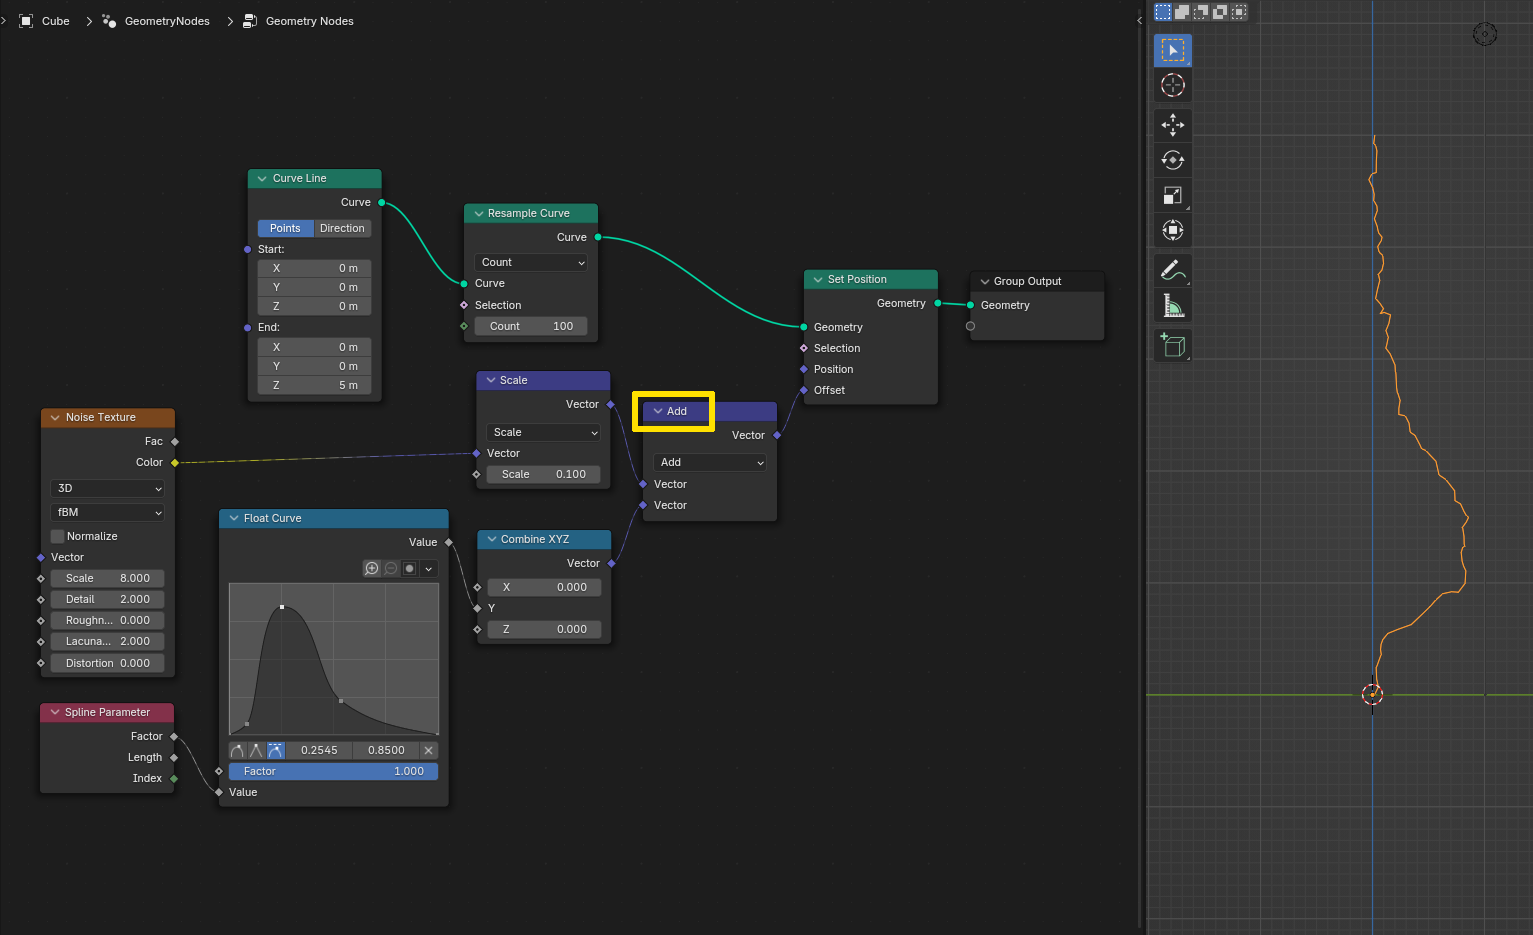
For the second part I use the Spline Parameter > Factor and a Float Curve plugged into the Y input of a Combine XYZ node, to bulge the curve to the right (which is the positive Y direction here). Instead of a Float Curve node you can of course use a Color Ramp as well like you did in your screenshot.
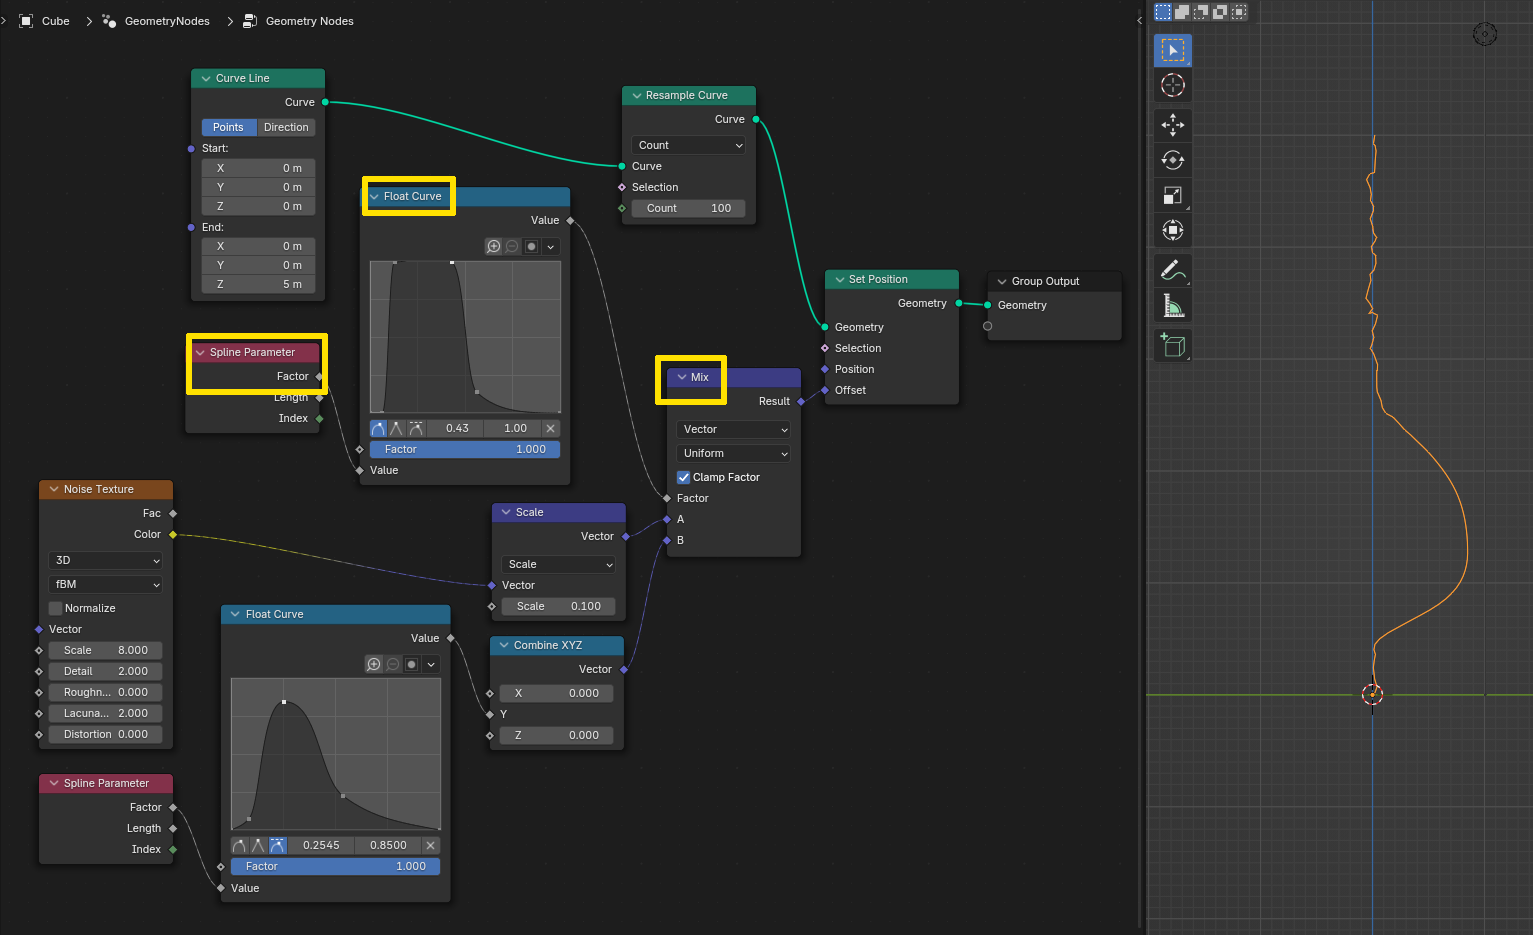
Now I combine them both with a Mix node set to Vector. If your Blender is too old for a Mix node, you can use a Mix Color node instead since the color inputs can handle 3-dimensional vectors as well. Again I'm using the Spline Parameter > Factor as base for mixing the two "noises", again with a Float Curve. Where the float curve is set to 0, only the first input (noise) will be applied to the spline, where it is 1 the second (smooth bulge) is applied. The float curve inbetween makes the transitions from noisy to smooth and vice versa. Of course here you can use a Color Ramp again, especially if you maybe want to create harsh transitions from noisy to smooth by setting the Color Ramp interpolation mode to Constant for example.
By the way, if you wanted the bulge to be noisy as well you could simply add them both together:
-
$\begingroup$ Wow, I am impressed! Thank you so much, you really helped me! $\endgroup$– BoxonCommented Jul 31 at 13:25
-
$\begingroup$ @Boxon No need to thank me, but if this helped you it would be good to accept the answer, so that others know there is a solution to this question. See: blender.stackexchange.com/help/someone-answers $\endgroup$ Commented Jul 31 at 14:33

