1
$\begingroup$

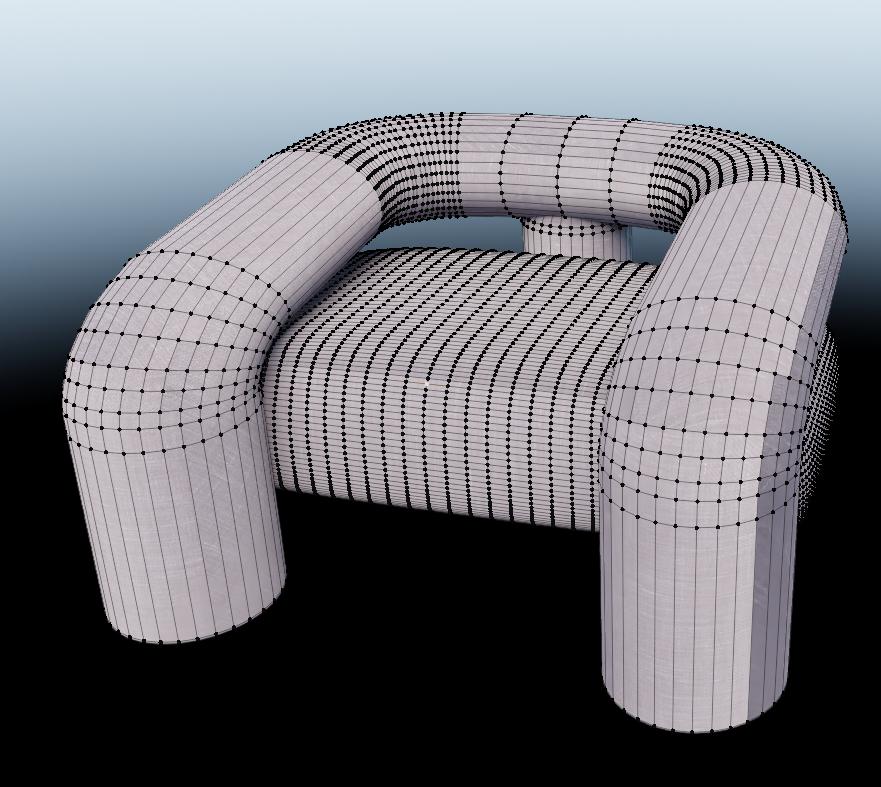
I have made a chair where I made the first 1/2 of it and the copied and mirrored the other side to make it equal. I then joined the pieces together and closed the shape using bridge edge loops.

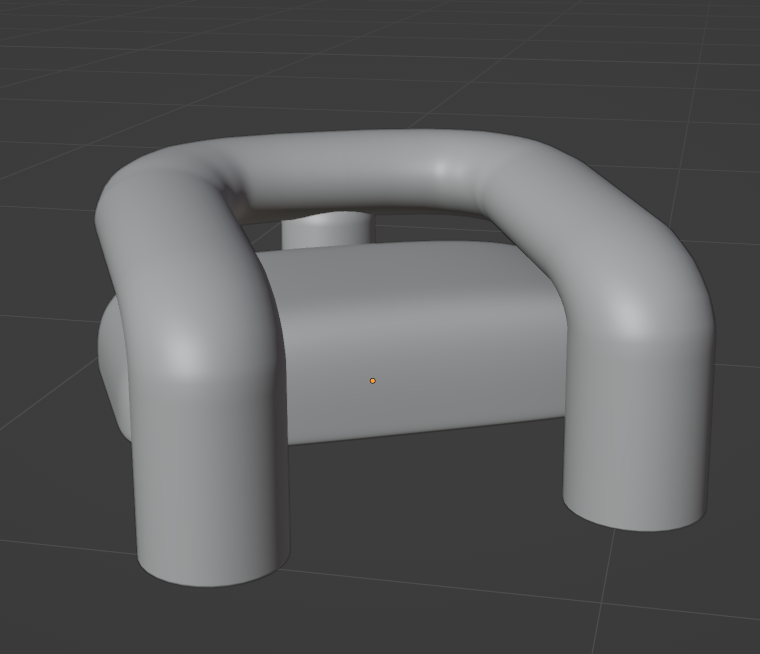
When looking at the object you can still see a crease where the center of the object is. enter image description here
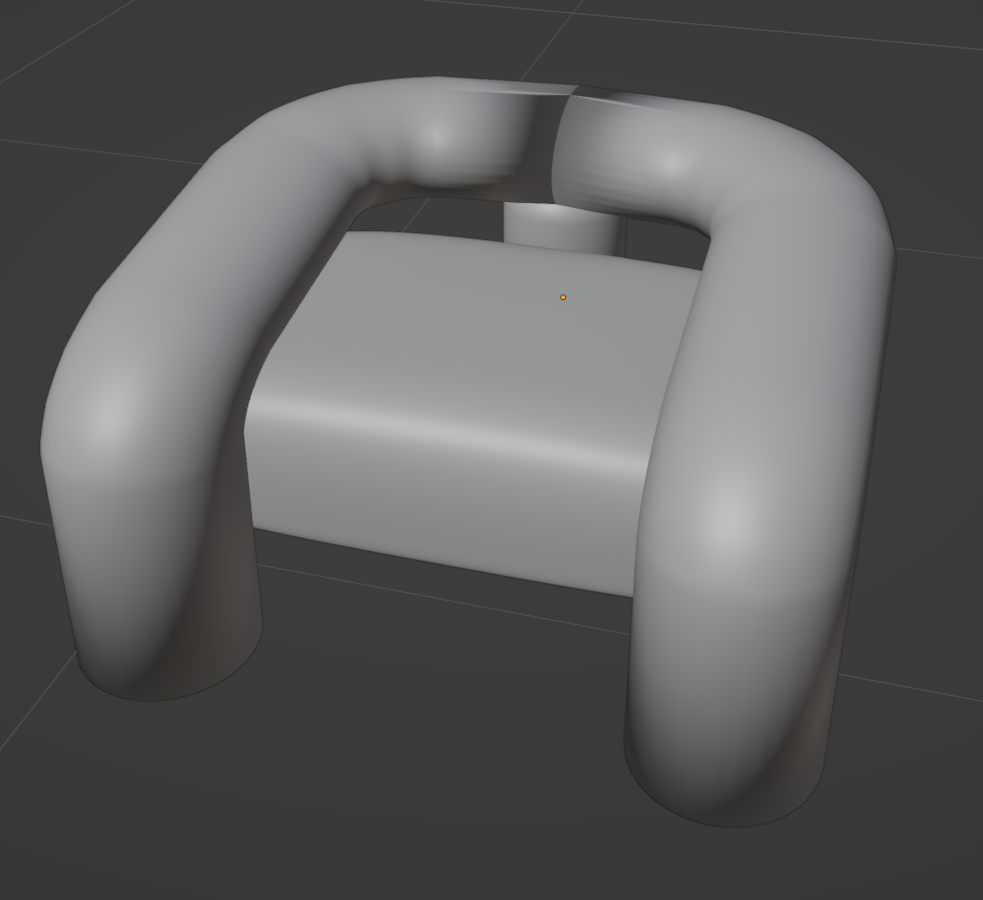
When going into the shading tool this becomes even worse. I have unwrapped it using smart UV project. enter image description here
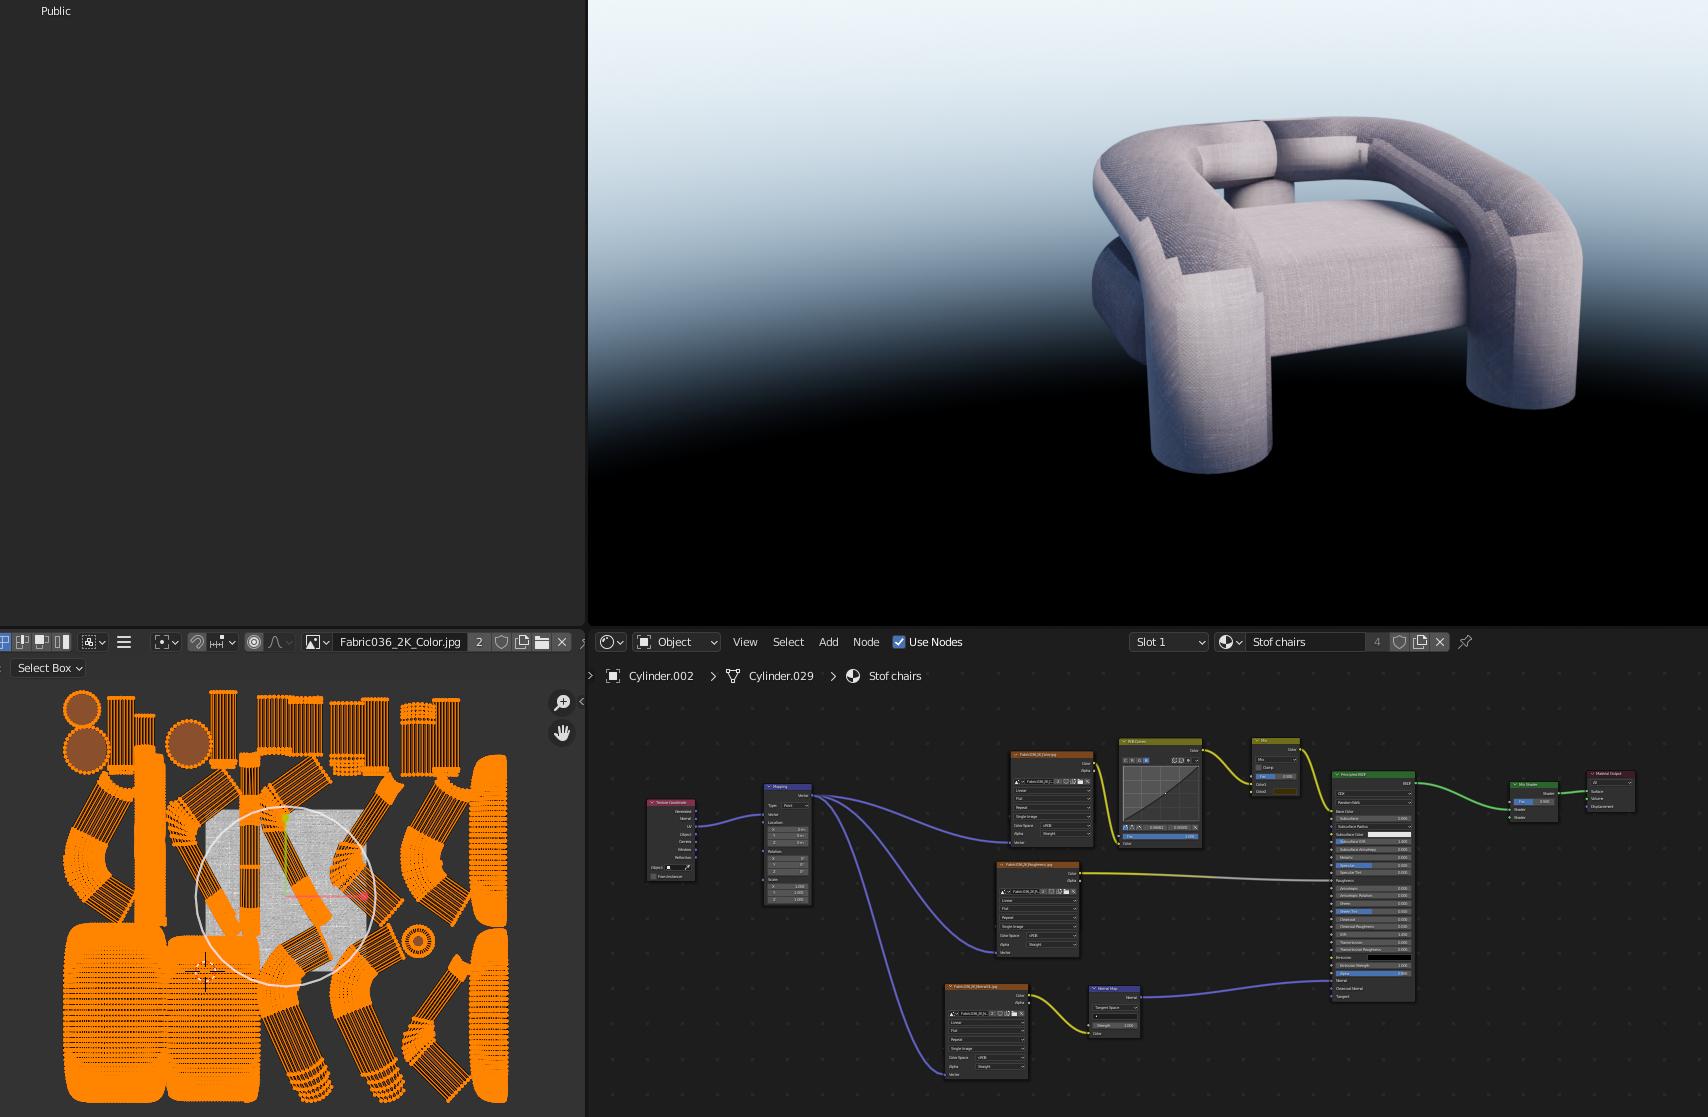
I have also merged the chair in another way which fixed the problem in solid mode enter image description here
But when going to the shading I can still see similar errors on the textures. enter image description here
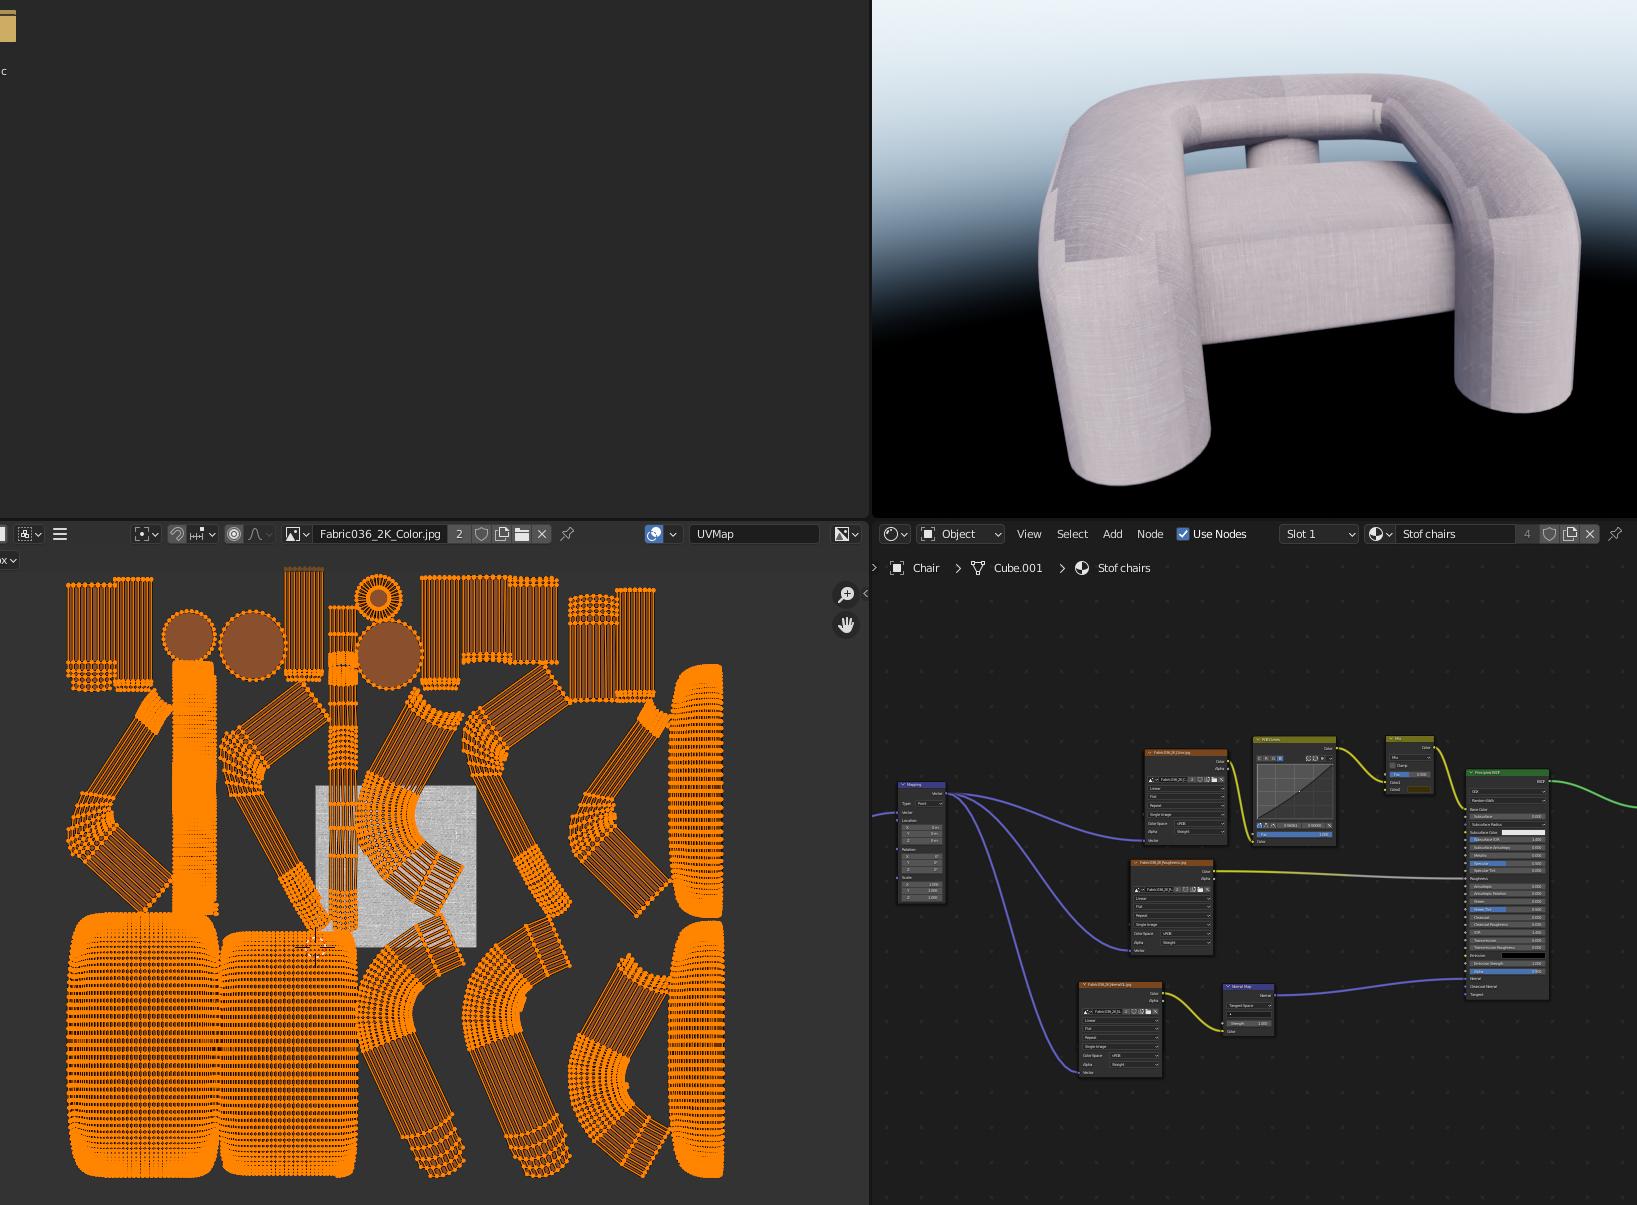
enter image description here

The chair has scale applied to it. What could be the issue? And how could I resolve it?

$\endgroup$
4
  • $\begingroup$ Hello, what does it give if you switch the normal Image Texture node from sRGB to Non-Color? Or please pack the images and share your file? $\endgroup$
    – moonboots
    Commented Apr 17, 2023 at 10:00
  • $\begingroup$ How did you "copy and mirror the other side" ? Did you use a mirror modifier and if so have you deleted any internal face there may be between the halves of the mirror? We'll need to see your Blend file to see exactly what's going on. You can share it via blend-exchange.com following the instructions there. $\endgroup$
    – John Eason
    Commented Apr 17, 2023 at 10:00
  • $\begingroup$ The solution from @moonboots worked, the chair now looks correct with the textures. Thank you for your help! $\endgroup$
    – Marnie
    Commented Apr 17, 2023 at 10:03
  • $\begingroup$ for your first question, there's probably a problem in your topology, like an inner face or overlapping vertices, but hard to say without the object $\endgroup$
    – moonboots
    Commented Apr 17, 2023 at 10:27

2 Answers 2

0
$\begingroup$

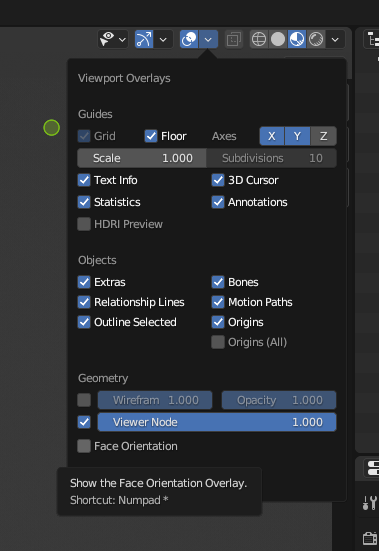
This is most probably a normal issue, make sure your normals are all facing the correct way! You can check them this way:

enter image description here

All of your outward facing normals should appear blue. If you notice some faces are red while others are blue you can reset this by simply selecting all the faces in edit mode and hitting alt + n and hitting recalculate outside.

When it comes to the actual UV of the chair, I suggest you lessen your poly count significantly as this will make manouevering the UV layout much easier. You don't need all of those polys as is. You can always subdivide the result after using a subdivide modifier!

Ideally to UV correctly you should place seams where you would expect the chair to have seams in real life! Think about it, nothing made of fabric will have no seams at all. Once you've decided on your seams and marked the edges (Select edges -> right click -> mark as seam) make sure all transforms are applied and just hit a normal unwrap! This should make the UVs much cleaner!

A quicker fix to the issue if you don't want to go through the full UV unwrapping procedure, I find the Cube project generally works a lot better than the Smart UV Unwrap as it doesn't create small islands

Let me know if this helps :)

$\endgroup$
0
$\begingroup$

Switch the normal Image Texture node from sRGB to Non-Color

$\endgroup$

You must log in to answer this question.

Not the answer you're looking for? Browse other questions tagged .