0
$\begingroup$

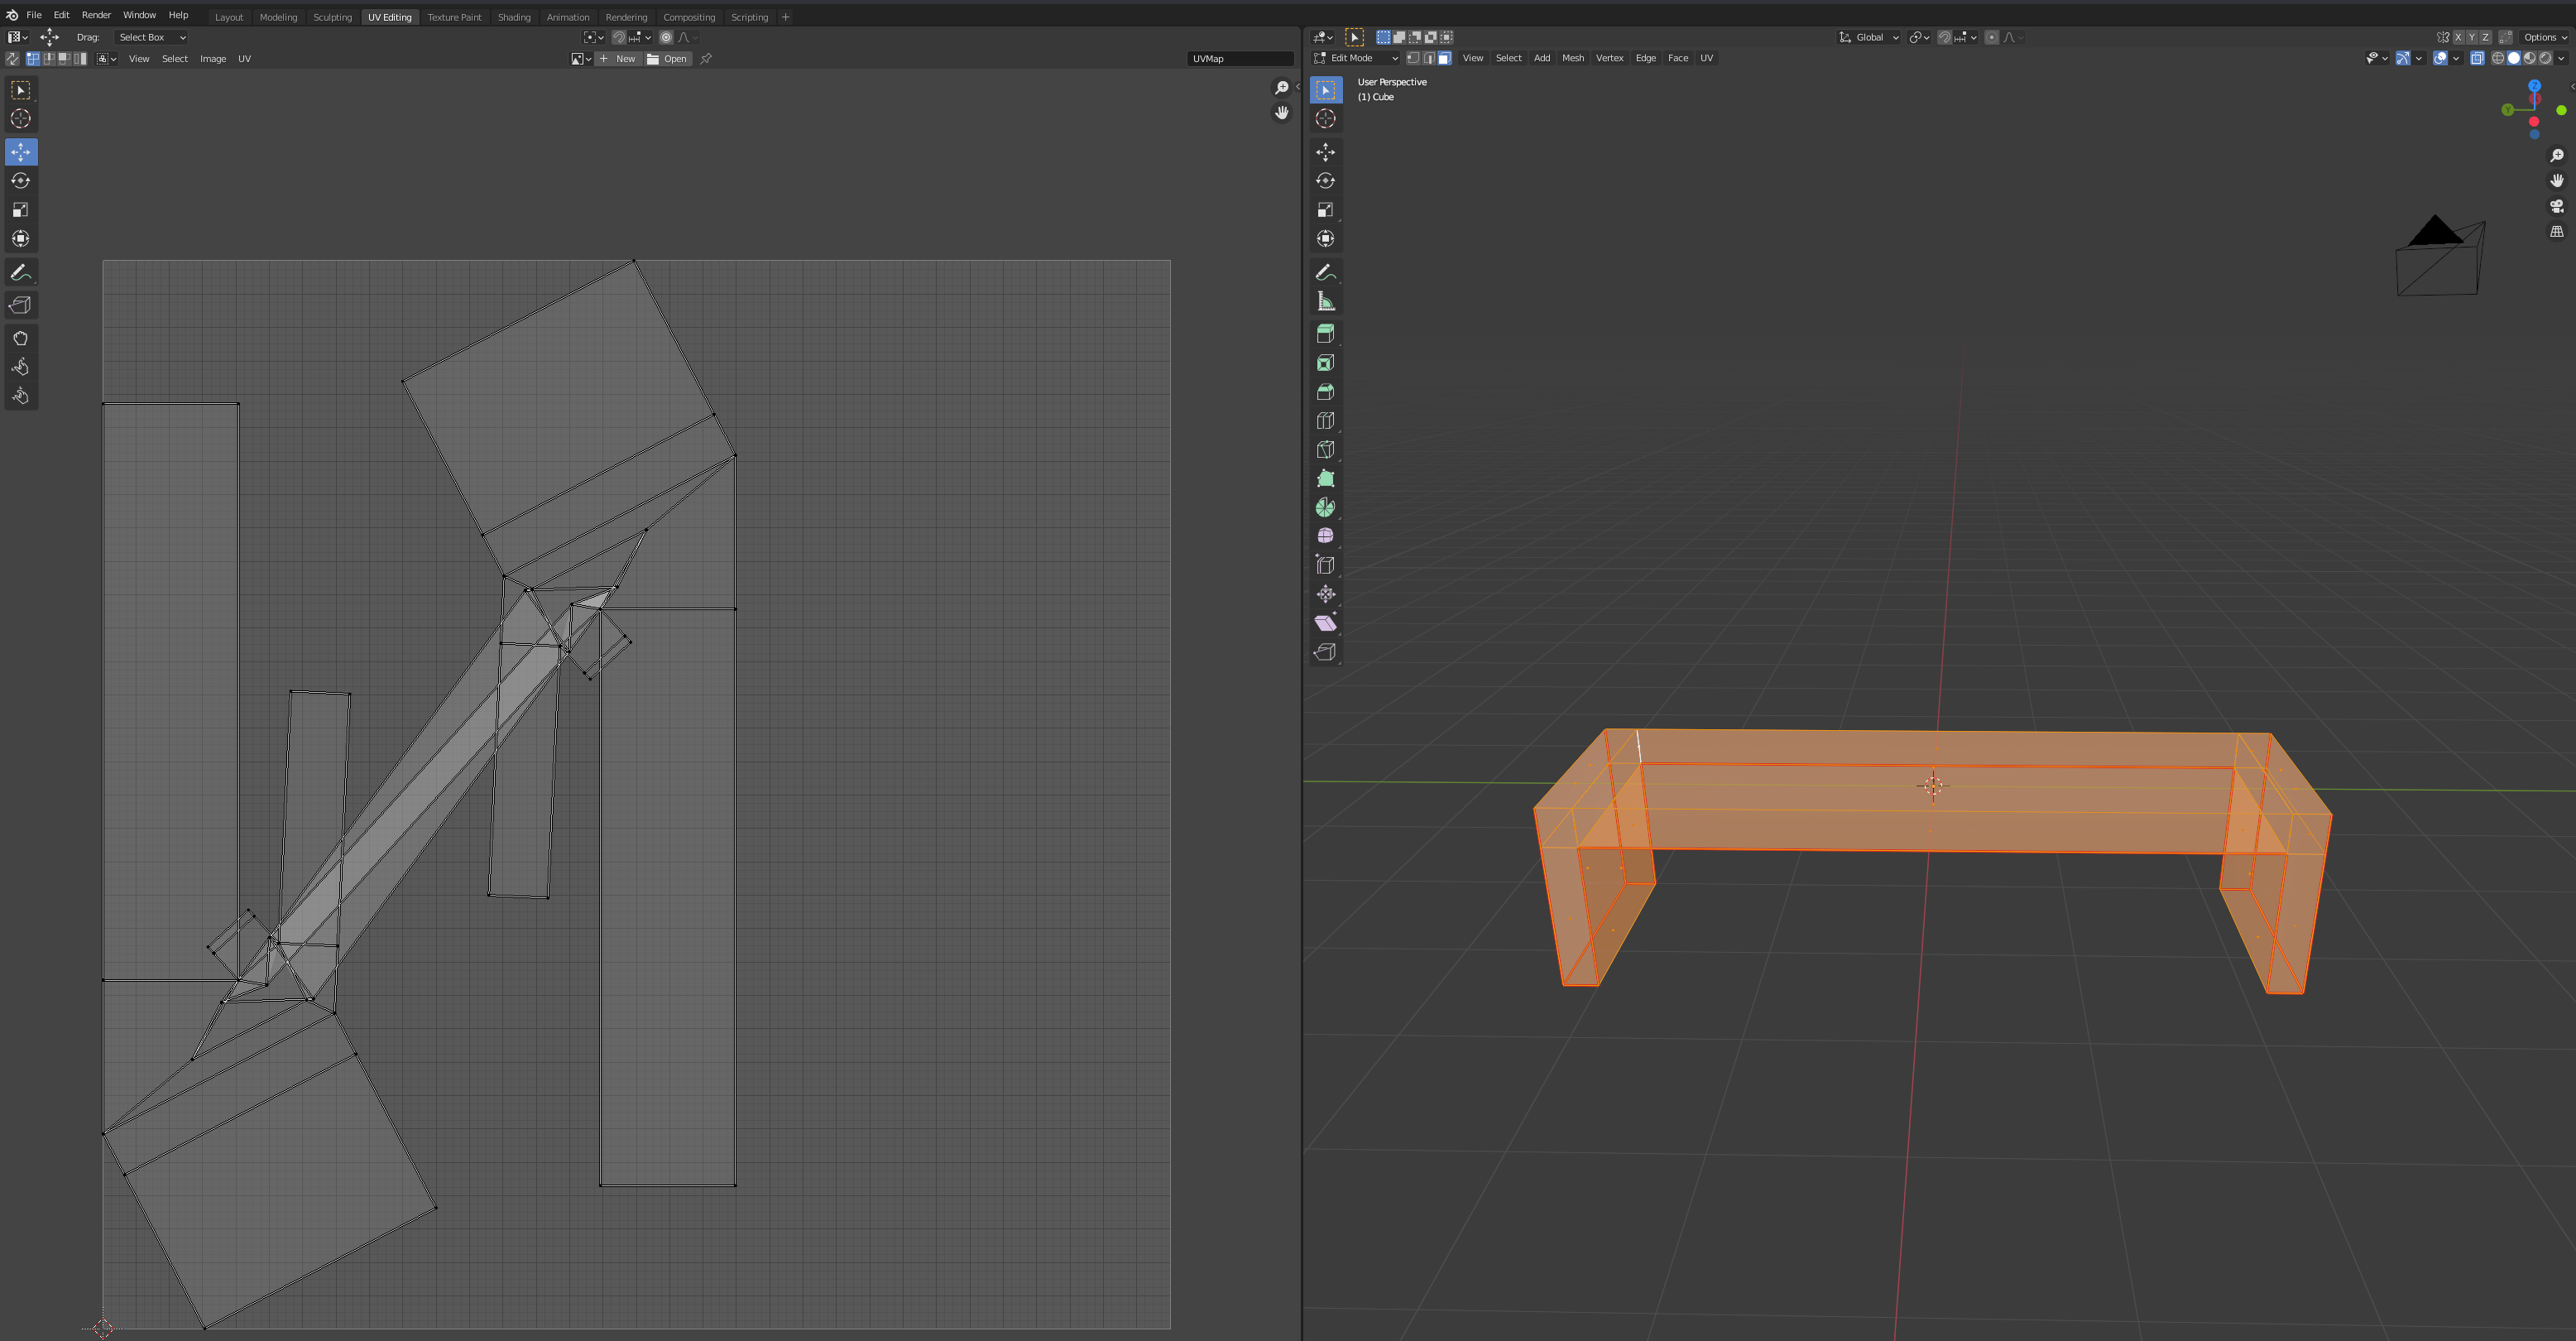
I'm following a small tutorial that includes UV unwrapping. It's for a very simple object that's supposed to represent a bench. The object itself is made by taking a cube, scaling in Edit mode and then extruding the ends to create the legs of bench. When I mark seams and unwrap it, I get a pretty insane, for lack of a better word, result (see image). The most common solution to this that I've found is switching from Angle based to Conformal method of unwrapping, but it does close to nothing. It does change the unwrapped map a bit, but it still very closely resembles the one that I get from using Angle based UW.

skewed result of UV unwrapping

I've tried changing up how the model is divided by seams and I do get some slightly improved results, but I haven't managed to get to a point where at least part of it isn't skewed.

Anyone have any ideas? I'm completely stumped at this point.

Thanks in advance!

$\endgroup$

2 Answers 2

1
$\begingroup$

I suspect your seams are not disconnecting the two sections - possibly you have duplicated geometry. In Edit mode, select all vertices and do a Merge By Distance to ensure you haven’t got overlapping geometry (possibly the result of a cancelled Extrude operation) then check your seams again and re-unwrap.

$\endgroup$
3
  • $\begingroup$ Thanks for the answer! Turns out I was just missing a couple of seams, as per XY's answer. Still, this will come in handy for the future. $\endgroup$ Commented Nov 15, 2020 at 14:24
  • $\begingroup$ The seams you have marked in your image should work fine - I tried it and got a successful unwrap - so I don’t know what went wrong there. At least you’ve got it sorted out now. $\endgroup$ Commented Nov 15, 2020 at 14:31
  • $\begingroup$ Ah, OK, yeah, you're right. Gonna change the accepted answer because this seems more relevant to me and the resulting map more accurately fits the one from the tutorial. Thanks a lot! $\endgroup$ Commented Nov 15, 2020 at 15:16
1
$\begingroup$

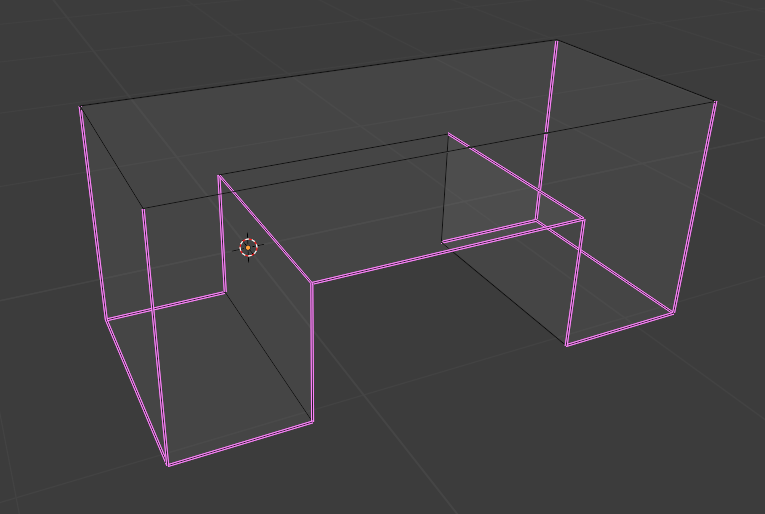
enter image description here

you should mark that seam. or just go edit mode to select all, UV > Cube projection or UV > smart UV project

$\endgroup$
1
  • $\begingroup$ Yeah, this was the answer. Thanks! I tried a bunch of different seam combinations, but somehow missed it. Feel really silly right now, but this is the first time I'm doing unwrapping $\endgroup$ Commented Nov 15, 2020 at 14:22

You must log in to answer this question.

Not the answer you're looking for? Browse other questions tagged .