I am using Blender 2.82a and am trying to pin cloth vertices only at a specific set of frames.
The broader context is to simulate actions on a cloth, where each action is parameterized by a cloth and a set of vertex indices. What I hope to do is something like this:
- Frames 0-49: let cloth settle.
- Frames 50-99, apply action by pinning vertices on frame 50, moving them with armatures, then releasing the vertices.
- Frames 100-149: let cloth settle.
- Frames 150-199: apply another action (using the same pinning+armature technique). This may require a pinned group to be created on the fly here, because the prior action might have changed the cloth state.
- Rinse and repeat, to get a sequence of actions and "simulator updates."
Obviously these frame counts are not precise and would be tuned accordingly. [However, this may be complex, so my focus is simply on pinning vertices for a specific set of frames.]
Here is my minimal working example. Some is boilerplate to get a video that makes sense, the interesting stuff is in action:
import bpy
import numpy as np
from mathutils import Vector
DEG_TO_RAD = np.pi / 180.

def _to_rad(data):
    return (DEG_TO_RAD * data[0], DEG_TO_RAD * data[1], DEG_TO_RAD * data[2])

def clear_scene():
    for block in bpy.data.meshes:
        if block.users == 0:
            bpy.data.meshes.remove(block)
    bpy.ops.object.mode_set(mode='OBJECT')
    bpy.ops.object.select_all(action='SELECT')
    bpy.ops.object.delete()

def add_camera_light():
    bpy.ops.object.camera_add(
        location=(0.0, -3.5, 2.2),
        rotation=_to_rad((60.8, 0.0, 0.0)),
    )
    bpy.context.scene.camera = bpy.context.object
    bpy.ops.object.light_add(
        type='SUN',
        radius=1,
        location=(33.2, -23.6, 17.4),
        rotation=_to_rad((208, 140, 181)),
    )
    bpy.data.worlds["World"].node_tree.nodes["Background"].inputs[0].default_value = (1, 1, 1, 1)

def make_plane():
    """Underlying plane. Use collision so that it can support cloth on top."""
    bpy.ops.mesh.primitive_plane_add(location=(0, 0, 0))
    bpy.ops.transform.resize(value=(6.0, 6.0, 6.0))
    bpy.ops.object.modifier_add(type='COLLISION')

def make_cloth():
    """Make a plane at height 0.2m (it then settles on the plane) and sub-divide."""
    bpy.ops.mesh.primitive_plane_add(location=(0, 0, 0.2))
    bpy.ops.object.editmode_toggle()
    bpy.ops.mesh.subdivide(number_cuts=20)
    bpy.ops.object.editmode_toggle()
    bpy.ops.object.modifier_add(type='CLOTH')

    # Colors
    mat = bpy.data.materials.new(name="CustomColor")
    mat.use_nodes = False
    mat.diffuse_color = (0,1,0,0)
    bpy.context.object.data.materials.append(mat)

    return bpy.context.object

def action(cloth, vertex_idxs):
    """Apply an action: pick up cloth at these vertex indices.

    We add an armature and make it the parent of a pinned vertex group. Parent set:
    https://docs.blender.org/api/current/bpy.ops.object.html#bpy.ops.object.parent_set
    """
    bpy.ops.object.armature_add(enter_editmode=False, location=(0, 0, 0))

    # Select the cloth _in_addition_ to the armature. The active one is the parent.
    arm = bpy.context.object
    cloth.select_set(True)
    bpy.context.view_layer.objects.active = arm
    bpy.ops.object.parent_set(type='ARMATURE_NAME')

    # Next, go back to the cloth, and pin the designated vertices.
    bpy.ops.object.select_all(action='DESELECT')
    bpy.context.view_layer.objects.active = cloth
    gripped_group = bpy.context.object.vertex_groups.new(name='Pinned')
    gripped_group.add(vertex_idxs, 1.0, 'ADD')
    cloth.modifiers["Cloth"].settings.vertex_group_mass = 'Pinned'

    # The arm modifier must be at the TOP of the modifier stack (over cloth)!
    for _ in range(2):
        bpy.ops.object.modifier_move_up(modifier="Armature")

    # Pinned set for the armature. Note: the arm's default name is 'Bone'.
    b_group = bpy.context.object.vertex_groups["Bone"]
    b_group.add(vertex_idxs, 1.0, 'ADD')

    # Now animate by assigning the arm to different positions at certain keyframes.
    bpy.context.view_layer.objects.active = arm
    bpy.ops.object.posemode_toggle()
    frames = [0, 50, 100]

    # Two keyframes at the same spot for no application of armature movement.
    for b in arm.pose.bones:
        b.keyframe_insert("location", frame=frames[0])
        b.keyframe_insert("location", frame=frames[1])
    c = arm.pose.bones["Bone"]
    c.location += Vector((0, 0.25, 0))
    for b in arm.pose.bones:
        b.keyframe_insert("location", frame=frames[2])

if __name__ == '__main__':
    clear_scene()
    add_camera_light()
    make_plane()
    cloth = make_cloth()
    bpy.context.scene.render.resolution_x = 720
    bpy.context.scene.render.resolution_y = 480

    # Normally we'd get vertex_idxs automatically by selecting an image pixel and
    # converting to indices. But for instructional purposes, hard-code one index.
    vertex_idxs = [0]
    action(cloth, vertex_idxs)
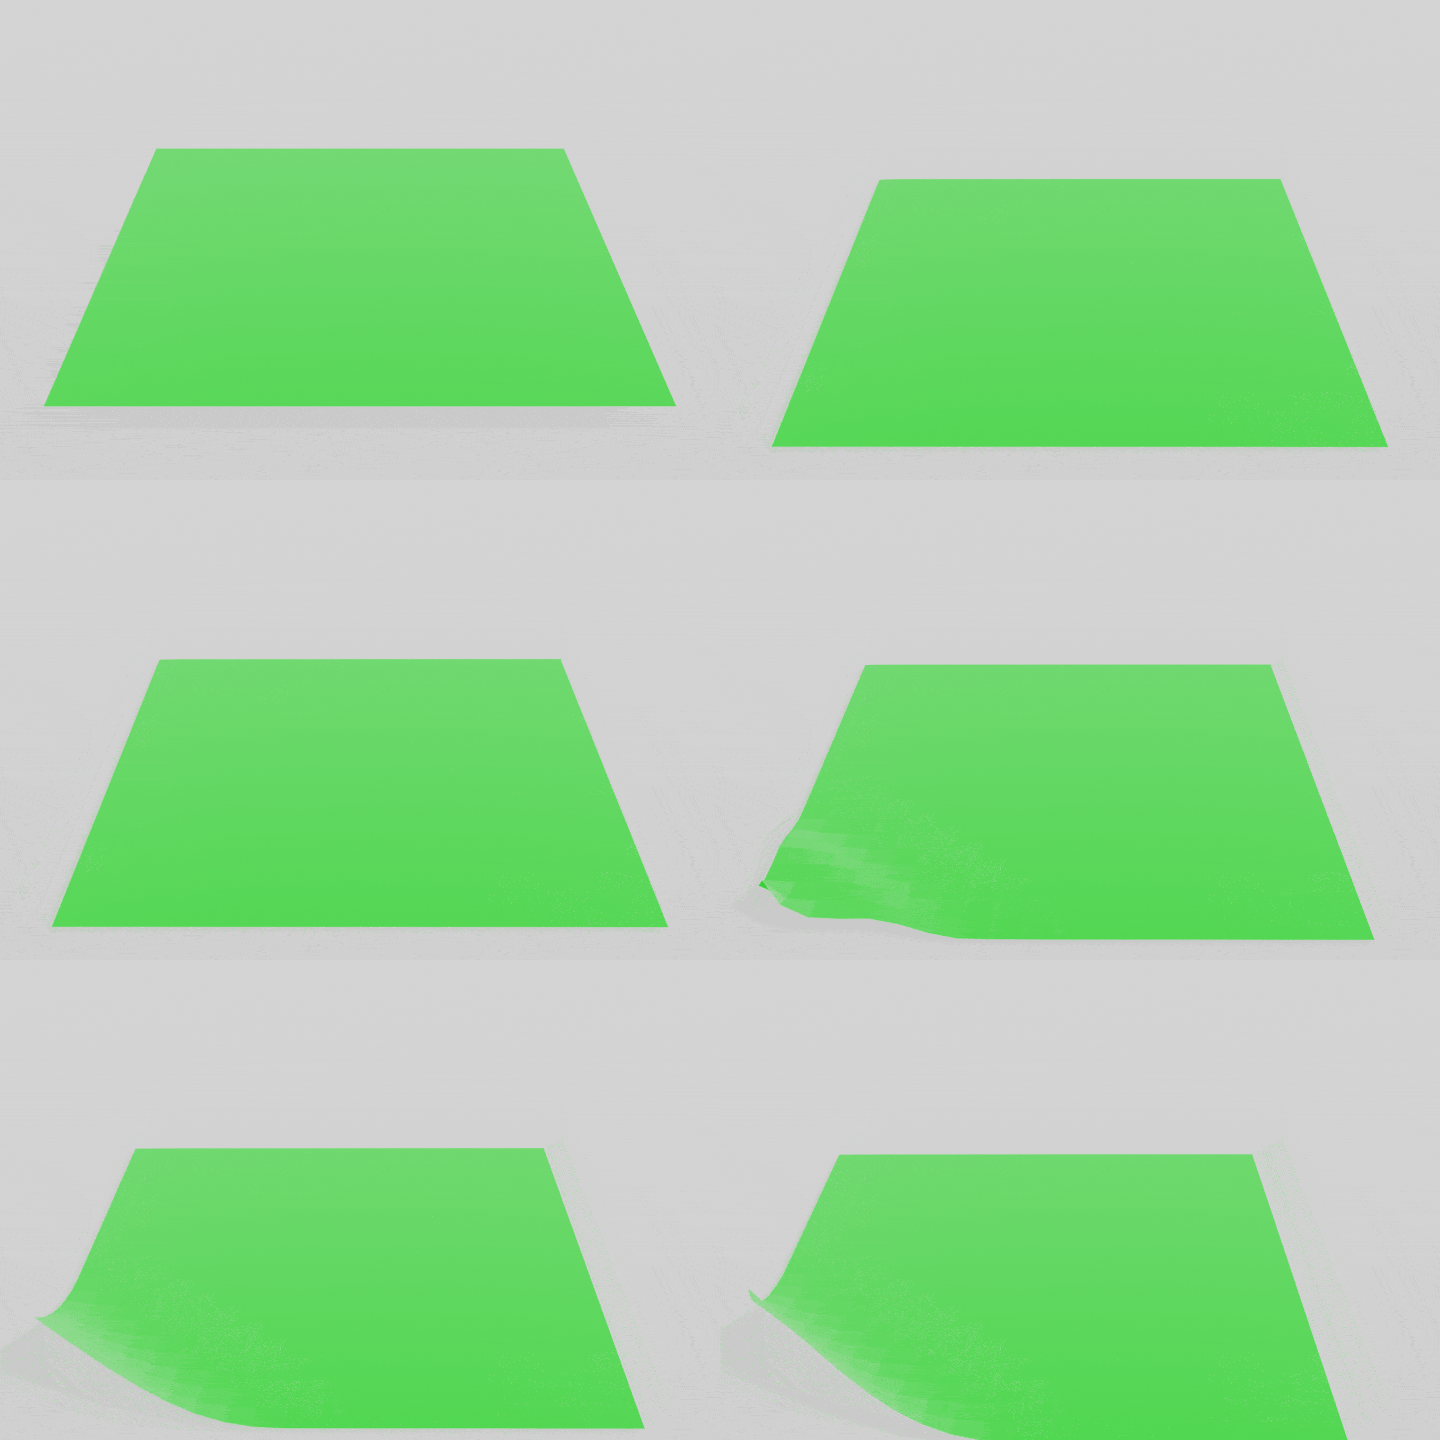
If this is saved in test-pinning-at-frame.py then you can run blender -P test-pinning-at-frame.py. Upon baking the simulation and then generating the video, I get:
Therefore, by using the keyframe_insert method for the arm, I am able to apply the actions at specified frames. In the video above, that's frames 50 through 100, out of 250 total.
However, there is a key problem. The video shows the cloth's vertices are pinned right from the start, which you can see when the cloth settles and before the armature's action applies. I'd like to get the pinning relationship to actually start on frame 50, which is when the keyframes tell Blender to move the armature upwards. But I am not sure how to do that. Putting this in the main method right before the call to action(cloth, vertex_idxs):
for f in range(50):
    bpy.context.scene.frame_set(f)
does not seem to have any effect. Another related issue is how to un-pin after originally pinning.
Using Google to search for "python blender pin vertices at specific frames", I get the following references: this, this, this, this and this, among others. I don't think any of these relate to the question. My impression is that this is a keyframe_insert thing where maybe we can enforce a keyframe for a pinning. Would that be the way to go?
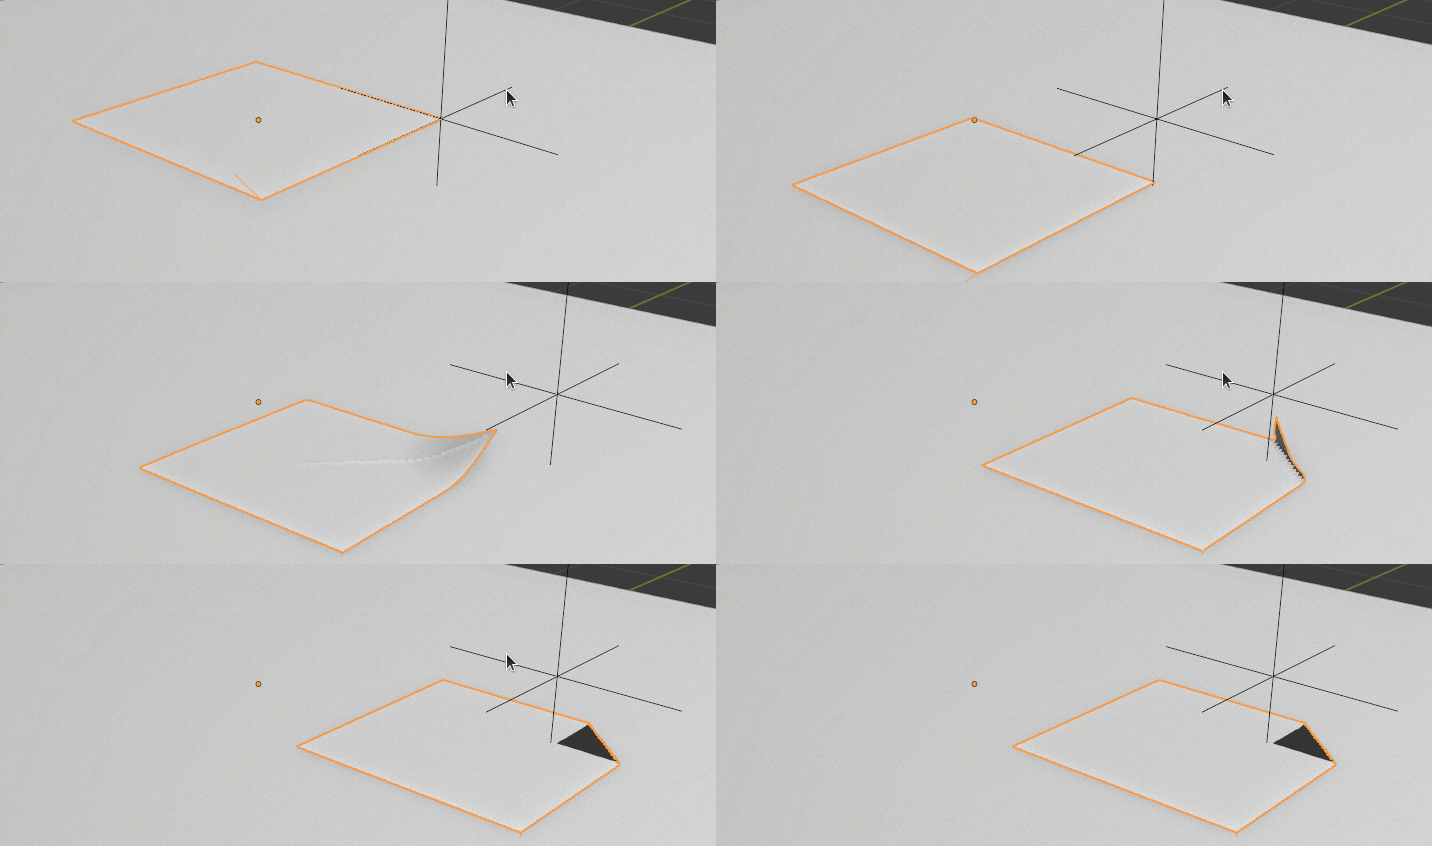
Update 1 (08 June 2020): I managed to partially resolve my question but not entirely. To summarize this devtalk post, we can use this minimal working example (from pastebin) to generate the following:
Code summary: initialize the cloth at a height of 0.200m, and let the cloth settle for the first 50 frames. Then for the next 50 frames, define keyframes that move the lower left corner (with respect to the camera view) up by 0.300m. The main differences with the above code is that this new code adds a reset method to try and remove older pinned vertex groups and uses the frame_set method to advance frames.
This almost works, except that at frame 51, the lower left vertex immediately jumps from the height at rest (which is 0.034m) to 0.200m, the original height. Then, over the next 49 frames, it correctly goes up by 0.300m, so that it reaches 0.500m. But, this is undesirable: the height should go from 0.034m to 0.334m over frames 51 to 100. The code in the pastebin will print out the height of the lower left vertex.
It appears that Blender uses the initial vertex positions to begin the pinning relationship, which is undesirable because the cloth state has changed.
Update 2 (08 June 2020): another possible solution (inspired by this question) is to do multiple animations separately and then combine them later. So, we can run one Blender script for one action, then save the state, and run another Blender script for the next action, and so on. Unfortunately this won't preserve modifiers (see this question) and when I write code to explicitly add the modifiers back in (such as subsurf or solidify) I get bad physics with the vertex count increasing, as shown in the linked question.


