2
$\begingroup$

I am trying to model the inside of a room (brick walls, wooden floor).

I modelled it from 4 planes, put together like walls. This has problems with the edges not aligning when using displacement however. So I think it may be better to switch to a cube.

I find it difficult to uv-unwrap it however.

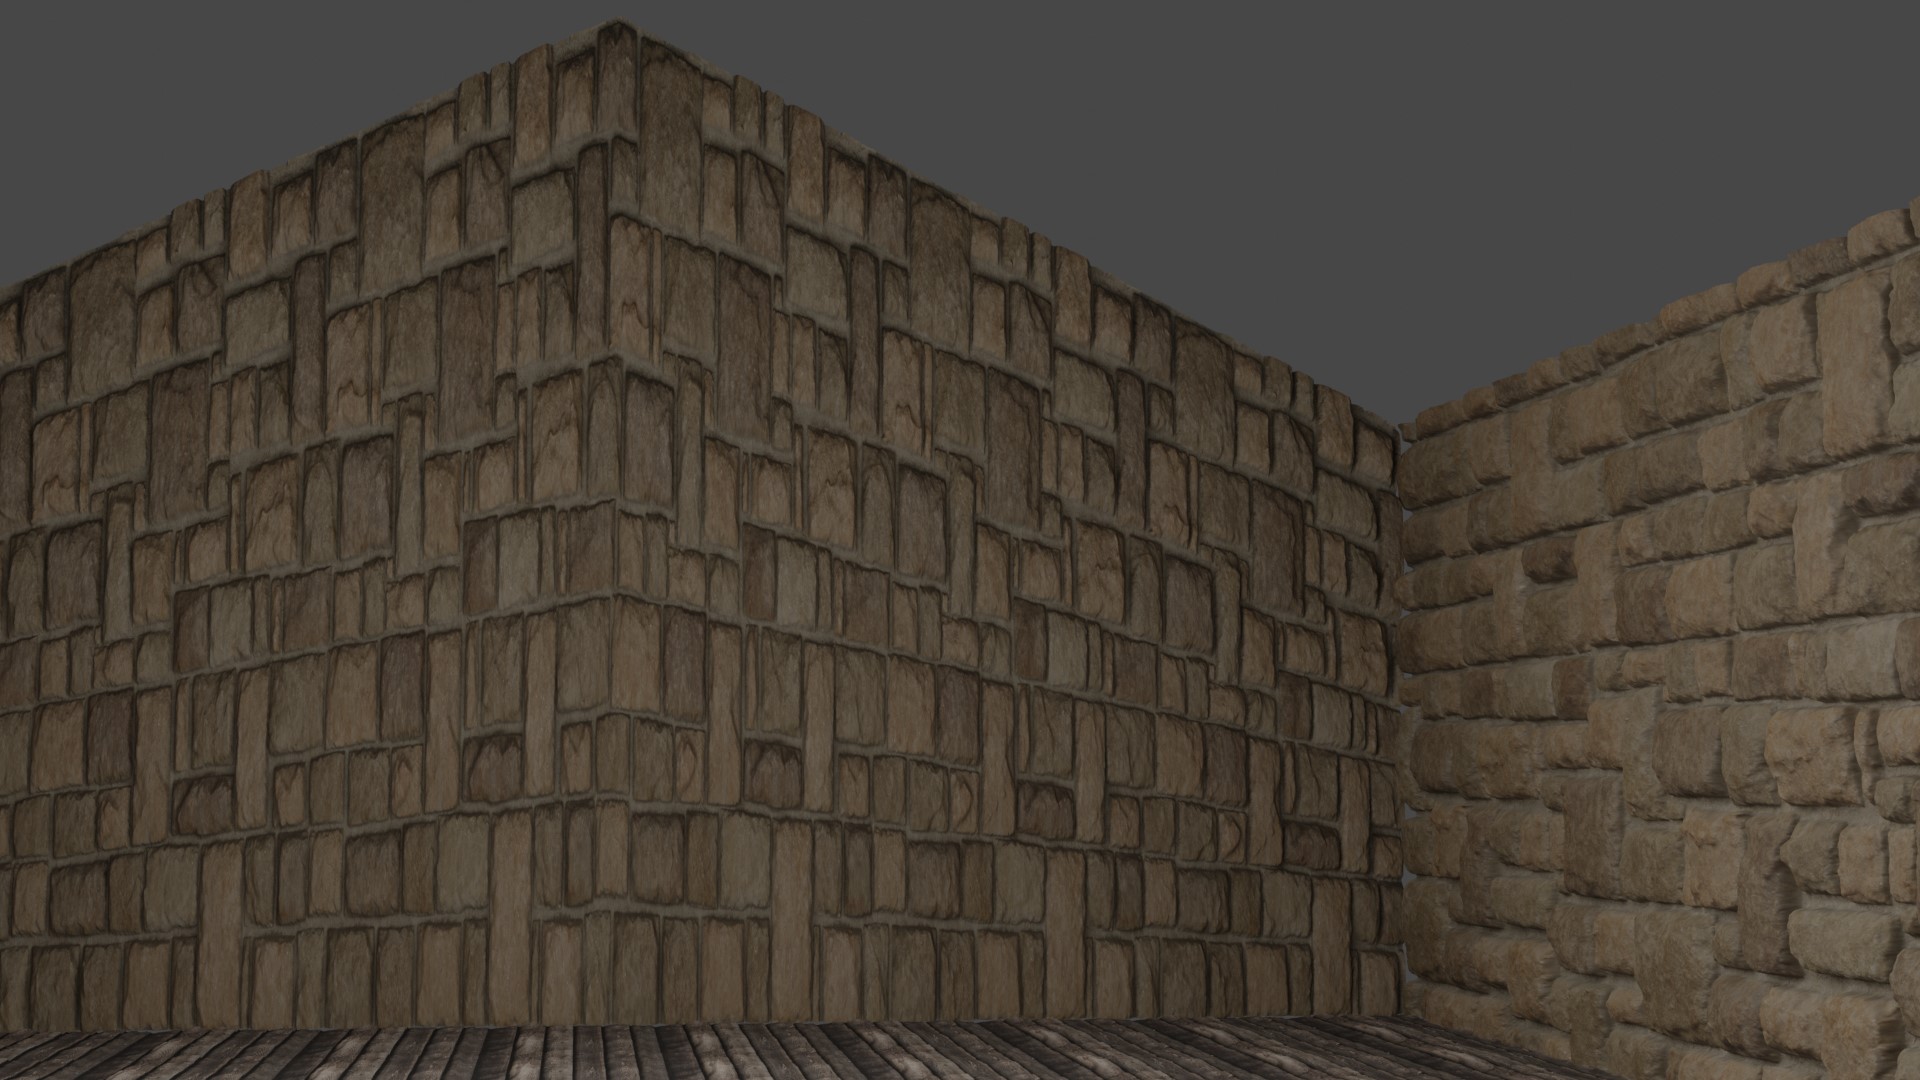
I want the roof to be slanted. But I can't figure out how to apply the texture correctly if I do, since it becomes warped, like this:

enter image description here

And I wanted a look something like this:

http://4.bp.blogspot.com/-3lENfxSJ_D0/UWWrONi20CI/AAAAAAAABrU/If-dkD5htwM/s1600/IMG_9933.JPG

How would one go around UV-unwrapping for that?

Best way that doesn't warp the "gables" (ends of the house, hope it's the right word) is to unwrap those by themselves. Only disadvantage to this is that blender will not see to it that proportions are kept then, so bricks will not be same size on all sides.

Also if possible I would like to avoid seams at the corners.

$\endgroup$
2
  • $\begingroup$ Unfortunately I don't have time now to answer in detail but what you need to do is : Is UV unwrap each wall using the project from view method. Front, back, left side and right side walls and importantly don't zoom in or out while changing view before unwrapping each wall. Then in the UV editor select all 4 walls and scale them together. $\endgroup$ Commented Jan 27, 2020 at 21:36
  • $\begingroup$ You need a kind of mix between these to posts : blender.stackexchange.com/questions/81551/… and blender.stackexchange.com/questions/156640/…. But its not nearly as complicated as it looks. :) $\endgroup$ Commented Jan 27, 2020 at 21:36

2 Answers 2

1
$\begingroup$

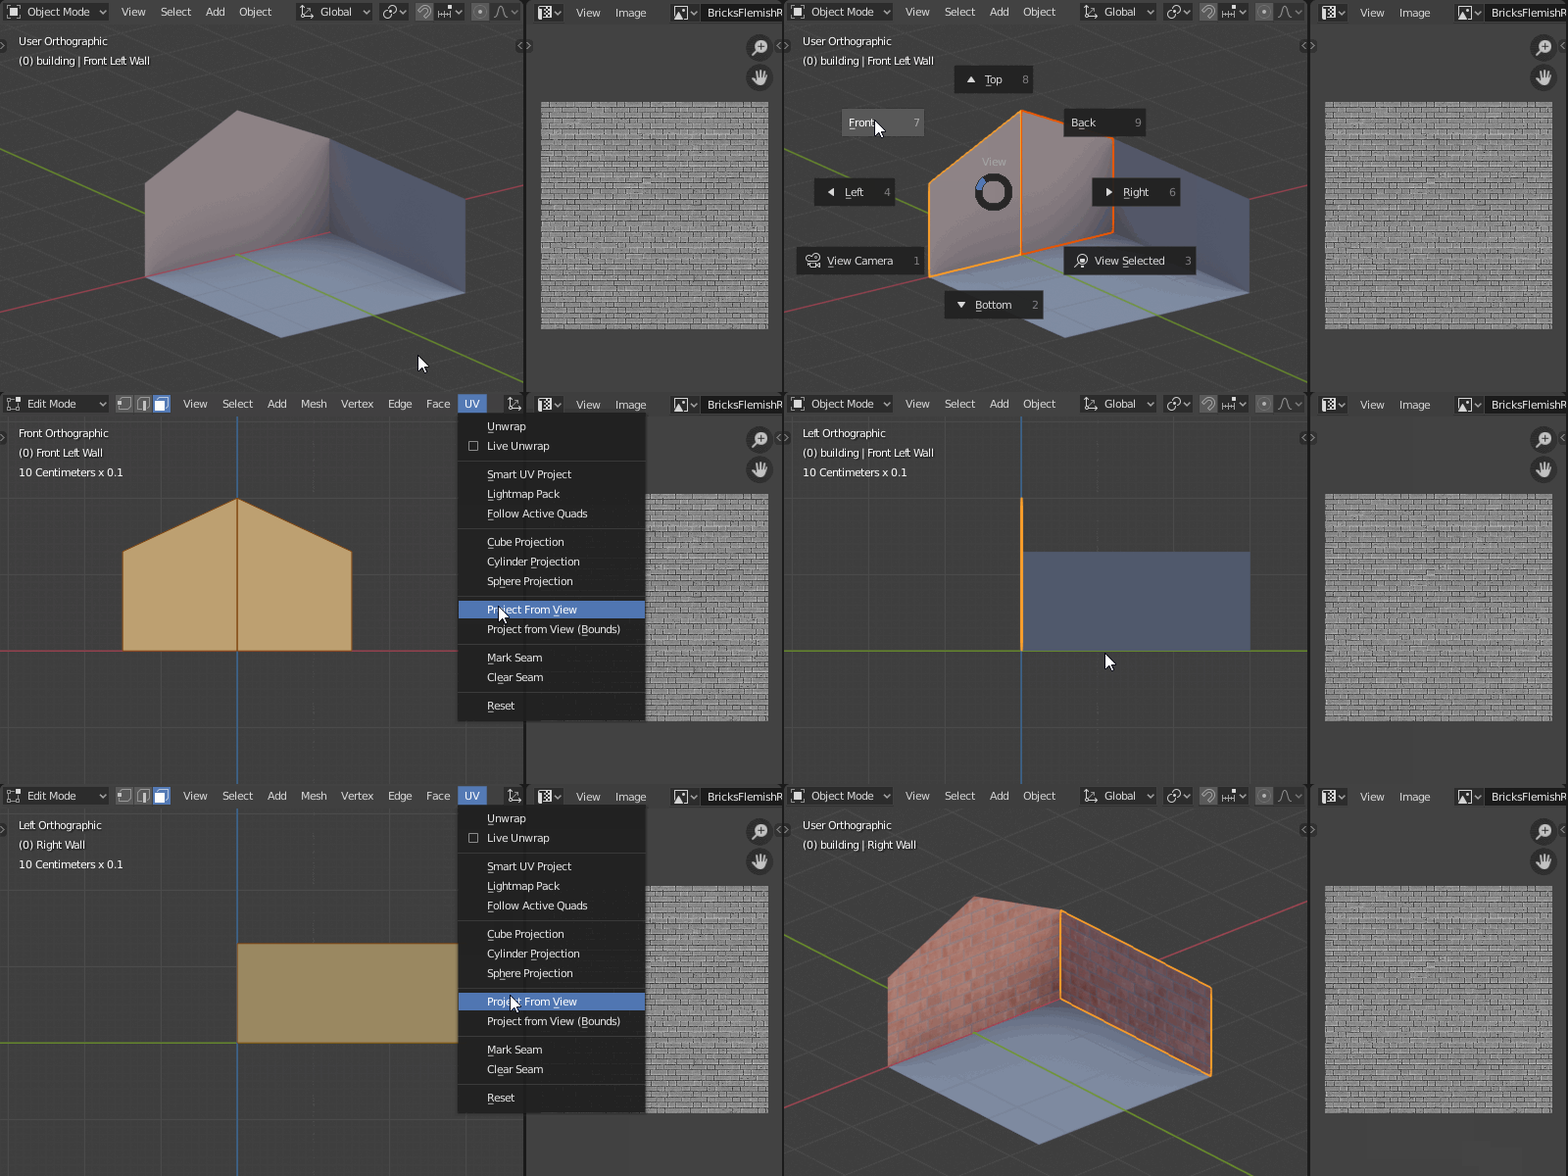
As @3fingeredfrog pointed out, use Project from view.
This will guarantee uniform scale of your texture.

  1. Go to front orthographic view
  2. Select faces and use UV > Project From View
  3. Switch to left/right orthographic view, and repeat.

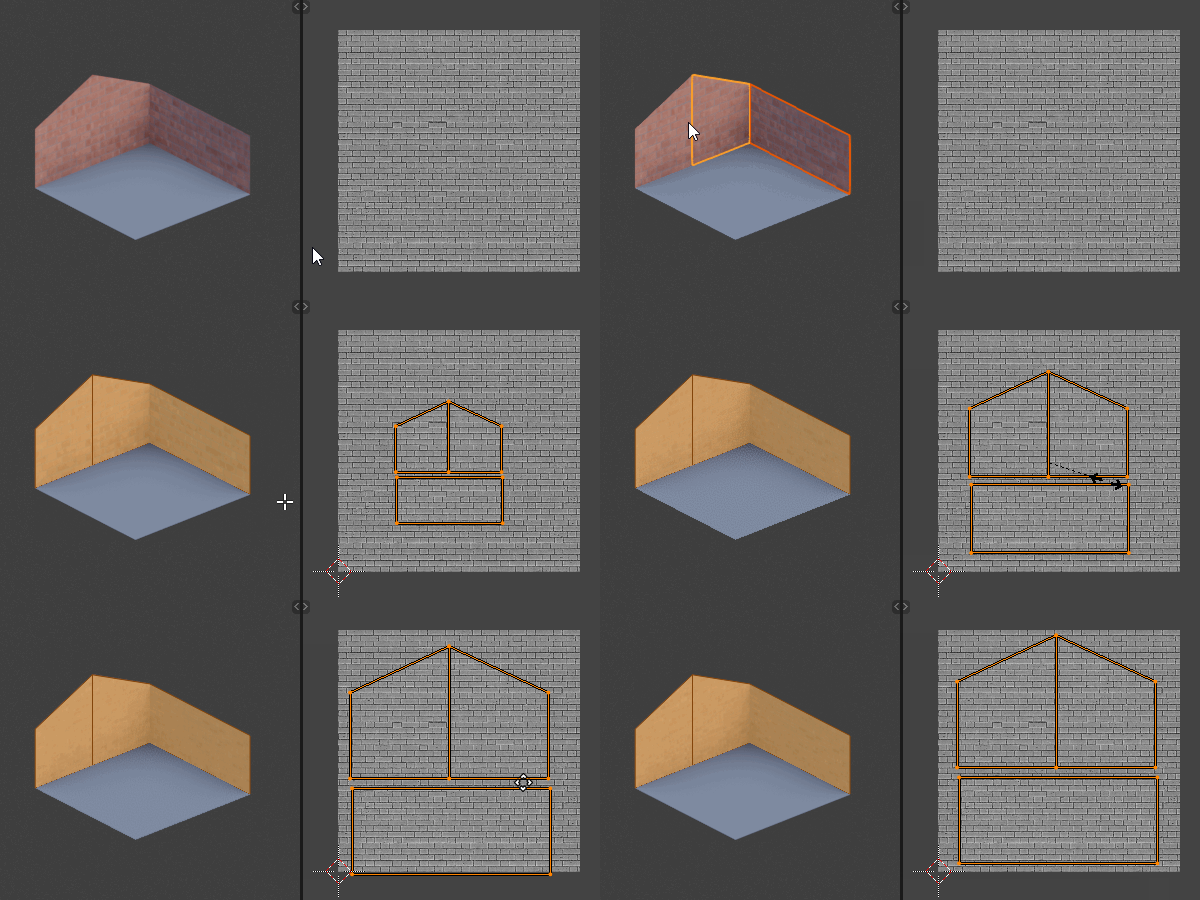
To keep the UV maps in proportion, scale them all at once.

enter image description here

enter image description here

$\endgroup$
1
  • $\begingroup$ Thanks jachym and @3fingeredfrog. I never considered the project from view, that I now see people may be using for this. Project method makes me have to line up the pieces to avoid seams at the corners, while just "unwrap" with a single seam at one corner (and then only unwrapping walls) does it auto for me. Both are ok workaround, I can't think of a way to get rid of the last seam. Probably not possible at all. $\endgroup$
    – Vanvid
    Commented Jan 28, 2020 at 13:43
2
$\begingroup$

"I can't think of a way to get rid of the last seam."

Using a seamless texture : With the Walls UV island (single vertical seam) left-hand corner snapped to X=0 Y=0 in the UV space and the right-hand lower corner perfectly aligned to X=1, then scale from X=0 Y=0 by a whole number the "last seam" will be seamless.

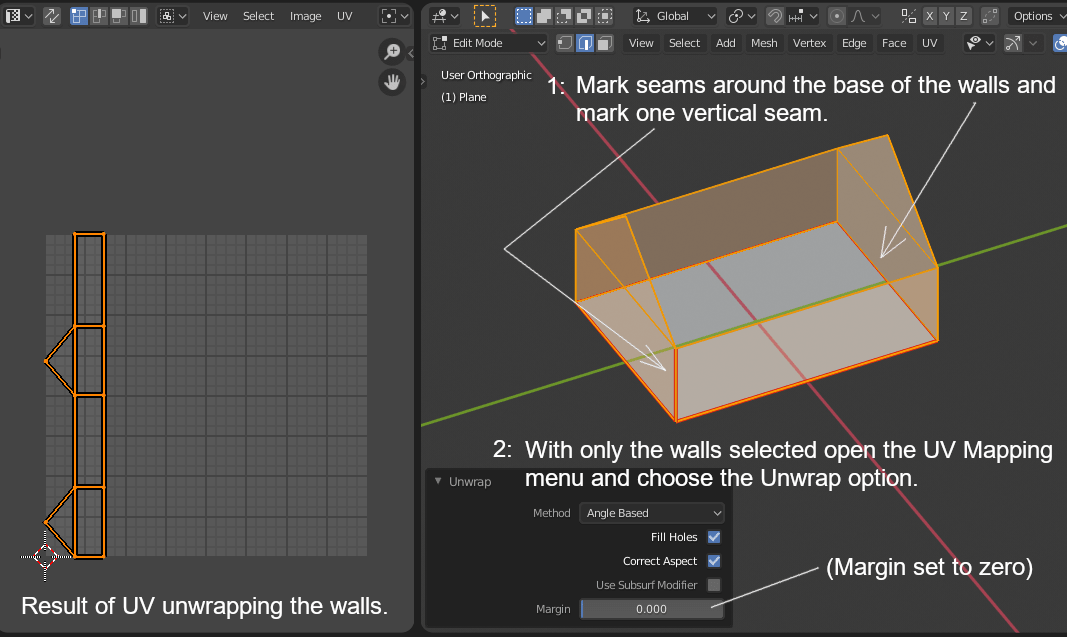
I try to explain with screenshots :

Mark seams around lower edges of the walls to separate them from the floor and add one vertical seam.

Then UV unwrap with a margin of 0.0 . The resulting UV island will be perfectly aligned to opposite borders of the UV space. enter image description here

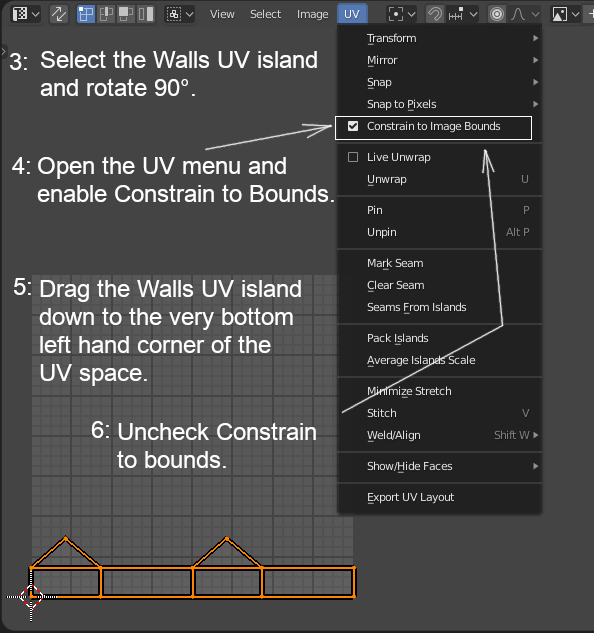
If necessary rotate the UV island 90° so that the lower edge of the wall is parallel with the lower edge of the UV space.

Open the UV menu and check Constrain to Bounds.

Next drag the island down (or up) in the UV space until the bottom edge of the island is aligned to the lower edge of the UV space. Having Constrains to Bounds enabled will keep the island within the UV space and the island will seem to "snap" to this lower edge and left-hand corner.

Now you can uncheck Constrain to Bounds. enter image description here

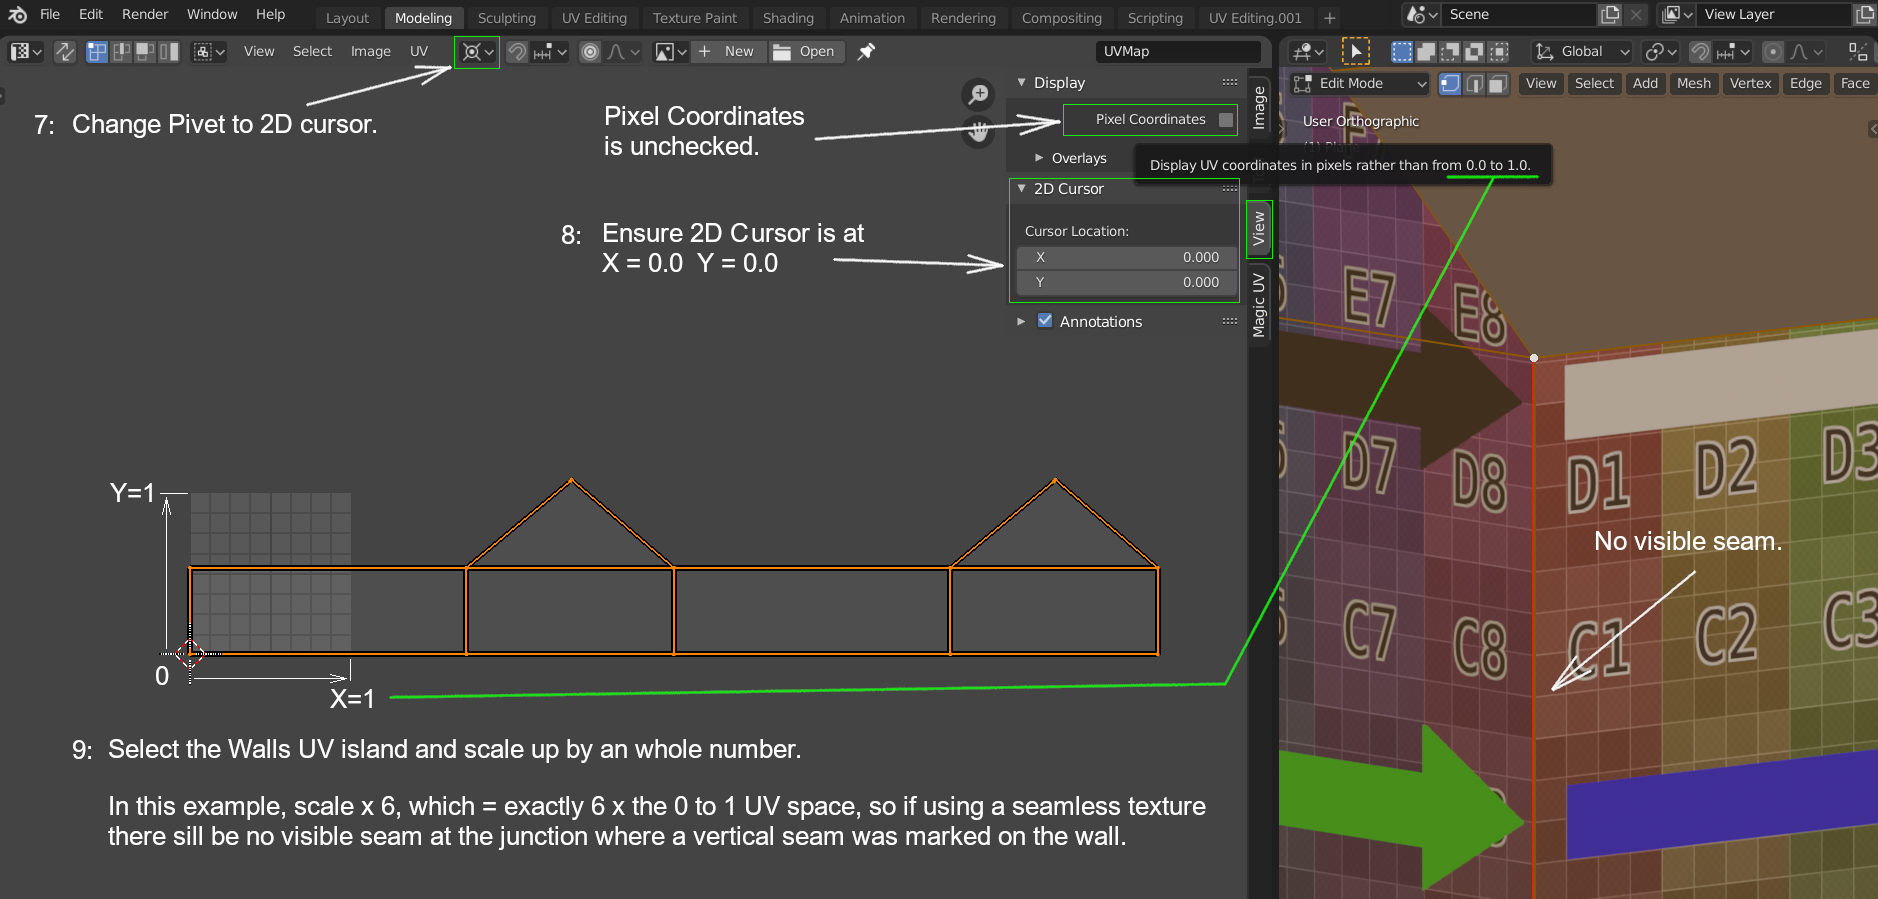
In the UV editor, change the Pivet to 2D Cursor.

Check that the 2D Cursor is at X=0.0 Y=0.0 of the UV space.

Select the UV island and scale by a whole number. This will result in the UV islands right-hand edge exactly lining up to the X = 1.0 of the repeating UV space. (X=1.0 is also X=0.0 of the following UV space.) So will be seamless.

(Just a note here: If you notice that the UV island has been reversed along the X axis in the following screenshot it is because I started out unwrapping the inner surfaces of the walls but switched to outer surfaces to show the seam better.)

enter image description here

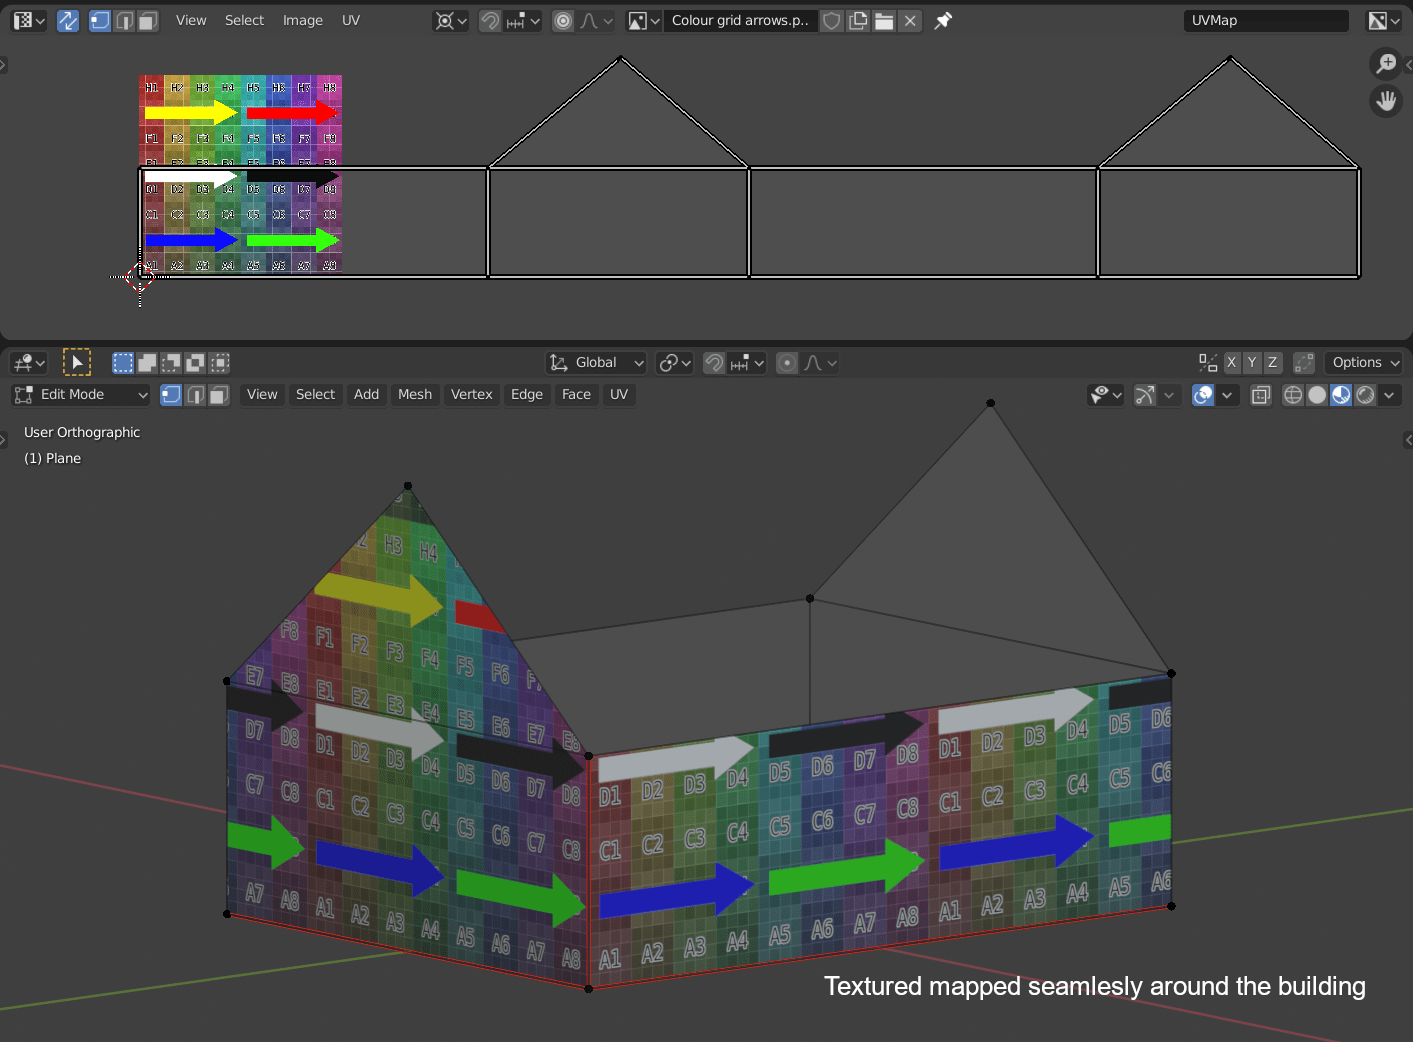
And finally the result of using the 2D cursor as pivet for scaling by a factor of 6:

enter image description here

$\endgroup$

You must log in to answer this question.

Not the answer you're looking for? Browse other questions tagged .